
YAICLI: Your AI assistant in command line.






YAICLI is a powerful yet lightweight command-line AI assistant that brings the capabilities of Large Language Models ( LLMs) like GPT-5 directly to your terminal. Interact with AI through multiple modes: have natural conversations, generate and execute shell commands, or get quick answers without leaving your workflow.
- Tools out of the box — 12 built-in tools load straight from the installed package; there is no install step before the model can use them.
- Safe by default — every tool call is confirmed before it runs, shell commands are
risk-classified, every decision is written to an audit log, and file writes stay inside the
workspace with backups +
/undo. - Scriptable —
-p/--print,--output-format json|stream-json, stdin piping, documented exit codes, and clean stdout/stderr separation make it usable in scripts and CI. - Lightweight, with numbers — startup, install size and memory are measured (see Lightweight & scope below); no background processes.
- Any provider — OpenAI, Anthropic, Gemini, Ollama and 30+ more through the Compatibility layer.
Supports both standard and deep reasoning models across all major LLM providers.
We support MCP since v0.7.0!
We support Function Call since v0.5.0!
⚡ Agent Quick Start (3 steps)
1. Install and give it a key (~30 seconds)
pip install yaicli

# either export a key for the default OpenAI provider ...
export YAI_API_KEY="sk-..."
# ... or run a real command once (e.g. `ai "hi"`) and edit ~/.config/yaicli/config.ini
ai --version
2. Give the agent a real task (~1 minute)
ai "Use your tools to find the 3 largest files in this repository and write a summary to REPORT.md"
The model picks the built-in tools it needs (fs_list_directory, fs_read_file, fs_write_file,
execute_shell_command, ...), reads each result, and continues until the task is done. There is no
--install-functions step — the built-in tools are loaded directly from the package.
3. Approve tool calls (the one safety rule you need)
╭─ Confirm tool call ─────────────────────────────────────╮
│ execute_shell_command({"shell_command": "du -sh ."})    │
╰─────────────────────────────────────────────────────────╯
Execute tool? [y]once, [a]session, [A]always, [n]o:
| Key | Meaning |
|---|---|
y |
Allow this call only |
a |
Allow this tool for the rest of the session |
A |
Always allow — saved to ~/.config/yaicli/tool_permissions.json |
n |
Deny — the model receives a refusal and adapts its plan |
Read-level tools can be auto-approved in scripts; write/execute-level tools still require an explicit rule. See Permissions & Safety for rules, audit log and headless approval flags.
Next: script it · long-context behaviour · upgrade notes · all command-line options
✨ Key Features
🤖 Agent Loop with Built-in Tools
- Multi-step tasks: the model plans, calls tools, reads results and continues — no manual copy-paste between steps
- 12 built-in tools: filesystem read/write/edit/search/info, image reading, shell execution, web fetch, web search and weather
- Project-aware:
.yaicli.md/AGENTS.md/CLAUDE.mdfrom the repository are loaded into the system prompt automatically — see Project Context - MCP (optional): connect external MCP servers as additional tools
- Bounded: tool-call depth, token budget and per-tool output limits keep long tasks under control
🛡️ Safe by Default
- Approval prompt for every tool call — allow once, for the session, permanently, or deny
- Risk classes (
read/write/network/exec) and danger classification for shell commands (rm -r -f,mkfs,dd of=/dev/*,curl … | sh, ...) - Allow rules in
tool_permissions.json— per tool name, shell argv prefix, or file path glob - Audit log of every tool decision in
tool_audit.jsonl - Workspace-confined writes: built-in file tools only change files inside
WORKSPACE_ROOT, back up existing files to.yaicli-backups/, refuse protected paths (.git/,.env*, ...), and/undoreverts the last change — see Workspace Safety - Guarded shell: timeout, process-group kill, filtered environment (no API keys leaked to
commands), workspace-confined
cwd
📜 Headless & Scriptable
-p/--printfor explicit one-shot runs,-q/--quietfor answer-only output--output-format json|stream-json— one JSON object, or one NDJSON event per line- stdout only carries the result; labels, warnings and errors go to stderr
- Deterministic exit codes (
0/1/2/3/130/141) and SIGINT/EPIPE handling - Non-interactive approvals with
--yes,--allowed-toolsand--fail-on-tool-denied
🧠 Context Economy
- Tool-output truncation with full output spilled to disk (head+tail kept, model can page it
back with
fs_read_file) - Token budget (
CONTEXT_BUDGET_TOKENS) and turn-group-aligned history trimming — atool_callsmessage is never separated from its tool results - Self-healing: a provider
context_lengtherror is retried once after trimming instead of failing permanently /contextshows what occupies the window,/compact [keep_rounds]compresses it on demand
🔄 Multiple Interaction Modes
- 💬 Chat Mode: Engage in persistent conversations with full context tracking
- 🚀 Execute Mode: Generate and safely run OS-specific shell commands
- ⚡ Quick Query: Get instant answers without entering interactive mode
💻 Enhanced Terminal Experience
- Real-time Streaming: See responses as they're generated with cursor animation
- Rich History Management: Manage histories with 500 entries by default
- Syntax Highlighting: Beautiful code formatting with customizable themes
🖼️ Image Input (Vision)
- Local Images: Pass local image files with
--image/-i(JPEG, PNG, GIF, WebP) - URL Images: Pass image URLs directly to vision-capable models
- Multi-Image: Specify
--imagemultiple times for comparison tasks
🛠️ Developer-Friendly
- Layered Configuration: Environment variables > Config file > Sensible defaults
- Any endpoint: Works with any OpenAI-compatible API endpoint
- Debugging Tools: Verbose mode with detailed API tracing

Full document: https://belingud.github.io/yaicli/
🪶 Lightweight & scope
YAICLI stays small on purpose: one pip install, no daemon, no background process, no vector
index. The numbers below were measured on the same macOS sandbox across the v0.19 fast path and the
v0.20 startup/packaging work.
| Metric (baseline = v0.18, macOS sandbox) | Value |
|---|---|
ai --version startup (P50) |
≈474–504 ms baseline → ≈40–45 ms (v0.19 fast path) |
--help startup (P50) |
≈519–568 ms baseline → ≈450–500 ms after the v0.20 lazy-import work (the CLI stack is no longer imported for help) |
one-shot local overhead (ai "hi", no network) |
≈1.5–1.6 s baseline → ≈1.6 s in the same sandbox; prompt_toolkit is no longer imported, provider-SDK init (≈0.9 s) still dominates |
| REPL ready (first prompt) | ≈1.55–1.75 s baseline → ≈0.55–0.65 s (the LLM client/SDK is constructed on the first request) |
| base install closure | 95 dists (v0.19.1: 103): fetch/search/MCP stay in base, the boto3/botocore/google-auth cloud closure (~25–29 MB) is now opt-in via [bedrock]/[vertex] |
| idle RSS | ≈30 MB for --version; ≈65 MB for a REPL with the OpenAI SDK loaded |
| background processes / daemons | none |
Measurement caveat: these numbers were measured on macOS inside a sandboxed benchmark environment, where file access is intercepted and absolute timings are inflated (expect 2–3× slower than a bare machine). Treat the relative deltas and proportions as the credible claim; absolute milliseconds will be re-measured on CI before they are used in release notes. The full benchmark method and per-import breakdown are kept with the release engineering notes.
📦 Installation
Prerequisites
- Python 3.10 or higher
Quick Install
# Using pip (recommended for most users)
pip install yaicli

# Using pipx (isolated environment)
pipx install yaicli

# Using uv (faster installation)
uv tool install yaicli
A plain pip install yaicli is tools-complete: all 12 builtin tools (including web_search
and fetch_webpage extraction) and MCP work with no extra steps. Optional extras are only needed for
cloud/long-tail provider SDKs.
# install all optional dependencies
pip install 'yaicli[all]'

# install with specific provider support
pip install 'yaicli[ollama,cohere,doubao,huggingface,gemini,mistral,cerebras,fireworks]'
Install with uv:
# install all optional dependencies
uv tool install 'yaicli[all]'

# install with specific provider support
uv tool install 'yaicli[ollama,cohere,doubao,huggingface,gemini,mistral,cerebras,fireworks]'
Anthropic's API is part of the core dependencies and needs no extra. Anthropic Bedrock and
Anthropic Vertex need the cloud SDK closure: pip install 'yaicli[bedrock]' or
pip install 'yaicli[vertex]' (both are always included in yaicli[all]).
Install from Source
git clone https://github.com/belingud/yaicli.git
cd yaicli
pip install .
🔌 Compatibility
Provider support is a compatibility layer, not the headline: YAICLI exposes one agent loop, and you
can point it at any of these providers (or any OpenAI-compatible endpoint) by changing PROVIDER /
API_KEY / MODEL.
- AI21
- Anthropic/Claude
- Anthropic Bedrock
- Anthropic Vertex
- Bailian
- Bailian International
- Cerebras
- ChatGLM
- Chutes
- Cohere
- Cohere Bedrock
- Cohere SageMaker
- DeepSeek
- Doubao
- Fireworks
- Gemini
- Groq
- HuggingFace
- Infini-AI
- LongCat
- LongCat (Anthropic format)
- MiniMax
- Mistral
- ModelScope
- Moonshot
- NVIDIA NIM
- Ollama
- OpenAI
- OpenAI Azure
- OpenRouter
- SambaNova
- SiliconFlow
- Spark
- Targon
- Together
- Vertex AI
- xAI
- Yi
Any other OpenAI-compatible endpoint can be used with the openai or openai-compatible
provider plus a custom BASE_URL. See the provider overview for
per-provider setup and the full configuration matrix.
⚙️ Configuration
YAICLI uses a simple configuration file to store your preferences and API keys.
First-time Setup
- Run a real command once (e.g.
ai "hi"); the default configuration file is created on first use. Or exportYAI_API_KEYand skip the file entirely. - Edit the config file to add your API key and customize settings.
- Customize other settings as needed.
Plain ai with no prompt only prints help; it does not create the config file.
The configuration directory is resolved in this order: YAI_CONFIG_DIR →
XDG_CONFIG_HOME/yaicli → %APPDATA%/yaicli (Windows) → ~/.config/yaicli. The file is created
with mode 0600 because it may contain API keys; exported environment variables are the preferred
way to keep keys out of disk.
Configuration File Structure
The default configuration file is config.ini inside the config directory above. You can use
ai --template to see the default configuration template.
Configuration Options Reference
| Option | Description | Default | Env Variable |
|---|---|---|---|
PROVIDER |
LLM provider (openai, anthropic, cohere, etc.) | openai |
YAI_PROVIDER |
BASE_URL |
API endpoint URL | - | YAI_BASE_URL |
API_KEY |
Your API key | - | YAI_API_KEY |
MODEL |
LLM model to use | gpt-5.2 |
YAI_MODEL |
DEFAULT_ROLE |
Default role | DEFAULT |
YAI_DEFAULT_ROLE |
SHELL_NAME |
Shell type | auto |
YAI_SHELL_NAME |
OS_NAME |
Operating system | auto |
YAI_OS_NAME |
STREAM |
Enable streaming | true |
YAI_STREAM |
TIMEOUT |
API timeout (seconds) | 60 |
YAI_TIMEOUT |
EXTRA_HEADERS |
Extra headers | - | YAI_EXTRA_HEADERS |
EXTRA_BODY |
Extra body | - | YAI_EXTRA_BODY |
REASONING_EFFORT |
Reasoning effort | - | YAI_REASONING_EFFORT |
INTERACTIVE_ROUND |
Chat turns kept in the REPL (×2 messages) | 25 |
YAI_INTERACTIVE_ROUND |
CODE_THEME |
Syntax highlighting theme | monokai |
YAI_CODE_THEME |
TEMPERATURE |
Response randomness | 0.3 |
YAI_TEMPERATURE |
FREQUENCY_PENALTY |
Frequency penalty | 0.0 |
YAI_FREQUENCY_PENALTY |
TOP_P |
Top-p sampling | 1.0 |
YAI_TOP_P |
MAX_TOKENS |
Max response tokens | 1024 |
YAI_MAX_TOKENS |
MAX_HISTORY |
Max history entries | 500 |
YAI_MAX_HISTORY |
AUTO_SUGGEST |
Enable history suggestions | true |
YAI_AUTO_SUGGEST |
SHOW_REASONING |
Enable reasoning display | true |
YAI_SHOW_REASONING |
JUSTIFY |
Text alignment | default |
YAI_JUSTIFY |
CHAT_HISTORY_DIR |
Explicit session-directory override (old flat layout); a value equal to the built-in default means the per-project store | unset (per-project ~/.yaicli/sessions/<hash>/) |
YAI_CHAT_HISTORY_DIR |
MAX_SAVED_CHATS |
Max saved sessions per store | 20 |
YAI_MAX_SAVED_CHATS |
ROLE_MODIFY_WARNING |
Warn when modifying built-in roles | true |
YAI_ROLE_MODIFY_WARNING |
ENABLE_FUNCTIONS |
Enable function calling | true |
YAI_ENABLE_FUNCTIONS |
SHOW_FUNCTION_OUTPUT |
Show function output when calling function | true |
YAI_SHOW_FUNCTION_OUTPUT |
ENABLE_MCP |
Enable MCP tools | false |
YAI_ENABLE_MCP |
SHOW_MCP_OUTPUT |
Show MCP output when calling mcp | false |
YAI_SHOW_MCP_OUTPUT |
MAX_TOOL_CALL_DEPTH |
Max tool calls in one request | 8 |
YAI_MAX_TOOL_CALL_DEPTH |
TOOL_CONFIRM |
Confirm each tool call before running it | true |
YAI_TOOL_CONFIRM |
TOOL_OUTPUT_MAX_CHARS |
Max characters of one tool result kept in context (0 = unlimited) |
32000 |
YAI_TOOL_OUTPUT_MAX_CHARS |
TOOL_OUTPUT_DIR |
Where full (untruncated) tool outputs are saved | <tempdir>/yaicli/chats/tool-outputs |
YAI_TOOL_OUTPUT_DIR |
ENABLE_PROJECT_CONTEXT |
Auto-load project instruction files into the system prompt (false = no project-file reads) |
true |
YAI_ENABLE_PROJECT_CONTEXT |
PROJECT_CONTEXT_MAX_CHARS |
Max characters of project context added to the system prompt (0 = no cap) |
20000 |
YAI_PROJECT_CONTEXT_MAX_CHARS |
CONTEXT_BUDGET_TOKENS |
Token budget per request (0 = 70% of the model window) |
0 |
YAI_CONTEXT_BUDGET_TOKENS |
TOOL_TIMEOUT |
Max seconds a shell tool command may run | 120 |
YAI_TOOL_TIMEOUT |
TOOL_ENV_INHERIT |
Pass the full parent environment to shell tools (old behaviour) | false |
YAI_TOOL_ENV_INHERIT |
WORKSPACE_ROOT |
Directory shell tools are confined to (empty = current dir) | - | YAI_WORKSPACE_ROOT |
RETRY_ENABLED |
Retry retryable API failures (429/5xx/network/timeout) | true |
YAI_RETRY_ENABLED |
RETRY_MAX |
Maximum retry attempts | 2 |
YAI_RETRY_MAX |
RETRY_BASE_DELAY |
Base backoff delay in seconds | 1.0 |
YAI_RETRY_BASE_DELAY |
EXIT_ON_DEPTH_LIMIT |
Exit non-zero in one-shot mode when the tool-round limit is reached | true |
YAI_EXIT_ON_DEPTH_LIMIT |
TOOL_AUDIT |
Write tool decisions to tool_audit.jsonl |
true |
YAI_TOOL_AUDIT |
EXCLUDE_PARAMS |
Comma-separated API parameters to omit | - | YAI_EXCLUDE_PARAMS |
MINIMAX_REASONING_SPLIT |
MiniMax interleaved reasoning (reasoning_split) | true |
YAI_MINIMAX_REASONING_SPLIT |
Tool execution confirmation: With
TOOL_CONFIRMenabled (the default), YAICLI asks before running each tool/function call. At the prompt you can allow it once, allow it for the rest of the session, allow it permanently, or deny it. Permanent approvals are stored per tool name intool_permissions.json. SetTOOL_CONFIRM=false(orYAI_TOOL_CONFIRM=false) to run tool calls silently, as in previous versions. In non-interactive sessions (e.g. piped input) only tools already in the permissions file (or passed via--allowed-tools) run; others are denied. See Permissions & Safety for the rule format, risk levels, audit log and headless approval flags.
LLM Provider Configuration
YAICLI works with major LLM providers. The default configuration is set up for OpenAI, but you can easily switch to other providers.
Note: blank BASE_URL (or no BASE_URL) means use provider default url.
Pre-configured Provider Settings
| Provider | BASE_URL |
|---|---|
| OpenAI (default) | https://api.openai.com/v1 |
| Anthropic/Claude | https://api.anthropic.com |
| Cohere | https://api.cohere.com/v2 |
| Gemini | https://generativelanguage.googleapis.com/v1beta |
Note: Many providers offer OpenAI-compatible endpoints that work with the default settings.
- Google Gemini: https://ai.google.dev/gemini-api/docs/openai
- Claude: https://docs.anthropic.com/en/api/openai-sdk
If you not sure about base_url or just use the default provider base_url, just leave it blank or delete BASE_URL.
[core]
PROVIDER=cohere
BASE_URL=
API_KEY=xxx
MODEL=command-r-plus
Openai
Yaicli use openai as provider as default provider, gpt-5.2 as default model, you can add your api key to use as it is.
PROVIDER=openai
BASE_URL=
API_KEY=
MODEL=gpt-5.2
Extra params:
# REASONING_EFFORT: [low, medium, high] (provider-specific)
REASONING_EFFORT=
See official for more details: https://platform.openai.com/docs/guides/reasoning?api-mode=chat
Openai Azure
PROVIDER=openai-azure
BASE_URL=
API_KEY=
MODEL=gpt-5.2
Support config keys:
AZURE_AD_TOKEN=
AZURE_ENDPOINT=
AZURE_DEPLOYMENT=
API_VERSION=
Support environment variables:
AZURE_OPENAI_API_KEY=
AZURE_OPENAI_AD_TOKEN=
AZURE_OPENAI_ENDPOINT=
If API_KEY not set in config, will look for AZURE_OPENAI_API_KEY environment variable.
If AZURE_AD_TOKEN not set in config, will look for AZURE_OPENAI_AD_TOKEN environment variable.
If BASE_URL and AZURE_ENDPOINT not set in config, will look for AZURE_OPENAI_ENDPOINT environment variable.
Anthropic/Claude
PROVIDER=anthropic
API_KEY=
MODEL=claude-sonnet-4-20250514
If you want to access Anthropic bedrock, install the extra first
(pip install 'yaicli[bedrock]') and set AWS_SECRET_ACCESS_KEY, AWS_ACCESS_KEY_ID,
AWS_SESSION_TOKEN and AWS_REGION in config or environment variables.
PROVIDER=anthropic-bedrock
AWS_SECRET_ACCESS_KEY=
AWS_ACCESS_KEY_ID=
AWS_SESSION_TOKEN=
AWS_REGION=
MODEL=anthropic.claude-opus-4-20250514-v1:0
Support ANTHROPIC_BEDROCK_BASE_URL env or BASE_URL in config file, with same effect.
Also support Anthropic vertex (pip install 'yaicli[vertex]') with key PROJECT_ID and
CLOUD_ML_REGION in config or environment variables.
PROVIDER=anthropic-vertex
PROJECT_ID=
CLOUD_ML_REGION=
You can set anthropic base url by ANTHROPIC_VERTEX_BASE_URL env, or set BASE_URL in config file, same effect.
Deepseek
PROVIDER=deepseek
API_KEY=
MODEL=deepseek-chat
Thinking mode can be controlled with the existing EXTRA_BODY and REASONING_EFFORT settings. DeepSeek enables
thinking by default for supported thinking models, so this is only needed when you want to be explicit or set effort:
PROVIDER=deepseek
API_KEY=
MODEL=deepseek-v4-pro
REASONING_EFFORT=high
EXTRA_BODY={"thinking":{"type":"enabled"}}
To disable thinking mode:
EXTRA_BODY={"thinking":{"type":"disabled"}}
When thinking mode is enabled, DeepSeek returns reasoning_content, which YAICLI displays as reasoning output and
preserves during live tool-call conversations. DeepSeek ignores temperature, top_p, presence_penalty, and
frequency_penalty while thinking is enabled.
OpenRouter
PROVIDER=openrouter
API_KEY=
MODEL=deepseek/deepseek-chat-v3-0324
Mistral
PROVIDER=mistral
API_KEY=
MODEL=codestral-latest
Gemini
Basic config:
PROVIDER=gemini
API_KEY=
MODEL=gemini-2.5-flash
Extra params:
TOP_K=
PRESENCE_PENALTY=
FREQUENCY_PENALTY=
SEED=
THINKING_BUDGET=
API_VERSION=
BASE_URL=
Vertex AI
PROVIDER=vertexai
MODEL=gemini-2.5-flash
PROJECT=
LOCATION=
Huggingface
Default HF_PROVIDER is auto.
HF_PROVIDER=auto
PROVIDER=huggingface
API_KEY=
MODEL=deepseek-ai/DeepSeek-R1-0528
See official docs for HF_PROVIDER: https://huggingface.co/docs/inference-providers/index
Groq
PROVIDER=groq
API_KEY=
MODEL=llama-3.3-70b-versatile
LongCat
PROVIDER=longcat
API_KEY=
MODEL=LongCat-Flash-Chat
BASE_URL=https://api.longcat.chat/openai
Moonshot
PROVIDER=moonshot
API_KEY=
MODEL=moonshot-v1-8k
XAI
PROVIDER=xai
API_KEY=
MODEL=grok-3
Minimax
PROVIDER=minimax
API_KEY=
MODEL=MiniMax-M2.1
Extra params:
# Enable/disable interleaved thinking (default: true)
MINIMAX_REASONING_SPLIT=true
MiniMax-M2.1 supports Interleaved Thinking - the model can reason before each tool use. When enabled, reasoning content is preserved in conversation history and displayed alongside responses.
Chatglm
PROVIDER=chatglm
API_KEY=
MODEL=glm-4-plus
Extra params:
Check offcial docs: https://bigmodel.cn/dev/api/normal-model/glm-4
# true or false
DO_SAMPLE=
Chutes
PROVIDER=chutes
API_KEY=
MODEL=deepseek-ai/DeepSeek-V3-0324
Cerebras
PROVIDER=cerebras
API_KEY=
MODEL=llama3.3-70b
AI21
PROVIDER=ai21
API_KEY=
MODEL=jamba-large-1.6
Sambanova
PROVIDER=sambanova
API_KEY=
MODEL=DeepSeek-V3-0324
Only a few models support tool call as below:
- Meta-Llama-3.1-8B-Instruct
- Meta-Llama-3.1-405B-Instruct
- Meta-Llama-3.3-70B-Instruct
- Llama-4-Scout-17B-16E-Instruct
- DeepSeek-V3-0324
See official docs for more detail: https://docs.sambanova.ai/cloud/docs/capabilities/function-calling
ModelScope
PROVIDER=modelscope
API_KEY=
MODEL=deepseek-ai/DeepSeek-V3-0324
Infini-AI
PROVIDER=infini-ai
; BASE_URL=https://cloud.infini-ai.com/maas/v1
API_KEY=
MODEL=deepseek-v3
Siliconflow
PROVIDER=siliconflow
API_KEY=
MODEL=Qwen/Qwen3-32B
Yi
PROVIDER=yi
API_KEY=
MODEL=yi-lightning
Cohere
You have to install cohere dependencies, pip install 'yaicli[cohere]'
PROVIDER=cohere
API_KEY=
MODEL=command-a-03-2025
Check official docs: https://docs.cohere.com/docs/text-gen-quickstart
Support keys:
ENVIRONMENT=
For private deploy and Azure api, you need to set BASE_URL.
PROVIDER=cohere
API_KEY=
MODEL=command-a-03-2025
BASE_URL=<YOUR_ENDPOINT>
For Bedrock and Sagemaker cohere api, you have to set below keys:
See https://docs.cohere.com/docs/text-gen-quickstart.
PROVIDER=cohere-bedrock
; PROVIDER=cohere-sagemaker
API_KEY=
MODEL=command-a-03-2025

AWS_REGION=xx
AWS_ACCESS_KEY_ID=xx
AWS_SECRET_ACCESS_KEY=xx
AWS_SESSION_TOKEN=xx
Note MODEL for Sagemaker should be endpoint name
MODEL=<YOUR_ENDPOINT_NAME>
Doubao
You have to install doubao dependencies, pip install 'yaicli[doubao]'
Use doubao OpenAI compatible api, you can just set API_KEY.
PROVIDER=doubao
API_KEY=
MODEL=doubao-1-5-lite-32k-250115
If you are using access key, you have to set AK and SK.
PROVIDER=doubao
MODEL=doubao-1-5-lite-32k-250115
AK=XXX
SK=XXX
Ollama
You have to install ollama dependencies, pip install 'yaicli[ollama]'
PROVIDER=ollama
; BASE_URL=http://localhost:11434
MODEL=qwen3:32b
Support options:
TEMPERATURE=
TOP_P=
SEED=
NUM_PREDICT=
NUM_CTX=
NUM_BATCH=
NUM_GPU=
MAIN_GPU=
LOW_VRAM=
F16_KV=
LOGITS_ALL=
VOCAB_ONLY=
USE_MMAP=
USE_MLOCK=
NUM_THREAD=
NOTE: Ollama provider not support extra body
Bailian
Only support model API call, not support application API call.
PROVIDER=bailian
API_KEY=
MODEL=qwen-plus
Bailian Intl
Bailian international platform.
PROVIDER=bailian-intl
API_KEY=
MODEL=qwen-plus
NVIDIA NIM
# the registered provider key is spelled "nvida" for historical reasons
PROVIDER=nvida
API_KEY=
MODEL=qwen/qwen3-235b-a22b
EXTRA_BODY={"chat_template_kwargs": {"thinking": false}}
chat_template_kwargsis for Qwen3 and ibm/granite models; the example above disables thinking.
Together
Using together openai-compatible capabilities
PROVIDER=together
API_KEY=
MODEL=Qwen/Qwen3-235B-A22B-fp8-tput
Spark
Spark requires both API_KEY and API_SECRET; APP_ID is optional (sent as the request uid).
PROVIDER=spark
API_KEY=
API_SECRET=
APP_ID=
MODEL=4.0Ultra
🚀 Usage
Common Commands
# Agent task: let the model pick and run tools
ai "Use your tools to find the 3 largest files here and write a summary to REPORT.md"

# Get a quick answer
ai "What is the capital of France?"

# Start an interactive chat session
ai --chat

# Generate and execute shell commands
ai --shell "Create a backup of my Documents folder"

# Generate code snippets, default in Python
ai --code "Write a Python function to sort a list"

# Analyze code from a file
cat app.py | ai "Explain what this code does"
# or use @
ai '@Justfile What does this file do'

# Scripting: one-shot, machine-readable output, answer only
ai -p "summarize the git log" --output-format json
ai -p "list open TODOs" --quiet

# Send an image to a vision model
ai --image photo.jpg "What is in this image?"

# Send multiple images
ai -i img1.png -i img2.png "Compare these two screenshots"

# Send an image URL
ai --image https://example.com/photo.jpg "Describe this"

# Debug with verbose mode
ai --verbose "Explain quantum computing"
Interactive Mode Features
|
Commands
Keyboard Shortcuts
|
Chat Mode (💬)
Execute Mode (🚀)
|
Chat Persistent
The <PROMPT> parameter in chat mode is used as the session title. Since v0.21 sessions are saved per
project under ~/.yaicli/sessions/<sha256(resolved working directory)[:16]>/ (directories 0700,
files 0600), and each session records the model, provider, role and working directory it was
created with.
If <PROMPT> is not specified, the session is temporary and is not persisted; use /save <title>
to keep it. Running ai --chat "<title>" again loads that session from the current project's store;
if no session with that title exists, YAICLI prints an explicit notice and starts a new one.
ai --resume continues the newest session of the current project.
Sessions from the old temp directory are left in place and are not migrated automatically — see Chat Sessions & Resume.
$ ai --chat "meaning of life"
!NOTE: Chat mode is not supported when you redirect input to
aicommand.$ cat error.log | ai --chat "Explain this error"The above command will be parsed as
ai "cat error.log | ai "Explain this error".
Start a temporary chat session
$ ai --chat
Start a persistent chat session
$ ai --chat "check disk usage"
Load a saved chat session
$ ai --chat hello
Chat title: hello

 ██    ██  █████  ██  ██████ ██      ██
  ██  ██  ██   ██ ██ ██      ██      ██
   ████   ███████ ██ ██      ██      ██
    ██    ██   ██ ██ ██      ██      ██
    ██    ██   ██ ██  ██████ ███████ ██

Welcome to YAICLI!
Current: Persistent Session: hello
Press Shift+Tab to switch mode
/clear             : Clear chat history
/his               : Show chat history
/list              : List saved chats
/save <title>      : Save current chat
/load <index>      : Load a saved chat
/del <index>       : Delete a saved chat
/exit|Ctrl+D       : Exit
Ctrl+C             : Clear input / cancel turn; press twice to exit
/mode chat|exec    : Switch mode (Case insensitive)
───────────────────────────────────────────────────────────────────────────────────────────────────────────────────────
 💬 > /his
Chat History:
1 User: hi
    Assistant:
    Hello! How can I assist you today?
───────────────────────────────────────────────────────────────────────────────────────────────────────────────────────
 💬 >
Resume the newest session of this project
$ ai --resume
Resumed session "check disk usage" (model=gpt-5.2, provider=openai, role=DEFAULT, messages=6)
Image Input
Send images to vision-capable models (GPT-5.2, Claude 4.5, Gemini, Llama 4 Vision, etc.) directly from the CLI.
Local image file
ai --image photo.jpg "What is in this image?"
Multiple images
ai -i screenshot1.png -i screenshot2.png "Compare these two UIs"
Image URL
ai --image https://example.com/diagram.png "Explain this architecture diagram"
Image without text prompt
ai --image photo.jpg
When no prompt is given, YAICLI sends a minimal prompt (Describe the image., or
Describe these images. for multiple images) with the image.
Supported formats: JPEG (.jpg, .jpeg), PNG (.png), GIF (.gif), WebP (.webp).
Note: Image input is currently supported in single-shot mode only, not in interactive
--chatmode. Providers without vision support (Cohere, HuggingFace, ChatGLM, ModelScope) will receive a warning and the images will be stripped.
Input Methods
Direct Input
ai "What is the capital of France?"
Piped Input
echo "What is the capital of France?" | ai
File Analysis
cat demo.py | ai "Explain this code"
Combined Input
cat error.log | ai "Why am I getting these errors in my Python app?"
File Context
YAICLI supports adding files and directories to the conversation context for better understanding of your codebase.
Temporary @ References
Use @ to reference files in your query:
# Reference a single file
ai '@README.md What is this project about?'

# Reference multiple files
ai '@src/main.py @config.yaml Explain the architecture'

# Use quotes for paths with spaces
ai @"my document.txt" Summarize this
Persistent Context
Add files/directories to context for the entire session:
ai --chat
💬 > /add src/
💬 > /context list
# Shows all files in context

💬 > Explain the codebase structure
# AI can now see all files in src/

💬 > /context remove src/
💬 > /context clear
# Remove or clear context
Features
- Auto-completion: Type
@and pressTabto browse files - Smart ignores: Automatically skips
.git,node_modules,__pycache__, etc. - Directory support: Add entire directories (2-level depth by default)
- Path flexibility: Use relative or absolute paths
📱 Examples
Quick Answer Mode
$ ai "What is the capital of France?"
Assistant:
The capital of France is Paris.
Command Generation & Execution
$ ai -s 'Check the current directory size'
Assistant:
du -sh .
╭─ Command ─╮
│ du -sh .  │
╰───────────╯
Execute command? [e]dit, [y]es, [n]o (y): e
Edit command, press enter to execute:
du -sh ./
Output:
109M    ./
Code Generation
In code mode, select the language for code generation. If none is specified, Python is the default.
The --code mode outputs plain text, making it easy to copy, paste, or redirect to a file, especially when using the standard model.
When using a deep reasoning model, the thinking content is displayed with syntax highlighting. To disable this, use the --hide-reasoning option or set SHOW_REASONING to false in the configuration.
$ ai --code 'Write a fib generator'
def fib_generator():
    a, b = 0, 1
    while True:
        yield a
        a, b = b, a + b
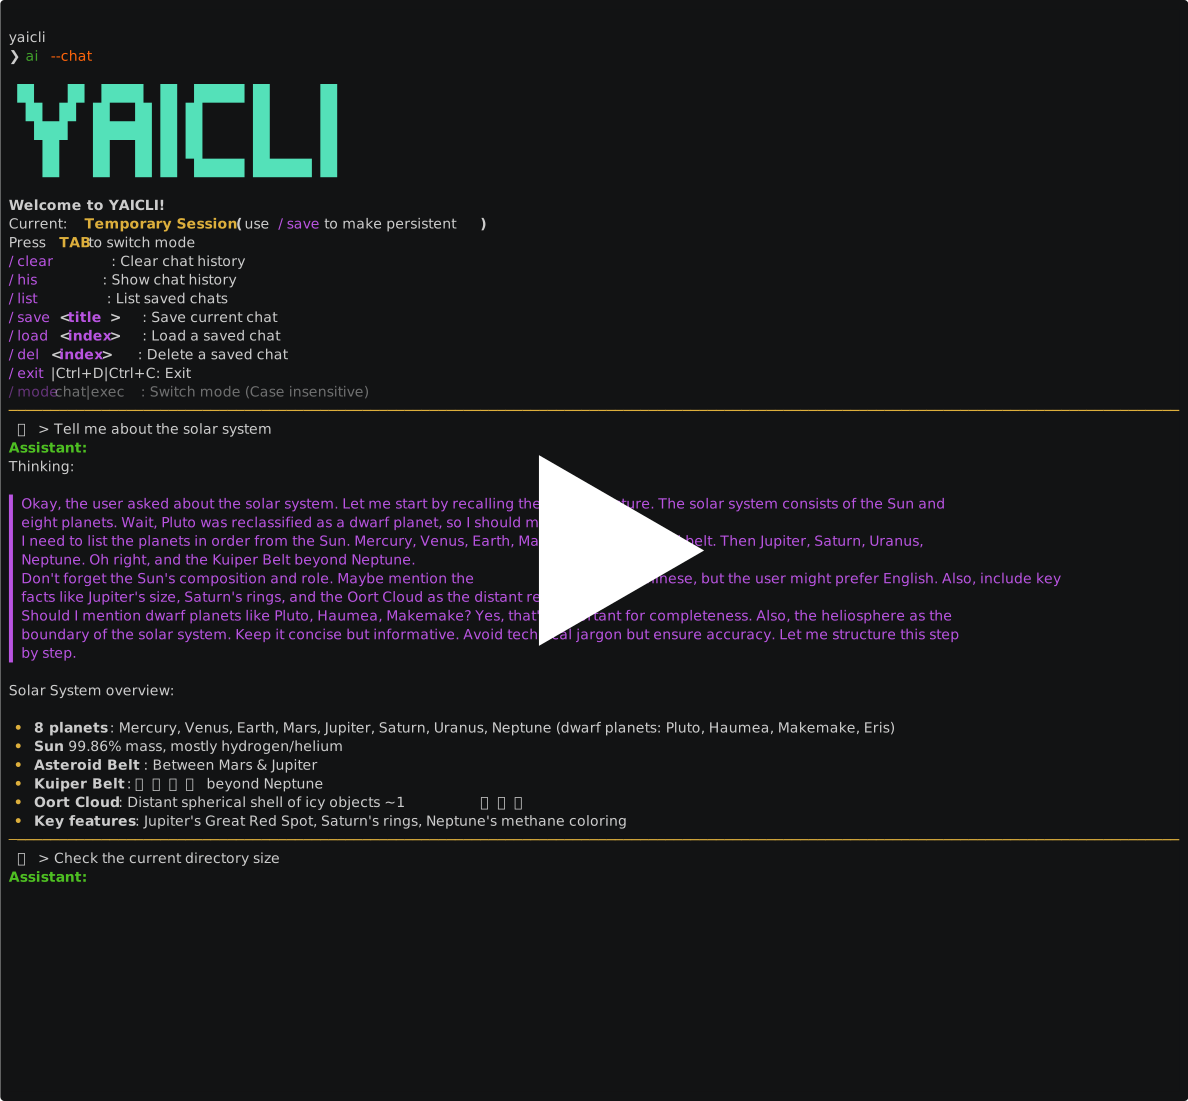
Chat Mode Example
$ ai --chat
Starting a temporary chat session (will not be saved automatically)

 ██    ██  █████  ██  ██████ ██      ██
  ██  ██  ██   ██ ██ ██      ██      ██
   ████   ███████ ██ ██      ██      ██
    ██    ██   ██ ██ ██      ██      ██
    ██    ██   ██ ██  ██████ ███████ ██

Welcome to YAICLI!
Current: Temporary Session (use /save to make persistent)
Press Shift+Tab to switch mode
/clear             : Clear chat history
/his               : Show chat history
/list              : List saved chats
/save <title>      : Save current chat
/load <index>      : Load a saved chat
/del <index>       : Delete a saved chat
!<command>         : Execute shell command directly (e.g., !ls -al)
/exit|Ctrl+D       : Exit
Ctrl+C             : Clear input / cancel turn; press twice to exit
/mode chat|exec    : Switch mode (Case insensitive)
───────────────────────────────────────────────────────────────────────────────────────────────────────────────────────
 💬 > Tell me about the solar system

Assistant:
Solar System Overview

 • Central Star: The Sun (99% of system mass, nuclear fusion).
 • Planets: 8 total.
    • Terrestrial (rocky): Mercury, Venus, Earth, Mars.
    • Gas Giants: Jupiter, Saturn.
    • Ice Giants: Uranus, Neptune.
 • Moons: Over 200 (e.g., Earth: 1, Jupiter: 95).
 • Smaller Bodies:
    • Asteroids (between Mars/Venus), comets ( icy, distant), * dwarf planets* (Pluto, Ceres).
 • Oort Cloud: spherical shell of icy objects ~1–100,000天文單位 (AU) from Sun).
 • Heliosphere: Solar wind boundary protecting Earth from cosmic radiation.

Key Fact: Earth is the only confirmed habitable planet.

🚀 > Check the current directory size
Assistant:
du -sh .
╭─ Suggest Command ─╮
│ du -sh .          │
╰───────────────────╯
Execute command? [e]dit, [y]es, [n]o (y): e
Edit command: du -sh ./
--- Executing ---
 55M    ./
--- Finished ---
🚀 >
Execute Mode Example
$ ai --shell "Find all PDF files in my Downloads folder"
Assistant:
find ~/Downloads -type f -name "*.pdf"
╭─ Suggest Command ───────────────────────╮
│ find ~/Downloads -type f -iname "*.pdf" │
╰─────────────────────────────────────────╯
Execute command? [e]dit, [y]es, [n]o (y): y
Output:

/Users/username/Downloads/document1.pdf
/Users/username/Downloads/report.pdf
...
Code Mode Example
$ ai --code "write a fib generator" --model deepseek-r1

Built-in Tools & Function Calling
Function calling is what makes YAICLI an agent: the model can ask YAICLI to run local tools such
as file readers, web_search, fetch_webpage and execute_shell_command, read the result, and
continue working. The 12 built-in tools are loaded directly from the installed package, so they
work immediately with no --install-functions step:
| Tool group | Built-in tools |
|---|---|
| Filesystem (read) | fs_get_filesystem_info, fs_list_directory, fs_read_file, fs_read_image, fs_search_files |
| Filesystem (write) | fs_write_file, fs_edit_file, fs_file_operations |
| Shell (exec) | execute_shell_command |
| Network | fetch_webpage, web_search, get_weather |
- Copy a built-in definition into
~/.config/yaicli/functions/to edit it:ai --install-functionsexports editable copies (existing files are kept), and a user copy overrides the built-in with the same tool name. ai --list-functionsshows every loaded tool and whether it isbuiltinoruser.ai --reinstall-functionsrefreshes stale copies after an upgrade (custom files are kept). This is only needed if you have exported copies in the functions directory.- Function calling is enabled by default (
ENABLE_FUNCTIONS); use--enable-functions/--disable-functionsto toggle it per run, and--hide-function-outputto hide tool output.
Every tool call asks for confirmation by default (TOOL_CONFIRM; allow once, for the session,
permanently, or deny); shell commands and writes get an extra risk check, and every decision is
recorded in the audit log. See Permissions & Safety,
Headless & Scripting and
Advanced Usage — Function Calling for the full
command/flag reference and custom-function guide.
MCP
Add your MCP config in ~/.config/yaicli/mcp.json (C:\Users\<user>\.config\yaicli\mcp.json on Windows.).
--enable-mcp option is corresponds to the configuration key ENABLE_MCP.
Example:
ai 'What is the latest exchange rate between the BTC and the US dollar?' --enable-mcp --show-mcp-output

Assistant:

@Mcp call: bing_search({"query": "latest exchange rate between BTC and US dollar"})
╭─ Mcp output ──────────────────────────────────────────────────────────────────────────────────────────────────────────────╮
│ [                                                                                                                         │
│   {                                                                                                                       │
│     "id": "result_1751024997243_0",                                                                                       │
│     "title": "BTC to USD - Bitcoin to US Dollar Conversion - Exchange Rates",                                             │
│     "link": "https://www.exchange-rates.org/converter/btc-usd",                                                           │
│     "snippet": "11 小时之前 · 1 Bitcoin = 107,304 US Dollars as of June 27, 2025 03:00 AM UTC. You can get live exchange  │
│ rates between Bitcoin and US Dollars using exchange-rates.org, which aggregates …"                                        │
│   },                                                                                                                      │
╰───────────────────────────────────────────────────────────────────────────────────────────────────────────────────────────╯
Here are some current exchange rates for Bitcoin (BTC) to US Dollar (USD):

 1 Exchange-Rates.org:
   ₿1 Bitcoin = 💵107,304 US Dollars (as of June 27, 2025, 03:00 AM UTC).
   Link
 2 BTC.CurrencyRate.Today:
   Live Bitcoin to US Dollars exchange rate.
   Link
 3 Xe.com:
   Latest conversion rate and information about Bitcoin to US Dollars.
   Link
 4 BestExchangeRates.com:
   Current BTC to USD market data, including charts and historic rates.
   Link
 5 Investing.com:
   Bitcoin price analysis and live BTC to USD updates.
   Link

For the most accurate and up-to-date rate, I recommend checking one of these sources directly.

💻 Technical Details
Architecture
YAICLI is designed with a modular architecture that separates concerns and makes the codebase maintainable:
- CLI Module: Handles user interaction and command parsing
- API Client: Manages communication with LLM providers
- Config Manager: Handles layered configuration
- History Manager: Maintains conversation history with LRU functionality
- Printer: Formats and displays responses with rich formatting
Dependencies
| Library | Purpose |
|---|---|
| Typer | Command-line interface with type hints |
| Rich | Terminal formatting and beautiful display |
| prompt_toolkit | Interactive input with history and auto-completion |
| json-repair | Repair llm function call arguments |
👨💻 Contributing
Contributions are welcome! Here's how you can help:
- Bug Reports: Open an issue describing the bug and how to reproduce it
- Feature Requests: Suggest new features or improvements
- Code Contributions: Submit a PR with your changes
- Documentation: Help improve or translate the documentation
📃 License
YAICLI - Your AI Command Line Interface
1 maintainer

Metadata
1 maintainer
Release files for yaicli 0.21.0
For a detailed explanation of source distributions (sdists) and built distributions (wheels), please see the package formats documentation.
Source distribution (sdist)
| File | Size | Uploaded | Provenance | Actions |
|---|---|---|---|---|
| yaicli-0.21.0.tar.gz | 246.5 kB | Without provenance | Details for yaicli-0.21.0.tar.gz |
Built distribution (wheel)
| File | Interpreter | ABI | Platform | Actions Reset |
|---|---|---|---|---|
| yaicli-0.21.0-py3-none-any.whl | Python 3 | none | any | Details for yaicli-0.21.0-py3-none-any.whl |
Total release size: 529.9 kB
Release files / yaicli-0.21.0.tar.gz
| Download URL | yaicli-0.21.0.tar.gz |
|---|---|
| Size | 246.5 kB |
| Tags | Source |
|
SHA-256 checksum How to use checksums |
b71845dd072aca589532869ed709a47059ed9e4bd30cbfafeb262e9182a13a47
|
|
BLAKE2b-256 checksum How to use checksums |
948dbc67bd9d89ace5e8a73bdf483b35dfa85342bbfc51c0f0c185712f36ef95
|
| Upload date | |
|
Uploaded using Trusted Publishing? What is trusted publishing? |
No |
| Uploaded via |
twine/7.0.0 CPython/3.13.16
|
Release files / yaicli-0.21.0-py3-none-any.whl
| Download URL | yaicli-0.21.0-py3-none-any.whl |
|---|---|
| Size | 283.4 kB |
| Tags | Python 3 |
|
SHA-256 checksum How to use checksums |
214f63101a5a26d156ed1416d50fc07a9a06e28d800c092be712287361a64667
|
|
BLAKE2b-256 checksum How to use checksums |
6bfdb3816515ef5adaf34977f5229566e800a2736c66e5bc6e4aeedf33a584ca
|
| Upload date | |
|
Uploaded using Trusted Publishing? What is trusted publishing? |
No |
| Uploaded via |
twine/7.0.0 CPython/3.13.16
|
Security for yaicli 0.21.0
Provenance
Provenance describes where a file came from. On PyPI, provenance is shared via attestations, which provide a verifiable record of the build or publishing details. View details, limitations and caveats.
No provenance found
None of the files in this release were uploaded with provenance metadata.
A note on package security
PyPI is a repository for distributing packages, not a service for auditing them. While third-party security researchers and our staff do their best to detect and remove malicious packages, PyPI cannot guarantee the quality, security or suitability of any given package.
To learn more about protecting yourself from malicious actors, visit our package security documentation.














