
FFmpeg Hardware Codec Detect Script(HwCodecDetect)




Today's hardware-accelerated video codec landscape is a "field of a hundred schools of thought." To leverage the immense power of GPUs, hardware manufacturers have introduced their own acceleration frameworks and encoding standards, such as NVIDIA's NVEnc/NVDec, Intel's QSV, and AMD's AMF. Additionally, operating systems provide universal APIs like Microsoft's Media Foundation, DXVA2, and D3D12VA, while the open-source community has developed cross-platform standards like VAAPI and Vulkan.
While this diversity drives technological progress, it also presents a challenge for users and developers. Due to historical issues and compatibility quirks, a single piece of hardware might support multiple encoders, but they can differ significantly in performance, supported formats, and resolutions. As a result, when using FFmpeg for hardware acceleration, it's not always clear which encoder is best suited for a specific device.
This project was created to solve this very problem. It's a convenient tool for automatically detecting the hardware video encoder capabilities of your system. Using FFmpeg, it generates single-frame video files at various resolutions (from 240p to 8K) and attempts to process them with different hardware encoders. This allows it to quickly determine which hardware encoders are available on your system and what resolutions they support.
Key Features
Encoders
The script automatically detect and reports on the following major hardware encoders and their supported formats:
| Encoder Name | Supported Video Formats |
|---|---|
| NVEnc | H.264、H.265、AV1 |
| QSV (Quick Sync Video) | H.264、H.265、AV1、MJPEG、MPEG-2、VP9 |
| AMF (Advanced Media Framework) | H.264、H.265、AV1 |
| Media Foundation | H.264、H.265、AV1 |
| D3D12VA (Direct3D 12 Video Acceleration) | H.264、H.265、AV1 |
| VAAPI (Video Acceleration API) | H.264、H.265、AV1、MJPEG、MPEG-2、VP8、VP9 |
| Vulkan | H.264、H.265、AV1 |
| Apple VideoToolbox | H.264、H.265、ProRes |
Decoders
The script automatically detect and reports on the following major hardware decoders and their supported formats:
| Decoder Name | Supported Video Formats |
|---|---|
| NVDec (CUVID) | H.264、H.265、AV1、MJPEG、MPEG-1、MPEG-2、MPEG-4、VP8、VP9 |
| QSV (Quick Sync Video) | H.264、H.265、AV1、MJPEG、MPEG-2、VP8、VP9 |
| AMF (Advanced Media Framework) | H.264、H.265、AV1 |
| DXVA2 (DirectX Video Acceleration) | H.264、H.265、MJPEG、MPEG-1、MPEG-2、MPEG-4、VP8 |
| D3D11VA (Direct3D 11 Video Acceleration) | H.264、H.265、AV1、MJPEG、MPEG-1、MPEG-2、MPEG-4、VP8、VP9 |
| D3D12VA (Direct3D 12 Video Acceleration) | H.264、H.265、AV1、MJPEG、MPEG-1、MPEG-2、MPEG-4、VP8、VP9 |
| Vulkan | H.264、H.265、AV1 |
| Apple VideoToolbox | H.264、H.265、MPEG-2、MPEG-4、ProRes、VP9 |
Bit-depth and Chroma Subsampling Detection
In addition to resolution-based testing, the tool now includes comprehensive bit-depth and chroma subsampling detection. This feature tests hardware codec support for different pixel formats, helping you understand the full capabilities of your hardware encoders and decoders.
The detection covers the following pixel formats:
| Bit-depth | Chroma Subsampling | Pixel Format | Description |
|---|---|---|---|
| 8-bit | YUV 4:2:0 | yuv420p | Standard 8-bit 4:2:0 |
| 8-bit | YUV 4:2:2 | yuv422p | 8-bit 4:2:2 |
| 8-bit | YUV 4:4:4 | yuv444p | 8-bit 4:4:4 |
| 10-bit | YUV 4:2:0 | yuv420p10le, p010le | 10-bit 4:2:0 |
| 10-bit | YUV 4:2:2 | yuv422p10le | 10-bit 4:2:2 |
| 10-bit | YUV 4:4:4 | yuv444p10le | 10-bit 4:4:4 |
| 12-bit | YUV 4:2:0 | yuv420p12le | 12-bit 4:2:0 |
| 12-bit | YUV 4:2:2 | yuv422p12le | 12-bit 4:2:2 |
| 12-bit | YUV 4:4:4 | yuv444p12le | 12-bit 4:4:4 |
This feature uses a fixed resolution of 1280x720 for all tests and follows the encode-then-decode workflow. If hardware encoding fails, the tool automatically falls back to software encoding to ensure decoder tests can still be performed.
Note: This feature is enabled by default. You can disable it using the --no-bitdepth-chroma command-line parameter.
How to Use
HwCodecDetect provides both a command-line (CLI) and a graphical user interface (GUI). You can install and use it in 3 ways.
Tip: Add the
--uiflag (or set the environment variableHWCODECDETECT_GUI=1) to launch the GUI mode instead of the default CLI.
Method 1: Install via PyPI (Recommended)
This is the easiest method if you just want to use the tool quickly.
-
Install: Use pip to install hwcodecdetect from the official PyPI repository.
pip install hwcodecdetect -U
-
Run: After installation, run the hwcodecdetect command directly from your terminal.
# CLI mode (default)
hwcodecdetect

# GUI mode
hwcodecdetect --ui
Method 2: Download and Run Executable (Standalone)
Use this method if you prefer to run the tool without installing Python dependencies, or if the PyPI installation fails.
Both CLI and GUI executables are available on the Releases page:
| Mode | Binary Name Example |
|---|---|
| CLI | HwCodecDetect-Windows-x64.exe, HwCodecDetect-Linux-x64, HwCodecDetect-macOS-ARM64 |
| GUI | HwCodecDetect-GUI-Windows-x64.exe, HwCodecDetect-GUI-Linux-x64, HwCodecDetect-GUI-macOS-ARM64 |
-
Download: Go to the project's Releases page and download the executable file corresponding to your operating system and preferred mode (CLI or GUI).
-
(Linux/macOS only) Add Execute Permission: If you are on Linux or macOS, you need to grant the downloaded file execute permission.
# Replace 'HwCodecDetect-Linux-x64' with the actual downloaded filename
chmod +x HwCodecDetect-Linux-x64
-
Run: Execute the file directly from your terminal.
# CLI - For Linux
./HwCodecDetect-Linux-x64
# CLI - For MacOS
./HwCodecDetect-macOS-ARM64
# CLI - For Windows (e.g., in PowerShell or Command Prompt)
.\HwCodecDetect-Windows-x64.exe

# GUI - For Linux
./HwCodecDetect-GUI-Linux-x64
# CLI - For MacOS
./HwCodecDetect-GUI-macOS-ARM64
# GUI - For Windows
.\HwCodecDetect-GUI-Windows-x64.exe
Method 3: Install from Source
Use this method if you have cloned the project source code from GitHub and want to run it locally.
-
Clone the repository: First, clone the project source code to your local machine.
git clone https://github.com/whyb/HwCodecDetect.git ./HwCodecDetect
-
Install dependencies: Navigate into the project's root directory and use pip to install the required dependencies.
cd HwCodecDetect
pip install .
-
Run: After the installation is complete, run the hwcodecdetect command directly.
# CLI mode (default)
hwcodecdetect

# GUI mode
hwcodecdetect --ui
Final effect
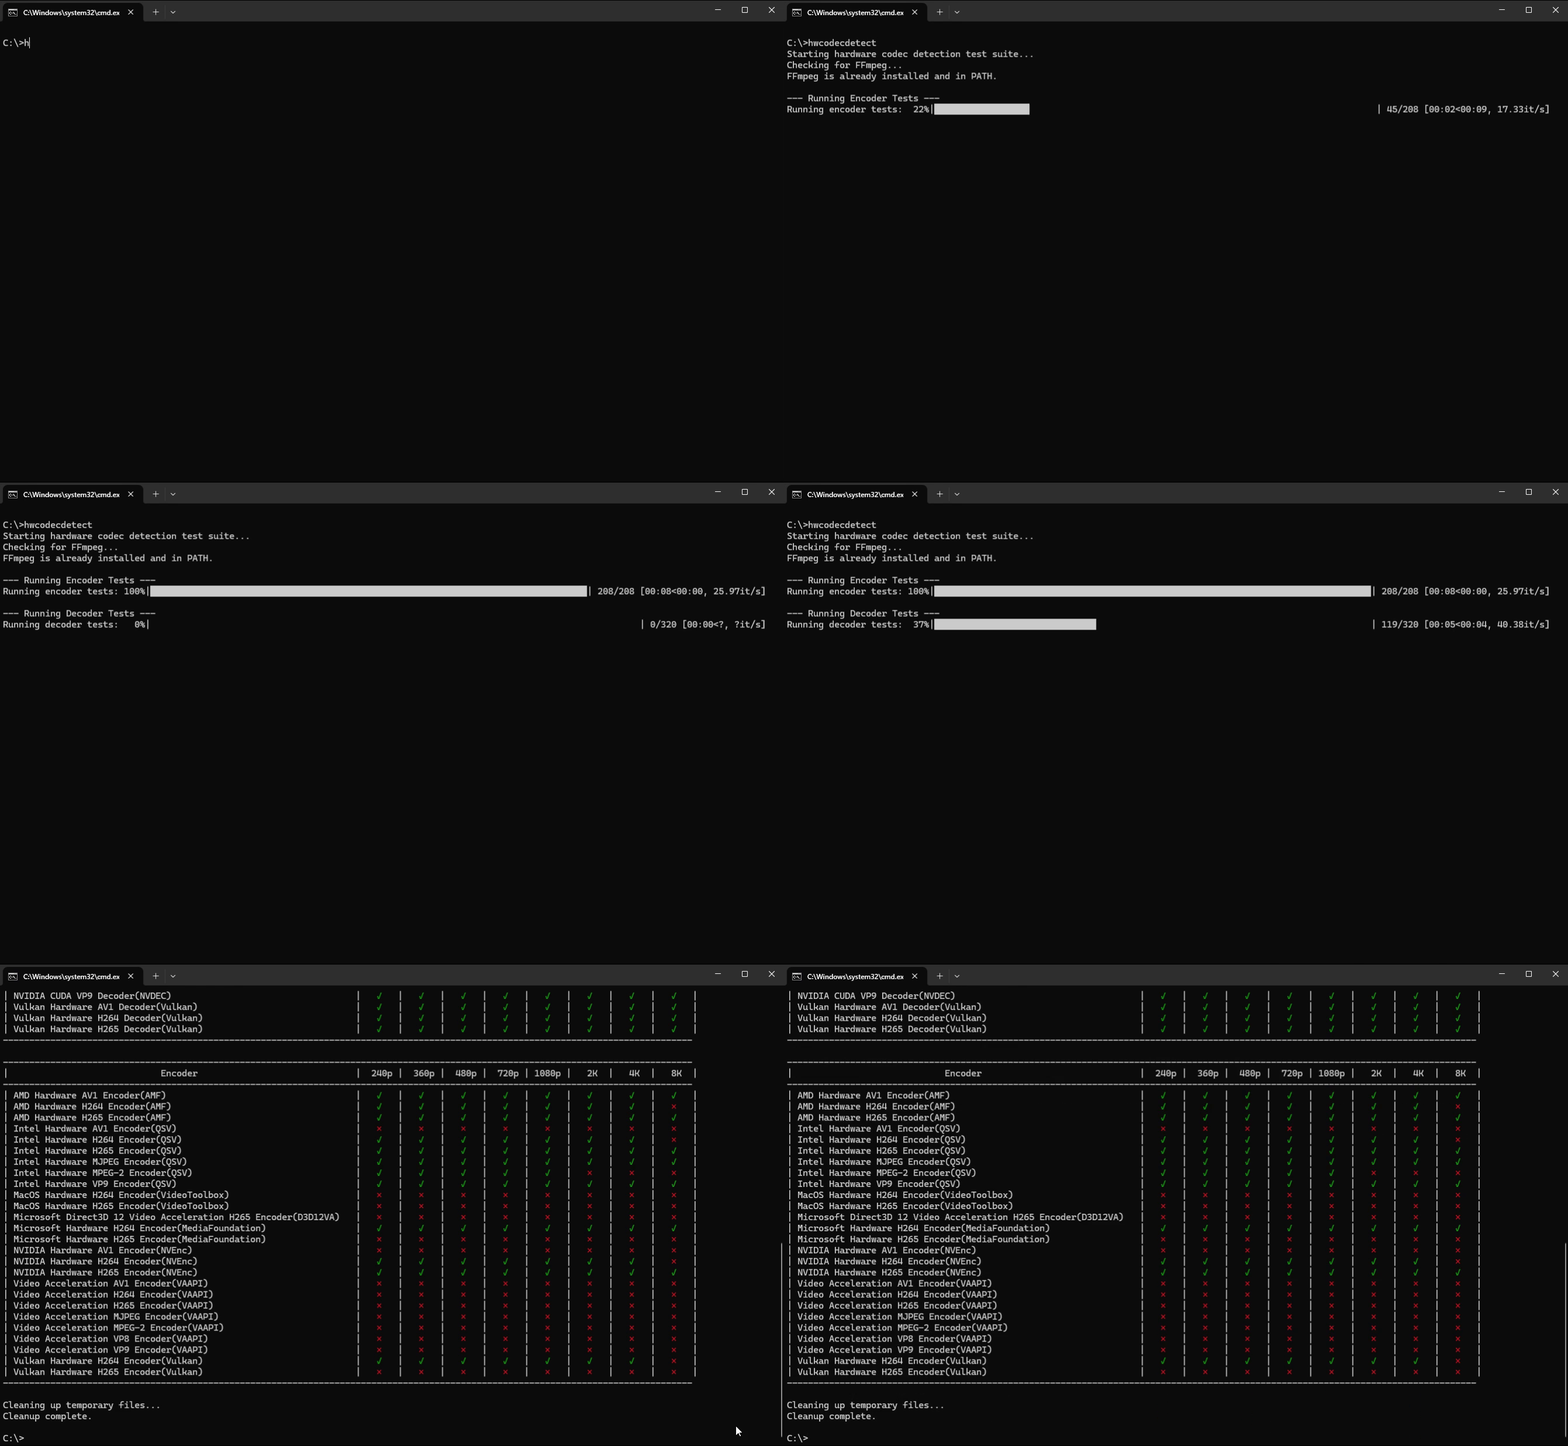
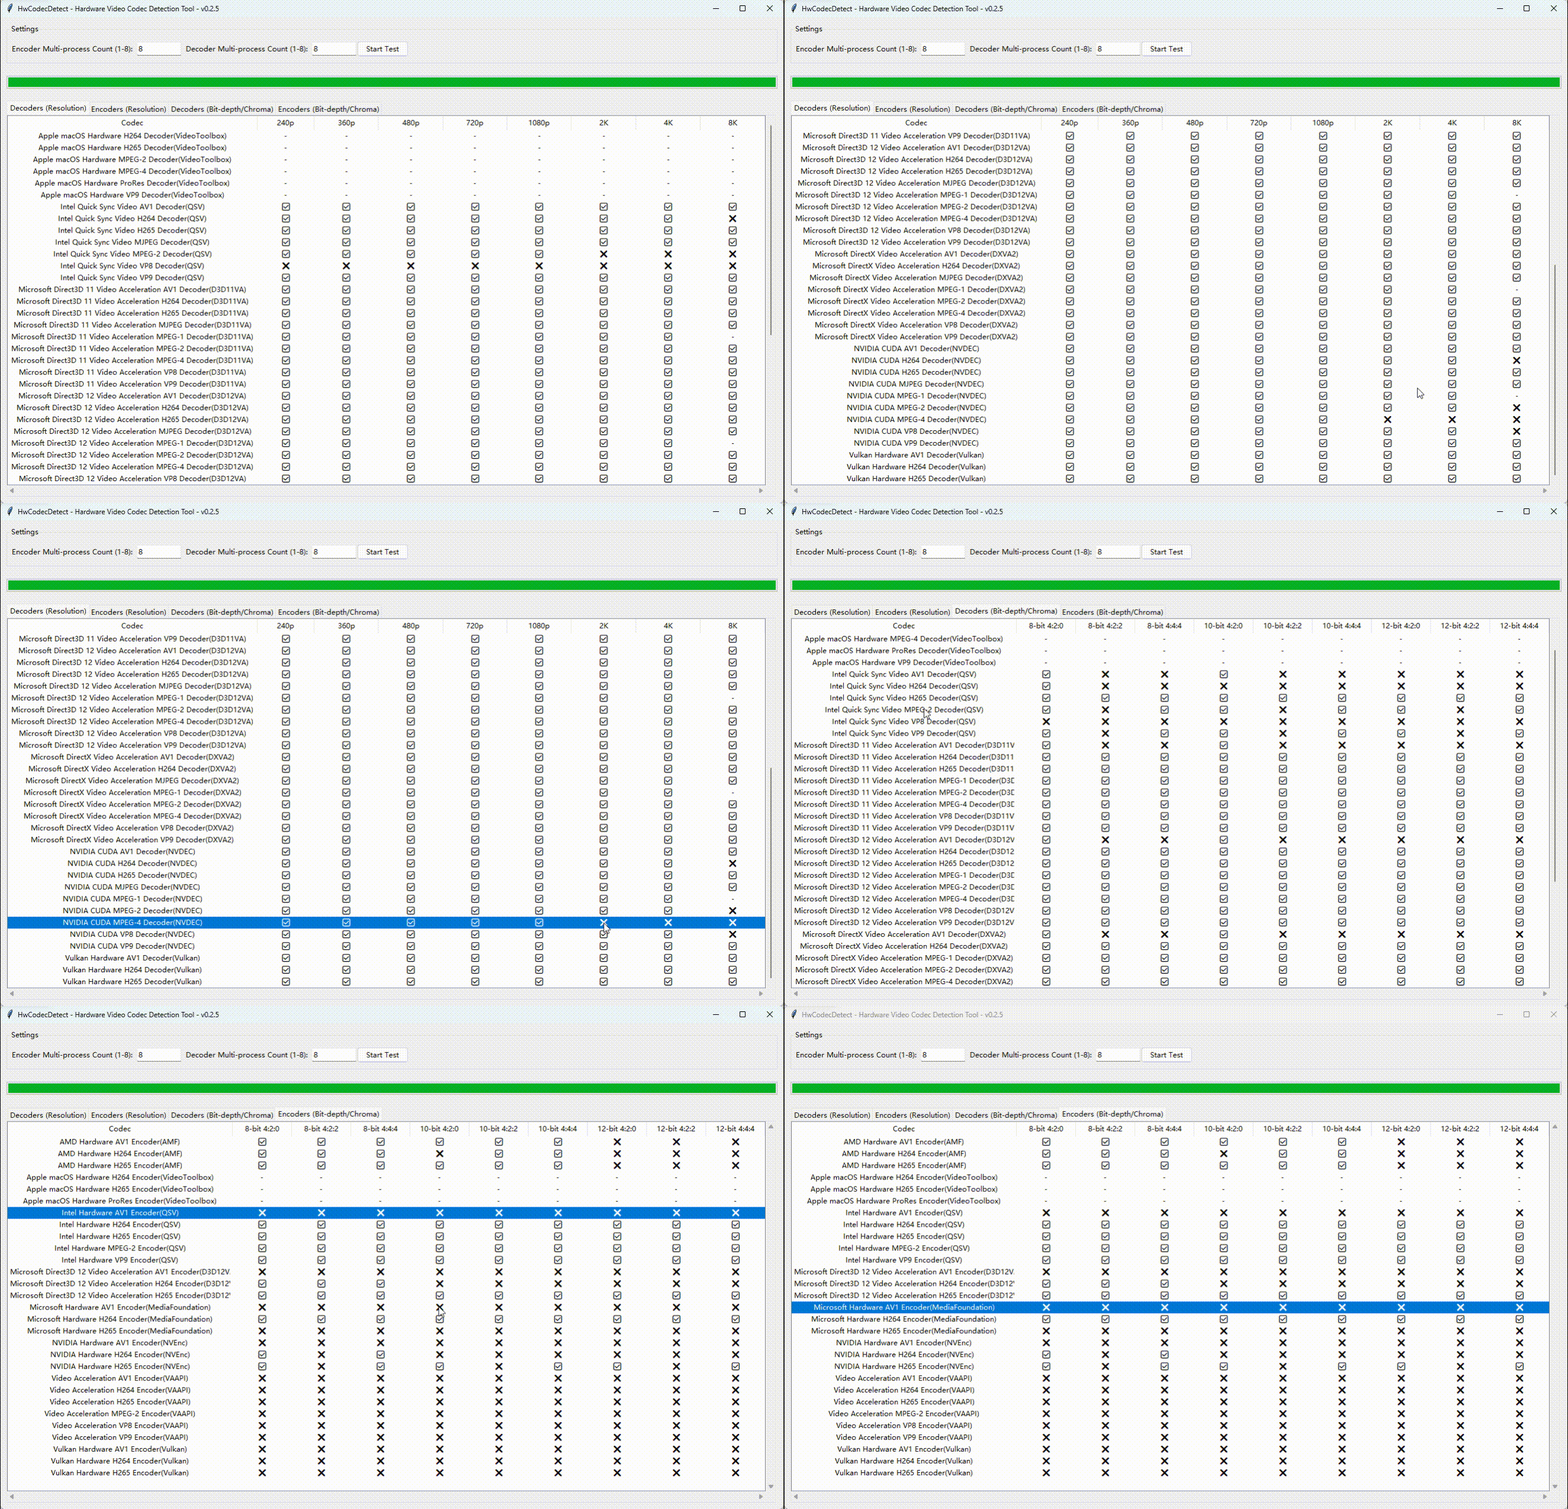
Here are some possible results from a local test run:
Command-line tool
GUI tool
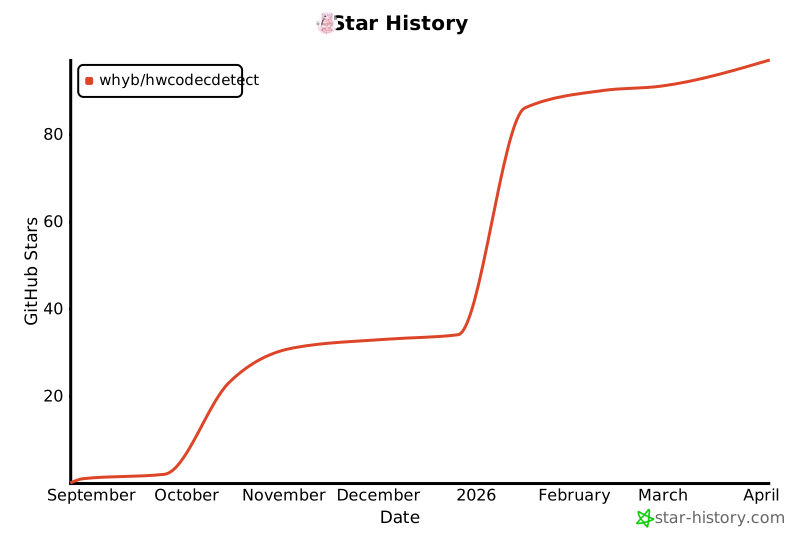
Star History
1 maintainer

Metadata
1 maintainer
Release files for HwCodecDetect 0.2.8
For a detailed explanation of source distributions (sdists) and built distributions (wheels), please see the package formats documentation.
Source distribution (sdist)
| File | Size | Uploaded | |
|---|---|---|---|
| hwcodecdetect-0.2.8.tar.gz | 478.7 kB | Details |
Built distribution (wheel)
| File | Interpreter | ABI | Platform | Reset |
|---|---|---|---|---|
| hwcodecdetect-0.2.8-py3-none-any.whl | Python 3 | none | any | Details |
Total release size: 954.0 kB
Release files / hwcodecdetect-0.2.8.tar.gz
| Download URL | hwcodecdetect-0.2.8.tar.gz |
|---|---|
| Size | 478.7 kB |
| Tags | Source |
|
SHA-256 checksum How to use checksums |
c0da0599cf8e2dbe8d3a2bcfdcef3f46815853338bbd07afb4e3b2226b6de29b
|
|
BLAKE2b-256 checksum How to use checksums |
9743986fed082438e2c6d4851453a829fce86ca1d822e011c7f4efbcd32c1f07
|
| Upload date | |
|
Uploaded using Trusted Publishing? What is trusted publishing? |
Yes |
| Uploaded via |
twine/6.1.0 CPython/3.13.12
|
Provenance
Provenance describes where a file came from. On PyPI, provenance is shared via attestations, which provide a verifiable record of the build or publishing details. View details, limitations and caveats.


PyPI Publish Attestation
PyPI verified that this artifact, at this checksum, originated from the publisher listed below.
Signed by GitHub Actions, verified by PyPI on Jun 16, 2026.
Transparency logRelease files / hwcodecdetect-0.2.8-py3-none-any.whl
| Download URL | hwcodecdetect-0.2.8-py3-none-any.whl |
|---|---|
| Size | 475.3 kB |
| Tags | Python 3 |
|
SHA-256 checksum How to use checksums |
b42093dd3dc3d696fc83a00a83fe08e3e27a0f05e7518b7969bfa229c5838bf5
|
|
BLAKE2b-256 checksum How to use checksums |
04a959a8db73c0837210e957e21e1802b0c5a86ae291fbfd5d26883184fee1d4
|
| Upload date | |
|
Uploaded using Trusted Publishing? What is trusted publishing? |
Yes |
| Uploaded via |
twine/6.1.0 CPython/3.13.12
|
Provenance
Provenance describes where a file came from. On PyPI, provenance is shared via attestations, which provide a verifiable record of the build or publishing details. View details, limitations and caveats.
PyPI Publish Attestation
PyPI verified that this artifact, at this checksum, originated from the publisher listed below.
Signed by GitHub Actions, verified by PyPI on Jun 16, 2026.
Transparency log













