A serial-port based oscilloscope

Project description

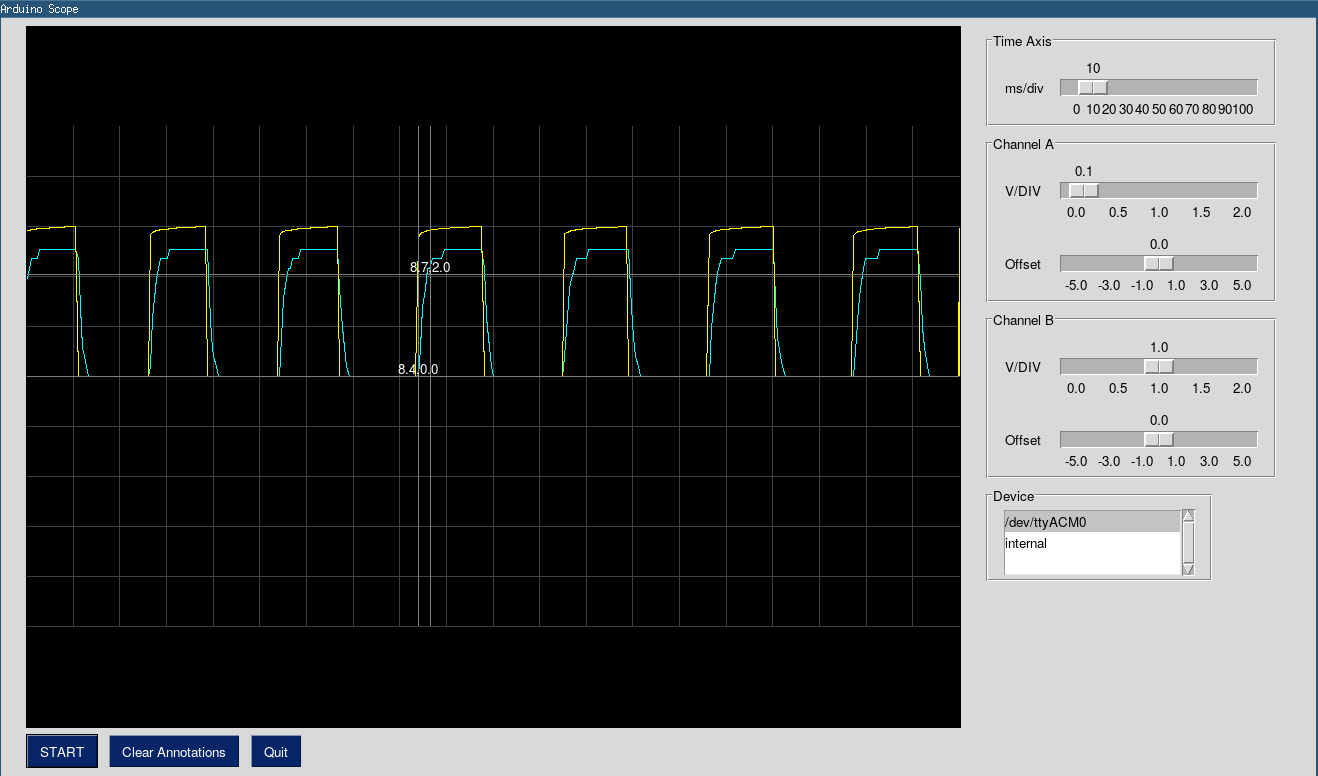
A serial port oscilloscope.
Install
$ pip install SerialScope --user # just for you
or,
$ sudo -E pip install SerialScope # for all users
After installation, launch it.
$ serialscope
Path ~/.local/bin should be in your PATH environment variable.
The default baud rate are serial port is 115200 and /dev/ttyACM0
respectively. You can change these values from command line
usage: serialscope [-h] [--port PORT] [--baudrate BAUDRATE]

Arduino NeuroScope.

optional arguments:
  -h, --help            show this help message and exit
  --port PORT, -p PORT  Serial port.
  --baudrate BAUDRATE, -B BAUDRATE
                        Baudrate of Arduino board.
Dependencies
- pyserial
- pysimplegui
- screeninfo (optional)
How it works
This oscilloscope has two channels. It assumes that 1 byte of data is sent
for each channel. That means you have 255 levels. If you are using arduino board
analog pins to read data, then your resolution would be 5/255 volts.
Arduino board
Function analogRead returns 10 bit value i.e., between 0 and 1023. You should
scale it to 255, cast it to char before writing to serial port.
You can use following snippets in your sketch.
Make sure that your arduino is set to use maximum possible baud-rate. I have used 115200 baud rate.,
// Two critical functions.
char intToChar( int val)
{
    // analogRead is 10 bits. Change it to 8 bits.
    char x = (char) (255.0 * val/1023.0);
    return x;
}

void write_data_line( )
{
    // channel A is on pin A0 and channel B is on A1
    char a = intToChar(analogRead(A0));
    char b = intToChar(analogRead(A1));
    Serial.print(a);
    Serial.print(b);
    Serial.flush();
}
Release history Release notifications | RSS feed


Download files
Download the file for your platform. If you're not sure which to choose, learn more about installing packages.
Source Distribution
File details
Details for the file SerialScope-0.1.1.tar.gz.
File metadata
- Download URL: SerialScope-0.1.1.tar.gz
- Upload date:
- Size: 85.7 kB
- Tags: Source
- Uploaded using Trusted Publishing? No
- Uploaded via: twine/1.13.0 pkginfo/1.4.2 requests/2.19.1 setuptools/40.4.3 requests-toolbelt/0.8.0 tqdm/4.26.0 CPython/3.7.3
File hashes
| Algorithm | Hash digest | |
|---|---|---|
| SHA256 |
41a826d7cb720a55571a0f86539ec23b0eb89bc4018b96eb82ca7f4fc9b7ff17
|
|
| MD5 |
f55e007c6e6441d6d49fe17ec375590e
|
|
| BLAKE2b-256 |
b4d2ee98b1b5bf7910e15df98153e58fe7aa1e8a3b352b9c8515324beb1e6839
|


