
cardbleed


Reshapes card scans for printing: it can just add cut bleed, or fit a
scan to an exact card trim size (e.g. 63×88 mm) with the borders each set to
their intended width. Any area it adds continues whatever border the card
already has (holofoil speckle, solid colors, gradients). On the extend path the
original image data is never re-encoded — PNG/WebP pixels stay bit-identical and
JPEGs are extended by splicing DCT coefficient blocks around the untouched
originals. (--stretch and shaving an over-target border resample the art and
are opt-in.)
 input, 400×550 |
 output, cardbleed demo_card.png --bleed 24 |
The demo card is generated by a script (examples/make_demo.py), so the repository contains no copyrighted scans. It has the traits that make real scans annoying: a speckled border, a brightness gradient across it, a scanner-bloom line at the very edge, and an inner frame line. Bloom is trimmed and the frame line is detected automatically, so sampling never crosses into it.
Install
uv tool install cardbleed        # or: pipx install cardbleed
uvx cardbleed card.png           # or run once without installing
Or from source: uv tool install git+https://github.com/ErikBavenstrand/cardbleed
Platforms
macOS, Linux and Windows, on Python 3.11–3.13. CI runs the selfcheck on all
three, and runs a real card through with output redirected to a file — the
case that matters, because a redirected stream on Windows falls back to the ANSI
codepage rather than the console's UTF-8 path (LC_ALL=C on Linux does the
same). When a stream cannot encode a →, the streams are reconfigured to UTF-8
with errors="replace": at worst a ? where a glyph should be, never a failed
run.
One inherited limit: on Linux arm64 (a Pi, Graviton, or Docker on Apple
Silicon) jpeglib publishes no wheel — its wheels cover macOS, Linux
x86_64/i686 and Windows — so pip builds it from source and needs a compiler
(apt install build-essential python3-dev). Everywhere else installs from
wheels with no toolchain, and only the JPEG path depends on it; PNG and WebP do
not.
Usage
# just add 2.5 mm of cut bleed on every edge
cardbleed card.png --bleed 2.5mm

# fit a scan to 63×88 with 5% side / 3.92% top-bottom borders, given where the
# border currently sits (the marks); --stretch makes the borders land exactly
cardbleed card.png --card-size 63x88 \
    --border-target 5% --border-target-top 3.92% --border-target-bottom 3.92% \
    --border-current-top 2.5% --border-current-right 3% \
    --border-current-bottom 2.4% --border-current-left 3.3% --stretch
Every amount is a single scalar with a unit — 5%, 2.5mm, or 18px. Every
per-edge quantity (--border-target, --border-current, --bleed) is a
uniform base plus -top/-right/-bottom/-left overrides; no option ever takes a
packed list. Outputs are written next to the input (or to --out-dir) with an
_ext suffix; inputs are never overwritten.
Fit
With --border-target and --border-current, cardbleed reshapes the scan so
the outer trim is exactly the card aspect while the borders land as close as
possible to target. It solves for the one degree of freedom (the card scale)
that minimizes the border error, grows each edge toward its own target (a
cropped edge takes more), and shaves an over-target border if --crop is on.
When the art itself is slightly off-aspect it can't hit every target exactly
without distortion — --stretch opts into a small resample that then lands
every border exactly. The card size and border spec are always inputs;
cardbleed stores nothing card-specific.
Modes
Zoomed left-edge detail, one panel per setting: smart, pattern, naive, mirror, soft.
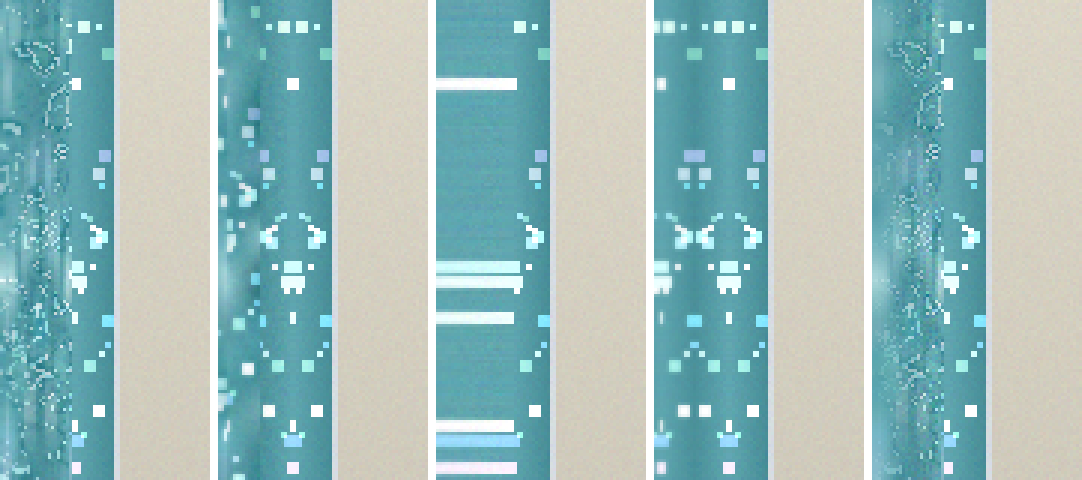
--mode pattern(default) keeps structure intact: every output line is a real contiguous border line, and each outward pass is shifted along the edge by a random offset. If the border has a repeating pattern, detected by autocorrelation, the continuation and the offsets snap to its period so the pattern stays in phase. With--shuffle 0it degrades to a plain deterministic mirror.--mode smartresamples the border band stochastically. Speckle is re-randomized in both directions, so nothing streaks or repeats, at the cost of some texture structure.--mode naivereplicates the outermost line straight outward (plus noise and smudge). Mostly useful as a baseline; it streaks on textured borders.
The gallery variants above, for reference:
 --mode smart |
 --mode naive |
 --smudge 2.5 --noise 0.8 |
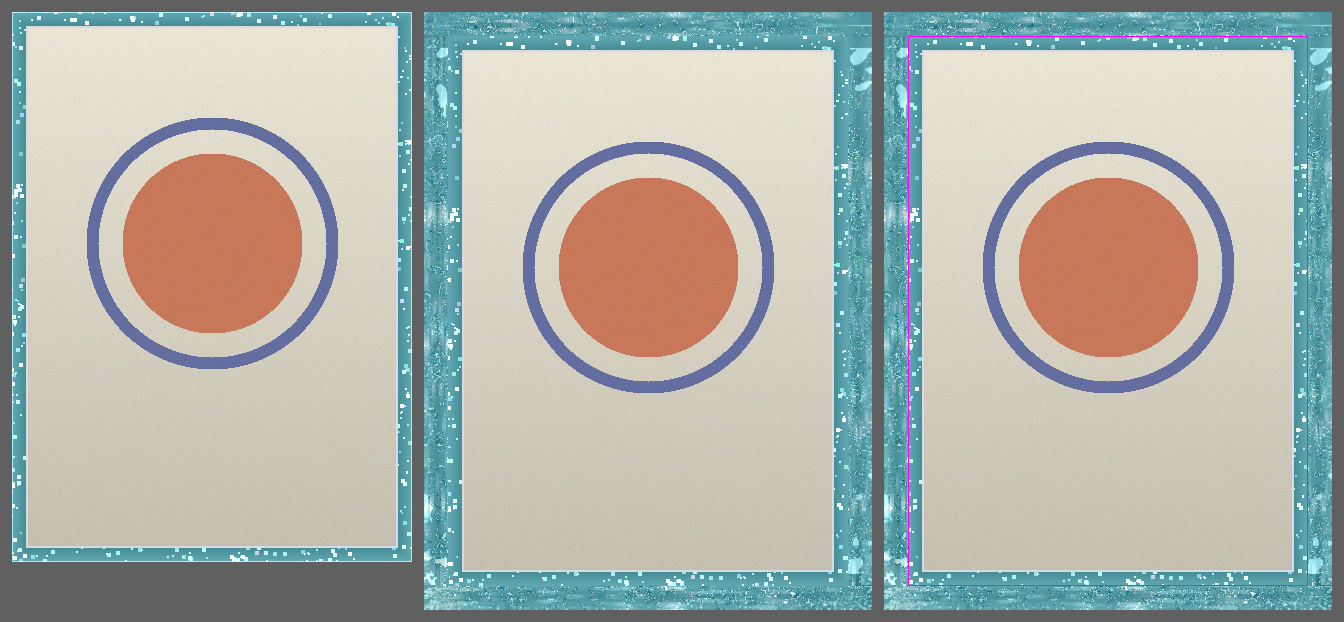 --compare sheet |
Format handling
| Format | What happens to the original data |
|---|---|
| PNG | re-serialized losslessly; pixels bit-identical |
| WebP | written as lossless WebP; decoded pixels preserved exactly |
| JPEG | original quantized DCT blocks are copied bit-exact into a larger coefficient grid; only the new border blocks are encoded, using the file's own quantization tables |
For JPEG the extension amounts have to align to the MCU grid (8 or 16 px). The remainder is shifted between opposite edges, so the final dimensions are still exactly what you asked for.
Options
cardbleed --help has the full reference. The ones worth knowing:
| Flag | Default | Meaning |
|---|---|---|
--card-size |
63x88 |
Card trim size in mm — the target aspect + mm basis |
--border-target |
none | Intended border, all edges (enables fit); -top/-right/-bottom/-left override |
--border-current |
none | Where the border sits now (the marks); per-edge overrides |
--stretch |
off | Un-distort the art so target borders land exactly (small resample) |
--crop |
on | Shave a border already thicker than target (never into artwork) |
--bleed |
none | Cut margin added outside the card, all edges; per-edge overrides |
--mode |
pattern |
pattern, smart, or naive (see above) |
--edge-fill |
auto |
Continue the border across transparent / rounded-corner / empty edge rows; off to disable |
--fill-corners |
off | Square rounded/ragged corners: fill edge background (transparent/black/white) with the nearest border. png/webp only |
--noise, --smudge |
0.35, 0.6 |
Added grain (relative to the border's own) and ramped blur |
--seed |
0 |
Output is deterministic per file |
Fine synthesis knobs (--jitter, --shuffle, --sample, --trim,
--seam-feather) live under Advanced in --help.
Python API
The CLI is a thin wrapper over bleed_card, which reshapes in-process:
from cardbleed import bleed_card, Edges

bleed_card(
    "card.png", "out.png",
    card_size=(63, 88),
    border_target=Edges.symmetric(vertical="3.92%", horizontal="5%"),
    border_current=Edges(top="2.5%", right="3%", bottom="2.4%", left="3.3%"),
    stretch=True,
    bleed="2.5mm",
)
Migrating from 0.3
0.4 is a breaking release. --extend → --bleed; the old --left/--right/ --top/--bottom, --target, --fix-aspect, and --corner-guard are removed —
use --bleed/--border-target with the -top/-right/-bottom/-left overrides,
and the new --border-current + --card-size fit for aspect correction.
How it works
Each edge is analyzed on the original image: bloom lines are trimmed and the sampling band is clamped before inner border structure. The border is split into a smooth tone component, which is continued outward mirrored so gradients stay seam-continuous, and a texture residual, which is resampled according to the selected mode. Noise matched to the border's measured grain and a ramped blur are applied on top. Corners are filled in two passes so they inherit synthesized side texture. All randomness ramps in from zero at the seam, so the first synthesized line is an exact continuation of the edge.
If a card already has rounded corners, the corner triangles are transparent (or
black/empty) in the scan. --edge-fill (on by default) detects those rows per
edge and continues the nearest real border across them, so the added bleed is
border colour rather than a grown black/transparent corner. It's a no-op on
edges with no such background, and stands down when an edge is mostly empty
(nothing to continue). Original pixels are still left untouched — only the
synthesized bleed is affected.
--fill-corners goes one step further and squares the corners themselves: edge
background (transparent, black, or white — anything reachable from the image
border that isn't the card) is flooded and filled with the nearest border, so a
rounded-corner scan becomes a clean rectangle before the bleed is added. Unlike
the rest of cardbleed it does change those background pixels (opaque artwork is
never touched); it's opt-in and png/webp only.
Development
git clone https://github.com/ErikBavenstrand/cardbleed && cd cardbleed
uv run cardbleed --selfcheck            # assertion suite (fixtures)
uv run cardbleed --selfcheck scan.png   # plus checks against a real scan
uv run --group dev ruff check src
uv run --group dev pyright
Module layout: synthesis.py (edge analysis and border synthesis),
formats.py (format-preserving I/O, including the JPEG DCT path),
sizing.py (px/mm/target/aspect math), process.py (per-file pipeline),
cli.py, output.py (stream encoding), selfcheck.py.
The selfcheck is the suite, so a portability guarantee has to be expressible as
one: it checks that every non-ASCII character in the package is declared in
output.GLYPHS, that a legacy-codepage stream survives them, and — by deleting
its own workspace at the end rather than leaving it behind — that nothing left a
file handle open, which is a silent leak on POSIX and a PermissionError on
Windows.
License
1 maintainer

Metadata
1 maintainer
Release files for cardbleed 0.4.1
For a detailed explanation of source distributions (sdists) and built distributions (wheels), please see the package formats documentation.
Source distribution (sdist)
| File | Size | Uploaded | |
|---|---|---|---|
| cardbleed-0.4.1.tar.gz | 3.7 MB | Details |
Built distribution (wheel)
| File | Interpreter | ABI | Platform | Reset |
|---|---|---|---|---|
| cardbleed-0.4.1-py3-none-any.whl | Python 3 | none | any | Details |
Total release size: 3.7 MB
Release files / cardbleed-0.4.1.tar.gz
| Download URL | cardbleed-0.4.1.tar.gz |
|---|---|
| Size | 3.7 MB |
| Tags | Source |
|
SHA-256 checksum How to use checksums |
8bd06f9f2ac777cb32ac7183f125c8365d7c63b8a0469d84aa89c296cb59a1c1
|
|
BLAKE2b-256 checksum How to use checksums |
4c32ba668581edfd058d2b11fdff1f9f5201fd8b99ef3094996daff937df3a4a
|
| Upload date | |
|
Uploaded using Trusted Publishing? What is trusted publishing? |
Yes |
| Uploaded via |
twine/6.1.0 CPython/3.13.14
|
Provenance
Provenance describes where a file came from. On PyPI, provenance is shared via attestations, which provide a verifiable record of the build or publishing details. View details, limitations and caveats.


PyPI Publish Attestation
PyPI verified that this artifact, at this checksum, originated from the publisher listed below.
Signed by GitHub Actions, verified by PyPI on Jul 27, 2026.
Transparency logRelease files / cardbleed-0.4.1-py3-none-any.whl
| Download URL | cardbleed-0.4.1-py3-none-any.whl |
|---|---|
| Size | 42.3 kB |
| Tags | Python 3 |
|
SHA-256 checksum How to use checksums |
682d755a2013f2fd81f12ef4de6bbf427785cdb3f6b069d5c2d7a412b734f1d6
|
|
BLAKE2b-256 checksum How to use checksums |
fc86da3ee08739bacb989faadf146c286ca00bff6f5f07fb48e5c3ab61411e0a
|
| Upload date | |
|
Uploaded using Trusted Publishing? What is trusted publishing? |
Yes |
| Uploaded via |
twine/6.1.0 CPython/3.13.14
|
Provenance
Provenance describes where a file came from. On PyPI, provenance is shared via attestations, which provide a verifiable record of the build or publishing details. View details, limitations and caveats.
PyPI Publish Attestation
PyPI verified that this artifact, at this checksum, originated from the publisher listed below.
Signed by GitHub Actions, verified by PyPI on Jul 27, 2026.
Transparency log













