
Django Simple 3rd Party JWT


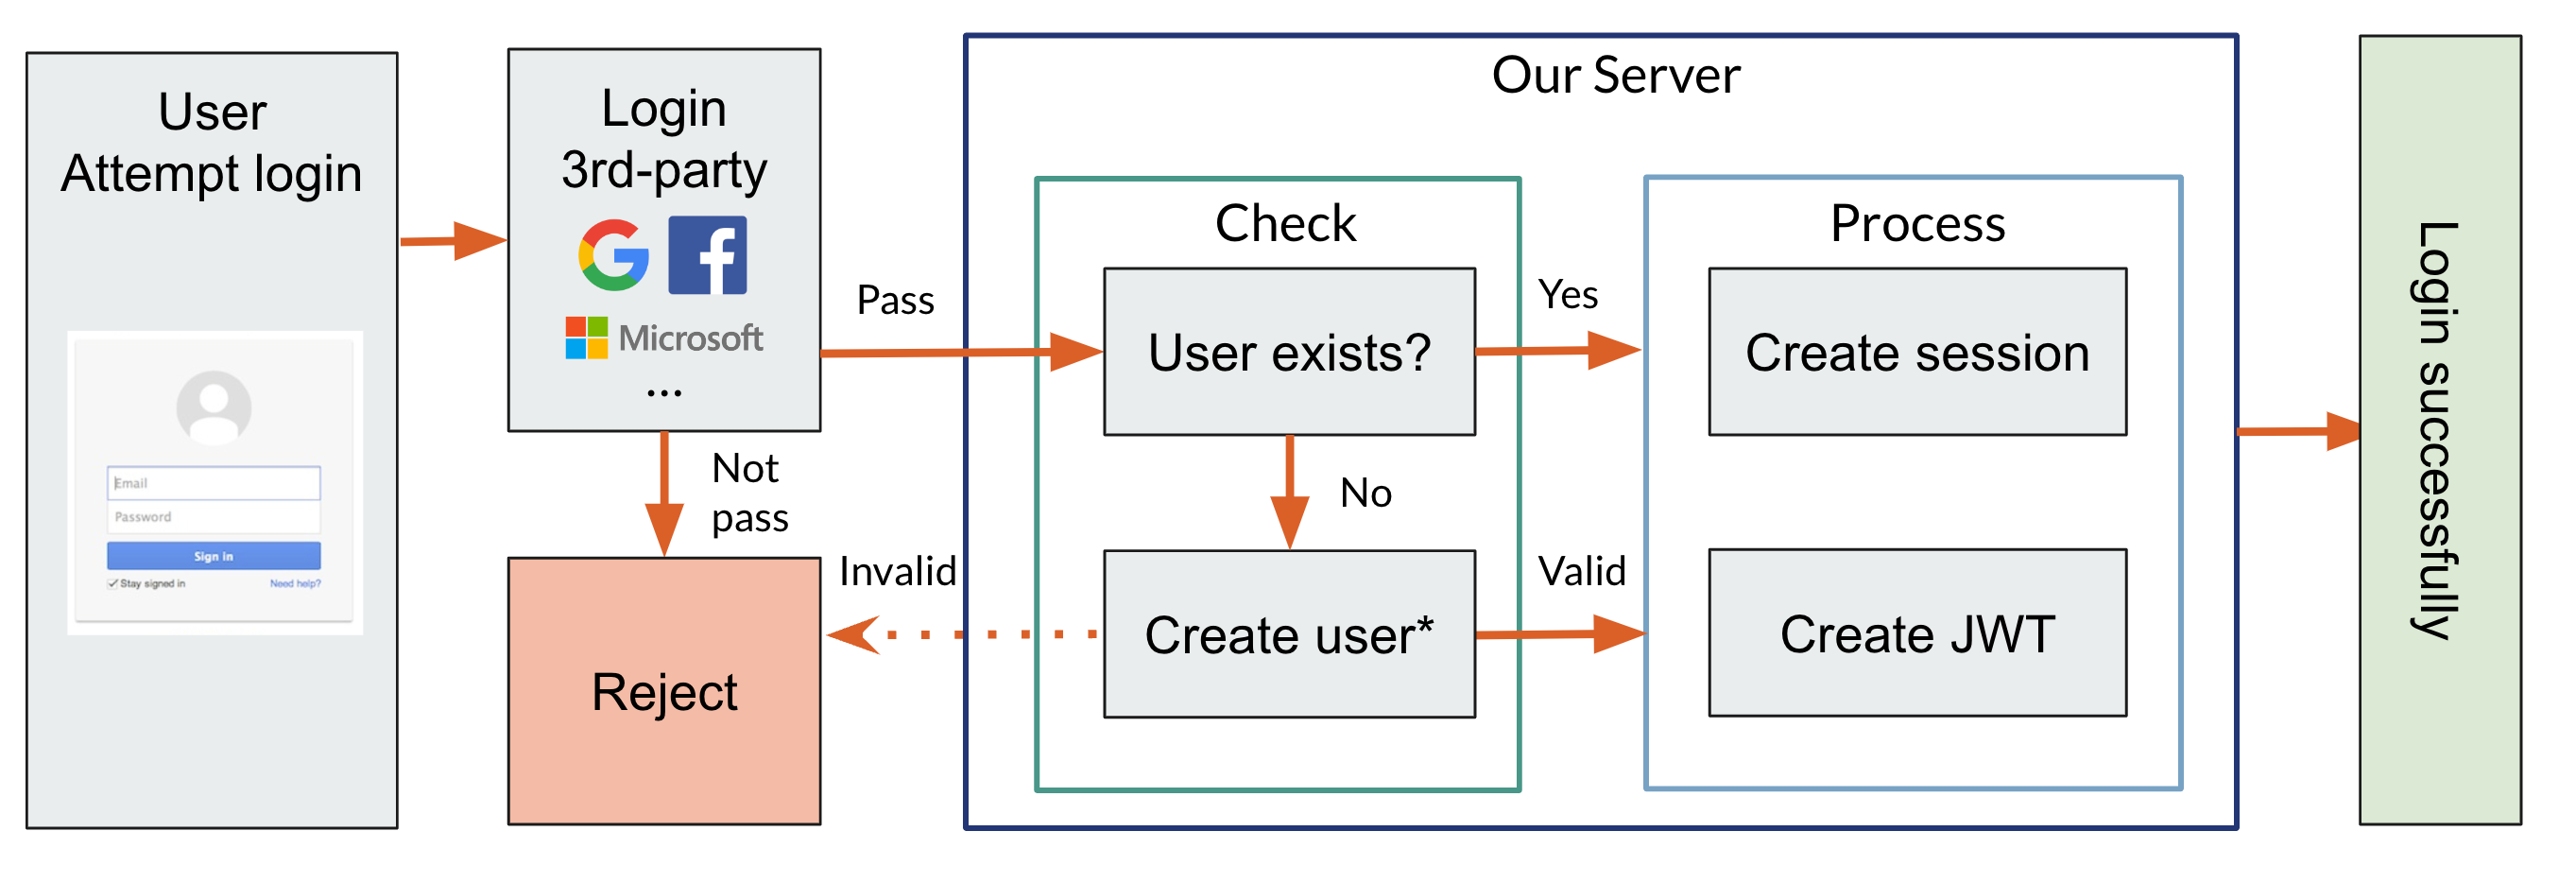
This is a simple tool for 3rd party login with JWT.
See Simple Version in another repo -> JWT 3rd Party Dashboard.
Installation
pip install django-simple-third-party-jwt
Check it in Pypi.
Quick Start
Backend
- Add
django_simple_third_party_jwtto yourINSTALLED_APPSinsettings.pylike this:
INSTALLED_APPS = [
...
'django_simple_third_party_jwt',
]
- Add APP settings to your
settings.pylike this:
from datetime import timedelta

# -------------- START - CORS Setting --------------
CORS_ALLOW_ALL_ORIGINS = True
CORS_ALLOW_CREDENTIALS = True
CSRF_TRUSTED_ORIGINS = [
    "http://*.127.0.0.1",
    "http://localhost",
]
# -------------- END - CORS Setting -----------------

# -------------- Start - SimpleJWT Setting --------------
SIMPLE_JWT = {
    "ACCESS_TOKEN_LIFETIME": timedelta(minutes=3600),
    "REFRESH_TOKEN_LIFETIME": timedelta(days=1),
    "ROTATE_REFRESH_TOKENS": False,
    "BLACKLIST_AFTER_ROTATION": False,
    "UPDATE_LAST_LOGIN": False,
    "ALGORITHM": "HS256",
    "SIGNING_KEY": SECRET_KEY,
    "VERIFYING_KEY": None,
    "AUDIENCE": None,
    "ISSUER": None,
    "JWK_URL": None,
    "LEEWAY": 0,
    "AUTH_HEADER_TYPES": ("Bearer",),
    "AUTH_HEADER_NAME": "HTTP_AUTHORIZATION",
    "USER_ID_FIELD": "id",
    "USER_ID_CLAIM": "user_id",
    "USER_AUTHENTICATION_RULE": "rest_framework_simplejwt.authentication.default_user_authentication_rule",
    "AUTH_TOKEN_CLASSES": ("rest_framework_simplejwt.tokens.AccessToken",),
    "TOKEN_TYPE_CLAIM": "token_type",
    "TOKEN_USER_CLASS": "rest_framework_simplejwt.models.TokenUser",
    "JTI_CLAIM": "jti",
    "SLIDING_TOKEN_REFRESH_EXP_CLAIM": "refresh_exp",
    "SLIDING_TOKEN_LIFETIME": timedelta(minutes=5),
    "SLIDING_TOKEN_REFRESH_LIFETIME": timedelta(days=1),
}
# -------------- END - SimpleJWT Setting --------------

# -------------- START - Auth Setting --------------

SECURE_REFERRER_POLICY = "no-referrer-when-downgrade"
# SECURE_CROSS_ORIGIN_OPENER_POLICY = "same-origin-allow-popups"
SECURE_CROSS_ORIGIN_OPENER_POLICY = None

LOGIN_REDIRECT_URL = "/"
VALID_REGISTER_DOMAINS = ["gmail.com", "hotmail.com"] # Only these domains can login.

# API URL Prefix
JWT_3RD_PREFIX = 'api'

# ================== Google Auth ==================
# Add this block if you want to login with Google.

SOCIAL_GOOGLE_CLIENT_ID = "376808175534-d6mefo6b1kqih3grjjose2euree2g3cs.apps.googleusercontent.com"

# ================== END - Google Auth ==================

# ================== Microsoft Auth ==================
# Add this block if you want to login with Microsoft.

# ID
SOCIAL_MICROSOFT_CLIENT_ID = '32346173-22bc-43b2-b6ed-f88f6a76e38c'
# Secret
SOCIAL_MICROSOFT_CLIENT_SECRET = 'K5z8Q~dIXDiFN5qjMjRjIx34cZOJ3Glkrg.dxcG9'

# ================== END - Microsoft Auth ==================


# --------------- END - Auth Setting -----------------
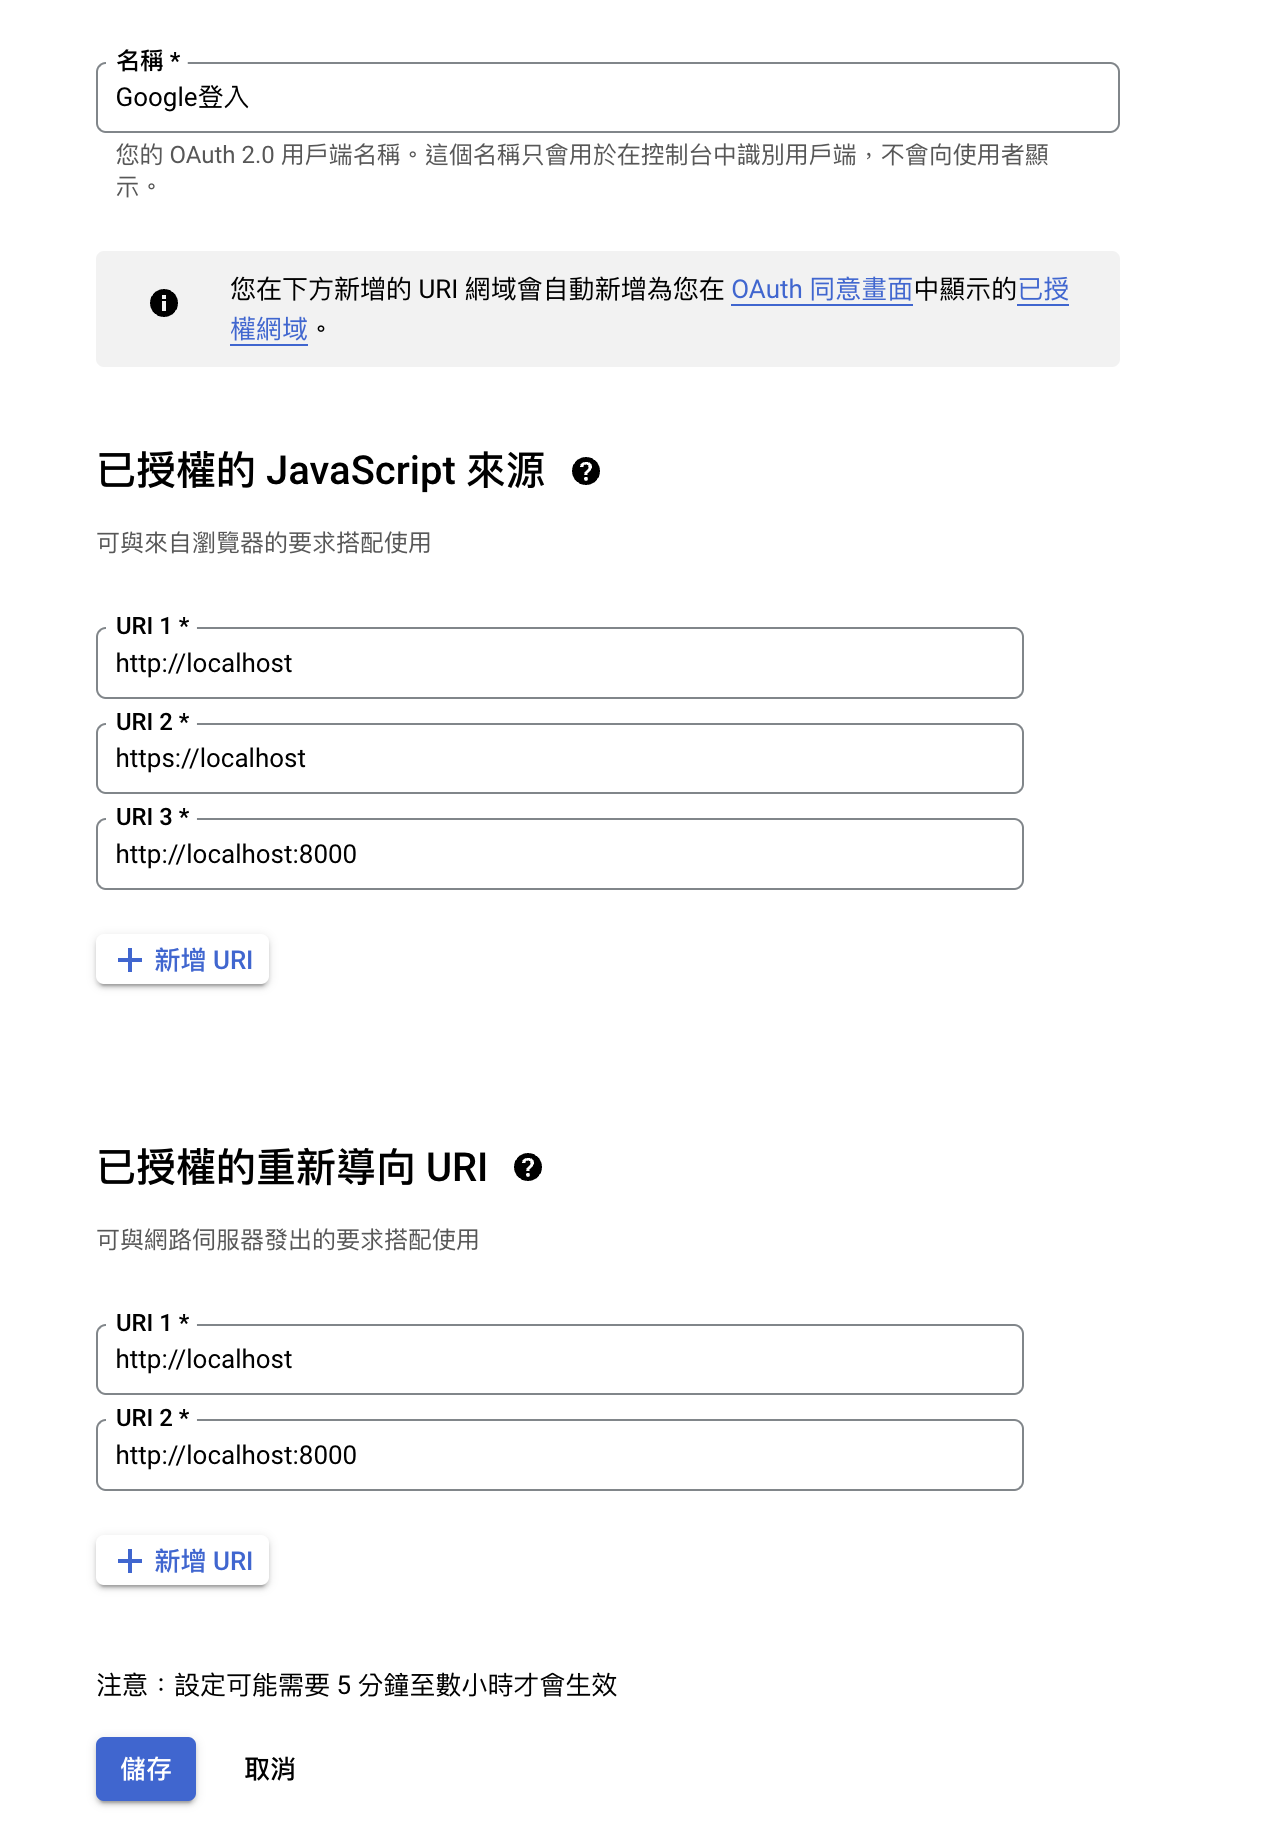
You can regist
SOCIAL_GOOGLE_CLIENT_IDon Google Cloud Platform.
-
Create a new project and create a new OAuth 2.0 Client ID.
-
Add
http://localhost:8000toAuthorized JavaScript originsandAuthorized redirect URIs.

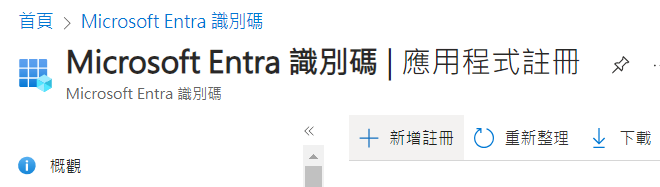
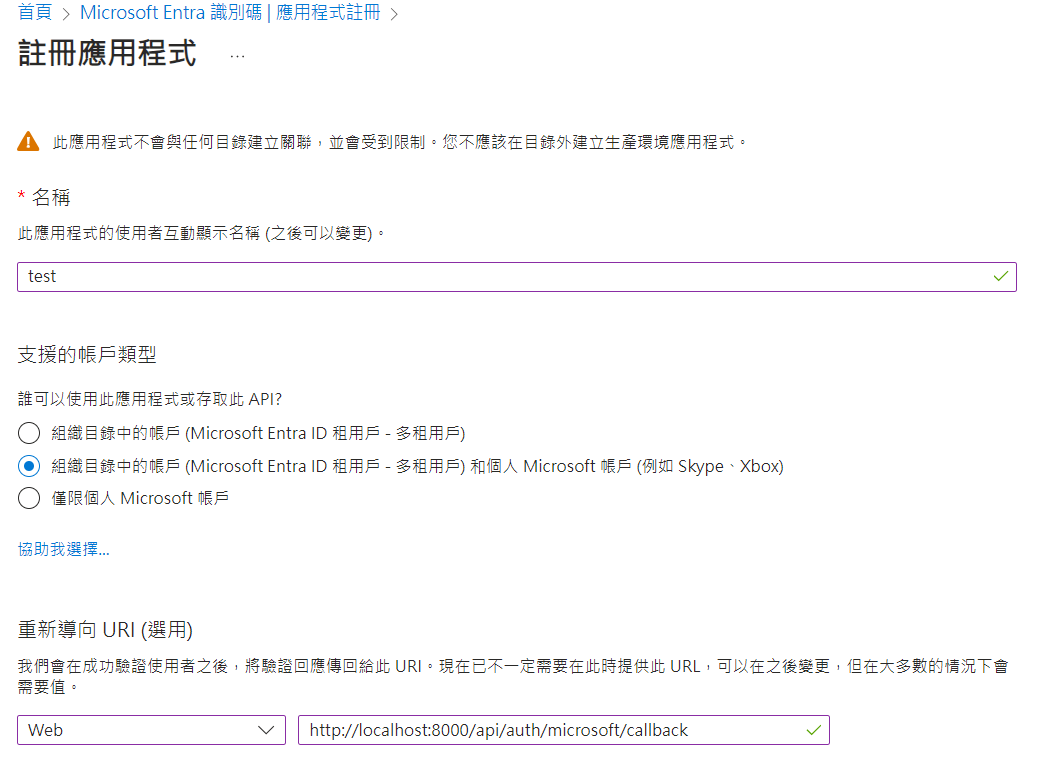
You can regist
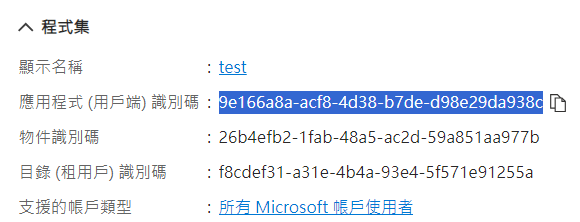
SOCIAL_MICROSOFT_CLIENT_IDon Microsoft Azure.
-
Create a new application.
-
Add
http://localhost:8000/api/auth/microsoft/callbacktoRedirect URIs -
Get
Client IDfromOverviewpage. -
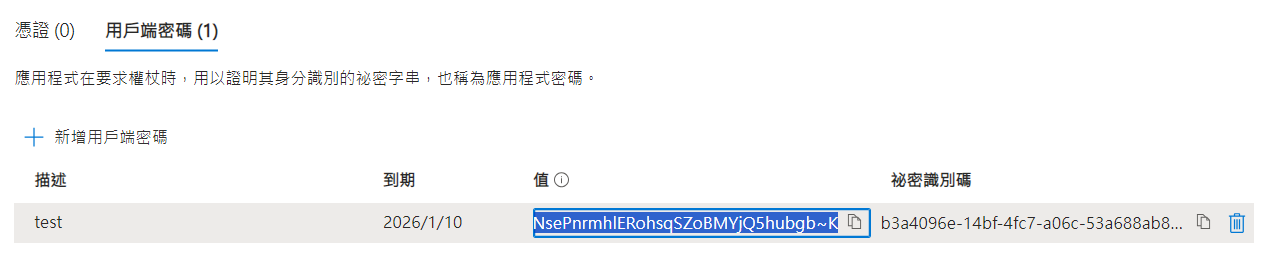
Get
Client SecretfromCertificates & secretspage. -
Include the
django_simple_third_party_jwtURL settings in your projecturls.pylike this:
from django.conf import settings
from django.urls import include
urlpatterns += [
    path("api/", include("django_simple_third_party_jwt.urls")),
]
You also need to include JWT settings in your urls.py.
# --------------- JWT
from rest_framework_simplejwt.views import (
    TokenVerifyView, TokenObtainPairView, TokenRefreshView
)
urlpatterns += [
    path("api/auth/token", TokenObtainPairView.as_view(), name="token_get"),
    path("api/auth/token/refresh", TokenRefreshView.as_view(), name="token_refresh"),
    path("api/auth/token/verify", TokenVerifyView.as_view(), name="token_verify"),
]
# ---------------------------------
- Migrate and test on your server.
- Migrate
python manage.py migrate django_simple_third_party_jwt
- Test
python manage.py runserver
Frontend (Optional)
Here just a demo frontend settings.
Google Login
You need to check {{ social_google_client_id }} is the same with Metadata and your Html page.
- Meta
<meta name="google-signin-scope" content="profile email" />
<meta name="google-signin-client_id" content="{{ social_google_client_id }}" />
<script src="https://accounts.google.com/gsi/client" async defer></script>
- Html
<li>
    <div id="g_id_onload"
            data-client_id="{{ social_google_client_id }}"
            data-callback="get_jwt_using_google_credential" </div>
    <div class="g_id_signin" data-type="standard" data-size="large" data-theme="outline"
            data-text="sign_in_with" data-shape="rectangular" data-logo_alignment="left">
    </div>
</li>
- Javascript
You can try this script to get credential token from Google and verify it with calling our custom 3rd party API.
<script>
  function get_jwt_using_google_credential(data) {
    const google_token_url = "/api/auth/google/token";
    // const google_token_url = "/api/auth/google/token/session"; <------ if you also need login as session, choose this one.
    const credential = data.credential;
    $.ajax({
      method: "POST",
      url: google_token_url,
      data: { credential: credential },
    }).done(function (data) {
      const access_token = data.access;
      const refresh_token = data.refresh_token;
      localStorage.setItem("access", access_token);
      localStorage.setItem("refresh", refresh_token);
      console.log("Google Login");
      $.ajax({
        type: "POST",
        url: "/api/auth/token/verify",
        data: { token: access_token },
        headers: {
          Authorization: "Bearer" + " " + access_token,
        },
        success: function (data) {
          var json_string = JSON.stringify(data, null, 2);
          if (json_string) {
            console.log("Token verified successfully!");
          }
        },
        error: function (data) {
          var result = "please login " + data.responseText;
          console.log(result);
        },
      });
    });
  }
</script>
Microsoft Login
Set LOGIN_REDIRECT_URL in settings.py and add the following code in your Html page.
- Html
<button id="microsoft-login-button" class="btn w-100" onclick="location.href='/api/auth/microsoft/signin';">
  <img src="https://upload.wikimedia.org/wikipedia/commons/thumb/4/44/Microsoft_logo.svg/2048px-Microsoft_logo.svg.png" alt="Microsoft logo" style="width: 30px; height: 30px;">
  Login with Microsoft
</button>
Example
Check Example of dashboard.
Or you can use the following steps.
Run example backend
You can see the example in ./example/
git clone https://github.com/NatLee/Django-Simple-3rd-Party-JWT
cd Django-Simple-3rd-Party-JWT/example/django_simple_third_party_jwt_example/
pip install -r requirements.txt
python manage.py makemigrations && python manage.py migrate
python manage.py runserver 0.0.0.0:8000
If you need superuser, run:
python manage.py createsuperuser
Visit example frontend
Open browser and visit localhost:8000.
There are several url routes available in this example.
api/auth/google/ <---- Google Login
api/auth/google/session <------ Google Login with Django Session

api/ auth/microsoft/signin <----- Microsoft Login with Django Session
api/ auth/microsoft/signout <----- Microsoft Logout
api/ auth/microsoft/callback <----- Microsoft Login Callback

api/__hidden_admin/
api/__hidden_dev_dashboard/

api/auth/token [name='token_get']
api/auth/token/refresh [name='token_refresh']
api/auth/token/verify [name='token_verify']

^api/__hidden_swagger(?P<format>\.json|\.yaml)$ [name='schema-json']
^api/__hidden_swagger/$ [name='schema-swagger-ui']
^api/__hidden_redoc/$ [name='schema-redoc']
- Dev Dashboard
In the first, visit testing dashboardhttp://localhost:8000/api/__hidden_dev_dashboard/.
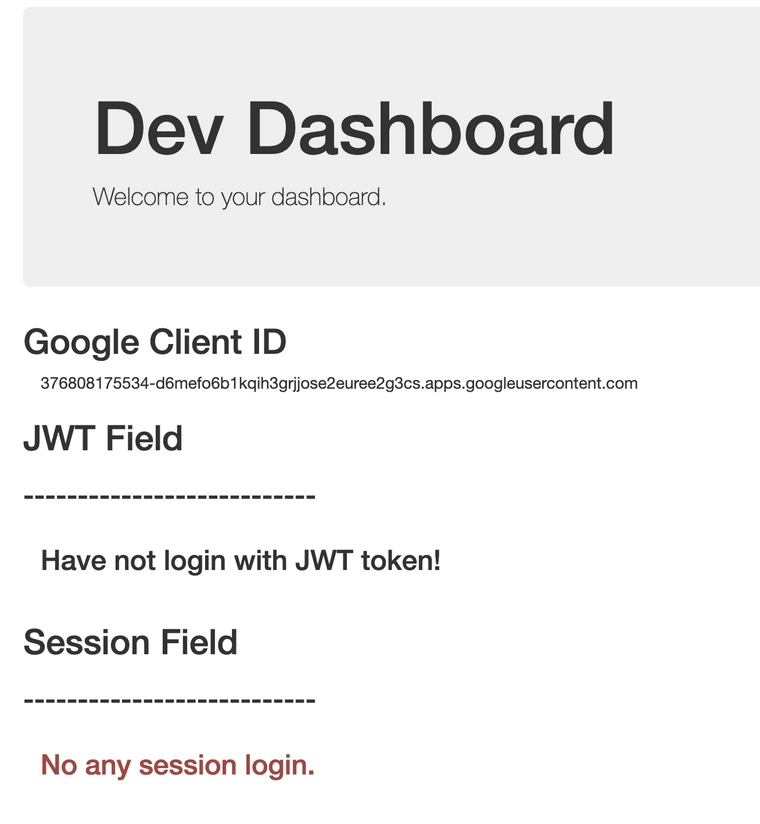
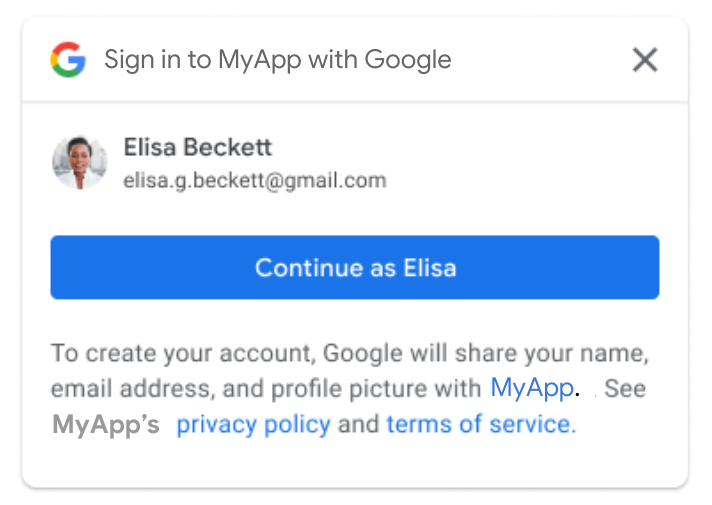
And, you can find Google Login in the top right corner like below.
Click it.
When you login, you will see the following hint.
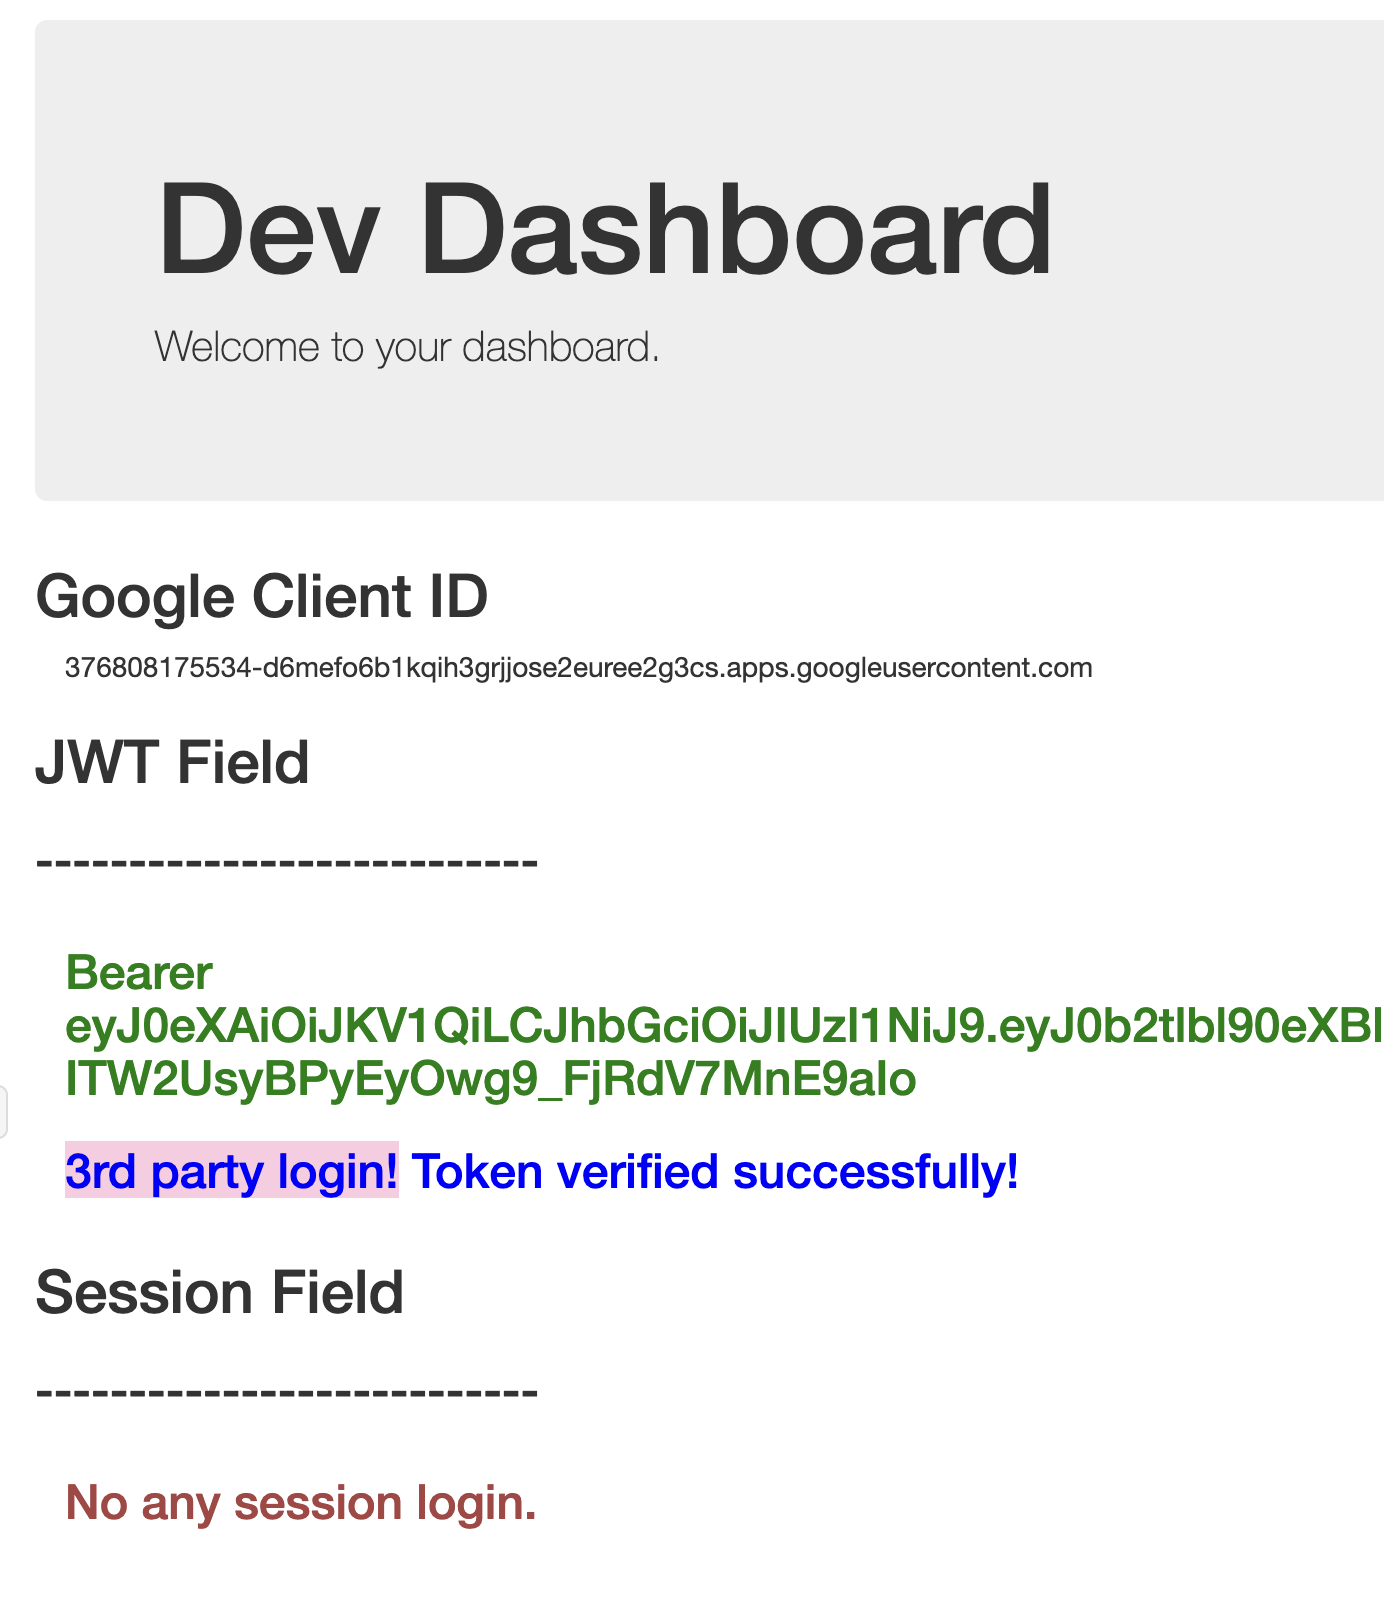
If you want to filter domains with Google Login, feel free to check VALID_REGISTER_DOMAINS in settings.py.
Once you login with Google, your account ID will be recorded in the database.
See more login information in
social_accounttable in database.
| id | provider | unique_id | user_id |
|---|---|---|---|
| 1 | 100056159912345678 | 1 |
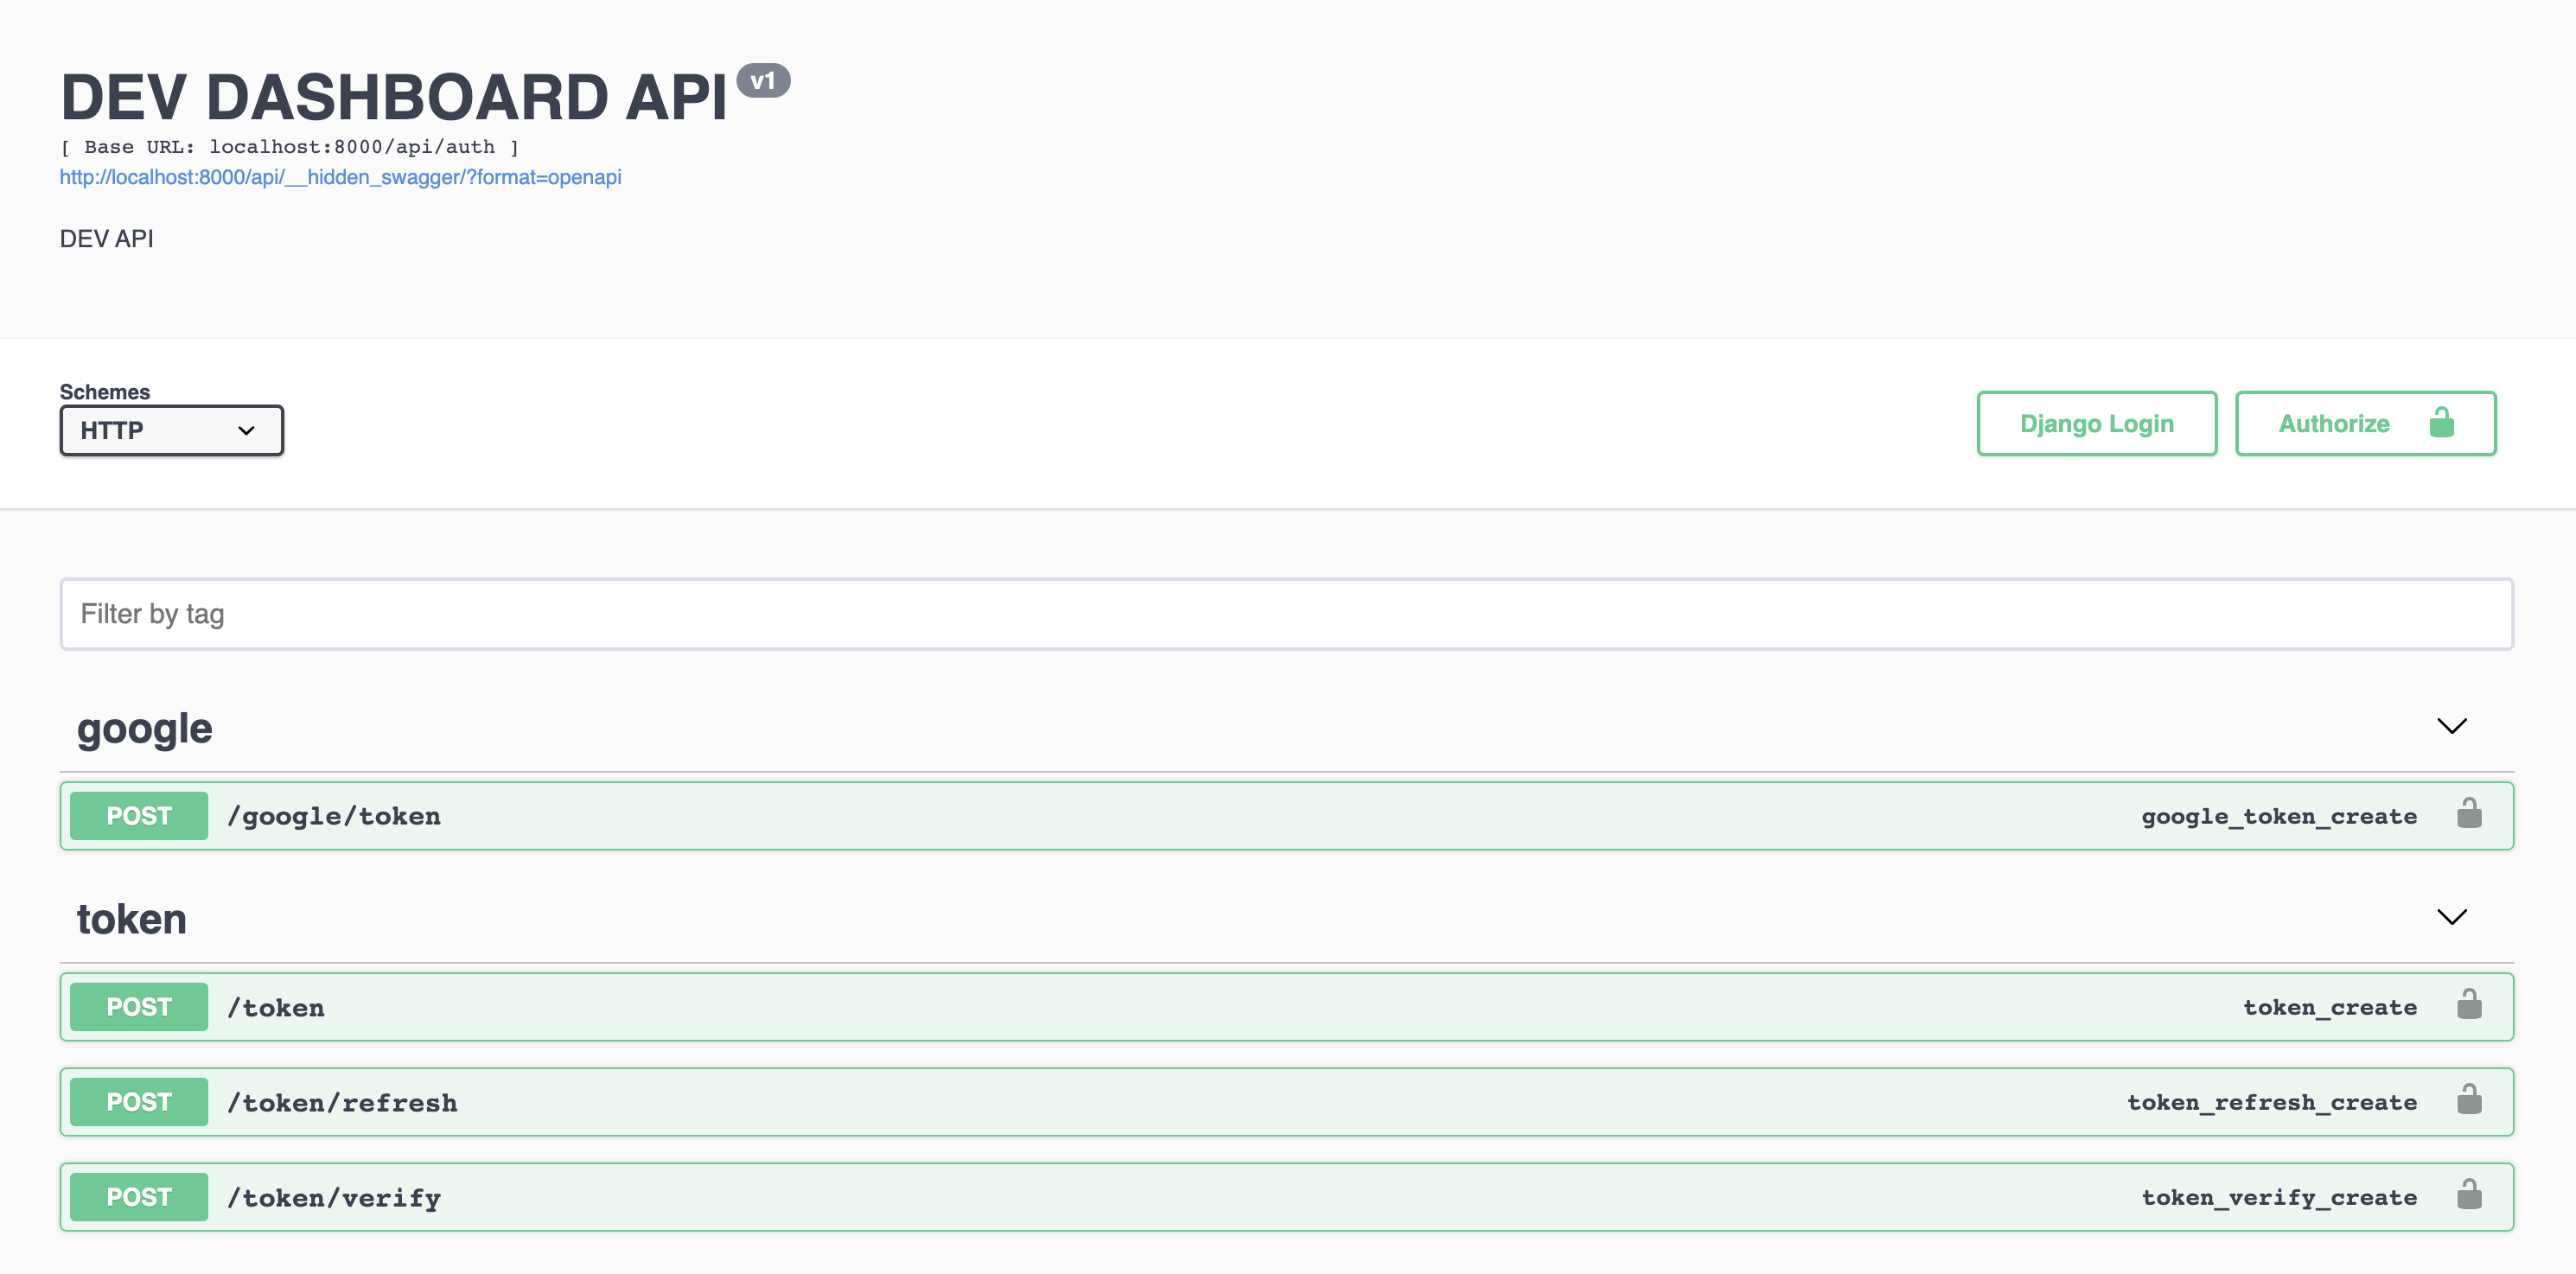
- Swagger
Also can see all information of APIs in http://localhost:8000/api/__hidden_swagger/.
More
Check https://developers.google.com/identity/gsi/web/guides/overview with more information of Google Login API.
Misc tools
Install & re-install package
- Linux
bash dev-reinstall.sh
- Windows
./dev-reinstall.ps1
1 maintainer

Metadata
1 maintainer
Release files for django-simple-third-party-jwt 0.3.1
For a detailed explanation of source distributions (sdists) and built distributions (wheels), please see the package formats documentation.
Source distribution (sdist)
| File | Size | Uploaded | |
|---|---|---|---|
| django_simple_third_party_jwt-0.3.1.tar.gz | 34.0 kB | Details |
Built distribution (wheel)
| File | Interpreter | ABI | Platform | Reset |
|---|---|---|---|---|
| django_simple_third_party_jwt-0.3.1-py3-none-any.whl | Python 3 | none | any | Details |
Total release size: 56.3 kB
Release files / django_simple_third_party_jwt-0.3.1.tar.gz
| Download URL | django_simple_third_party_jwt-0.3.1.tar.gz |
|---|---|
| Size | 34.0 kB |
| Tags | Source |
|
SHA-256 checksum How to use checksums |
9c48a10a7f8ad9d5ca56782d2d8673276947ac43da2bd36914752c549f1bae4a
|
|
BLAKE2b-256 checksum How to use checksums |
be39513f08beb863893bf16ca4cdba092c24c77e6333783f49aa335f1546c529
|
| Upload date | |
|
Uploaded using Trusted Publishing? What is trusted publishing? |
No |
| Uploaded via |
twine/5.1.1 CPython/3.12.4
|
Release files / django_simple_third_party_jwt-0.3.1-py3-none-any.whl
| Download URL | django_simple_third_party_jwt-0.3.1-py3-none-any.whl |
|---|---|
| Size | 22.2 kB |
| Tags | Python 3 |
|
SHA-256 checksum How to use checksums |
ef04cdb18439b3ed3c80f7509698b93001e2ee5c9b49526ccea6f7b564a97215
|
|
BLAKE2b-256 checksum How to use checksums |
8a8bb912a726ace09332856c3b4fb82ea734b01a002a44cc7ccb7aa3ab27aa32
|
| Upload date | |
|
Uploaded using Trusted Publishing? What is trusted publishing? |
No |
| Uploaded via |
twine/5.1.1 CPython/3.12.4
|














