







Introduction
Formation studio is a tool that makes developing user interfaces in Python a breeze. By generating the interface code from simple drag-and-drop widgets, it allows developers to focus on building product functionality and beautiful designs. Formation Studio has a set of powerful tools which can be used to design interfaces saved in .XML or .JSON files. These generated files can then be loaded in code. Formation Studio draws inspiration from other RAD tools such as Android Studio's visual layout editor, PAGE.
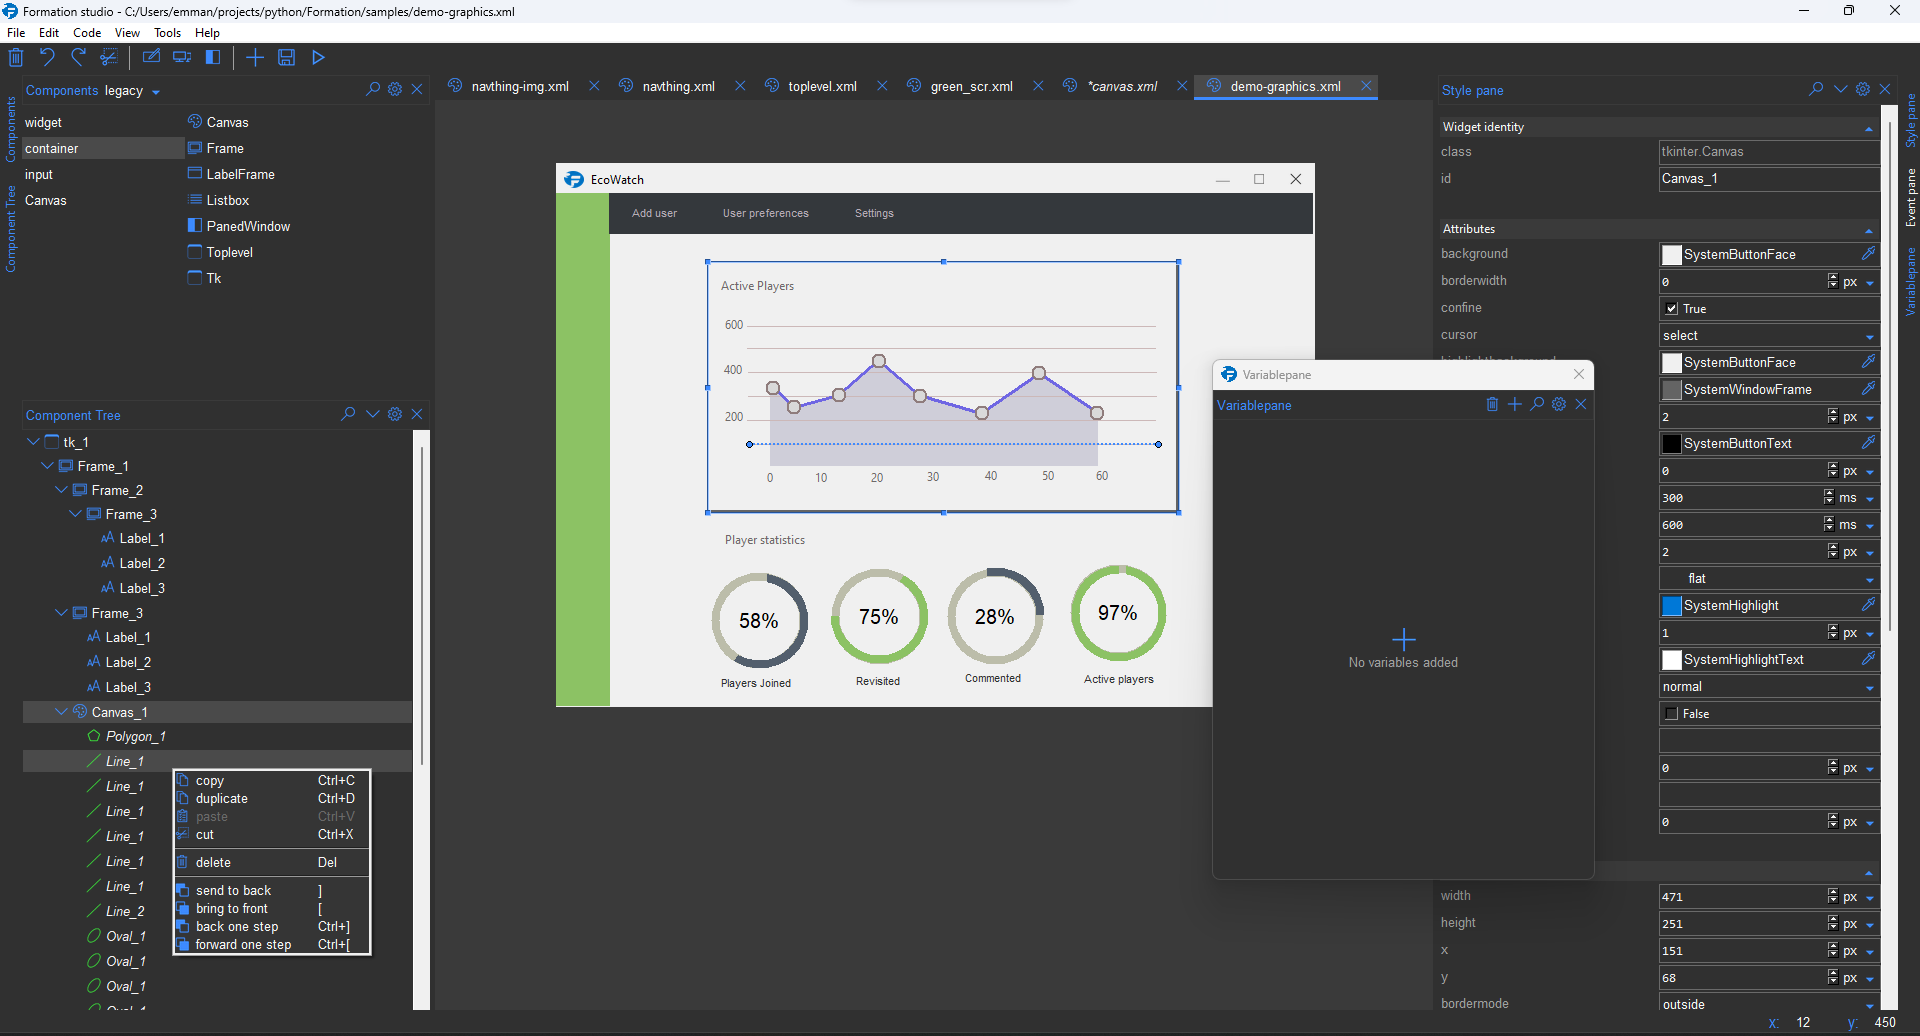
The design below was built solely in Formation Studio (no images or external tools).
Getting started
Installation
To use Formation Studio, install Python 3.9 or higher
Afterwards, install Formation Studio with pip (Python package manager).
pip install formation-studio
The development branch can be installed with the following command:
note: Git needs to be installed to use the following command, and the above version of Formation Studio should be installed prior
pip install --upgrade git+https://github.com/obaraemmanuel/Formation@master
Installation on Linux
Formation Studio uses TKinter and, depending on the distribution/platform, it may not be installed by default. If TKinter is not installed, install tkinter and imagetk after installing Formation Studio.
Install command for tkinter and imagetk on Debian Python:
sudo apt-get install python3-tk python3-pil.imagetk
Note: The above instruction is only assured to work on Ubuntu. For other versions, change the installation command based on the platform. Also, ensure these commands install to the correct directory if multiple versions of python exist on the machine. Formation Studio is a Python 3 application, therefore it does not support Python 2.
Launching
After installation, you can launch Formation Studio from the command line using the command
formation-studio
Note: Multiple instances of Formation Studio will not work simultaneously.
The studio will open a blank design by default (This can be changed in the preferences). With detachable tool windows, Formation Studio is able to provide the flexibility to tailor to every developer's unique needs.
Multiple design files can be opened in different tabs.
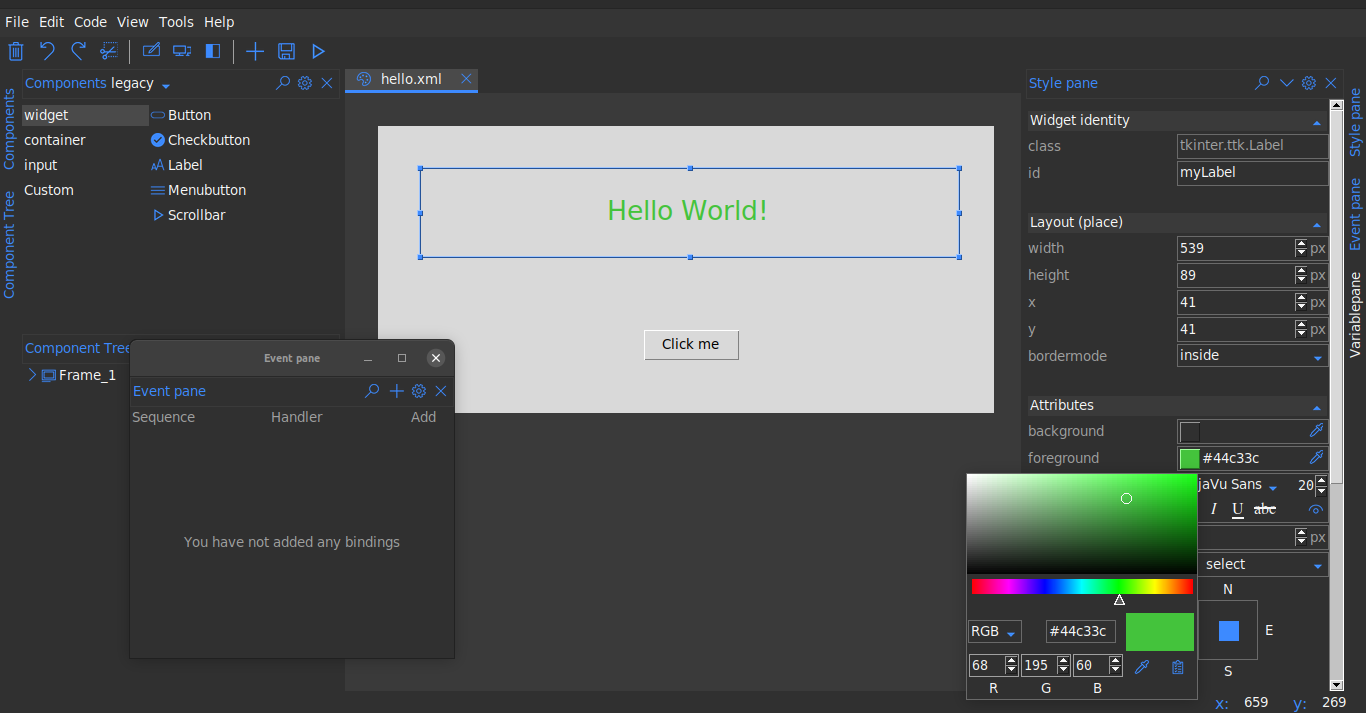
Widgets can be selected from the Components pane at the top to be dragged on stage. Click to select widgets
on the workspace and customize them on Stylepane to the right. The widget hierarchies can be viewed from the **
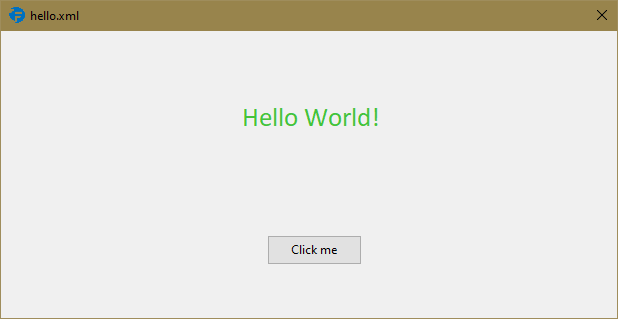
Component tree** at the bottom left. To preview the design, use the preview ("run button") on the toolbar. The design can be saved in the top bar by going to File > Save. Below is a sample studio preview saved
as hello.xml
The underlying xml uses namespaces as shown below:
<tkinter.Frame
    xmlns:attr="http://www.hoversetformationstudio.com/styles/"
    xmlns:layout="http://www.hoversetformationstudio.com/layouts/"
    name="Frame_1"
    attr:layout="place"
    layout:width="616"
    layout:height="287"
    layout:x="33"
    layout:y="33">
    <tkinter.ttk.Label
        name="myLabel"
        attr:foreground="#44c33c"
        attr:font="{Calibri} 20 {}"
        attr:anchor="center" attr:text="Hello World!"
        layout:width="539"
        layout:height="89"
        layout:x="41"
        layout:y="41"/>
    <tkinter.ttk.Button
        name="myButton"
        attr:command="on_click"
        attr:text="Click me"
        layout:width="95"
        layout:height="30"
        layout:x="266"
        layout:y="204"/>
</tkinter.Frame>
Note: this xml file has been manually formatted to make it more legible. The actual xml file will not be formatted as the developer is not expected to change it manually.
To load the design in your python code is as simple as:
# import the formation library which loads the design for you
from formation import AppBuilder

def on_click(event):
    print("Button clicked")

app = AppBuilder(path="hello.xml")

app.connect_callbacks(globals()) # clicking the button will trigger the on_click function

print(app.myLabel["text"]) # outputs text in the label 'Hello world!'
print(app.myButton["text"]) # outputs text in the button 'Click me'

app.mainloop()
Note: Its advisable that widget names are valid Python identifiers (starting with underscores/letters, not having special letters, and not being a reserved keyword) to avoid possible issues at runtime. Use the widget's exact name as specified in the design to avoid
AttributeError
formation CLI
Formation also features a CLI to help do certain operations outside the studio such
as install updates and modify or delete config files. The CLI is however more
useful for Formation Studio developers. To run the CLI use the command formation-cli.
formation-cli --help
usage: formation-cli [-h] [-r FILES] [-c KEY [VALUES ...]] [-u] [-v]

Command line tools for formation studio

optional arguments:
  -h, --help            show this help message and exit
  -r FILES, --remove FILES
                        Removes and cleans internal app files. Can be set to config, cache or all.
  -c KEY [VALUES ...], --config KEY [VALUES ...]
                        Get or set studio configuration values.
  -u, --upgrade         Upgrade formation studio to latest version
  -v, --version         show program's version number and exit
Formation Debugger
Formation debugger is a tool that lets you inspect, modify or debug widgets in a running Tkinter application in real-time. You can adjust widget attributes and layouts using an intuitive debugger UI. It also features a console that can be used to interact with your running application.
To use the debugger run your python app using the formation-dbg command.
formation-dbg /path/to/myapp.py
The debugger will automatically attach to the running application as shown below:

You can then use the pointer icon to select any widget in your running app and inspect or modify its properties/layout. The console is a standard Python REPL. There is a minimal debugger interface that allows you to access the currently selected widget in the console. Below is a demonstration of this interface:
# get the currently selected widget
widget = debugger.selected

# when multiple widgets are selected
# this will return a list of the widgets
widgets = debugger.selection

# get the root widget
root = debugger.root
The returned widget will be the actual tk widget running in your application, so you can call any method or access any attribute
For more details checkout the documentation For those wishing to contribute, see the studio notes for developers and contributors Some good documentation for building Python user interfaces include:
1 maintainer

Release files for formation-studio 0.9.0
For a detailed explanation of source distributions (sdists) and built distributions (wheels), please see the package formats documentation.
Source distribution (sdist)
| File | Size | Uploaded | |
|---|---|---|---|
| formation_studio-0.9.0.tar.gz | 859.1 kB | Details |
Built distribution (wheel)
| File | Interpreter | ABI | Platform | Reset |
|---|---|---|---|---|
| formation_studio-0.9.0-py3-none-any.whl | Python 3 | none | any | Details |
Total release size: 1.8 MB
Release files / formation_studio-0.9.0.tar.gz
| Download URL | formation_studio-0.9.0.tar.gz |
|---|---|
| Size | 859.1 kB |
| Tags | Source |
|
SHA-256 checksum How to use checksums |
e678f26065d8e21ab89991bd08b573f3a59c98507080fb9f9bdfac06eca28eb6
|
|
BLAKE2b-256 checksum How to use checksums |
2315d5ce16e197dd9623a4d31dc264d3d6d2309157dbe2e2219c30ce000409fc
|
| Upload date | |
|
Uploaded using Trusted Publishing? What is trusted publishing? |
Yes |
| Uploaded via |
twine/7.0.0 CPython/3.13.14
|
Provenance
Provenance describes where a file came from. On PyPI, provenance is shared via attestations, which provide a verifiable record of the build or publishing details. View details, limitations and caveats.


PyPI Publish Attestation
PyPI verified that this artifact, at this checksum, originated from the publisher listed below.
Signed by GitHub Actions, verified by PyPI on Aug 25, 2026.
Transparency logRelease files / formation_studio-0.9.0-py3-none-any.whl
| Download URL | formation_studio-0.9.0-py3-none-any.whl |
|---|---|
| Size | 903.7 kB |
| Tags | Python 3 |
|
SHA-256 checksum How to use checksums |
91eb352b33085a588ec99ca57db95824efb4b67e3c6aa94773194aa49e5b129c
|
|
BLAKE2b-256 checksum How to use checksums |
40884b5c9cee3292065e5e696fbb359685ce45ed0317a275722b9cc60bb81733
|
| Upload date | |
|
Uploaded using Trusted Publishing? What is trusted publishing? |
Yes |
| Uploaded via |
twine/7.0.0 CPython/3.13.14
|
Provenance
Provenance describes where a file came from. On PyPI, provenance is shared via attestations, which provide a verifiable record of the build or publishing details. View details, limitations and caveats.
PyPI Publish Attestation
PyPI verified that this artifact, at this checksum, originated from the publisher listed below.
Signed by GitHub Actions, verified by PyPI on Aug 25, 2026.
Transparency log













