goatshell - goat shell interface to common cloud providers.
Project description

GOATSHELL
7 Clouds & 1 Shell
Installation
Manual Installation
- Create a virtual environment. We will call it
prod:python3 -m venv ~/prod
- Activate virtual environment:
cd ~/prod && source bin/activate
- Clone the repo:
git clone git@github.com:stacksc/goat.git
- Install all required packages with 1 script from the main repository:
cd ~/prod/goat && ./bulk.sh --action rebuild --target all
PIP installation (stable)
- Install the following packages from pypi:
pip install goatshell goaat --force-reinstall - Type the following command to launch goatshell:
goatshell
┌───────────────────────────────────────────────────────────────────────────────────────────────────────| GOAT INTERFACE |───────────────────────────────────────────────────────────────────────────────────────────────────────┐
│                                                                                                     Purpose: Cloud Wrapper                                                                                                     │
│                                                                                             TIP: resource completion coming soon!                                                                                              │
└────────────────────────────────────────────────────────────────────────────────────────────────────────────────────────────────────────────────────────────────────────────────────────────────────────────────────────────────┘
┌────────| Hotkeys |─────────┐┌─────────────| Advanced |─────────────┐┌────────| Commands |────────┐
│[F9]  Toggle VI mode        ││history   : shell history             ││e|exit    : exit shell      │
│[F10] Toggle Profile        ││!<cmd>    : run OS command            ││c|clear   : clear screen    │
│[TAB] Fuzzy Complete        ││cloud     : view cloud details        ││h|help    : display usage   │
└────────────────────────────┘└──────────────────────────────────────┘└────────────────────────────┘

    Auto-Completion Instructions:
    ----------------------------
    1. To trigger auto-completion, start with TAB or type the beginning of a command or option and press Tab.
    2. Auto-completion will suggest available commands, options, and arguments based on your input.
    3. Use the arrow keys or Tab to navigate through the suggestions.
    4. Press Enter to accept a suggestion or Esc to cancel.
    5. If an option requires a value, use --option=value instead of --option value.
    6. The prompt will change dynamically based on cloud provider interaction.

[oci:DEFAULT]>
Contacts
Christopher Stacks - centerupt@gmail.com
Mechanics
The project is built with dependecies such as aws2, oci-cli, az-cli.
However, other cloud providers are configured to work but NOT packaged with the project such as ibmcloud, gcloud, and Alibaba cloud.
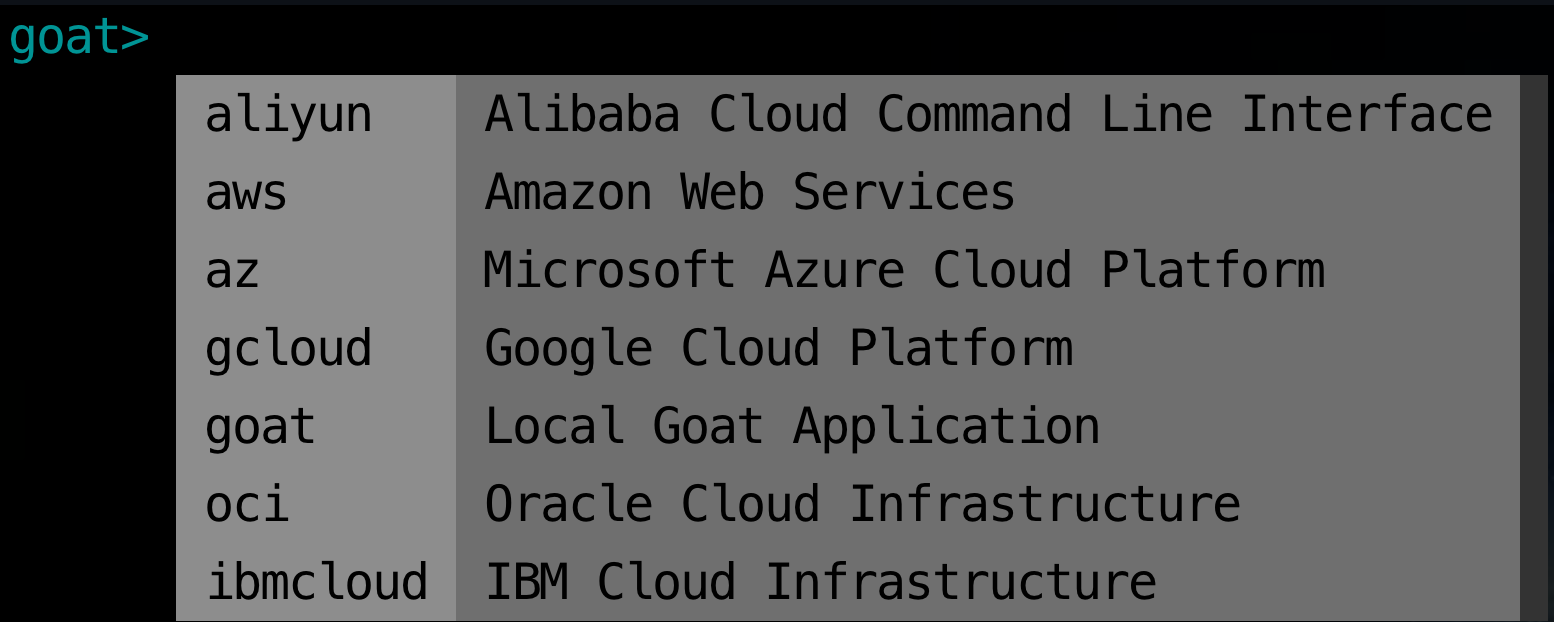
Each time the first token is passed (i.e. cloud provider) a function will verify if the command is avialable.
This keeps the command line clean with the cloud providers you only work with.
The following cloud providers are currently supported:
Toolbar
The toolbar will refresh after hitting the ENTER key or with specific hotkeys.
The toolbar is updated appropriately based on what command you ran. Once you run a command, the toolbar is refreshed with your current cloud.
The profile is updated dynamically based on your current cloud and you have the ability to toggle profiles for any cloud.
goat>
Current Cloud: AWS  F8 Usage F10 Toggle Profile: CENTERUPT F12 Quit
Toggle
The only toggle currently supported is profile switching. Everything else is dynamic based on first token.
Cloud CLI Options
| # | Name | Status | Additional Info |
|---|---|---|---|
| 1 | OCI-CLI | Default / Supported | |
| 2 | AWS | Default / Supported | |
| 3 | AZ | Default / Supported | |
| 4 | GCLOUD | Supported / Manual Installation | Installation Guide |
| 5 | ALIYUN | Supported / Manual Installation | Installation Guide |
| 6 | IBMCLOUD | Supported / Manual Installation | Installation Guide |
Once the relative CLI is installed, the goatshell application will recognize that it is available & syntax completion will be provided.
The project is packaged with cloud provider JSON files which get refreshed automatically per major release with dynamic CLI scrapers.
As the first token is passed (i.e. cloud provider) it directs the goatshell application to the correct JSON file.
Project details
Release history Release notifications | RSS feed
Download files
Download the file for your platform. If you're not sure which to choose, learn more about installing packages.
Source Distribution
Built Distribution
Hashes for goatshell-2023.9.21.1932-py2.py3-none-any.whl
| Algorithm | Hash digest | |
|---|---|---|
| SHA256 | f0c01354fa9f2b6c91e2b7ebb3b0729b20274dbaaa19829dd4a872d17d2aecd5 |
|
| MD5 | 887935e0c28b0ddebfefcae1a11d9487 |
|
| BLAKE2b-256 | 4825e50141f6a32254986777706f63678ee4dbfc4cc826b2e55e98b0734930d3 |


