A JupyterLab extension for profiling cells execution using NVIDIA Nsight tools.

Project description
NVIDIA Nsight Tools JupyterLab Extension
A JupyterLab extension for profiling cells execution using NVIDIA Nsight tools.
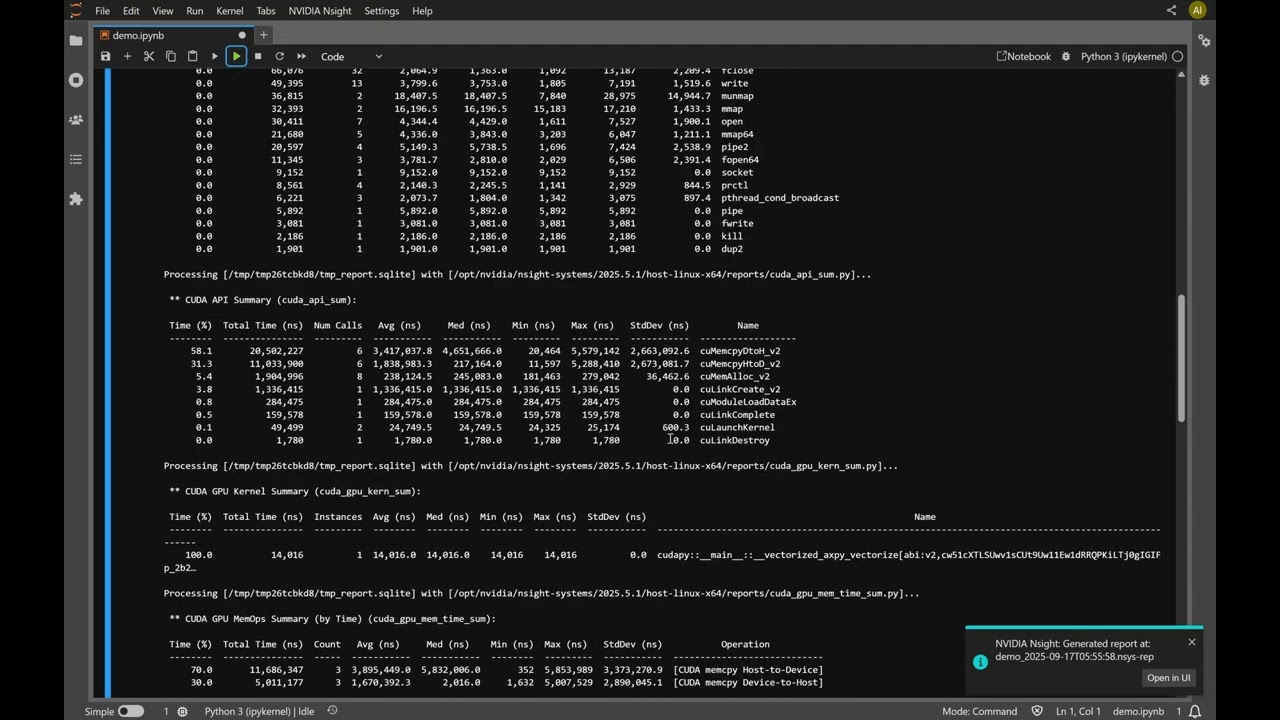
Demo
Click on the image to launch the video
Requirements
- JupyterLab >= 4.0.0
- Docker (optional, for GUI support)
- nvtx (For Nsight Compute support, required to be installed on the profiled Python)
Nsight tools are not bundled with this extension. The required tool(s) should be installed separately on the JupyterLab server machine.
Install and setup
- To install the extension, execute:
pip install jupyterlab-nvidia-nsight
-
Install Nsight Systems and/or Nsight Compute (these tools are not shipped with this extension).
-
Set Nsight Systems and/or Nsight Compute installation location in the extension settings.
- Example: If Nsight Systems installation location is set to
/opt/nvidia/nsight-systems/<version>, then the extension will look for nsys executable in/opt/nvidia/nsight-systems/<version>/target-linux-x64 - If not set,
PATHenvironment variable should contain the locations of the tool's executables.
- Example: If Nsight Systems installation location is set to
Profile JupyterLab cells
Profiling can be performed using the extension's GUI commands or by using magic commands directly. Both methods can be used interchangeably.
Using JupyterLab GUI
When opening a notebook in a web browser connected to a JupyterLab server,
jupyterlab-nvidia-nsight provides the following UI enhancements for profiling cells:
- Enable Nsight tool by using the Profiling with Nsight Systems/Compute... command
under the NVIDIA Nsight menu, or by using the command palette.
- Note: This restarts the JupyterLab kernel.
- Profile cells execution by using:
- Run and profile selected cells... command under the NVIDIA Nsight menu, or
- The "profile" toolbar button, or
- The command palette.
- The cell's profiling info is displayed in the cell output area.
Using Magic Commands
The extension provides two magic commands: %nsys for Nsight Systems and %ncu for Nsight Compute.
These commands allow you to control the profiling session directly from the notebook cells.
Magic commands can be used in any Jupyter client, not just JupyterLab.
See the "VS Code" and "Google Colab" sections below.
1. Enable the tool
Before profiling, you must enable the desired tool. The Python kernel must be restarted for the action to take effect.
%nsys enable [args]
# or
%ncu enable [args]
[args]: Optional CLI flags passed to the tool (e.g.,%nsys enable --trace=cuda,nvtx).- These flags are applied globally to the profiling session.
- See the "Supported Tools" section below for a list of allowed/disallowed flags.
- The tool executable is located using the
PATHenvironment variable (equivalent towhich nsysorwhich ncu).
2. Profile code
Once enabled, you can profile code using either cell magics or line magics.
Option A: Profile a single cell (Cell Magic)
Use the %%nsys or %%ncu cell magic to profile the execution of a specific cell. This is the simplest way to profile.
%%nsys [args]
# or
%%ncu [args]

# ... code to profile ...
[args]: Optional CLI flags passed to the tool for this specific profiling range (e.g.,%%nsys --stats=true).- The generated report is located in the current directory with the name
report_<datetime>.nsys-rep(or.ncu-rep).
Option B: Manual Start/Stop (Line Magic)
For more control, or to profile across multiple cells, use the start and stop line magics.
%nsys start [args]
# ... code to run ...
%nsys stop
[args]: Same as for cell magic.- The generated report is located in the current directory with the name
report_<datetime>.nsys-rep(or.ncu-rep).
3. Disable the tool
Use %nsys disable or %ncu disable to disable profiling.
The Python kernel must be restarted for the action to take effect.
%nsys disable
# or
%ncu disable
VS Code
Nsight magic commands can be used in VS Code with the Jupyter extension.
Requirement: You must connect your client to a Jupyter server where jupyterlab-nvidia-nsight is installed.
To connect VS Code to your remote server:
- Click Select Kernel.
- Choose Existing Jupyter Server.
- Select Enter the URL of the running Jupyter Server.
- Paste the Jupyter server URL (retrieve it by running
jupyter server liston the server).
Google Colab
A short setup is required to use Nsight magic commands in Google Colab. Copy the following commands, paste them into a Google Colab notebook and run the cell to install the extension and the required Nsight tools.
%%bash

# Install Nsight Systems.
# The URL below is an example tested with this extension.
# It is recommended to use the latest version of Nsight Systems.
# Visit: https://developer.nvidia.com/nsight-systems/get-started
wget -q https://developer.nvidia.com/downloads/assets/tools/secure/nsight-systems/2026_1/NsightSystems-linux-cli-public-2026.1.1.204-3717666.deb
apt-get install -y ./NsightSystems-linux-cli-public-2026.1.1.204-3717666.deb

# Install Nsight Compute.
# The URL below is an example tested with this extension.
# It is recommended to use the latest version of Nsight Compute
# that is compatible with the available CUDA drivers.
# Nsight Compute 2025.2.1 is the latest CUDA12.X compatible.
# Visit: https://developer.nvidia.com/nsight-compute-history
wget -q https://developer.download.nvidia.com/compute/cuda/repos/ubuntu2404/x86_64/nsight-compute-2025.2.1_2025.2.1.3-1_amd64.deb
apt-get install -y ./nsight-compute-2025.2.1_2025.2.1.3-1_amd64.deb

# Install the extension
pip install jupyterlab-nvidia-nsight

# Restart the Jupyter server to load the extension
jupyter server stop 9000
Analyzing the profile session in Nsight tools GUI
-
Open Nsight tools report files in a tab inside JupyterLab.
-
Display of Nsight tools GUI requires NVIDIA Nsight Streamer.
-
When JupyterLab is running inside a Docker container, displaying Nsight tools UI requires to have the Docker daemon socket mounted (i.e.,
docker run -v /var/run/docker.sock:/var/run/docker.sock ...).- SECURITY ALERT: The Docker daemon socket should not be mounted when using untrusted sources because it may provide root access to the host system.
- See also the Docker Example section below.
-
Nsight Streamer requires two communication ports for HTTP and media. By default, the extension picks two random free ports per each open report. Use "Allowed HTTP ports" and "Allowed media ports" to restrict the pool of the ports used for this purpose.
-
For systems where the Jupyter server is not directly reachable from the client, and Jupyter is behind nginx, the following is typically required:
- Expose the HTTP port with nginx.
- Use a TURN server for the media communication channel.
- See "NGINX Example" and "TURN Server Example" sections below.
Supported Tools
Nsight Systems
- Supports Nsight Systems release 2024.1.1 or later. It is recommended to use the latest release.
- Use
--stats=truewhen profiling cells execution to see textual output ofnsys stats.
NSYS CLI flags that can't be used within the extension
--help,-h--hotkey-capture--output,-o--session-new--session--stop-on-exit,-x
Nsight Compute
- Supports Nsight Compute release 2024.3 or later. It is recommended to use the latest release.
- Requires nvtx to be installed on the profiled Python.
NCU CLI flags that can't be used within the extension
--app-replay-buffer--app-replay-match--app-replay-mode--check-exit-code--chips--config-file-path--config-file--export,-o--force-overwrite,-f--help,-h--hostname--import,-i--kill--list-chips--list-metrics--list-rules--list-sections--list-sets--log-file--mode--null-stdin--open-in-ui--profile-from-start--query-metrics-collection--query-metrics-mode--query-metrics--quiet--range-filter--range-replay-options--rename-kernels-export--replay-mode--section-folder-restore--version,-v
NCU CLI flags that can be used only when enabling NCU
--apply-rules--cache-control--call-stack-type--call-stack--clock-control--disable-profiler-start-stop--graph-profiling--import-source--injection-path-32--injection-path-64--max-connections--metrics--pm-sampling-buffer-size--pm-sampling-interval--pm-sampling-max-passes--port,-p--preload-library--rule--section-folder-recursive--section-folder--section--set--source-folders--support-32bit--target-processes-filter--target-processes--verbose--warp-sampling-buffer-size--warp-sampling-interval--warp-sampling-max-passes
NCU CLI flags that can be used only when profiling cells
--csv--devices--disable-extra-suffixes--filter-mode--kernel-id--kernel-name-base--kernel-name,-k--launch-count,-c--launch-skip-before-match--launch-skip,-s--nvtx-exclude--nvtx-include--page--print-details--print-fp--print-kernel-base--print-metric-attribution--print-metric-instances--print-metric-name--print-nvtx-rename--print-rule-details--print-source--print-summary--print-units--rename-kernels-path--rename-kernels--resolve-source-file
Docker Example
This example demonstrates how to use the extension in a Jupyter Docker Stacks image.
The following Dockerfile defines a Docker image based on pytorch-notebook with CUDA 12,
and includes the extension and cuda-toolkit.
It is recommended to use the latest cuda-toolkit - https://developer.nvidia.com/cuda-downloads
Dockerfile
FROM quay.io/jupyter/pytorch-notebook:cuda12-python-3.11.8

# Install cuda-toolkit
ADD https://developer.download.nvidia.com/compute/cuda/repos/ubuntu2404/x86_64/cuda-keyring_1.1-1_all.deb /tmp/
USER root
RUN dpkg -i /tmp/cuda-keyring_1.1-1_all.deb && apt-get -y update && \
    apt-get -y install cuda-toolkit-12-9
USER ${NB_UID}

# Install jupyterlab-nvidia-nsight and set the default settings
ARG HOST_IP
RUN pip install --no-cache-dir jupyterlab-nvidia-nsight nvtx && \
    fix-permissions "${CONDA_DIR}" && fix-permissions "/home/${NB_USER}" && \
    mkdir -p /home/${NB_USER}/.jupyter/lab/user-settings/jupyterlab-nvidia-nsight && echo ' \
{ \
    "ui": { \
        "enabled": true, \
        "suppressServerAddressWarning": true, \
        "dockerHost": "'"$HOST_IP"'" \
    }, \
    "nsys": { \
        "installationPath": "/opt/nvidia/nsight-systems/2025.1.3", \
        "args": "--trace=cuda,nvtx,osrt --python-sampling=true --python-backtrace=cuda --cudabacktrace=all" \
    }, \
    "ncu": { \
        "installationPath": "/opt/nvidia/nsight-compute/2025.2.1" \
    } \
}' > /home/${NB_USER}/.jupyter/lab/user-settings/jupyterlab-nvidia-nsight/plugin.jupyterlab-settings
Build the image:
docker build --rm --tag <your-image-name> --build-arg HOST_IP="$(hostname -i | cut -d' ' -f1)" .
Run the container:
# SECURITY ALERT: Remove `-v /var/run/docker.sock:/var/run/docker.sock` when using untrusted sources
docker run -it --rm --group-add $(getent group docker | cut -d: -f3) --runtime=nvidia -p 8888:8888 -v /var/run/docker.sock:/var/run/docker.sock <your-image-name>
Note: Using --runtime=nvidia requires NVIDIA Container Toolkit.
NGINX Example
jupyterlab-nvidia-nsight uses NVIDIA Nsight Streamer
for displaying Nsight tools UI inside JupyterLab. Hence, when JupyterLab is proxied via nginx,
in order to properly display the UI, the HTTP port that is used for the streamer must be properly
exposed by nginx. This example demonstrates a minimal nginx configuration for proxying JupyterLab,
and the modifications required for properly displaying Nsight tools UI.
JupyterLab is started with the following command, allowing remote access:
jupyter lab --no-browser --ServerApp.allow_remote_access=True
Below is a basic nginx configuration file for exposing only the JupyterLab server over HTTPS.
Commonly saved at /etc/nginx/sites-available/ and soft linked to /etc/nginx/sites-enabled/.
nginx configuration file without Nsight extension settings (/etc/nginx/sites-available/jupyter)
server {
    listen 443 ssl;
    server_name my-server-hostname;

    ssl_certificate /path/to/mycert.pem;
    ssl_certificate_key /path/to/mykey.key;

    # The location path should match the JupyterLab `ServerApp.base_url` ('/' by default).
    location / {
        proxy_pass http://127.0.0.1:8888/; # Replace with the actual JupyterLab server address
        proxy_set_header Host $host;
        proxy_set_header X-Real-IP $remote_addr;
        proxy_set_header X-Forwarded-For $proxy_add_x_forwarded_for;
        proxy_set_header X-Forwarded-Proto $scheme;

        proxy_http_version 1.1;
        proxy_set_header Upgrade $http_upgrade;
        proxy_set_header Connection "upgrade";
    }
}
After reloading nginx with sudo systemctl reload nginx, it is possible to open JupyterLab
from a browser via https://my-server-hostname/,
(assuming the used SSL certificate is valid, and trusted by the browser).
But displaying Nsight tools UI inside JupyterLab doesn't work because
the ports used by Nsight Streamer are not exposed by nginx.
Change the jupyterlab-nvidia-nsight settings as follows:
- Set "Proxy domain".
- This example uses "NsightStreamer", any name can be chosen.
- The location path for exposing Nsight Streamer in nginx should match this setting. See inline comment in the configuration example snippet below.
- Set "Allowed HTTP ports".
- This example arbitrarily uses "9001-9003", any set of free ports can be chosen.
- The number of ports sets the maximum number of report files that can be opened simultaneously in the extension.
Add a "location" block inside the nginx conf for properly exposing the Nsight Streamer. Here is the updated configuration file.
nginx configuration file with Nsight extension settings (/etc/nginx/sites-available/jupyter)
server {
    listen 443 ssl;
    server_name my-server-hostname;

    ssl_certificate /path/to/mycert.pem;
    ssl_certificate_key /path/to/mykey.key;

    # The location path should match the JupyterLab `ServerApp.base_url` ('/' by default).
    location / {
        proxy_pass http://127.0.0.1:8888/; # Replace with the actual JupyterLab server address
        proxy_set_header Host $host;
        proxy_set_header X-Real-IP $remote_addr;
        proxy_set_header X-Forwarded-For $proxy_add_x_forwarded_for;
        proxy_set_header X-Forwarded-Proto $scheme;

        proxy_http_version 1.1;
        proxy_set_header Upgrade $http_upgrade;
        proxy_set_header Connection "upgrade";
    }

    # The location path should contain the JupyterLab `ServerApp.base_url`, and the Proxy domain
    # defined in the extension settings.
    # For example, if `ServerApp.base_url == 'my_base_url'`, then the location path would be:
    # ^/my_base_url/NsightStreamer/(\d+)/(.*)
    location ~ ^/NsightStreamer/(\d+)/(.*) {
        set $port $1;
        set $rest $2;

        if ($is_nsight_streamer_port = INVALID) {
            return 403 "Port not allowed";
        }

        # Replace "0.0.0.0" with the Jupyter server address
        set $target "http://0.0.0.0:$port/$rest$is_args$args";

        proxy_pass $target;
        proxy_set_header Host $host;
        proxy_set_header X-Real-IP $remote_addr;
        proxy_http_version 1.1;
        proxy_set_header Upgrade $http_upgrade;
        proxy_set_header Connection "upgrade";
        proxy_cache_bypass $http_upgrade;
    }
}

map $port $is_nsight_streamer_port {
    default INVALID;
    9001 OK;
    9002 OK;
    9003 OK;
}
After reloading nginx, displaying Nsight UI inside JupyterLab works. If the display is stuck on "Waiting for stream", it indicates that the media communication channel is broken. First, make sure that the media port that is used by Nsight streamer is not blocked by Firewall or NAT. If a direct peer-to-peer communication is not possible, see next section "TURN server Example" for a possible solution.
TURN Server Example
This section provide a solution for when a direct peer-to-peer communication is not possible between the client and the Jupyter server via the media port (use "Allowed media ports" setting to control which media ports are used by the extension). In such case, the Nsight UI display is stuck on "Waiting for stream". This is commonly needed in corporate environments or when the Jupyter server is behind strict network policies.
The solution is to run and use a TURN server that is reachable from both the client (browser) and the Jupyter server, typically the TURN server runs on the same host that runs nginx.
The following example demonstrates how to set up a TURN server using coturn, and how to configure the extension appropriately.
Save a coturn configuration file
Note: The coturn configuration requirements may vary on different environments. See this example for more information about coturn configuration.
turnserver.conf
# Should be set as the "Turn port" extension setting
listening-port=3478

# This port range should be set as the "Allowed media ports" setting
# One media port is required per each opened report (in addition to the http port)
min-port=49152
max-port=49154

# Should match the "JupyterLab server address" setting
allowed-peer-ip=<jupyter-server-ip>

# Must be set, the value is usually arbitrary.
realm=nsightstreamer

# Default is username=nvidia, password=nvidia
# For non-default, set the "TURN username" and "TURN password" accordingly
lt-cred-mech
fingerprint
user=nvidia:nvidia
Run coturn
docker run -d --rm --network=host -v /path/to/turnserver.conf:/etc/turnserver.conf coturn/coturn -c /etc/turnserver.conf
Set the extension settings
- "Turn server address" - The IP address (or hostname) of the TURN server.
- "Turn port" - The
listening-portas set in the coturn configuration above. - "Allowed media ports" - The
<min-port>:<max-port>range as set in the coturn configuration above. - "TURN username" and "TURN password" - The user credentials as set in the coturn configuration above.
If Nsight UI display still doesn't work,
adding verbose and log-file=stdout to turnserver.conf and inspecting
coturn logs (using docker logs command) are a good starting point to understand what went wrong.
Uninstall
To remove the extension, execute:
pip uninstall jupyterlab-nvidia-nsight
Troubleshooting
If you are seeing the frontend extension, but it is not working, check that the server extension is enabled:
jupyter server extension list
If the server extension is installed and enabled, but you are not seeing the frontend extension, check the frontend extension is installed:
jupyter labextension list
Known Issues
- While Nsight Compute is enabled, interrupting the JupyterLab kernel with the "Interrupt Kernel" command (by using the command palette, kernel menu or the stop-button) causes the kernel to terminate and restart.
- Magic commands do not use the extension settings configured in JupyterLab (e.g., installation path, output directory).
- No notification in JupyterLab UI when reports are generated via magic commands.
- Enabling Nsight tools fails when JupyterLab is running over HTTPS with a relative
--certfilepath.
Release Notes
1.0.0
- New: Magic commands for profiling cells from any client (Web browser, VS Code Jupyter extension, etc.). See "Using Magic Commands" section.
- UI improvements:
- Made "Profile" toolbar button always visible (enabled only when profiling is active).
- Added icons to profiling menubar commands.
- Improved error messages.
- Made "Docker host address" setting optional when running in Docker (defaults to
window.location.hostname). - Fixed: Client incorrectly indicated profiling was disabled after browser refresh or new connection.
0.8.1
- Issue fixed: Profiling cells fails when output directory is set to an absolute path that is relative to Jupyter's root directory.
0.8.0
- New setting for configuring the allowed media ports to be used for displaying Nsight UI.
- Support displaying Nsight UI when JupyterLab is running on a private network
using an external TURN server.
- Introduces new settings for configuring the TURN server that is used - Turn server address, Turn port, and Turn username and password.
0.7.1
- Support Linux SBSA.
- Support displaying Nsight UI when JupyterLab is running over HTTPS.
- Support displaying Nsight UI when JupyterLab is proxied via nginx.
- Support displaying Nsight UI when JupyterLab is using a remote file system.
- New setting for configuring the allowed HTTP ports to be used for displaying Nsight UI.
- New setting for configuring the maximum resolution of Nsight Streamer.
- New command for refreshing a Nsight UI display tab.
- By right-clicking a tab and selecting "Refresh Tab".
- Register report files in Jupyter DocumentRegistry with Nsight UI display as the default file opener (e.g., double-clicking a report file will display it with Nsight UI).
0.7.0
- New setting for configuring the location of the generated reports.
- Support displaying Nsight UI when running inside a docker container.
- Use (and pull if required) the latest NVIDIA Nsight Streamer for displaying Nsight UI.
- Support displaying an external WebRTC streamer.
0.6.0
- Support displaying Nsight Compute UI inside JupyterLab.
- Fix keyboard interaction with Nsight tools UI.
0.5.2
- Added Nsight Compute section in the project description.
- Verify server connection on extension load.
0.5.1
- Initial release.
Project details


Download files
Download the file for your platform. If you're not sure which to choose, learn more about installing packages.
Source Distributions
Built Distribution
Filter files by name, interpreter, ABI, and platform.
If you're not sure about the file name format, learn more about wheel file names.
Copy a direct link to the current filters
File details
Details for the file jupyterlab_nvidia_nsight-1.0.0-py3-none-any.whl.
File metadata
- Download URL: jupyterlab_nvidia_nsight-1.0.0-py3-none-any.whl
- Upload date:
- Size: 76.5 kB
- Tags: Python 3
- Uploaded using Trusted Publishing? No
- Uploaded via: twine/5.0.0 CPython/3.10.19
File hashes
| Algorithm | Hash digest | |
|---|---|---|
| SHA256 |
df50a2cd84f1d577d75a85764ed55cd9fbb4ea1ebff9f8ecf115184aaa49856f
|
|
| MD5 |
3ba000350753f34770128a153035845c
|
|
| BLAKE2b-256 |
f0421124a3d461ff28ca90c232a65a8fe40ef467200f718ba1358cd6d2c75050
|


