
LeVibes
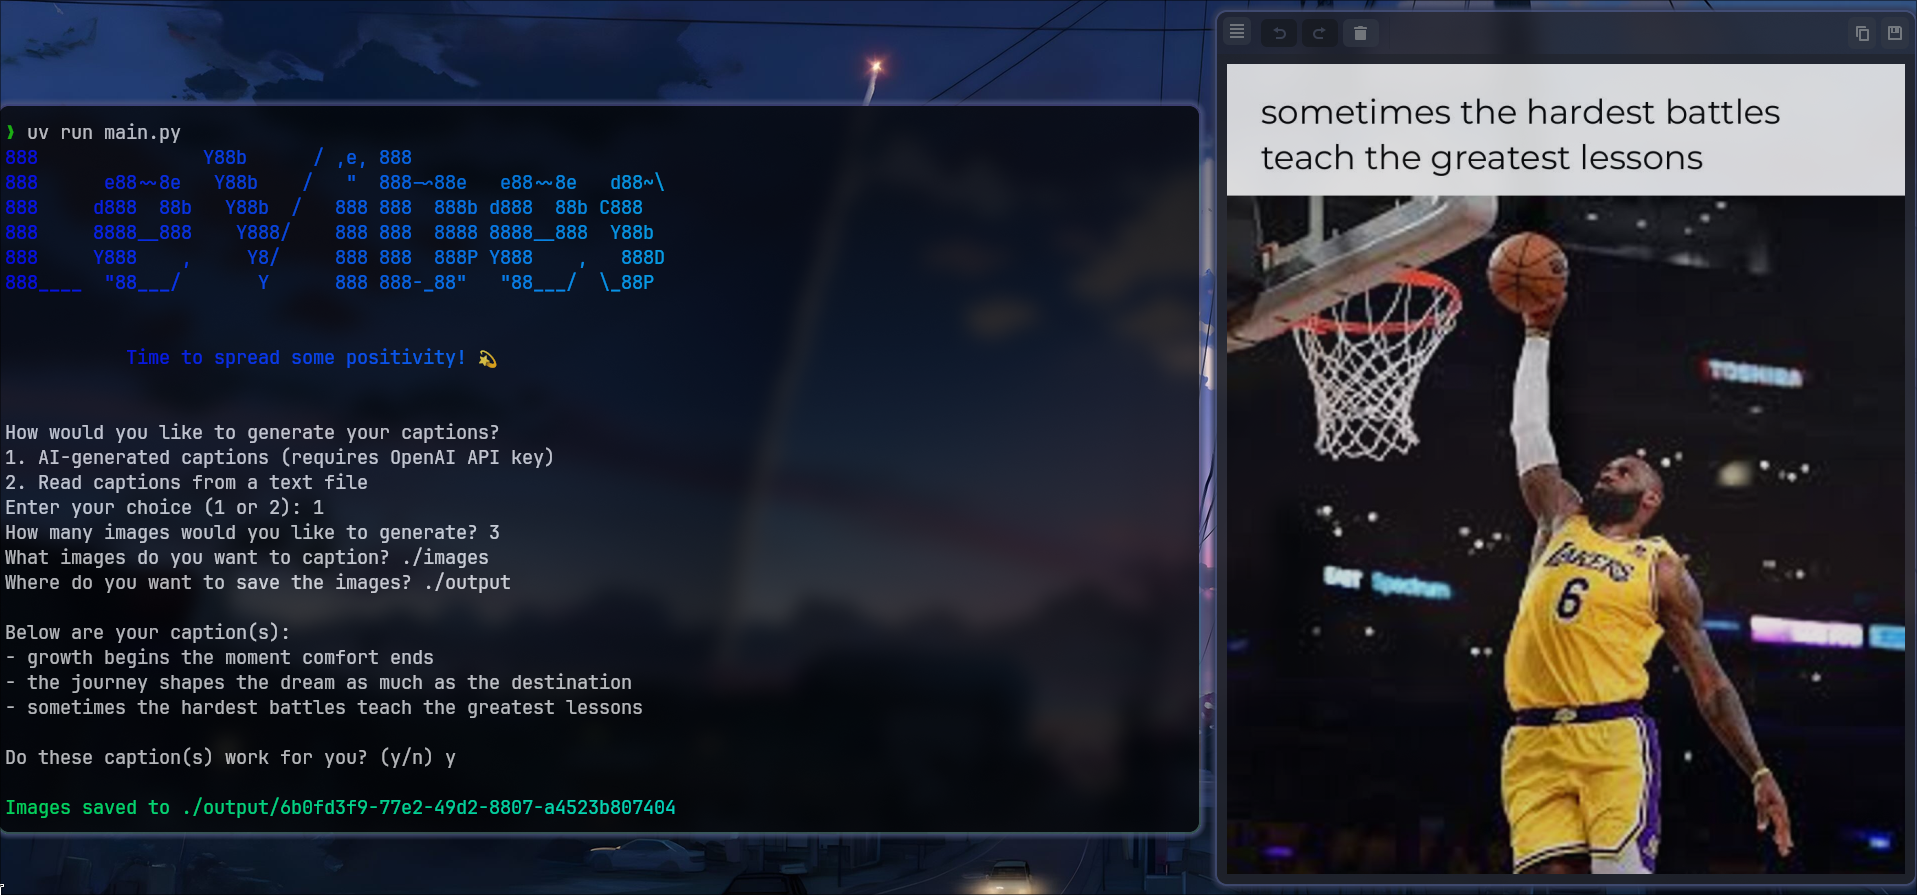
Generate motivational social media posts with AI and LeBron James


Features
- Generate beautiful motivational images with AI-powered captions
- Upload images as draft slideshows to TikTok
- Cloudflare R2 integration for image hosting
- Interactive CLI interface
Installation
# Clone the repository
git clone https://github.com/makors/levibes
cd levibes

# Install dependencies using uv
uv sync

# Or with pip
pip install -e .
Configuration
Create a .env file in the project root with the following variables:
Complete Example .env File
# OpenAI Configuration
OPENAI_API_KEY=your_openai_api_key_here

# TikTok API Configuration
TIKTOK_CLIENT_ID=your_tiktok_client_id
TIKTOK_CLIENT_SECRET=your_tiktok_client_secret

# Cloudflare R2 Configuration
CLOUDFLARE_R2_ENDPOINT_URL=https://abc123def456.r2.cloudflarestorage.com
CLOUDFLARE_R2_ACCESS_KEY_ID=your_r2_access_key_id
CLOUDFLARE_R2_SECRET_ACCESS_KEY=your_r2_secret_access_key
CLOUDFLARE_R2_BUCKET_NAME=my-levibes-bucket

# R2 Public URL (r2.dev subdomain - recommended)
CLOUDFLARE_R2_PUBLIC_URL_BASE=https://my-levibes-bucket.r2.dev
Environment Variables Breakdown
OpenAI Configuration
OPENAI_API_KEY=your_openai_api_key_here
TikTok API Configuration
TIKTOK_CLIENT_ID=your_tiktok_client_id
TIKTOK_CLIENT_SECRET=your_tiktok_client_secret
Cloudflare R2 Configuration
# Required R2 variables
CLOUDFLARE_R2_ENDPOINT_URL=https://your-account-id.r2.cloudflarestorage.com
CLOUDFLARE_R2_ACCESS_KEY_ID=your_r2_access_key_id
CLOUDFLARE_R2_SECRET_ACCESS_KEY=your_r2_secret_access_key
CLOUDFLARE_R2_BUCKET_NAME=your_r2_bucket_name

# Optional: Public URL base for accessing files
# Use r2.dev subdomain: https://your-bucket-name.r2.dev
# Or custom domain: https://your-custom-domain.com
CLOUDFLARE_R2_PUBLIC_URL_BASE=https://your-bucket-name.r2.dev
Setting up Cloudflare R2
-
Create a Cloudflare R2 Bucket:
- Go to Cloudflare Dashboard
- Navigate to R2 Object Storage
- Create a new bucket with a unique name
- Note the bucket name for your
.envfile
-
Create R2 API Token:
- Go to "Manage R2 API Tokens"
- Create a new API token with read/write permissions
- Note the Access Key ID and Secret Access Key
-
Configure Public Access:
- In your bucket settings, enable public access
- This will give you an r2.dev subdomain:
https://your-bucket-name.r2.dev - Set
CLOUDFLARE_R2_PUBLIC_URL_BASE=https://your-bucket-name.r2.dev - Alternatively, configure a custom domain if desired
💡 Using r2.dev Subdomain
If you're using an r2.dev subdomain (like
https://my-bucket.r2.dev), this is the recommended and simplest approach:
- Enable public access on your R2 bucket
- Use the provided r2.dev URL as your
CLOUDFLARE_R2_PUBLIC_URL_BASE- The app will upload via the R2 API and serve files via the r2.dev subdomain
Example configuration:
CLOUDFLARE_R2_PUBLIC_URL_BASE=https://my-levibes-bucket.r2.dev
- Set R2 Endpoint URL:
- Format:
https://your-account-id.r2.cloudflarestorage.com - Replace
your-account-idwith your actual Cloudflare account ID - This is used for uploads via API, not for public access
- Format:
Setting up TikTok API
-
Create TikTok Developer Account:
- Go to TikTok for Developers
- Create a developer account
- Create a new app
-
Configure App Settings:
- Set redirect URI to:
https://tiktoklocal.com:8080/callback - Enable the following scopes:
user.info.basicuser.info.profilevideo.upload
- Note the Client ID and Client Secret
- Set redirect URI to:
-
Domain Configuration:
- Add
tiktoklocal.comto your hosts file pointing to127.0.0.1 - On macOS/Linux:
echo "127.0.0.1 tiktoklocal.com" | sudo tee -a /etc/hosts - On Windows: Add to
C:\Windows\System32\drivers\etc\hosts
- Add
Usage
Basic Usage
# Run the application
python main.py

# Or use the CLI directly
levibes
Command Line Options
# Generate images only
python main.py --no-upload

# Upload existing images
python main.py --upload-only

# Specify custom output directory
python main.py --output-dir ./my-images

# Set custom caption
python main.py --caption "Follow for more motivation!"
TikTok Upload Process
-
Authentication:
- The app will open a browser for TikTok OAuth
- You may see a security warning (SSL certificate)
- Click "Advanced" and "Proceed to tiktoklocal.com"
- Authorize the app
-
Image Upload:
- Images are first uploaded to Cloudflare R2
- R2 URLs are then used to create TikTok draft
- Draft appears in your TikTok app inbox
-
Publishing:
- Open TikTok app on your phone
- Go to inbox and find the draft
- Edit and publish as desired
File Structure
levibes/
├── src/levibes/
│   ├── caption_generation.py  # AI caption generation
│   ├── generate_images.py     # Image creation
│   ├── upload.py             # TikTok/R2 upload
│   ├── cli.py                # Command line interface
│   └── config.py             # Configuration management
├── output/                   # Generated images
├── main.py                   # Entry point
└── .env                      # Environment variables
API Limits
- TikTok API: 6 requests per minute per user
- R2 Storage: Check your Cloudflare plan limits
- OpenAI API: Based on your plan and usage
Troubleshooting
Common Issues
-
"Missing required environment variables"
- Ensure all required variables are set in
.env - Check for typos in variable names
- Ensure all required variables are set in
-
"Authorization failed"
- Verify TikTok Client ID and Secret
- Check that redirect URI is correctly configured
- Ensure
tiktoklocal.comis in your hosts file
-
"Failed to upload to R2"
- Verify R2 credentials and bucket name
- Check bucket permissions
- Ensure endpoint URL is correct
- If using r2.dev subdomain, make sure public access is enabled on the bucket
-
SSL Certificate Warning
- This is normal for local development
- Click "Advanced" and "Proceed to tiktoklocal.com"
Debug Mode
Set DEBUG=1 in your .env file for detailed logging:
DEBUG=1
Contributing
- Fork the repository
- Create a feature branch
- Make your changes
- Test thoroughly
- Submit a pull request
License
MIT License - see LICENSE file for details.
1 maintainer

Metadata
1 maintainer
Release files for levibes 0.1.1
For a detailed explanation of source distributions (sdists) and built distributions (wheels), please see the package formats documentation.
Source distribution (sdist)
| File | Size | Uploaded | |
|---|---|---|---|
| levibes-0.1.1.tar.gz | 22.6 kB | Details |
Built distribution (wheel)
| File | Interpreter | ABI | Platform | Reset |
|---|---|---|---|---|
| levibes-0.1.1-py3-none-any.whl | Python 3 | none | any | Details |
Total release size: 46.2 kB
Release files / levibes-0.1.1.tar.gz
| Download URL | levibes-0.1.1.tar.gz |
|---|---|
| Size | 22.6 kB |
| Tags | Source |
|
SHA-256 checksum How to use checksums |
e0a7d0993784ac963a94d062df3f3051ede059b0ac2a227e3ac24520b5c5e2d3
|
|
BLAKE2b-256 checksum How to use checksums |
f59167f2c59b7af6fd5a8b9fe76f45259da4341e32332771472539c73bf5a194
|
| Upload date | |
|
Uploaded using Trusted Publishing? What is trusted publishing? |
No |
| Uploaded via |
uv/0.7.19
|
Release files / levibes-0.1.1-py3-none-any.whl
| Download URL | levibes-0.1.1-py3-none-any.whl |
|---|---|
| Size | 23.6 kB |
| Tags | Python 3 |
|
SHA-256 checksum How to use checksums |
7b66a8378950104337ae62ff7757dec3a1b1bf129d41ffbd666ac435ead8fa8a
|
|
BLAKE2b-256 checksum How to use checksums |
1ad49d08b86c6b235326ac126e4cff2ba32d38c52af82c05163550b5a39a5bbe
|
| Upload date | |
|
Uploaded using Trusted Publishing? What is trusted publishing? |
No |
| Uploaded via |
uv/0.7.19
|














