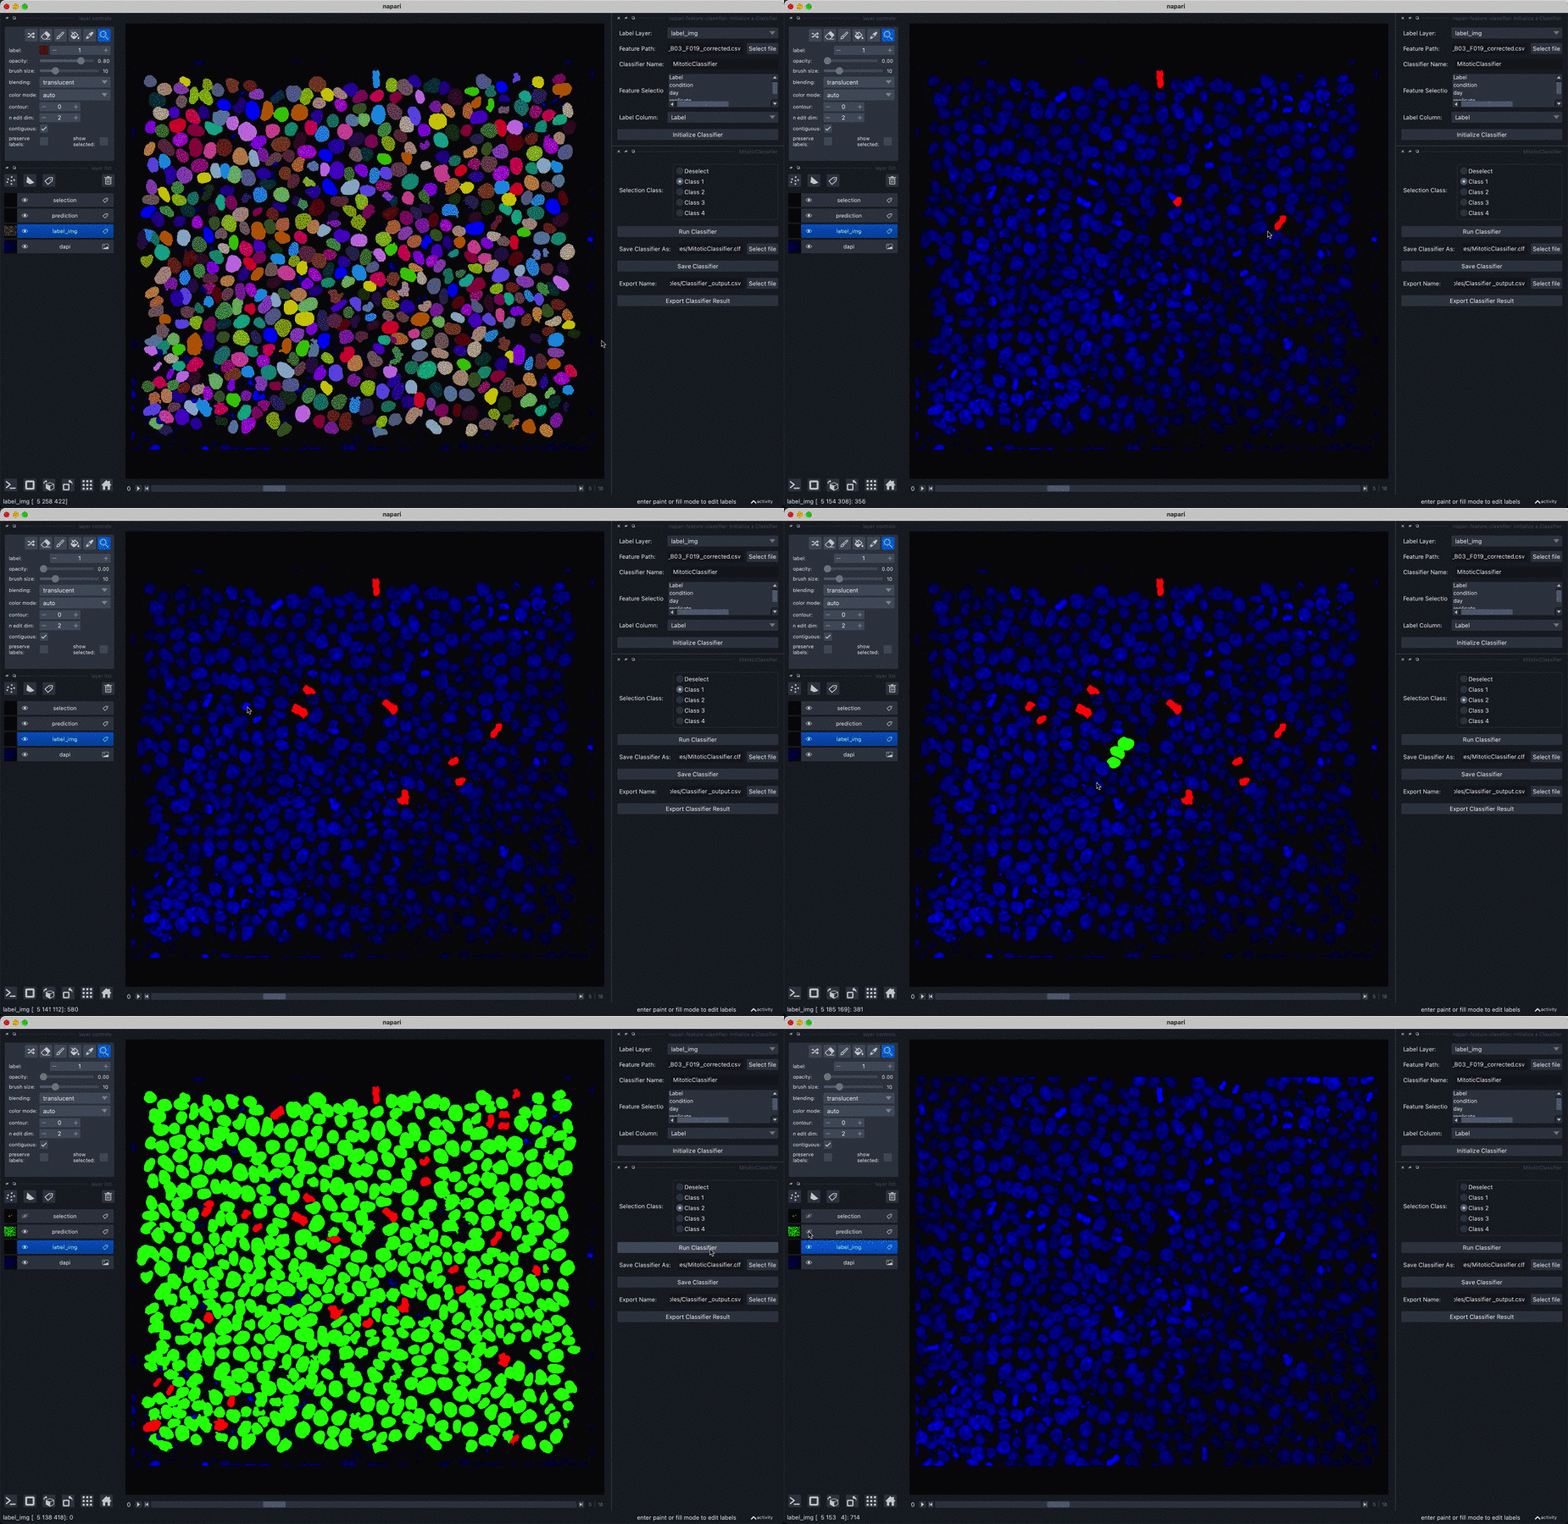
An interactive classifier plugin to use with label images and feature measurements
Project description
napari-feature-classifier
An interactive classifier plugin that allows the user to assign objects in a label image to multiple classes and train a classifier to learn those classes based on a feature dataframe.
Usage
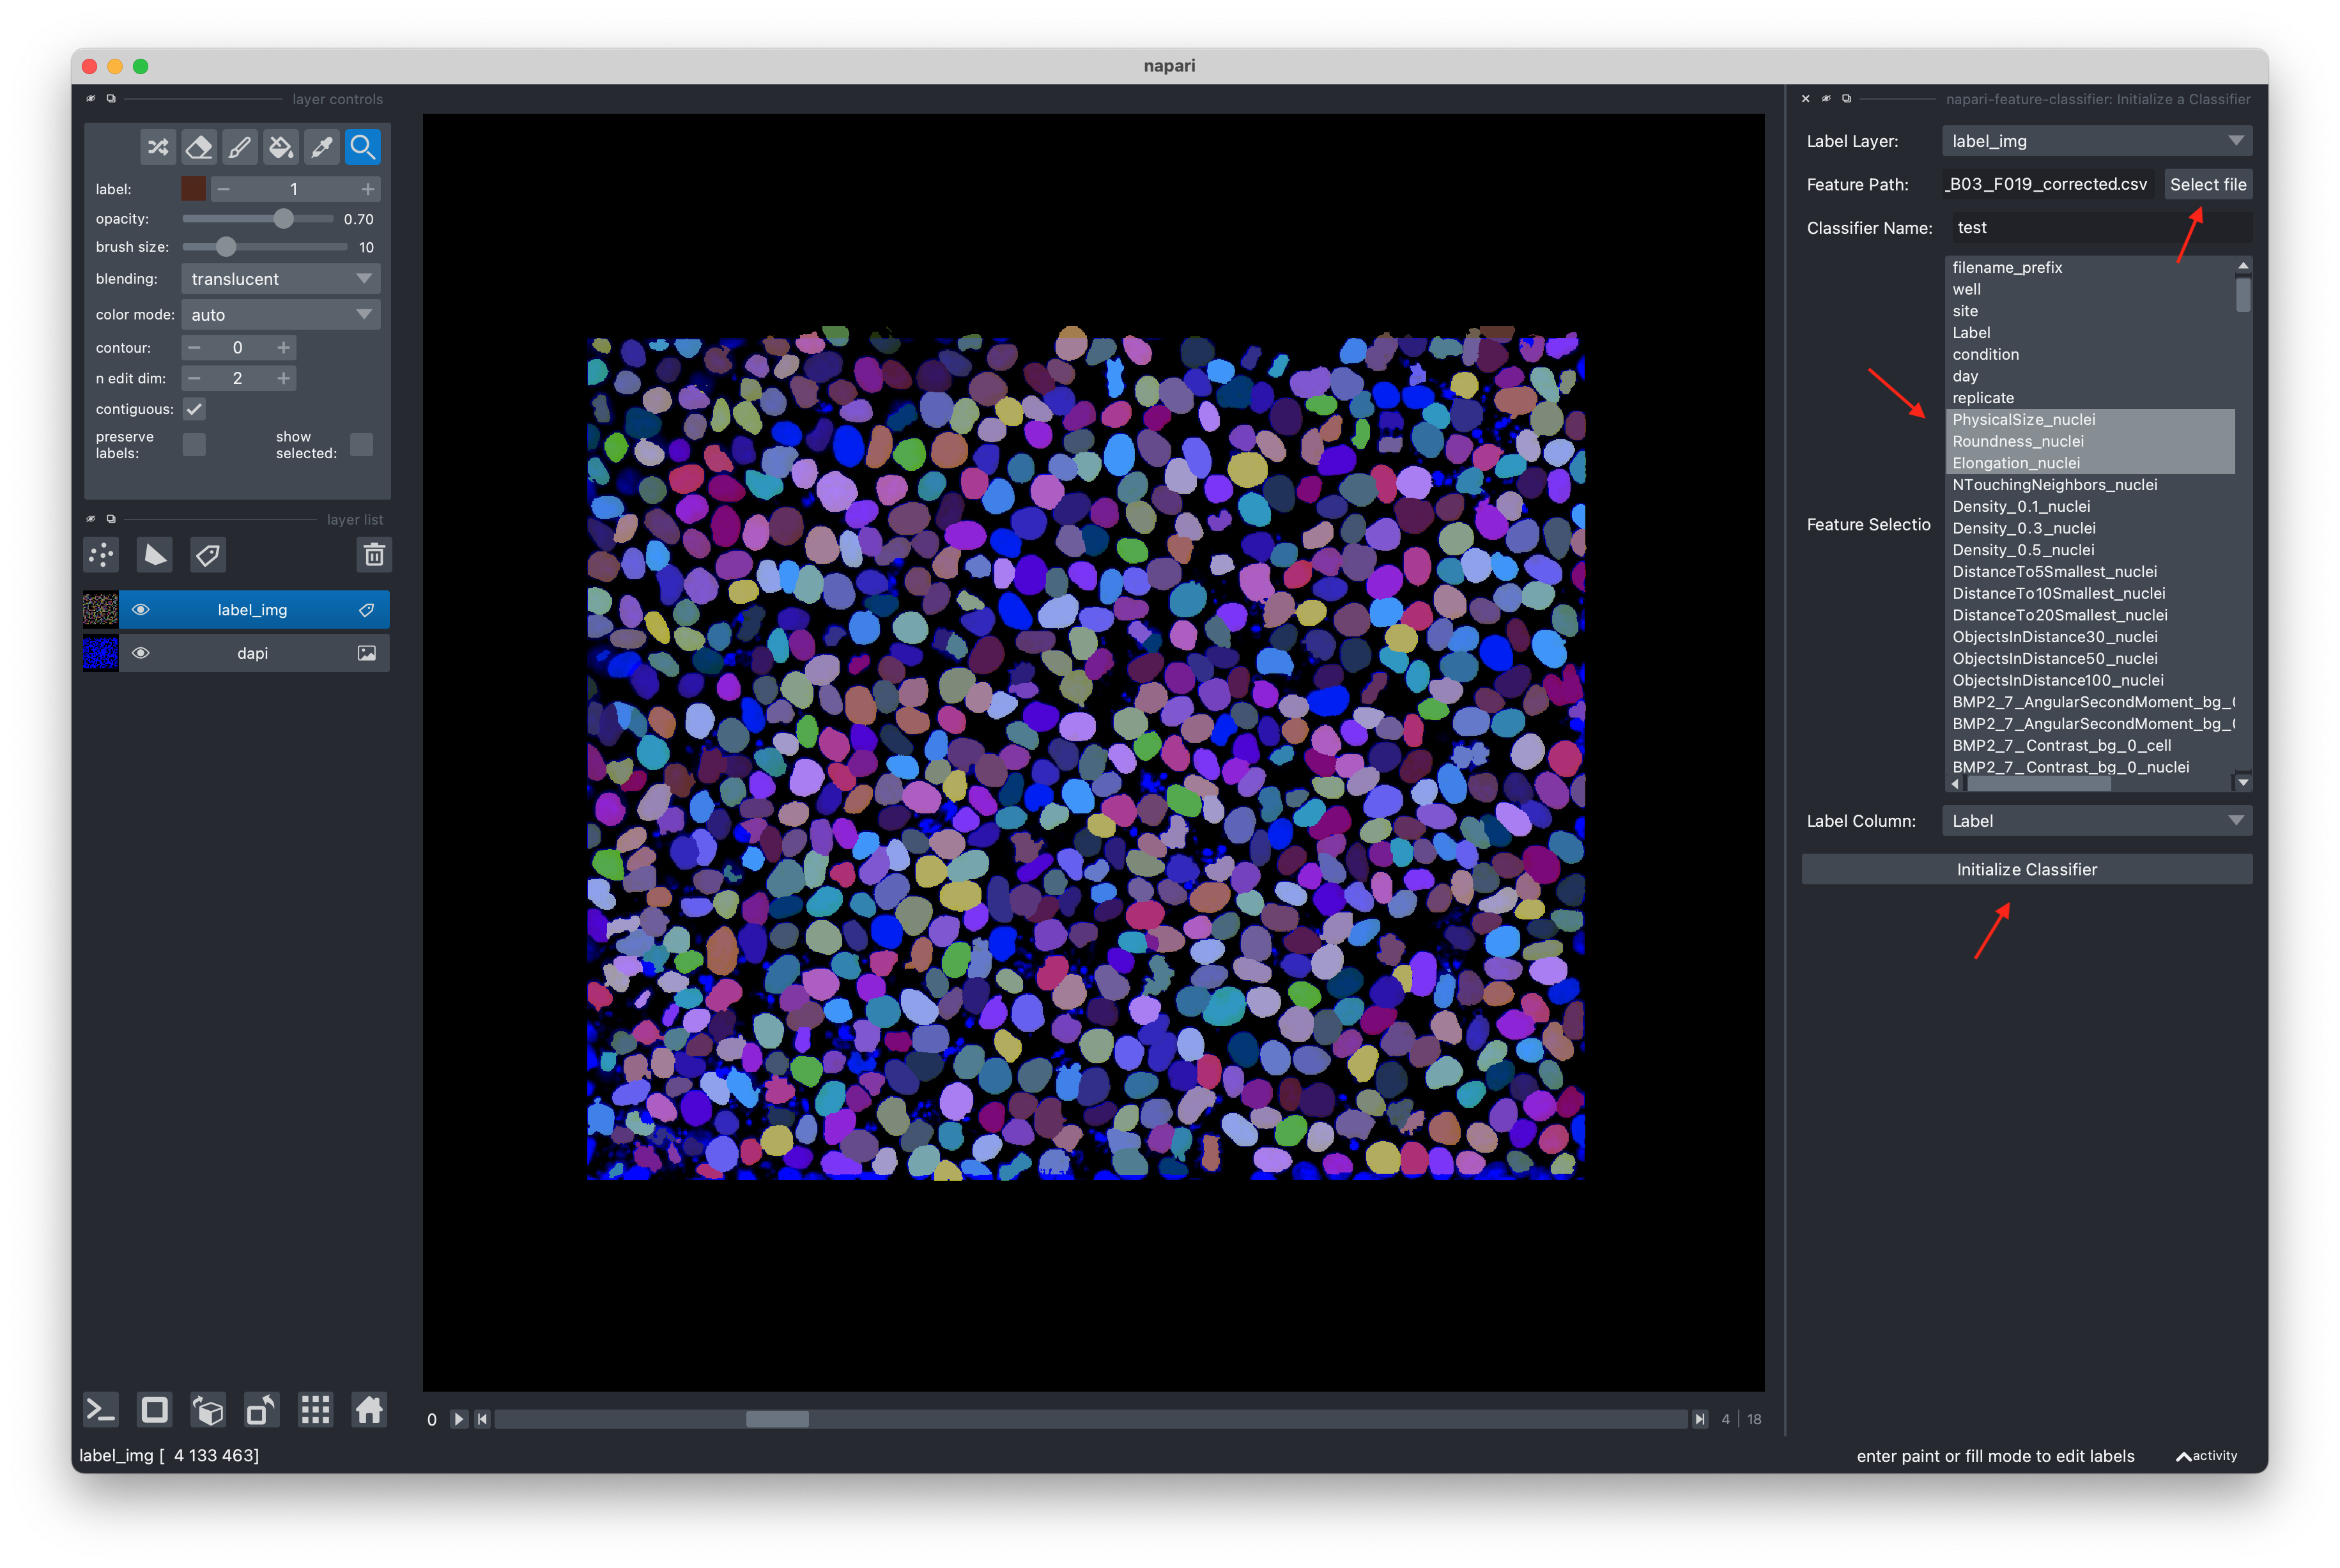
Initialize a classifier:
- Start the classifier in napari by going to
Plugins -> napari-feature-classifier -> Initialize a Classifier - Provide a csv file that contains feature measurements and a column with the integer labels corresponding to the label layer you are using.
- Choose a name (or relative path from the current working directory) for the classifier. The classifier is initially saved in the current working directory (you can change this later on).
- Select the features you want to use for the classifier (you need to do the feature selection before initializing. The feature selection can't be changed after initialization anymore). Hold the command key to select multiple features.
Classify objects:
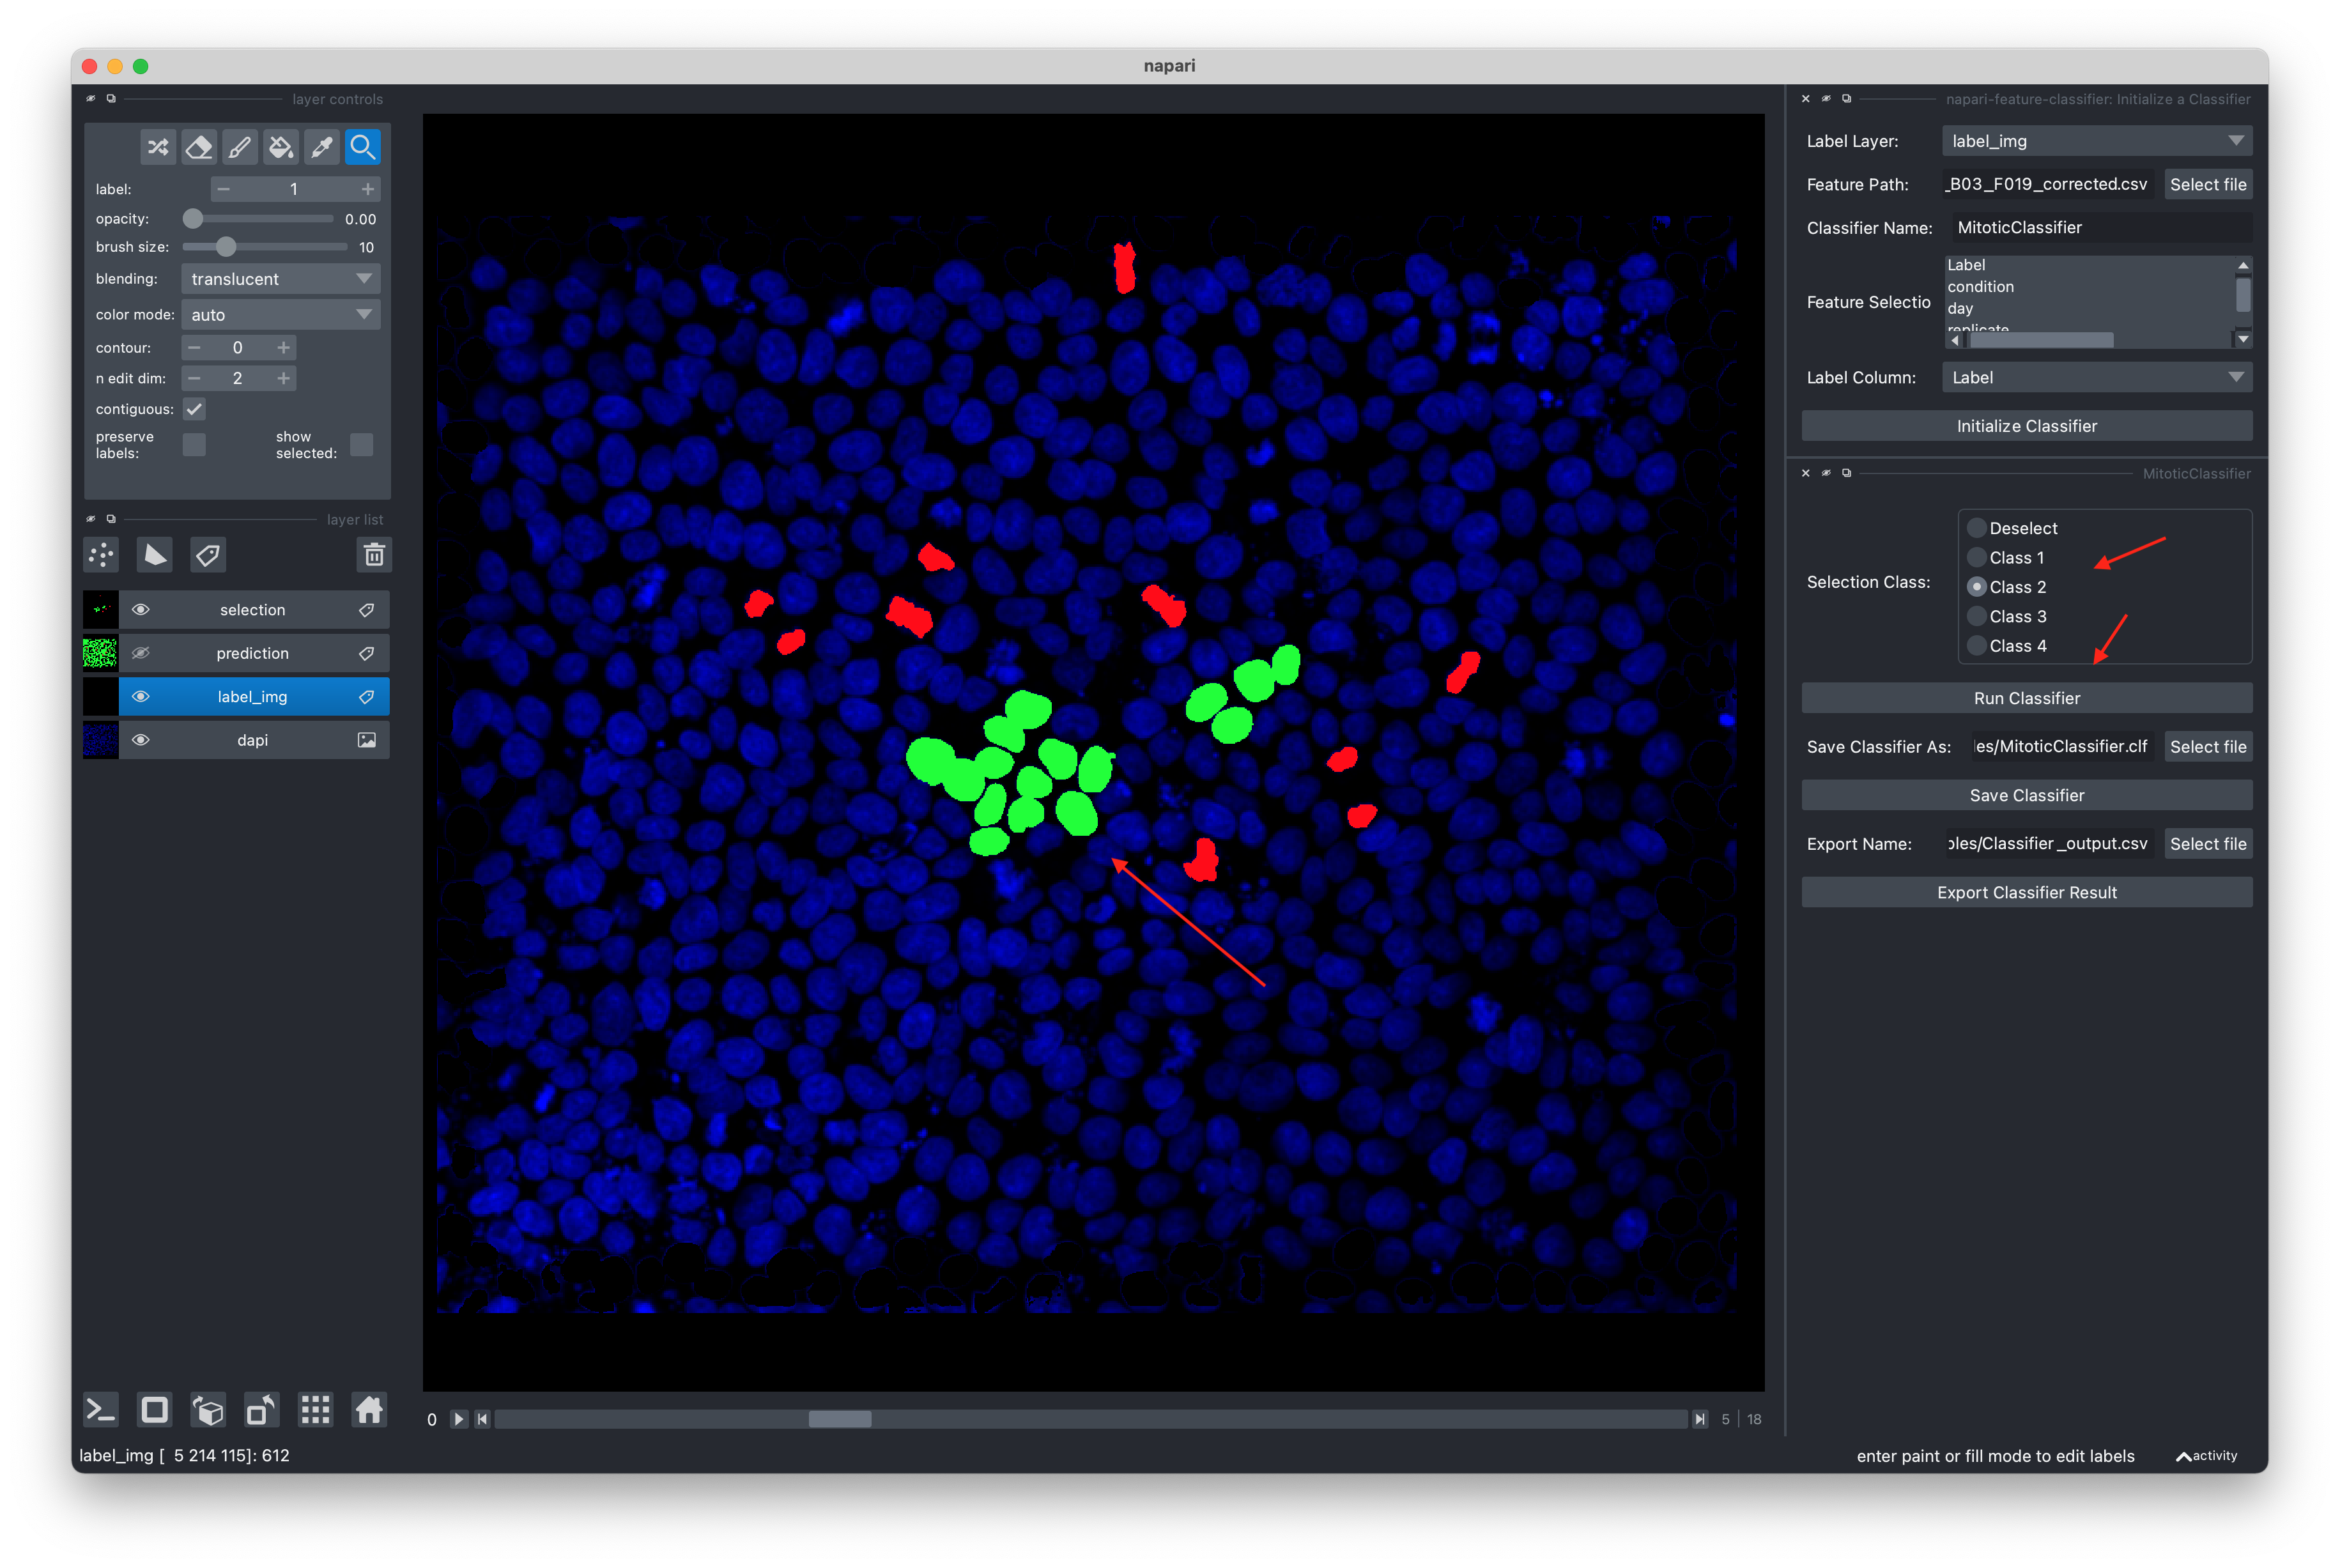
- Make sure you have the label layer selected on which you want to classify
- Select the current class with the radio buttons or by pressing 0, 1, 2, 3 or 4
- Click on label objects in the viewer to assign them to the currently selected class
- While you need to have the label layer active to select, sometimes you want to focus on the intensity images. You can press
v(or manually change the opacity of the label layer) to focus on the intensity images. - Once you have trained enough examples, click "Run Classifier" (or press
t) to run the classifier and have it make a prediction for all objects. Aim for at least a dozen annotations per class, as the classifier divides your annotations 80/20 in training and test sets. To get good performance readouts, aim for >30 annotations per class. - Once you get predictions, correct mistakes the classifier made and retrain it to improve its performance.
- You can save the classifier under a different name (to move it to a new folder or to have a slightly different version of the classifier - but careful, it autosaves whenever you run it). Define the new output location and then click
Save Classifier(you need to click the Save Classifier button. Just defining the new output path does not save it yet)
Apply the classifier to additional images:
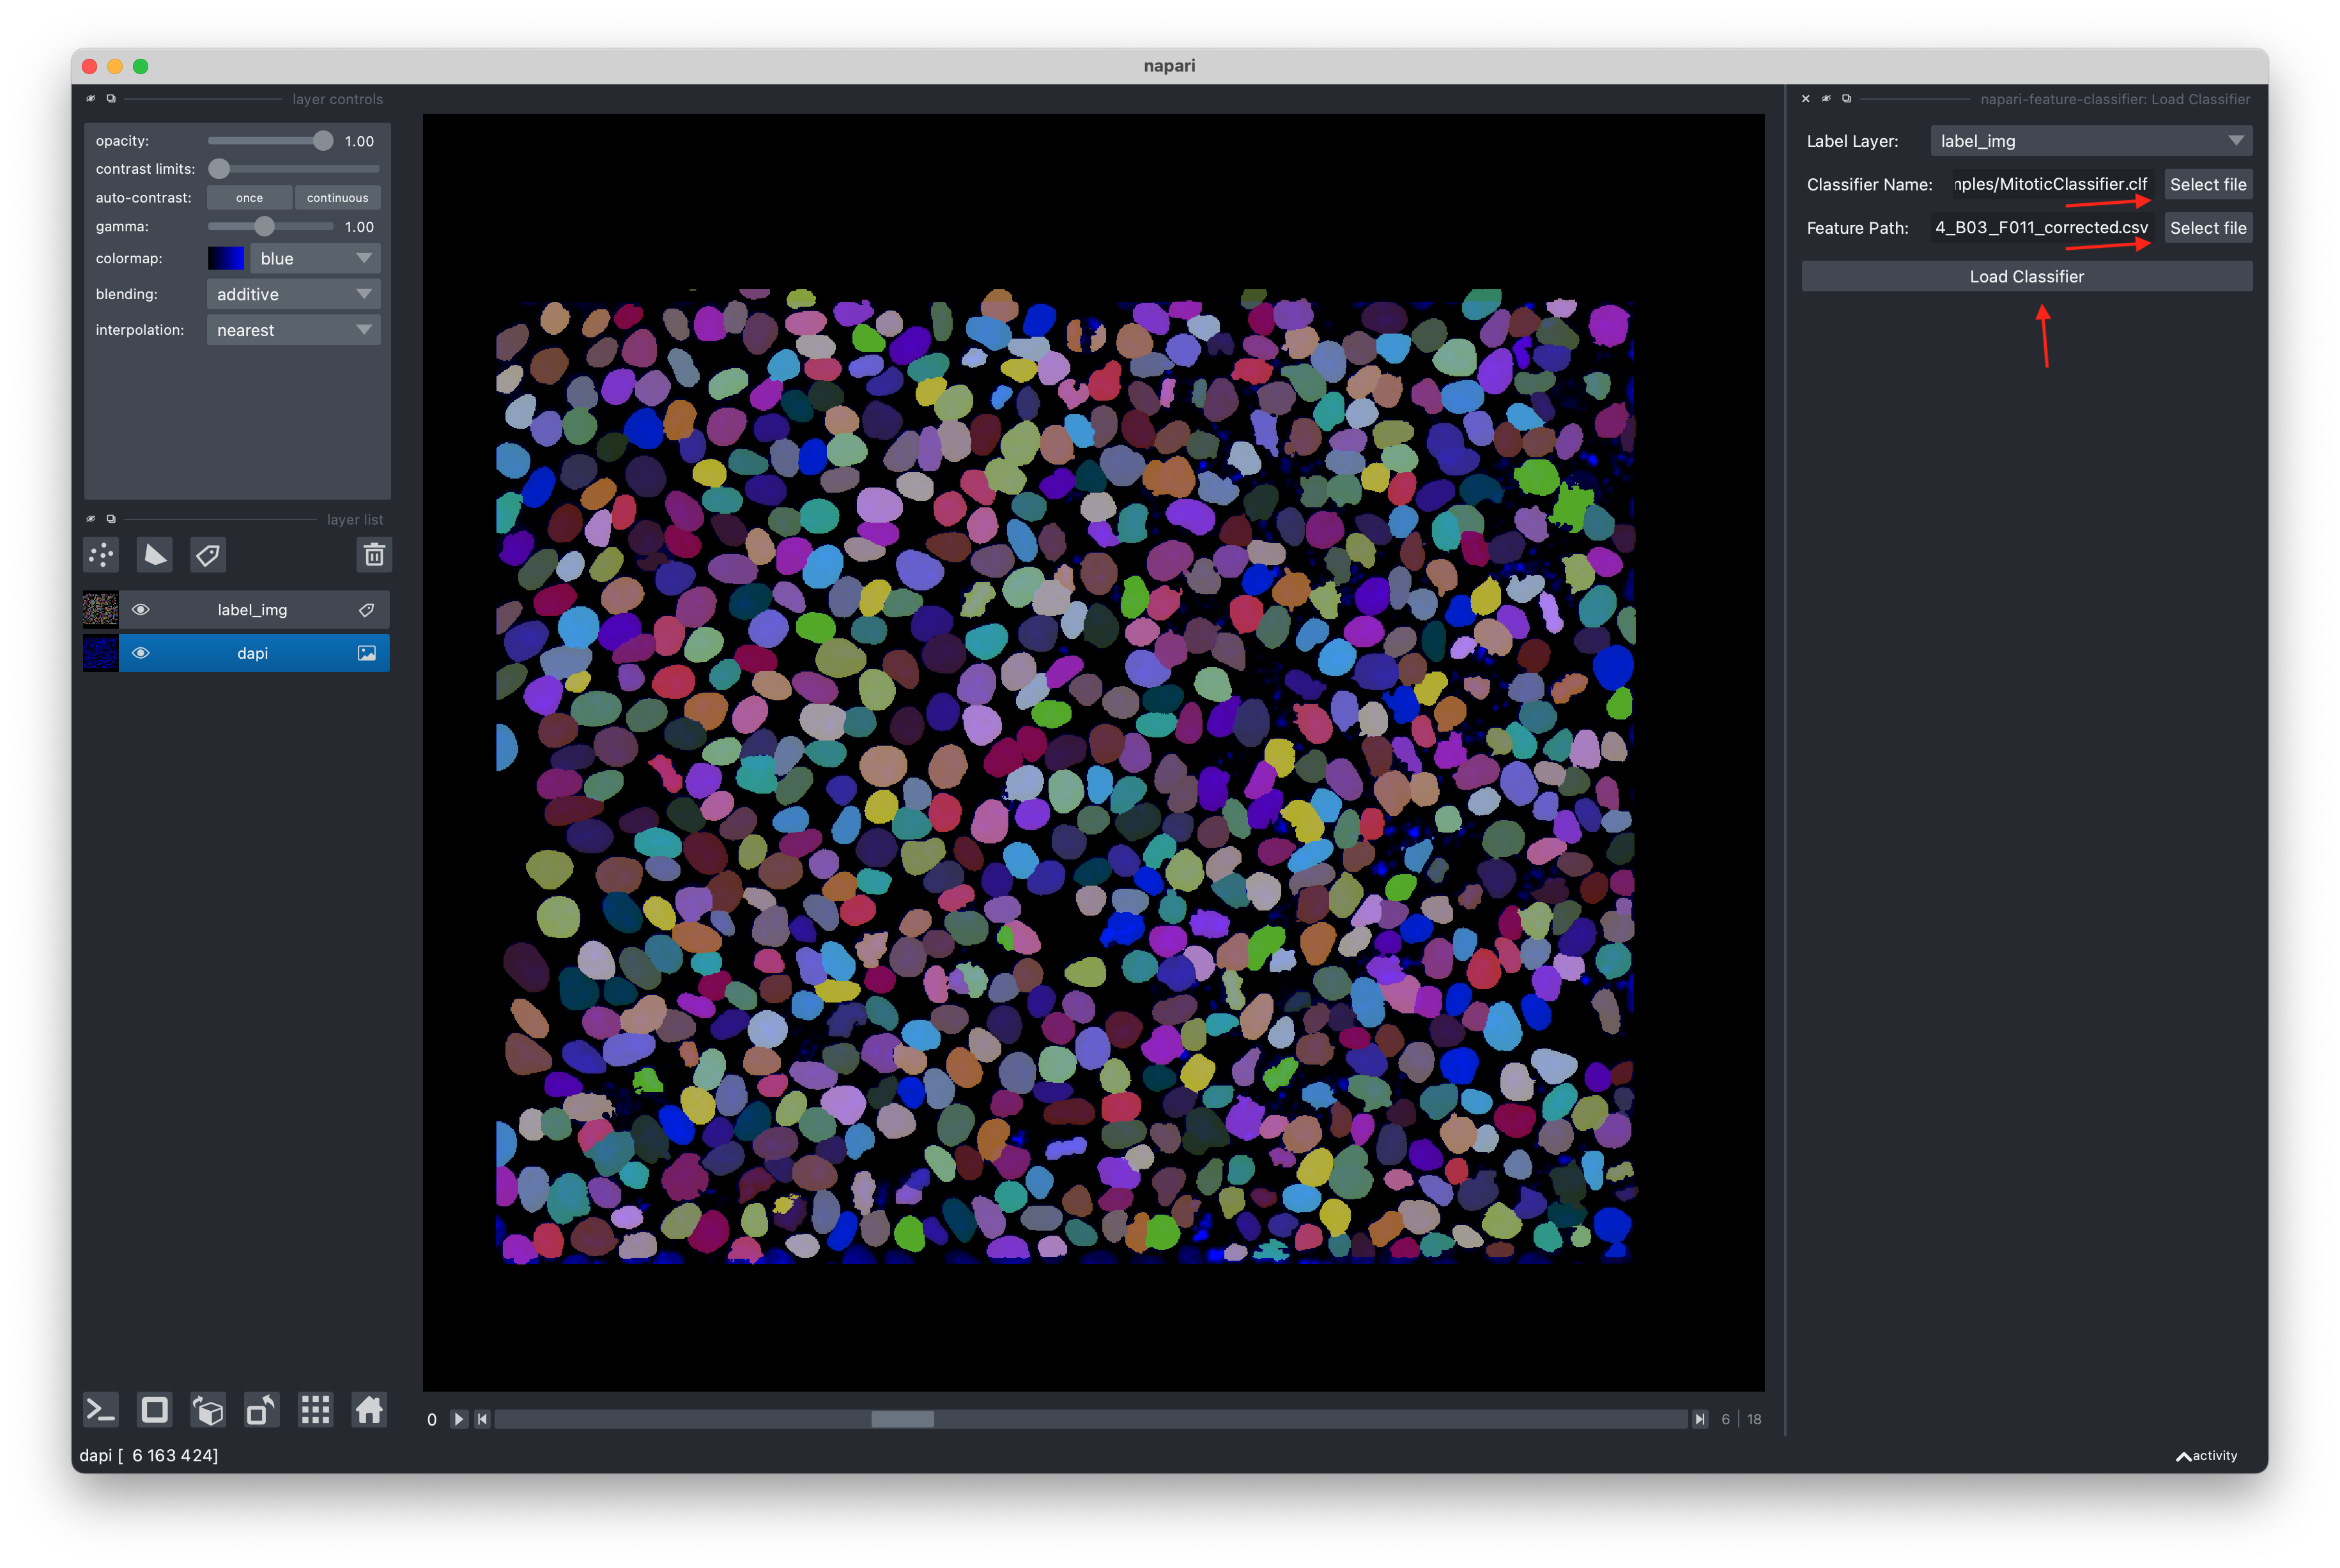
- You can apply a classifier trained on one image to additional label images. Use
Plugins -> napari-feature-classifier -> Load Classifier - Select the classifier (.clf file with the name you gave above) and a csv file containing the same features as the past images.
- Click Load Classifier, proceed as above.
Export classifier results
- To export the training data and the results of the classifier, define an Export Name (full path to an output file or just a filename ending in .csv) where the results of the classifier shall be saved
- Click
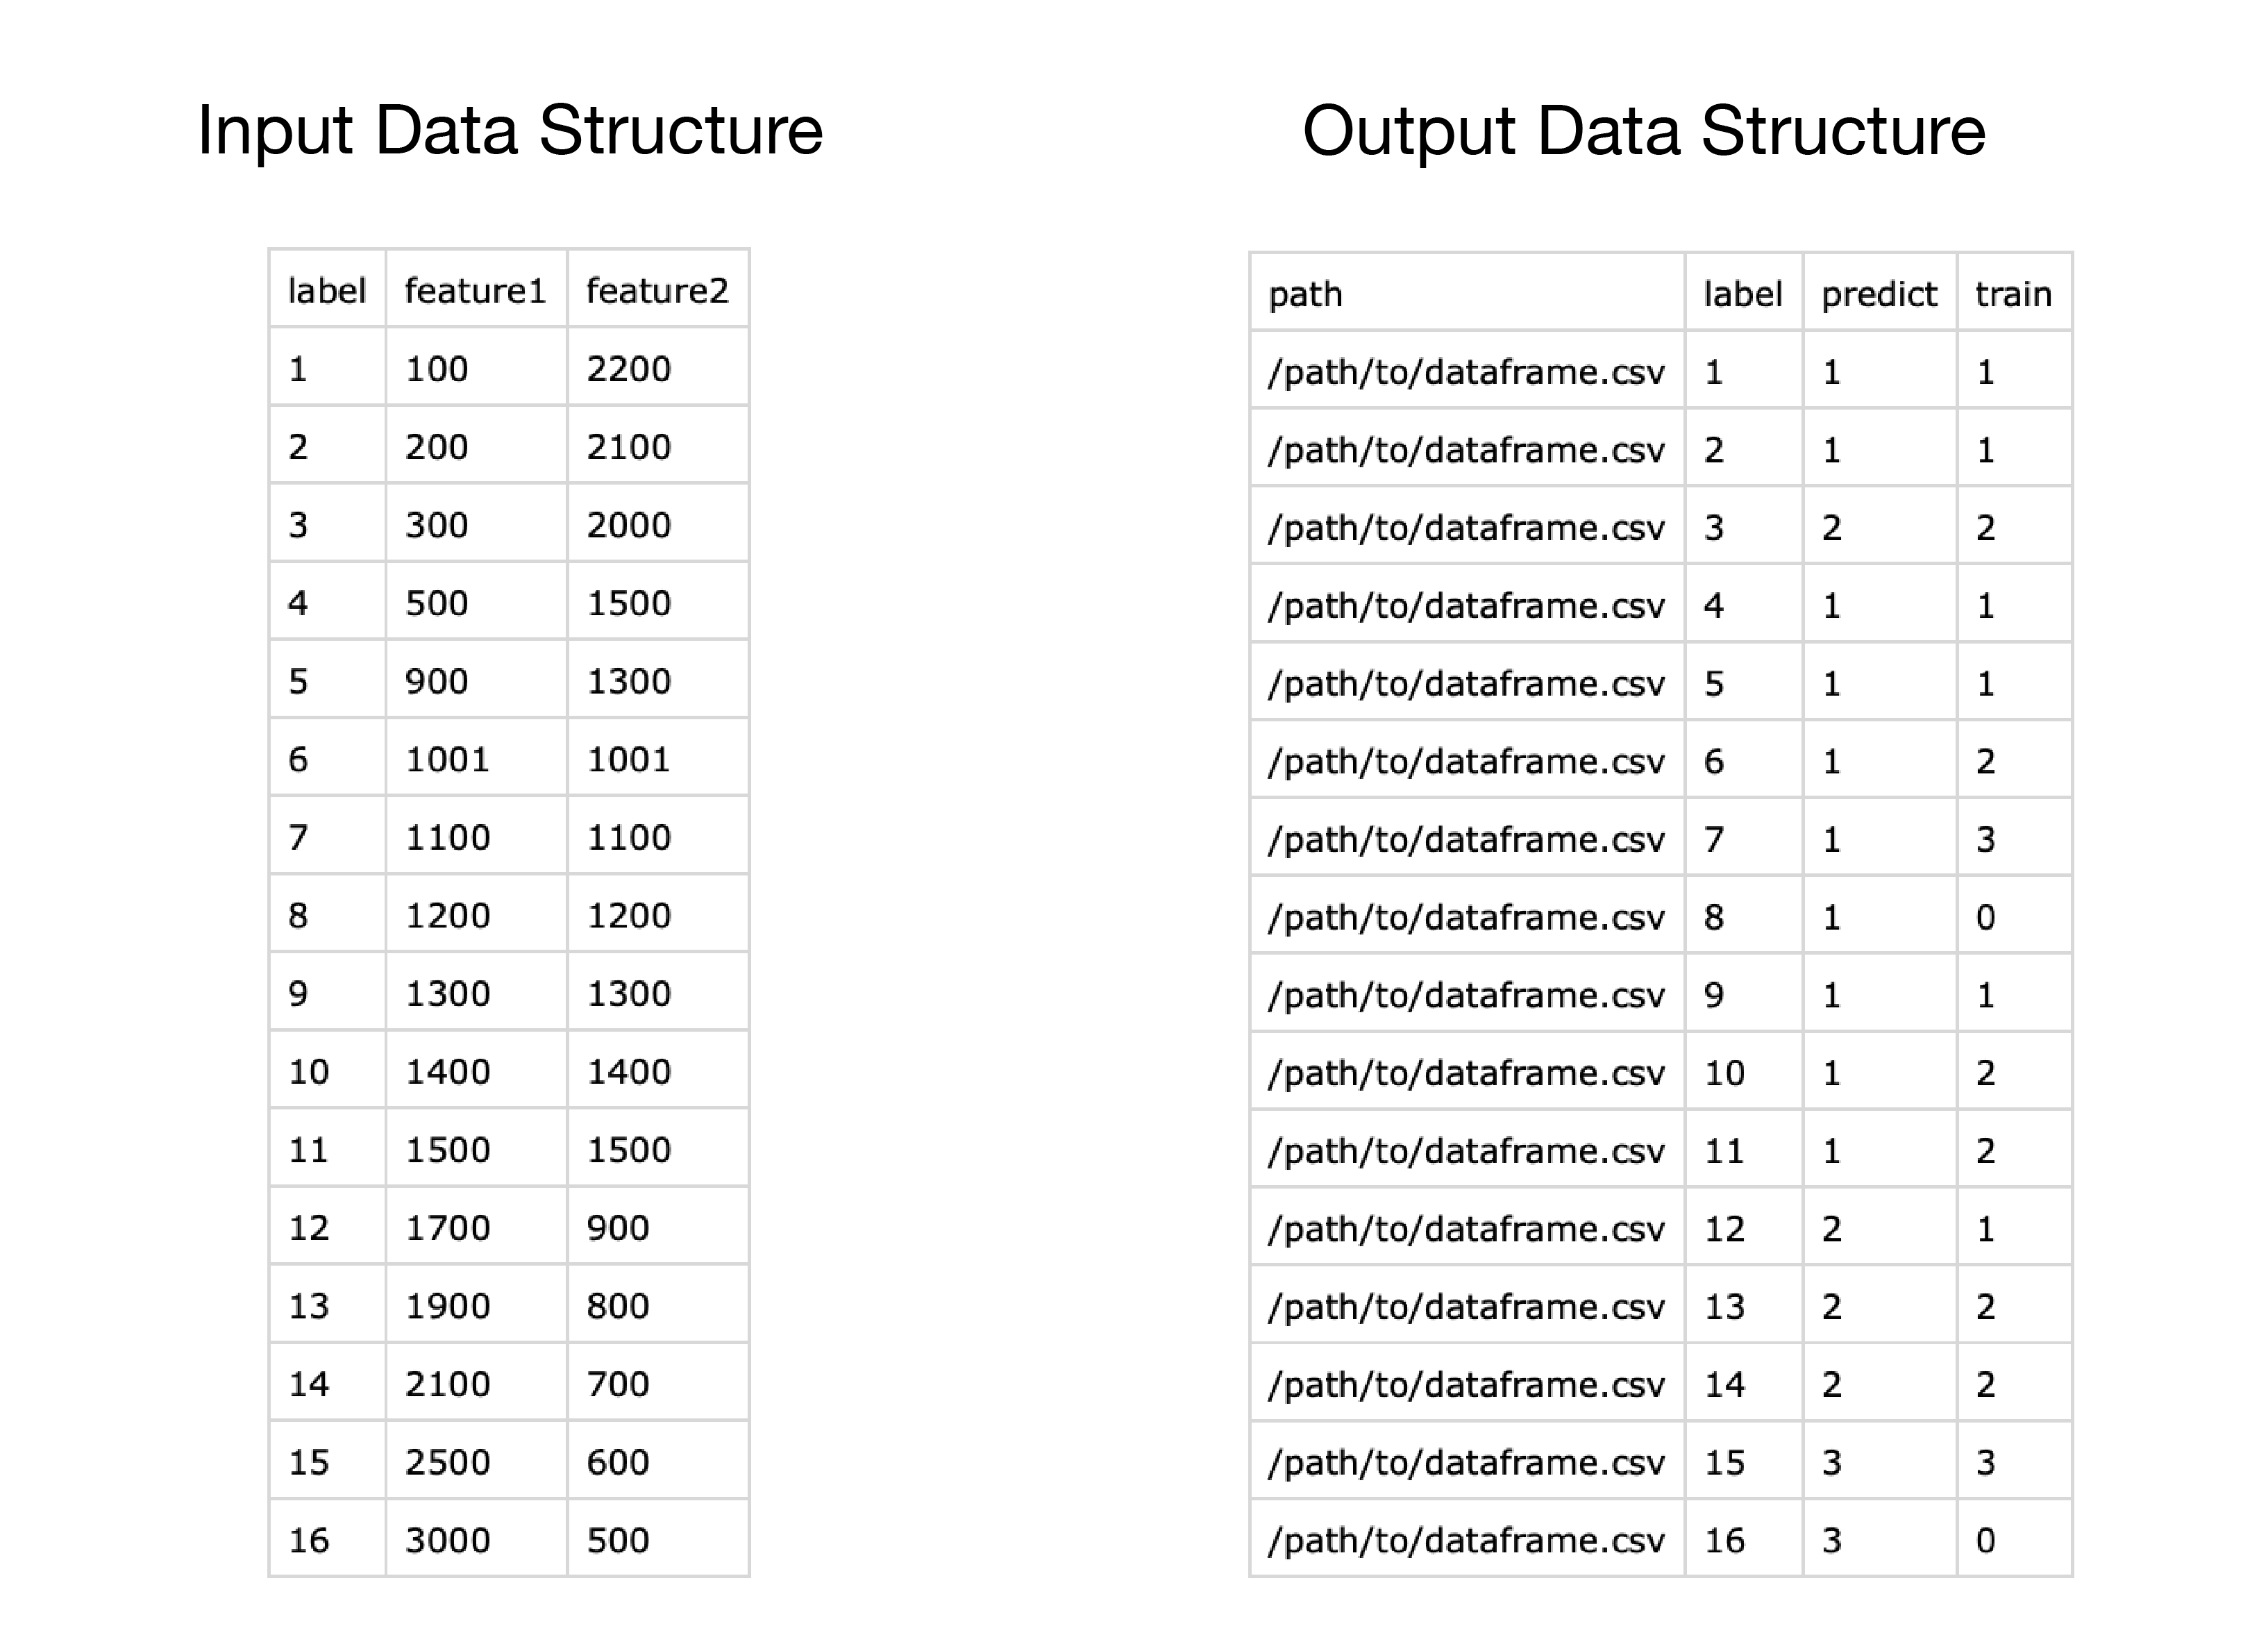
Export Classifier Result(Just selecting a filename is not enough, you need to click the export button) - The results of the classifier are save in a csv file. The first two columns are index columns: path describes the Feature Path used (and allows you to understand which image / feature dataframe a result is from) and label is an integer of the label object within that image. The predict column contains predictions of the classifier for all objects (except those that contained NaNs in their feature data) and the train column contains the annotations you made (0 for unclassified objects, 1, 2, 3 or 4 for the classes)
There is a simple workflow for the classifier in the examples folder:
- Install jupyter-lab (
pip install jupyterlab) - Open the notebook in jupyter lab (Type
jupyter-labin the terminal when you are in the examples folder) - Follow the instructions to generate an example dataframe and an example label image
- Use the classifier in napari with this simplified data
Installation
This plugin is written for the new napari npe2 plugin engine. Thus, it requires napari >= 0.4.13.
Activate your environment where you have napari installed (or install napari using pip install "napari[all]"), then install the classifier plugin:
pip install napari-feature-classifier
Contributing
Contributions are very welcome.
License
Distributed under the terms of the BSD-3 license, "napari-feature-classifier" is free and open source software
Issues
If you encounter any problems, please [file an issue] along with a detailed description.
Contributors
Project details
Download files
Download the file for your platform. If you're not sure which to choose, learn more about installing packages.
Source Distribution
Built Distribution
Hashes for napari-feature-classifier-0.0.1.tar.gz
| Algorithm | Hash digest | |
|---|---|---|
| SHA256 | 22be3bdc3265772bb0f00cec840cd22f5a100ec3e3332bf9d1bd6a44ccb5f4f1 |
|
| MD5 | 7a3a3451f22d4b2bd2fc0e1f4d9db648 |
|
| BLAKE2b-256 | 04c3b46c81b220187b64cb8eb378ec0cc5c78e1e2112c524d6ea6544d8e1751a |
Hashes for napari_feature_classifier-0.0.1-py3-none-any.whl
| Algorithm | Hash digest | |
|---|---|---|
| SHA256 | 18d9834a2f033d8885b73d87cb7c330bd9c5af352cfc90eed2c39c4284f2a057 |
|
| MD5 | 33876febd424c8cfa995a4ce5234dfee |
|
| BLAKE2b-256 | 58cb743e4e9038f0d729810204ee30df498af4727be3882f4b020dd0ef5b9abb |


