
otaku — an LLM frontend for creative writing and roleplay




Otaku is free and open source, runs on your own computer, needs no infrastructure, installs in one command, and requires minimal configuration. LLMs can be local (via llama.cpp, KoboldCpp, Ollama, and others) or accessed via an API service (OpenRouter, NanoGPT).
The three pillars of otaku:
- maintain writing quality as the story grows;
- keep the context small, even for long stories, without losing the details that matter;
- high-quality interfaces, in the browser and in the terminal.
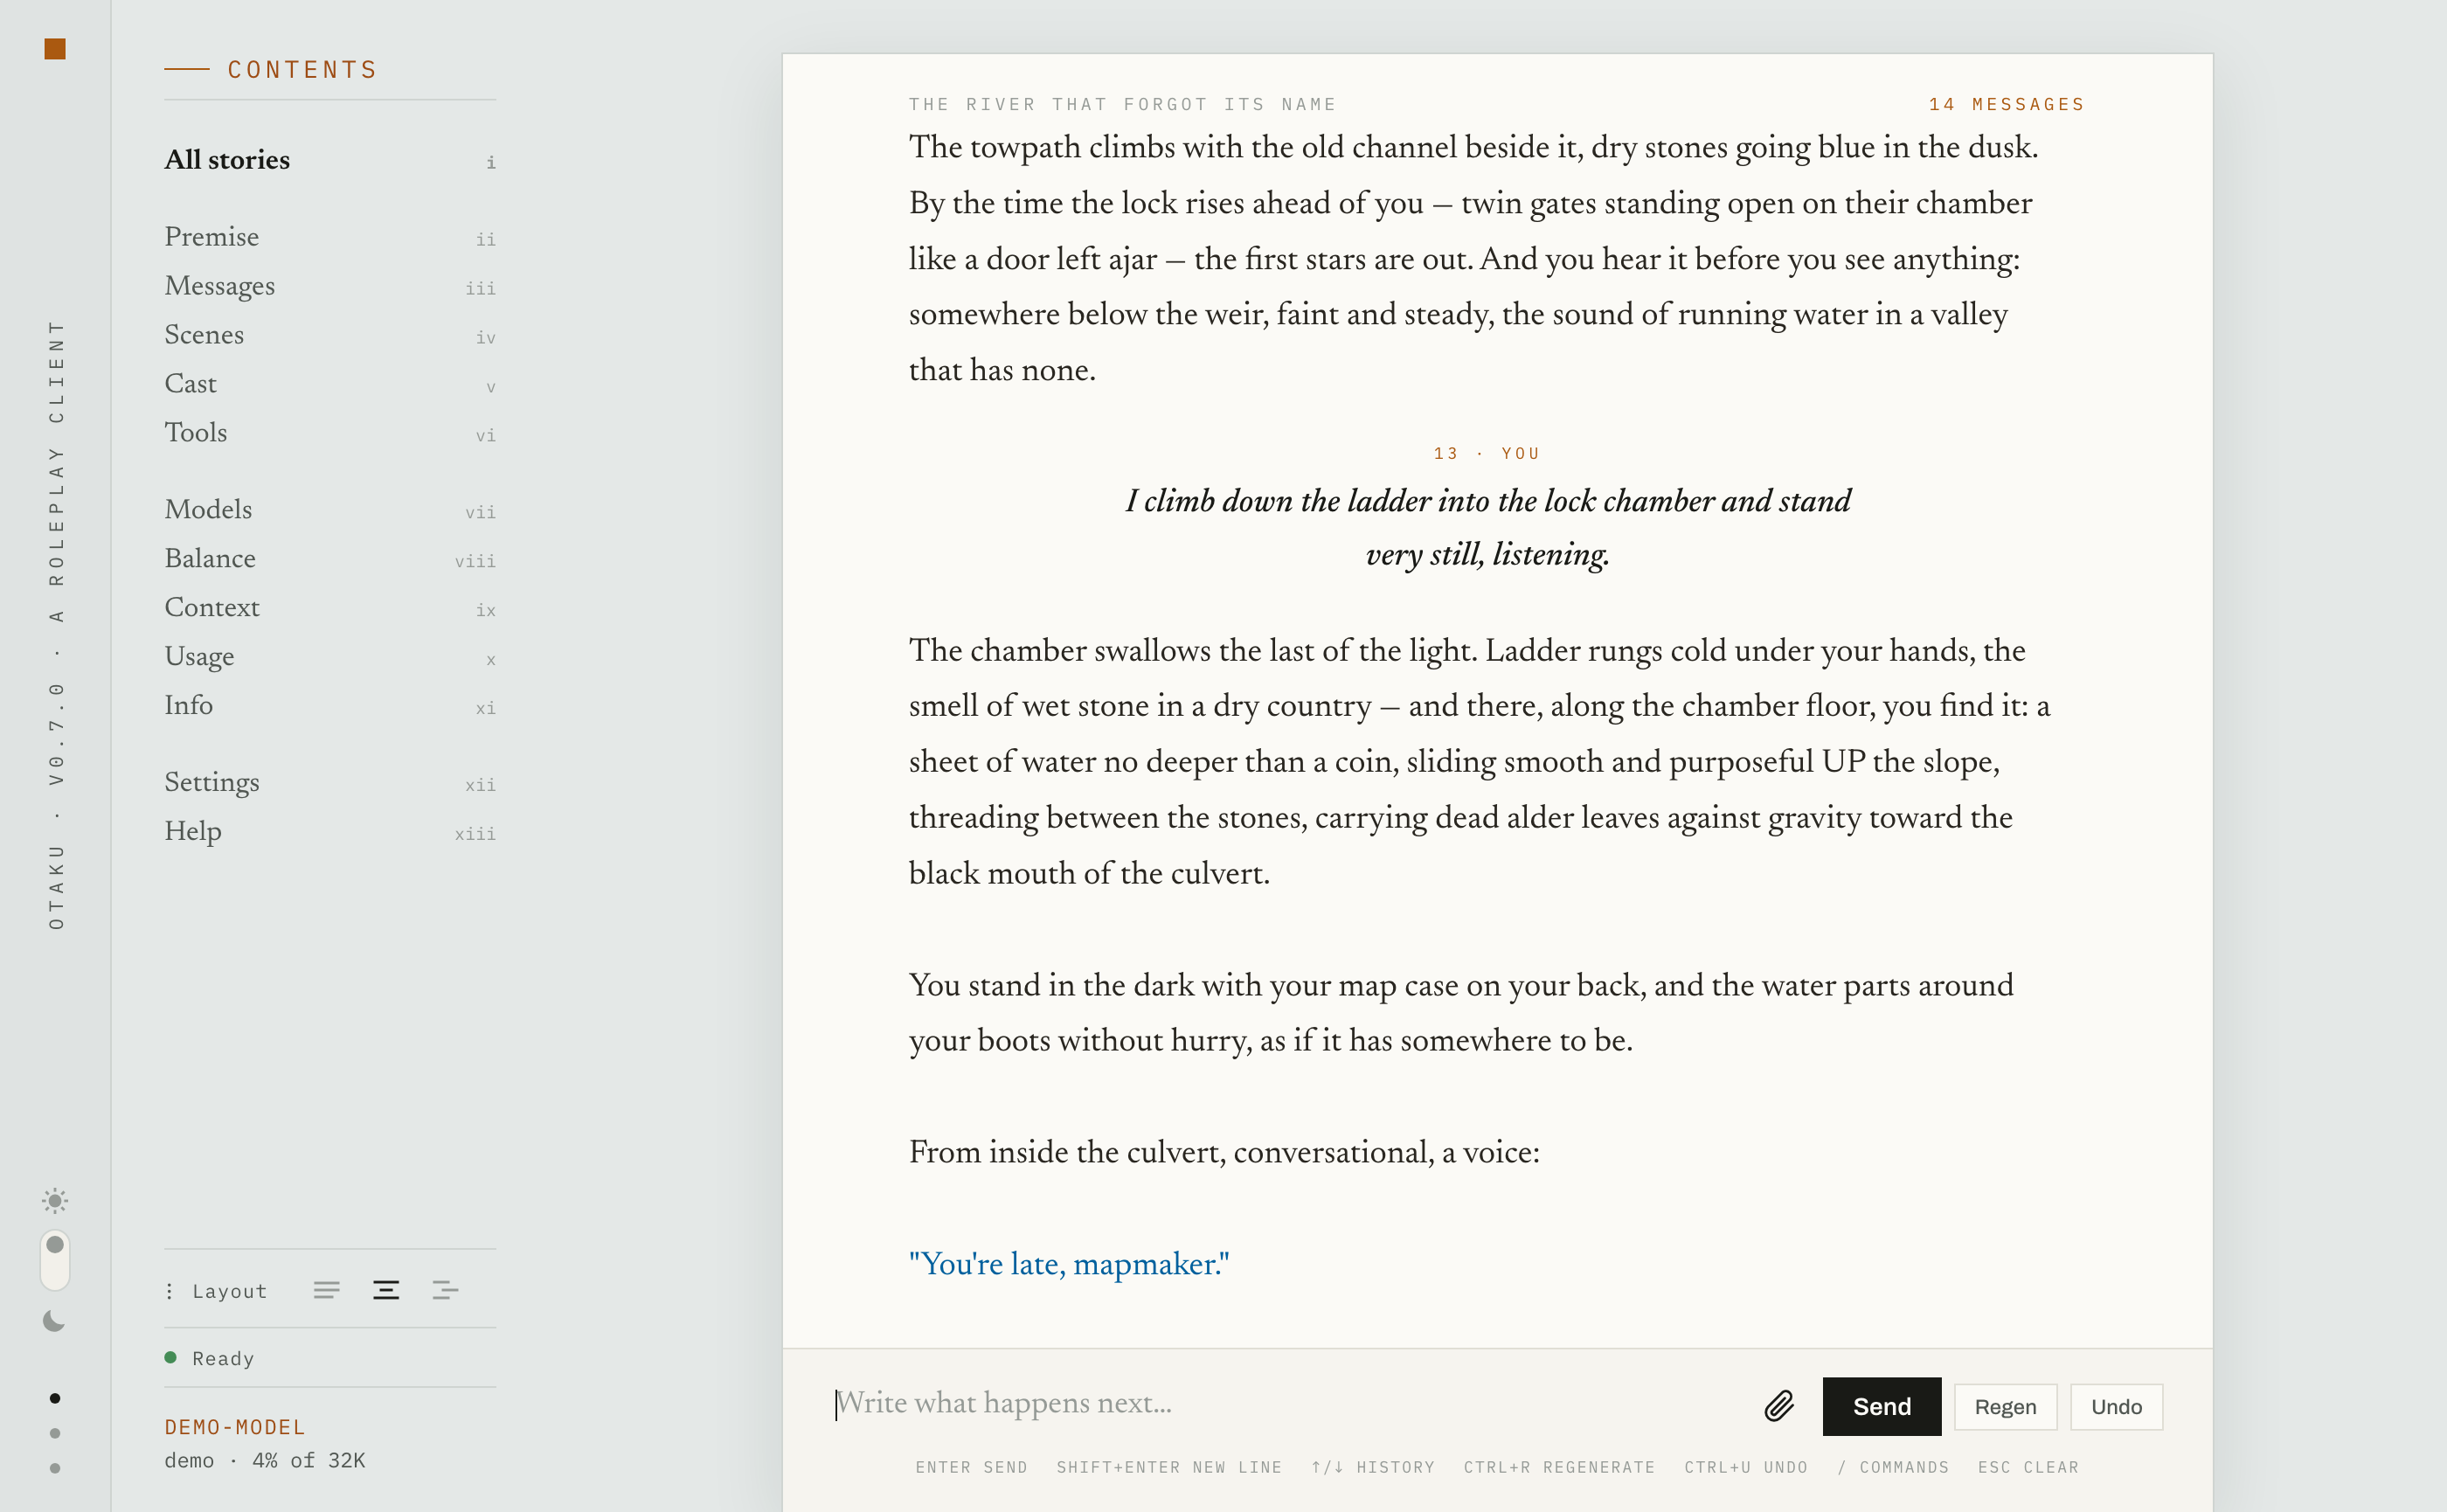
Demo
Demos are available on the website:
Both demos include two sample stories and a scripted "model", so you can actually send prompts and see how the UI works.
Features
Writing features:
- chat and story modes, with alternative UI layouts:
- chat mode (the manuscript or chat layout in the web interface), for a dialogue-based story;
- story mode (the canvas layout in the web interface), for writing the story as a novel directly in the transcript;
- consistent prose: the first 20 and the last 150 messages are always sent to the model as they are, to make it maintain the style;
- automatic summaries and context control: as the number of messages grows, intermediate messages are split into scenes and are automatically replaced by scene summaries;
- character recognition: characters you introduce in your story are extracted automatically; each character keeps their own journal of what they've seen and experienced;
- no fixed persona: you are free to play any character during the story;
- pictures: if the model supports vision, you can attach pictures to your messages;
- helper commands:
/oocand/cueto steer the plot,/meand/youto say who is speaking; - transparent context: you can see what will be sent to the model with the
/contextcommand.
Injections:
- reminders (aka author's notes): a custom reminder of yours injected at a depth you choose;
- lorebooks are planned (see below).
Tools the model can use (switched on per story, in the story dossier's Tools tab):
- questions: the model can ask you questions with answers to pick from — you pick an answer instead of typing one;
- assistant notes: the model can keep private notes between turns to store e.g. characters' unspoken intentions, which can improve the plot development;
- web search: the model can search for facts on the internet;
- system info: the model can ask for the current date, time, and other local facts.
Import your existing content:
- character cards — into a story you've already started;
- SillyTavern chats — creates a new story that you can continue;
- a plain text file — will be split into turns, and you can play with the characters in it.
Planned (a release every one to two weeks):
- a central character registry: add and remove characters outside stories, and invite them into a story;
- lorebooks, including import from SillyTavern — not implemented yet, but you can import world info into the system message;
- per-character context for better character isolation;
- audio input: speak instead of typing your turns.
Requirements
- Platform: Windows / macOS / Linux.
- Local LLM provider(s) or an API key for cloud provider(s).
Providers supported: llama.cpp, KoboldCpp, Ollama, oMLX, LM Studio; OpenRouter and NanoGPT; and any other OpenAI-compatible server through the Generic OpenAI provider, by URL and key.
Installation
The script first installs the uv package manager — if you don't have it yet — and then
installs otaku with it.
macOS and Linux:
curl -LsSf https://otaku.sh/install.sh | sh
Windows:
irm https://otaku.sh/install.ps1 | iex
Other ways to install:
# directly with uv
uv tool install otaku

# alternatively, via Homebrew
brew trust enclavum/tap
brew install enclavum/tap/otaku
How to update:
otaku update
Launch
In the terminal, type one of the two commands:
otaku— opens the terminal UI;otaku web— makes the web interface available at http://localhost:9600 (can be configured).
On first start, you choose a provider and a model. Otaku automatically detects local LLM backends, while for cloud providers (OpenRouter, NanoGPT) you have to enter their API keys. You can also use any OpenAI-compatible provider by specifying its URL in the Generic OpenAI provider. After you've chosen a model, you land at the prompt. The model picker is also available later.
To give you an idea of the features and what play looks like, two sample stories are imported on first start.
Terminal user guide
Both the web interface and the terminal share the same functions; the difference is that in the
terminal you execute them with slash commands (the reference is available with /help), while
in the web interface the operations are available from the menu. In the description below, all
commands are given as they are called from the terminal.
Starting a story
You can start a new story with the /new command. You can also import a
SillyTavern chat with /import. Note that importing takes time, because it not only imports
the messages but also extracts characters and scenes from them (more on that below), though you
can cancel the extraction. You can also import a plain text file the same way; it will be split
into messages.
Playing
You send messages as usual, as your persona; the model infers which character to play from the
dialogue. There are helper commands — /you, /me, and /ooc — which only frame your prompt
with minimal injections like "you play as …" (you can see and configure these templates in
~/.otaku/configs/prompts.toml).
Mid-prompt, there are also two helper commands: /ooc and /cue. Both wrap the text after
them in an OOC block; the difference is that the /ooc block persists — right for a standing
note to the model — while the /cue block is sent only once — right for one-time story steering.
A few example prompts:
I follow the keeper deeper into the vault.— plain play/ooc Keep replies under three paragraphs.— out of character, a standing note"Who goes there?" I whisper. /ooc the keeper does not know me yet— play with an aside"Come away with me," I tell the keeper. /cue she refuses— play with a one-time steer/me Keeper: You are late again.— hint to the model that you are playing Keeper now/you Keeper— tell the model to play as Keeper/you Keeper: she is furious— the same but with a direction
For D&D roleplay, there is the /roll command: /roll 1d20+5 I search the alcove rolls the
dice, shows you what fell, and sends the result together with your action; /regen re-tells the
same roll rather than re-rolling it. Dice examples: 2d6+3, d20, 2d20kh1/2d20kl1.
During play, you can /undo (Ctrl+U) the last exchange and /regen (Ctrl+R) the last reply.
Story mode
You can switch between chat and story modes with /set mode chat or /set mode story; in the web
interface, use the layout buttons in the contents.
In story mode, you write text directly in the transcript. After you press Enter, the model
continues the story. If you want to add a new paragraph, press Ctrl+Enter (or Ctrl+J if that
doesn't work). You can just hit Enter without adding your text, and the model will continue. As in
chat mode, you can use the helper commands /ooc and /cue to steer the story.
Importing character cards
You can import character cards into the story you are playing with the /card command, where
you specify a card file to load (either PNG or JSON). The command automatically creates a
character in the lore (see below), and the character greets you. The card is treated as a normal
prompt — it's just that you are sending the card content as your message. The imported card can
later be edited in the /cast tab of the story dossier, and the context will change
accordingly.
Managing and forking stories
You can browse the stories you've played with the /stories (Ctrl+T) command. From the story
browser, you can choose a story to continue from any message, or fork from there to another
story. You can also fork a new version of the story you are playing with the /fork command.
Forking copies all scenes, characters, journals, etc. to the new branch. Note that you can edit
messages in the story browser with the e key.
Extracting summaries and lore
After you've sent around 50 messages, a summary pass starts automatically in the background once
you've been idle for 5 minutes, so it doesn't disturb your roleplay. You can also run it on
demand with /extract. You'll see a notification and its progress in the status bar, and you
can keep playing meanwhile — replies will just be slower while it runs.
Once the extraction completes, you can browse and edit the extracted summaries and characters
with the /lore and /cast commands. Summaries are editable, so you can correct them however
you like.
Understanding the context
The summaries only kick in once you have more than around 200 messages in the chat. The first 20 and the last 150 messages (both configurable) are always sent as is, to preserve maximum detail of recent story development and your prose style; everything in between is replaced with scene summaries. Even though summaries may exist up to the latest message, only the older ones are actually used. Nothing is included in the context by a condition or a trigger word.
The exact context composition, case by case, is described in
context_design.md.
You can use the /context command to see what exactly will be sent to the model.
Configuration and environments
Configuration files
Everything lives in the state dir, ~/.otaku by default:
configs/config.toml— context shape, extraction thresholds, encryption, backups, and web settings.configs/providers.toml— one section per provider (URL, API key). The model picker edits it for you, and API keys are stored sealed.configs/prompts.toml— every template otaku ever sends, editable.configs/state.toml,configs/models.toml— the app's own memory of your session and per-model settings.web/custom.cssandweb/fonts/— web interface customization, if needed.
The config files are written on first run and after that edited only surgically — line by line,
never rewritten as a whole: version migrations at launch and the picker's provider edits, each
keeping the pre-edit file in configs/backups/. prompts.toml migrates the same way: a
template you left unedited follows a new release's built-in, and one you've edited is never
touched.
Set OTAKU_CONFIG_DIR to run a completely separate environment:
OTAKU_CONFIG_DIR=~/.otaku-alt otaku.
Web interface settings
Local only, or over the network
By default, the web interface is available on the local machine only. You can make it available
over the network by changing the host parameter in the [web] section of
~/.otaku/configs/config.toml from localhost to 0.0.0.0.
If you go public, you should also consider turning on the next two parameters, https and
password, for privacy.
HTTPS protection
The web interface can serve over HTTPS. Turn on https in the config file and otaku generates a
self-signed certificate, which you can also replace with your own if you need to. Browsers will
show warnings about an untrusted certificate — that is unavoidable with a self-signed certificate,
but the encryption is real.
Password protection
When the web interface is available over the network, protect it with a password — set it in the same config file.
Customizing the web interface
To restyle the web interface, create ~/.otaku/web/custom.css; it overrides styles in the bundled
design. The custom properties it can set are listed in
docs/web_tokens.md.
Storage and privacy
Stories live in a local SQLite database; the database is snapshotted daily into the state dir, the last seven kept (configurable).
Pictures attached to a turn are kept beside the database, downsized and stripped of their metadata; they are not part of the daily snapshot.
Encryption at rest is disabled by default but is one config switch away (AES-256-GCM, sealed client-side): the key can live in your OS keychain, come from a command of your choice (a password manager, a hardware token), derive from a passphrase, or sit on disk. The request log and the pictures are sealed with the same cipher.
Provider API keys are always stored sealed, their key in the OS keychain.
Details in SECURITY.md.
Contributing
See CONTRIBUTING.md — a small, focused project; contributions that keep it sharp are very welcome.
License
1 maintainer

Metadata
1 maintainer
Release files for otaku 0.7.0
For a detailed explanation of source distributions (sdists) and built distributions (wheels), please see the package formats documentation.
Source distribution (sdist)
| File | Size | Uploaded | |
|---|---|---|---|
| otaku-0.7.0.tar.gz | 4.1 MB | Details |
Built distribution (wheel)
| File | Interpreter | ABI | Platform | Reset |
|---|---|---|---|---|
| otaku-0.7.0-py3-none-any.whl | Python 3 | none | any | Details |
Total release size: 6.5 MB
Release files / otaku-0.7.0.tar.gz
| Download URL | otaku-0.7.0.tar.gz |
|---|---|
| Size | 4.1 MB |
| Tags | Source |
|
SHA-256 checksum How to use checksums |
5f30f51014871c6724a48ff065fb77961bf7a283f921ad8be3b7cf0604f5a5f9
|
|
BLAKE2b-256 checksum How to use checksums |
5402232d4542469590d23205bbbcb25bb20bd3a6659d29822b329bcf5e5eed18
|
| Upload date | |
|
Uploaded using Trusted Publishing? What is trusted publishing? |
No |
| Uploaded via |
uv/0.5.9
|
Release files / otaku-0.7.0-py3-none-any.whl
| Download URL | otaku-0.7.0-py3-none-any.whl |
|---|---|
| Size | 2.3 MB |
| Tags | Python 3 |
|
SHA-256 checksum How to use checksums |
72f1c3dcebf81e1dca694ff920b75e7a106b88026118277b4f5830ce8dc46c44
|
|
BLAKE2b-256 checksum How to use checksums |
186401b41e3863d2831ed6e2b16d1aba8ac9ad58e33e113d7f0efecad04b0748
|
| Upload date | |
|
Uploaded using Trusted Publishing? What is trusted publishing? |
No |
| Uploaded via |
uv/0.5.9
|














