A Python package to help speed up the workflow of creating beautiful CLI apps.

Project description

pinsy (pronounced pin-si) formerly pins, is a powerful lightweight python package that helps speed up the workflow of creating visually apealing command-line applications.
Table of contents
Features
-
Ability to create a box around text
-
Ability to print colorful calendars
-
Ability align, indent and wrap text
-
Ability to create nested ordered and unordered lists
-
Ability to create dynamic HRs (Horizontal Rules)
-
Syntax Highlight for Json
-
Text effects like typewriter and reveal text effect.
-
Text coloring and styling
-
Supports 3 color modes (
4-bit,8-bit,24-bit) -
Prompting and validation
-
Basic cursor manipulation functions using
ansi sequences -
Highly optimized
-
And much more!
-
And pretty lightweight* too (under
160kb)
Dependencies
pinsy has three small dependencies.
-
colorama(to fix windows console for color output) -
cursor(to show/hide cursor in terminal) -
ansy(which i wrote specifically forpinsyfor color support)
Installation
Open terminal and run below command:
pip install pinsy
Basic Usage
There is a class in pinsy which is the heart of it, called Pins. Most of the time, you'll be using this class for all sorts of stuff. Rest of the package is just built around it or to extend it.
from pinsy import Pins


# Create an instance of Pins and pins is ready to be used or abused.

pins = Pins()
How to color text
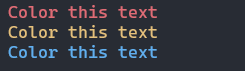
Use pins.colorize() method to color text using any of the three color modes.
text = "Color this text"

red_text = pins.colorize(text, fgcolor="red")

yellow_text = pins.colorize(text, fgcolor="yellow")

blue_text = pins.colorize(text, fgcolor="blue")


print(red_text)

print(yellow_text)

print(blue_text)
How to color a regex match
You can color only specific parts of text that match a regular expression, using pins.colorize_regex().
text = "Thi5 t3xt c0ntain5 a l0t 0f number5."

highlights = pins.colorize_regex(text, pattern="\d", fgcolor="red")

print(highlights)

pattern can also be a re compiled pattern.
pattern = re.compile(r"\d")

pins.colorize_regex(text, pattern=pattern, fgcolor="red")
How to print status messages
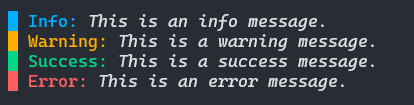
Status messages include info, warning, success, and error messages. There are four built-in methods for printing these messages.
pins.print_info("This is an info message.")

pins.print_warning("This is a warning message.")

pins.print_success("This is a success message.")

pins.print_error("This is an error message.")
Colors are set by default for these built-in messages. But you can also create custom status messages for more control, using pins.create_status().
message = "This is a hint message"

hint = pins.create_status("Hint", message, label_fg="green", text_fg="blue")

print(hint)

How to align text
You can easily align text in the terminal using pins.textalign_x() (for horizontal alignment) or pins.textalign_y (for vertical alignment).
# Horizontal Alignment

text = "Align this text"

print(pins.textalign_x(text, align="left"))

print(pins.textalign_x(text, align="center"))

print(pins.textalign_x(text, align="right"))

How to indent text
Use pins.indent_text() to indent text, Duh!
text = "Indent this 4 spaces"

print("|", pins.indent_text(text, indent=4))

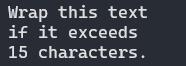
How to wrap text
You can wrap text using pins.wrap_text(). This method is merely a wrapper around the fill() method from textwrap module.
text = "Wrap this text if it exceeds 15 characters."

print(pins.wrap_text(text, 15))
How to create lists
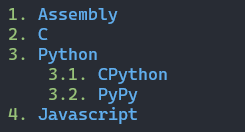
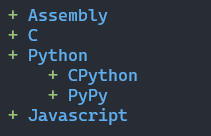
There are two types of lists that you can create, ordered and unordered, using pins.create_list_ordered() and pins.create_list_unordered() respectively.
# Ordered List

items = ["Assembly", "C", "Python", ["CPython", "PyPy"], "Javascript"]

ordered_list = pins.create_list_ordered(items, num_color="green", item_color="blue")

print(ordered_list)
# Unordered List

items = ["Assembly", "C", "Python", ["CPython", "PyPy"], "Javascript"]

unordered_list = pins.create_list_unordered(items, bullet_color="green", item_color="blue")

print(unordered_list)
You can further tweak these lists using other arguments of both of these methods.
How to take inputs of various types
There are 13 input methods that can be used take all sorts of inputs from users. almost all of them support colors.
# Taking integer input

number = pins.input_int(prompt="Enter a number: ",

                        prompt_color="dark_grey",

                        input_color="magenta")

print(f"You entered {number}")
# Taking y/n (yes or no)

answer = pins.input_question(prompt="Accept terms & conditions? (y/N) ", prompt_color="light_green")

if answer:

    print("Good boy. You may use Windows now.")

else:

    print("No? create Windows yourself then.")
There are other similar input functions for floats, strings, ip addresses, emails, passwords, urls, filepaths, and directory paths.
You can also use pins.inputc() to create your own input functions similar to the ones pinsy provides.
name = pins.inputc("Enter your name: ",

                   prompt_fg="dark_grey",

                   input_fg="light_green",

                   input_attrs=["italic"])

print("Your name in %s" % name)
You can also take multiline input using pins.input_multiline().
text = pins.input_multiline(prompt="Tell me about yourself: ", input_fg="green")

print(text)

Pressing enter twice submits the input.
There is another input function pins.input_menu(), which prints a menu in the terminal and lets user choose an option with up/down arrow keys.
menu = ["Login", "Signup", "Exit"]

choice = pins.input_menu(menu, bullet="■", bullet_fg="light_green",

                         selected_fg="green", normal_fg="dark_grey")


print("\nYou chose option %d" % choice)

It returns the index of choice that was selected. (starting from 1)
How to create HRs (horizontal rules)
Use pins.create_hr() to create a horizontal line, or pins.print_hr() to create and then print the line.
line = pins.create_hr(width=50, color="yellow")

print(line)

You can also use pins.print_hr() to just print the line, it takes the same arguments as pins.create_hr().
pins.print_hr(width=50, color="magenta", fill_char="▼")

pins.print_hr(width=50, color="blue", fill_char="▒")

pins.print_hr(width=50, color="green", fill_char="▲")

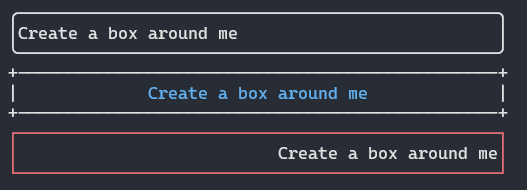
How to create box around text
You can easily create a box around text using pins.boxify().
text = "Create a box around me"

print(pins.boxify(text, width=50))

print(pins.boxify(text, width=50, x_align="center", charset="ascii", text_color="blue"))

print(pins.boxify(text, width=50, x_align="right", charset="box", border_color="red"))
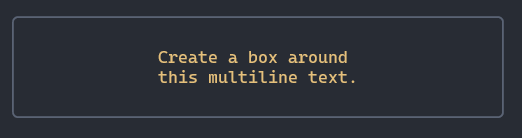
This method use the Box class under the hood. You can use it too.
from pinsy import Box


box = Box(width=50, x_align="center", y_align="center",

              charset="box_round", pad_y=1,

              border_color="dark_grey", text_color="yellow")


print(box.create("Create a box\naround this\nmultiline text."))
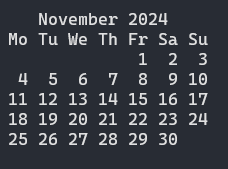
How to create a calendar
Use pins.get_calendar() to get a calendar of any month of any year.
print(pins.get_calendar())
You can also use pins.print_calendar() to print the calendar.
pins.print_calendar(month_color="red", date_color="blue")
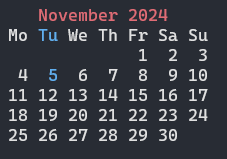
It's November 05, 2024 today.
How to pretty-print json
You can use pins.print_json() to pretty-print json.
import json


with open("person.json") as jfile:

    data = json.load(jfile)


pins.print_json(data)
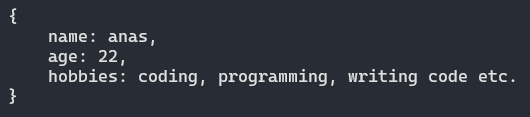
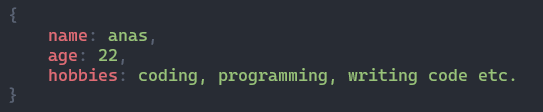
This method uses JsonHighlight class under the hood. and so can you!
from pinsy import JsonHighlight


data = {

        "name": "anas",

        "age": "22",

        "hobbies": "coding, programming, writing code etc."

}


jsh = JsonHighlight(quotes=False,

                    str_color="light_green",

                    number_color="light_yellow",

                    key_color="red",

                    symbol_color="dark_grey")


print(jsh.highlight(data))
How to print lengthy text for user to read easily
You can use pins.print_more() to print a lengthy multiline text in the terminal.
with open("temp.md") as md:

    text = md.read()


pins.print_more(text, prompt_fg="magenta")
It let's user read the text easily.
How to print multiline text as pages
Use pins.print_pages() to print a length multiline text as pages. somewhat similar to paginations in websites.
with open("temp.md") as md:

    text = md.read()


pins.print_pages(text, lines_per_page=16, statusbar_fg="yellow")
How to print info about your program
Similar to softwares and webapps, you can print info about your program/application using pins.print_about().
pins.print_about(name="pinsy",

                 version="1.0",

                 author="Anas Shakeel",

                 source_url="https://github.com/anas-shakeel/pinsy",

                 license="MIT",

                 platforms=["Windows", "Mac", "Linux"],

                 border_color="dark_grey",

                 heading_fg="dark_grey",

                 heading_bg="light_blue",

                 heading_attrs=["dark", "reverse"],

                 keys_color="dark_grey",

                 values_color="light_blue")
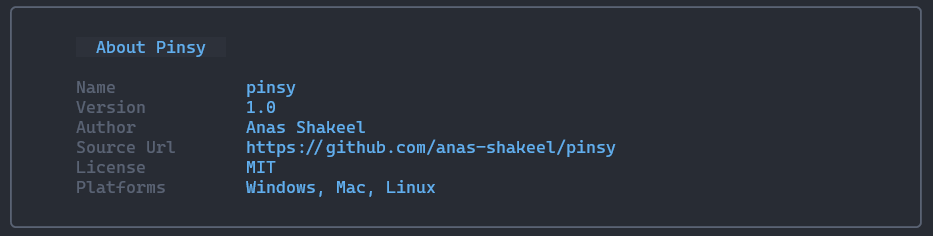
A bit verbose i know.
How to print text with typewriter effect
You can use the typewriter effect in two ways: using pins.typewrite() or using Typewrite class (which pins.typewrite() uses under the hood).
# Using pins.typewrite

text = "Print this text with the typewriter effect."

pins.typewrite(text, interval=0.04, hide_cursor=False)
# Using Typewrite class

writer = Typewriter(0.04)

writer.write(text)
Output is exactly the same.
How to print text with reveal effect
You can use the pins.reveal_text() or RevealText class to print text with reveal effect.
# Using pins.reveal_text

text = "Print this text with the reveal-text effect."

pins.reveal_text(text, initial_color="black", final_color="blue")

# Using RevealText class

revealer = RevealText(initial_color="black", final_color="blue")

revealer.reveal(text)
Output will be somewhat similar to previous output. "somewhat" because there is randomness added to the effect. each time it outputs a slightly different result.
This is not a True-Reveal Effect. It's just an illusion (sort of). let's see this effect in slow-motion with a different initial_color.
pins.reveal_text(text, interval=0.1, max_seconds=3, initial_color="red", final_color="blue")

It scrambles the text and then solves each letter using bruteforce method. max_seconds is the number of maximum seconds to let this effect run, and prints the original text afterwards.
And there's much more that you can do...
Compatibility
Tested on Windows, Mac, and Linux (ubuntu) with python version 3.9, 3.10, 3.11, 3.12, 3.13.
Pinsy CLI
Coming soon!


Download files
Download the file for your platform. If you're not sure which to choose, learn more about installing packages.
Source Distribution
Built Distribution
Filter files by name, interpreter, ABI, and platform.
If you're not sure about the file name format, learn more about wheel file names.
Copy a direct link to the current filters
File details
Details for the file pinsy-0.2.0.tar.gz.
File metadata
- Download URL: pinsy-0.2.0.tar.gz
- Upload date:
- Size: 46.4 kB
- Tags: Source
- Uploaded using Trusted Publishing? No
- Uploaded via: twine/5.1.1 CPython/3.13.0
File hashes
| Algorithm | Hash digest | |
|---|---|---|
| SHA256 |
710a49c33ecfa4a341c1691e3949b052eed42e7da93d3c88ed8fa1752c9a1652
|
|
| MD5 |
b67dfc477e8383ea9d6b1d576b49ba8b
|
|
| BLAKE2b-256 |
815eb5d4f08bb6cfa1061ee78ac14b352bb6c25b17ee33666802bb1656c72a27
|
File details
Details for the file pinsy-0.2.0-py3-none-any.whl.
File metadata
- Download URL: pinsy-0.2.0-py3-none-any.whl
- Upload date:
- Size: 41.5 kB
- Tags: Python 3
- Uploaded using Trusted Publishing? No
- Uploaded via: twine/5.1.1 CPython/3.13.0
File hashes
| Algorithm | Hash digest | |
|---|---|---|
| SHA256 |
e20cb8cc61c097c410a50f3619bd3757c63e236ff6d3542a0f7df2b858deb26a
|
|
| MD5 |
e03b34cfce4049830a542639f6a284b0
|
|
| BLAKE2b-256 |
b5c83cd13282c1833f067320f6db27a7f75a8c79101b859de5436e1254f99cc3
|


