
This release is a pre-release and may not be stable for production use.

MemGPT
Try out our MemGPT chatbot on Discord!
⭐ NEW: You can now run MemGPT with open/local LLMs and AutoGen! ⭐



🤖 Create perpetual chatbots with self-editing memory!

🗃️ Chat with your data - talk to your local files or SQL database!

Quick setup
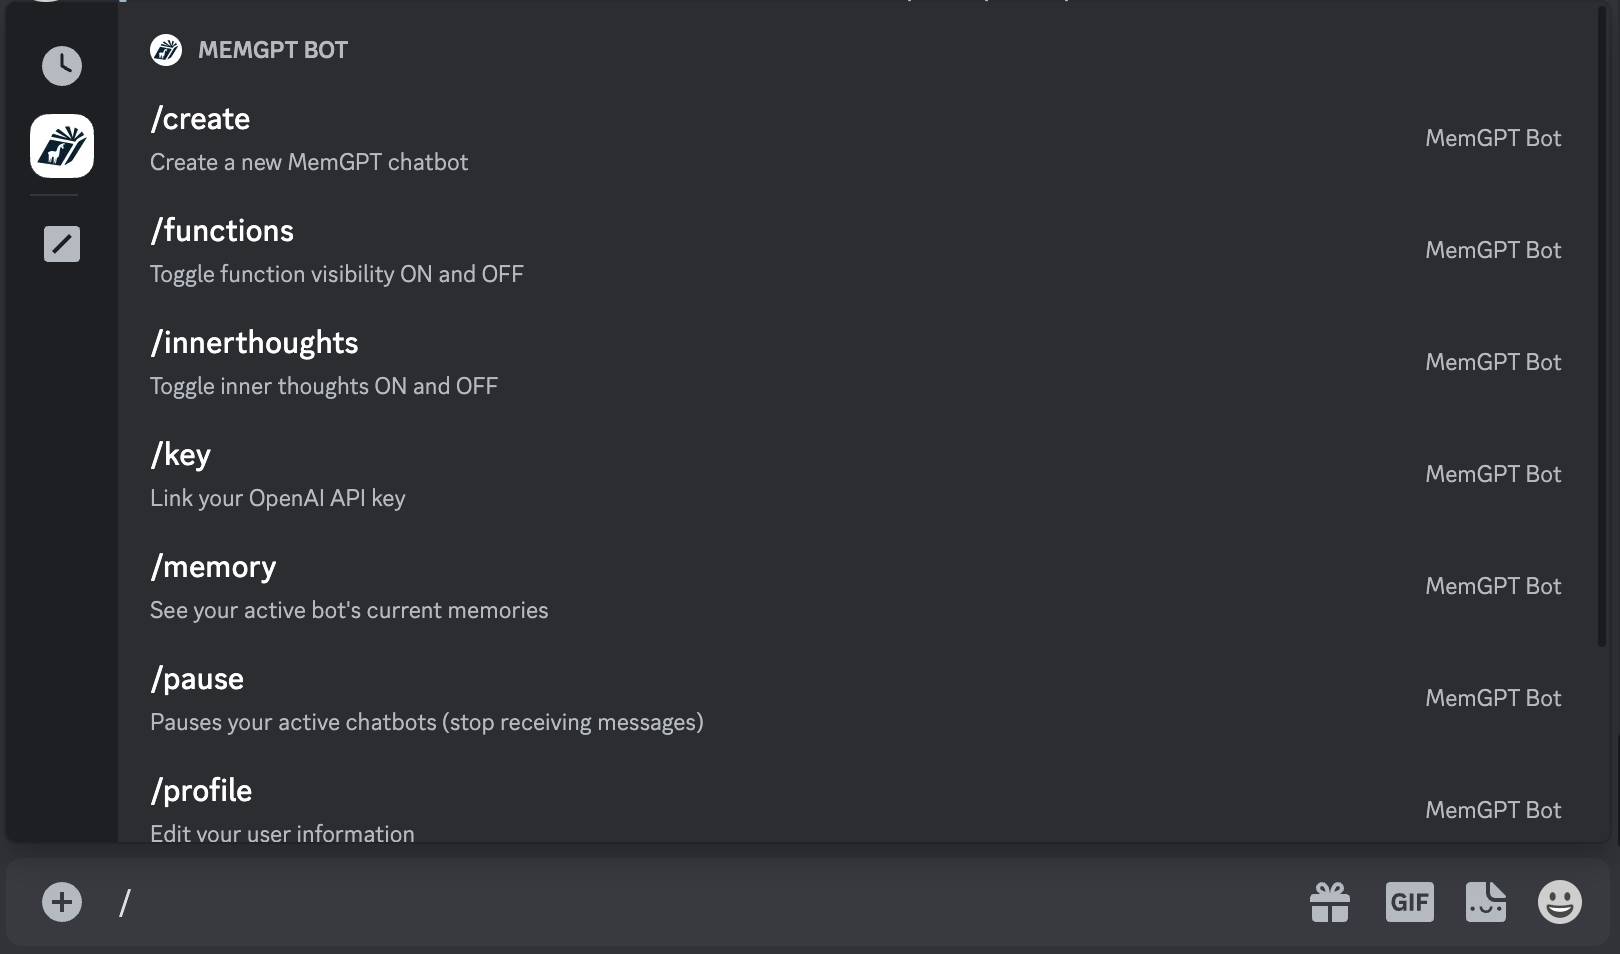
Join Discord and message the MemGPT bot (in the #memgpt channel). Then run the following commands (messaged to "MemGPT Bot"):
/profile(to create your profile)/key(to enter your OpenAI key)/create(to create a MemGPT chatbot)
Make sure your privacy settings on this server are open so that MemGPT Bot can DM you:
MemGPT → Privacy Settings → Direct Messages set to ON

You can see the full list of available commands when you enter / into the message box.
What is MemGPT?
Memory-GPT (or MemGPT in short) is a system that intelligently manages different memory tiers in LLMs in order to effectively provide extended context within the LLM's limited context window. For example, MemGPT knows when to push critical information to a vector database and when to retrieve it later in the chat, enabling perpetual conversations. Learn more about MemGPT in our paper.
Running MemGPT locally
Install MemGPT:
pip install -U pymemgpt
Now, you can run MemGPT and start chatting with a MemGPT agent with:
memgpt run
If you're running MemGPT for the first time, you'll see two quickstart options:
- OpenAI: select this if you'd like to run MemGPT with OpenAI models like GPT-4 (requires an OpenAI API key)
- MemGPT Free Endpoint: select this if you'd like to try MemGPT on a top open LLM for free (currently variants of Mixtral 8x7b!)
Neither of these options require you to have an LLM running on your own machine. If you'd like to run MemGPT with your custom LLM setup (or on OpenAI Azure), select Other to proceed to the advanced setup.
Advanced setup
You can reconfigure MemGPT's default settings by running:
memgpt configure
In-chat commands
You can run the following commands in the MemGPT CLI prompt while chatting with an agent:
/exit: Exit the CLI/attach: Attach a loaded data source to the agent/save: Save a checkpoint of the current agent/conversation state/dump: View the current message log (see the contents of main context)/dump <count>: View the last messages (all if is omitted)/memory: Print the current contents of agent memory/pop: Undo the last message in the conversation/pop <count>: Undo the last messages in the conversation. It defaults to 3, which usually is one turn around in the conversation/retry: Pops the last answer and tries to get another one/rethink <text>: Will replace the inner dialog of the last assistant message with the/rewrite: Will replace the last assistant answer with the given text to correct or force the answer/heartbeat: Send a heartbeat system message to the agent/memorywarning: Send a memory warning system message to the agent
Once you exit the CLI with /exit, you can resume chatting with the same agent by specifying the agent name in memgpt run --agent <NAME>.
Documentation
See full documentation at: https://memgpt.readme.io
Installing from source
To install MemGPT from source, start by cloning the repo:
git clone git@github.com:cpacker/MemGPT.git
Then navigate to the main MemGPT directory, and do:
pip install -e .
Now, you should be able to run memgpt from the command-line using the downloaded source code.
If you are having dependency issues using pip install -e ., we recommend you install the package using Poetry (see below). Installing MemGPT from source using Poetry will ensure that you are using exact package versions that have been tested for the production build.
Installing from source (using Poetry)
First, install Poetry using the official instructions here.
Then, you can install MemGPT from source with:
git clone git@github.com:cpacker/MemGPT.git
poetry shell
poetry install
Python integration (for developers)
The fastest way to integrate MemGPT with your own Python projects is through the MemGPT client class:
from memgpt import MemGPT

# Create a MemGPT client object (sets up the persistent state)
client = MemGPT(
  quickstart="openai",
  config={
    "openai_api_key": "YOUR_API_KEY"
  }
)

# You can set many more parameters, this is just a basic example
agent_id = client.create_agent(
  agent_config={
    "persona": "sam_pov",
    "human": "cs_phd",
  }
)

# Now that we have an agent_name identifier, we can send it a message!
# The response will have data from the MemGPT agent
my_message = "Hi MemGPT! How's it going?"
response = client.user_message(agent_id=agent_id, message=my_message)
More in-depth example of using MemGPT Client
from memgpt.config import AgentConfig
from memgpt import MemGPT
from memgpt.cli.cli import QuickstartChoice


client = MemGPT(
    # When auto_save is 'True' then the agent(s) will be saved after every
    # user message.  This may have performance implications, so you
    # can otherwise choose when to save explicitly using client.save().
    auto_save=True,

    # Quickstart will automatically configure MemGPT (without having to run `memgpt configure`
    # If you choose 'openai' then you must set the api key (env or in config)
    quickstart=QuickstartChoice.memgpt_hosted,

    # Allows you to override default config generated by quickstart or `memgpt configure`
    config={}
)

# Create an AgentConfig with default persona and human txt
# In this case, assume we wrote a custom persona file "my_persona.txt", located at ~/.memgpt/personas/my_persona.txt
# Same for a custom user file "my_user.txt", located at ~/.memgpt/humans/my_user.txt
agent_config = AgentConfig(
    name="CustomAgent",
    persona="my_persona",
    human="my_user",
)

# Create the agent according to AgentConfig we set up. If an agent with
# the same name already exists it will simply return, unless you set
# throw_if_exists to 'True'
agent_id = client.create_agent(agent_config=agent_config)

# Create a helper that sends a message and prints the assistant response only
def send_message(message: str):
    """
    sends a message and prints the assistant output only.
    :param message: the message to send
    """
    response = client.user_message(agent_id=agent_id, message=message)
    for r in response:
        # Can also handle other types "function_call", "function_return", "function_message"
        if "assistant_message" in r:
            print("ASSISTANT:", r["assistant_message"])
        elif "thoughts" in r:
            print("THOUGHTS:", r["internal_monologue"])

# Send a message and see the response
send_message("Please introduce yourself and tell me about your abilities!")
Support
For issues and feature requests, please open a GitHub issue or message us on our #support channel on Discord.
Datasets
Datasets used in our paper can be downloaded at Hugging Face.
🚀 Project Roadmap
- Release MemGPT Discord bot demo (perpetual chatbot)
- Add additional workflows (load SQL/text into MemGPT external context)
- Integration tests
- Integrate with AutoGen (discussion)
- Add official gpt-3.5-turbo support (discussion)
- CLI UI improvements (issue)
- Add support for other LLM backends (issue, discussion)
- Release MemGPT family of open models (eg finetuned Mistral) (discussion)


Release files for pymemgpt-nightly 0.2.12.dev20240117103947
For a detailed explanation of source distributions (sdists) and built distributions (wheels), please see the package formats documentation.
Source distribution (sdist)
| File | Size | Uploaded | |
|---|---|---|---|
| pymemgpt_nightly-0.2.12.dev20240117103947.tar.gz | 397.9 kB | Details |
Built distribution (wheel)
| File | Interpreter | ABI | Platform | Reset |
|---|---|---|---|---|
| pymemgpt_nightly-0.2.12.dev20240117103947-py3-none-any.whl | Python 3 | none | any | Details |
Total release size: 851.6 kB
Release files / pymemgpt_nightly-0.2.12.dev20240117103947.tar.gz
| Download URL | pymemgpt_nightly-0.2.12.dev20240117103947.tar.gz |
|---|---|
| Size | 397.9 kB |
| Tags | Source |
|
SHA-256 checksum How to use checksums |
4244abacdd523b6ca578e8d34874b7d59e591fbba33eb640eb8e3790353f24b1
|
|
BLAKE2b-256 checksum How to use checksums |
adfd9f67dbea5a2b10f603179fb3f9217fd7fdb685dc6a11506f017506994a90
|
| Upload date | |
|
Uploaded using Trusted Publishing? What is trusted publishing? |
No |
| Uploaded via |
poetry/1.7.1 CPython/3.11.7 Linux/6.2.0-1018-azure
|
Release files / pymemgpt_nightly-0.2.12.dev20240117103947-py3-none-any.whl
| Download URL | pymemgpt_nightly-0.2.12.dev20240117103947-py3-none-any.whl |
|---|---|
| Size | 453.7 kB |
| Tags | Python 3 |
|
SHA-256 checksum How to use checksums |
1ad8196700a85b65d0b20ea091a184776269a0a7271ddcbcf1569e4c33b7c8e4
|
|
BLAKE2b-256 checksum How to use checksums |
fc786bfb7555b86ad9a3fdca5f378e4cc8db0aa61466293b3755930480389c79
|
| Upload date | |
|
Uploaded using Trusted Publishing? What is trusted publishing? |
No |
| Uploaded via |
poetry/1.7.1 CPython/3.11.7 Linux/6.2.0-1018-azure
|














