
TensorLens
demo in seconds with uvx tensorlens if you have uv installed.
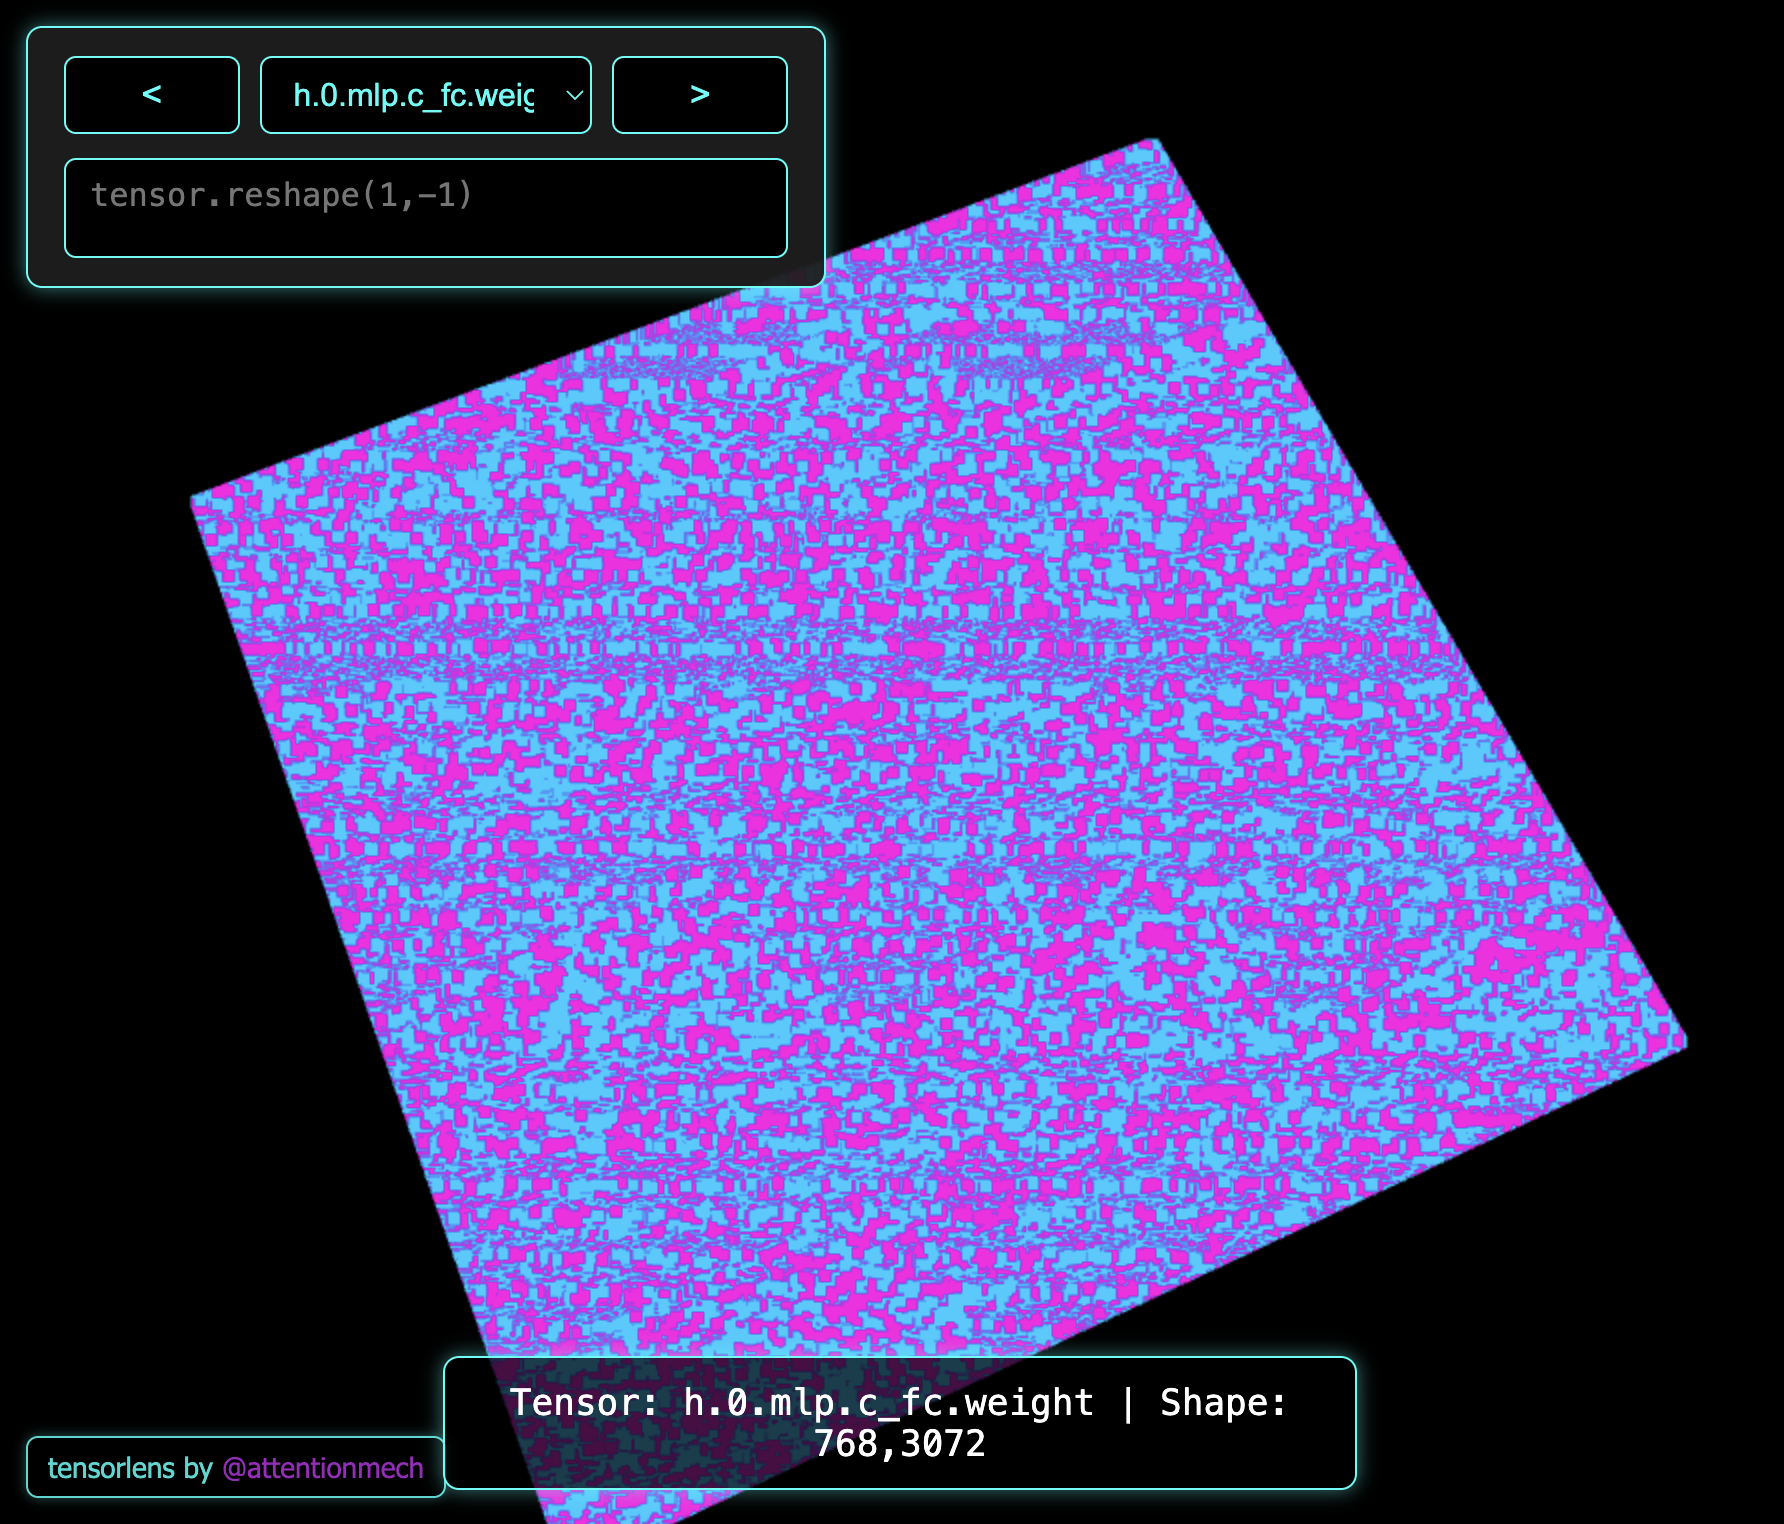
TensorLens is a minimalistic python library to trace and visualise tensors. It provides an interactive viewer for inspecting these tensors. Currently supporting only 1D,2D and 3D tensors. Works on jupyter/colab too.
Installation
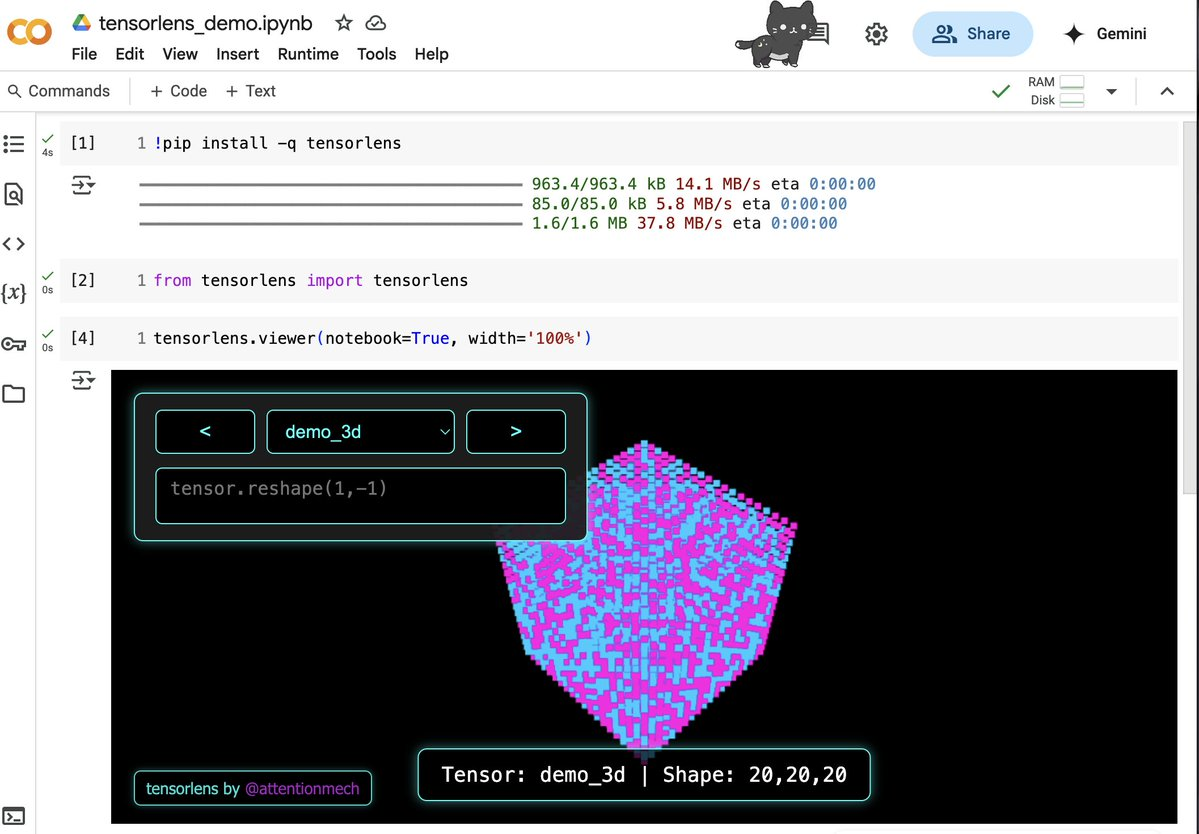
try in colab in 3 lines:

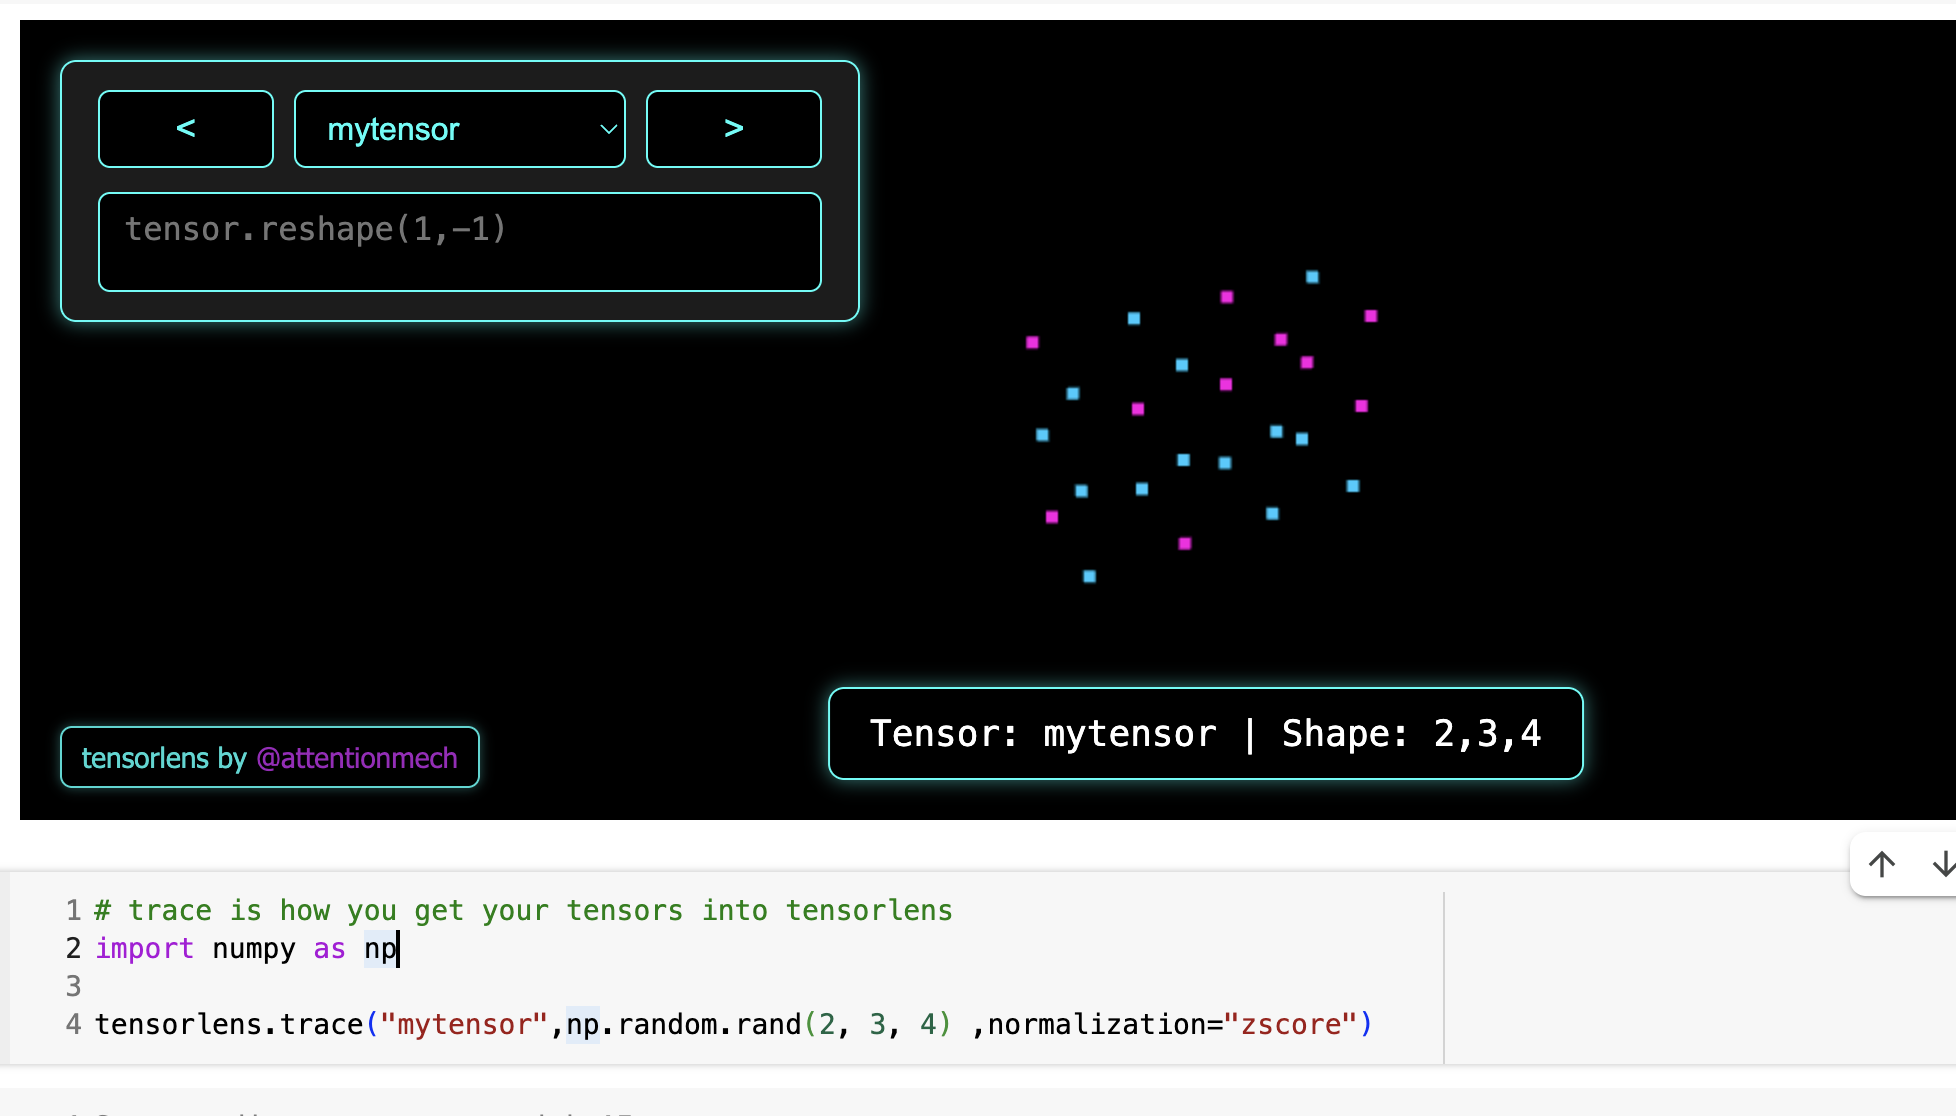
Source of data is backend, hence you can change params like normalisation strategy and they will reflect immediately:
Install TensorLens from PyPI:
pip install tensorlens
For a quick demo
uvx tensorlens
or
uv run --with tensorlens tensorlens
Demos with LLMs
Have done some demos with models and they can be run via my other script repo smolbox (or you can just use the code directly).
Usage
It can be used to visualise and manipulate tensors using UI. for example this code visualises GPT2 state dict tensors
import torch
import numpy as np
from transformers import GPT2Model, GPT2Config
from tensorlens.tensorlens import trace, viewer

[trace(key, tensor.detach().cpu().numpy()) for key, tensor in GPT2Model.from_pretrained('gpt2-large').state_dict().items()]

viewer(height='100%')
you can run the above code via uv like this uv run --with torch,transformers,tensorlens demo.py where demo.py is file where you pasted this example.
If you are superlazy, you can run this recipe via my other project smolbox
uv run --with git+https://github.com/attentionmech/smolbox smolbox inspect/tensorlens_weights
Trace Operator
The core operation of TensorLens is the trace function.
import numpy as np
from tensorlens.tensorlens import trace

# Example: Tracing a 2D tensor
tensor = np.random.randint(-100, 100, size=(10, 10))
trace("my_tensor", tensor)
Parameters:
key: A unique string identifier for the tensor.tensor: The tensor to trace (must be a NumPy array).normalize_range: Tuple specifying the range for clipping (default:(-1.0, 1.0)).normalization: Defines the normalization strategy:"clip": Clips values within the specified range."minmax": Scales values between [-128, 127] based on tensor's min and max."zscore": Normalizes based on z-score and clips outliers."none": No normalization (assumes the tensor is already in the desired range).
Viewer
The library includes a web-based viewer for exploring your tensors. You can run a local server or view the tensors in Jupyter/Colab notebooks.
from tensorlens.tensorlens import viewer

# Start the viewer server
viewer(host="127.0.0.1", port=8000, notebook=True)
IMPORTANT NOTE: you can disable the numpy code execution (generally not a good practice) if you are exposing it on a network beyond your personal workflow.
Command-Line Interface
Options:
--debug: Run in debug server mode.--notebook: Run in notebook/Colab mode.--workers: Number of server workers.--host: Host to bind.--port: Port to bind.--downsample_threshold: Points threshold after which downsampling occurs (default 1M).
Example
from tensorlens import trace, viewer
import numpy as np

# Trace a few tensors
trace("demo_1d", np.random.randint(-100, 100, size=30))
trace("demo_2d", np.random.randint(-100, 100, size=(20, 20)))
trace("demo_3d", np.random.randint(-100, 100, size=(20, 20, 20)))

# Start the viewer server
viewer(port=8080, debug=True)
Contributing
This repo is consisting of frontend and backend both. In the python package we embed the packed webapp. A very simple dev workflow is to create a local venv and then use sh scripts/build_webapp.sh && uv pip install --no-cache . command to build webapp, then build python package. this will ensure every change is part of the final tensorlens package and you can then run it via tensorlens on command line.
if you are doing trace operation, it will take some time to reflect on the UI if you have not called the viewer again. this is because we do a call to backend at some frequency not like continuously. This can be improved via some other message passing approaches too.
Citation
@article{attentionmech2025tensorlens,
  title={tensorlens: tensor visualisation tool},
  author={attentionmech},
  year={2025}
}
1 maintainer

Metadata
1 maintainer
Release files for tensorlens 0.0.3
For a detailed explanation of source distributions (sdists) and built distributions (wheels), please see the package formats documentation.
Source distribution (sdist)
| File | Size | Uploaded | |
|---|---|---|---|
| tensorlens-0.0.3.tar.gz | 962.9 kB | Details |
Built distribution (wheel)
| File | Interpreter | ABI | Platform | Reset |
|---|---|---|---|---|
| tensorlens-0.0.3-py3-none-any.whl | Python 3 | none | any | Details |
Total release size: 1.9 MB
Release files / tensorlens-0.0.3.tar.gz
| Download URL | tensorlens-0.0.3.tar.gz |
|---|---|
| Size | 962.9 kB |
| Tags | Source |
|
SHA-256 checksum How to use checksums |
b6b64070ae6da1a752e007b3a4a0df884fec8a97146559ca3e3b9a561dfd4118
|
|
BLAKE2b-256 checksum How to use checksums |
ffc76aa13d98c4c3b3f600bbb068af1355bf85ad8571cf374c1c3a359d399fc1
|
| Upload date | |
|
Uploaded using Trusted Publishing? What is trusted publishing? |
No |
| Uploaded via |
twine/6.1.0 CPython/3.12.7
|
Release files / tensorlens-0.0.3-py3-none-any.whl
| Download URL | tensorlens-0.0.3-py3-none-any.whl |
|---|---|
| Size | 966.0 kB |
| Tags | Python 3 |
|
SHA-256 checksum How to use checksums |
8e60d9309d50153af6e44294c95fc719920b4fc73ac5c4a8e1b6aa710719f2cc
|
|
BLAKE2b-256 checksum How to use checksums |
bbcb0105b445a5947f5a7e48fe9cfe6e7ce9e1bb8088bb318606dda3cc84f895
|
| Upload date | |
|
Uploaded using Trusted Publishing? What is trusted publishing? |
No |
| Uploaded via |
twine/6.1.0 CPython/3.12.7
|














