
terminalCanvas
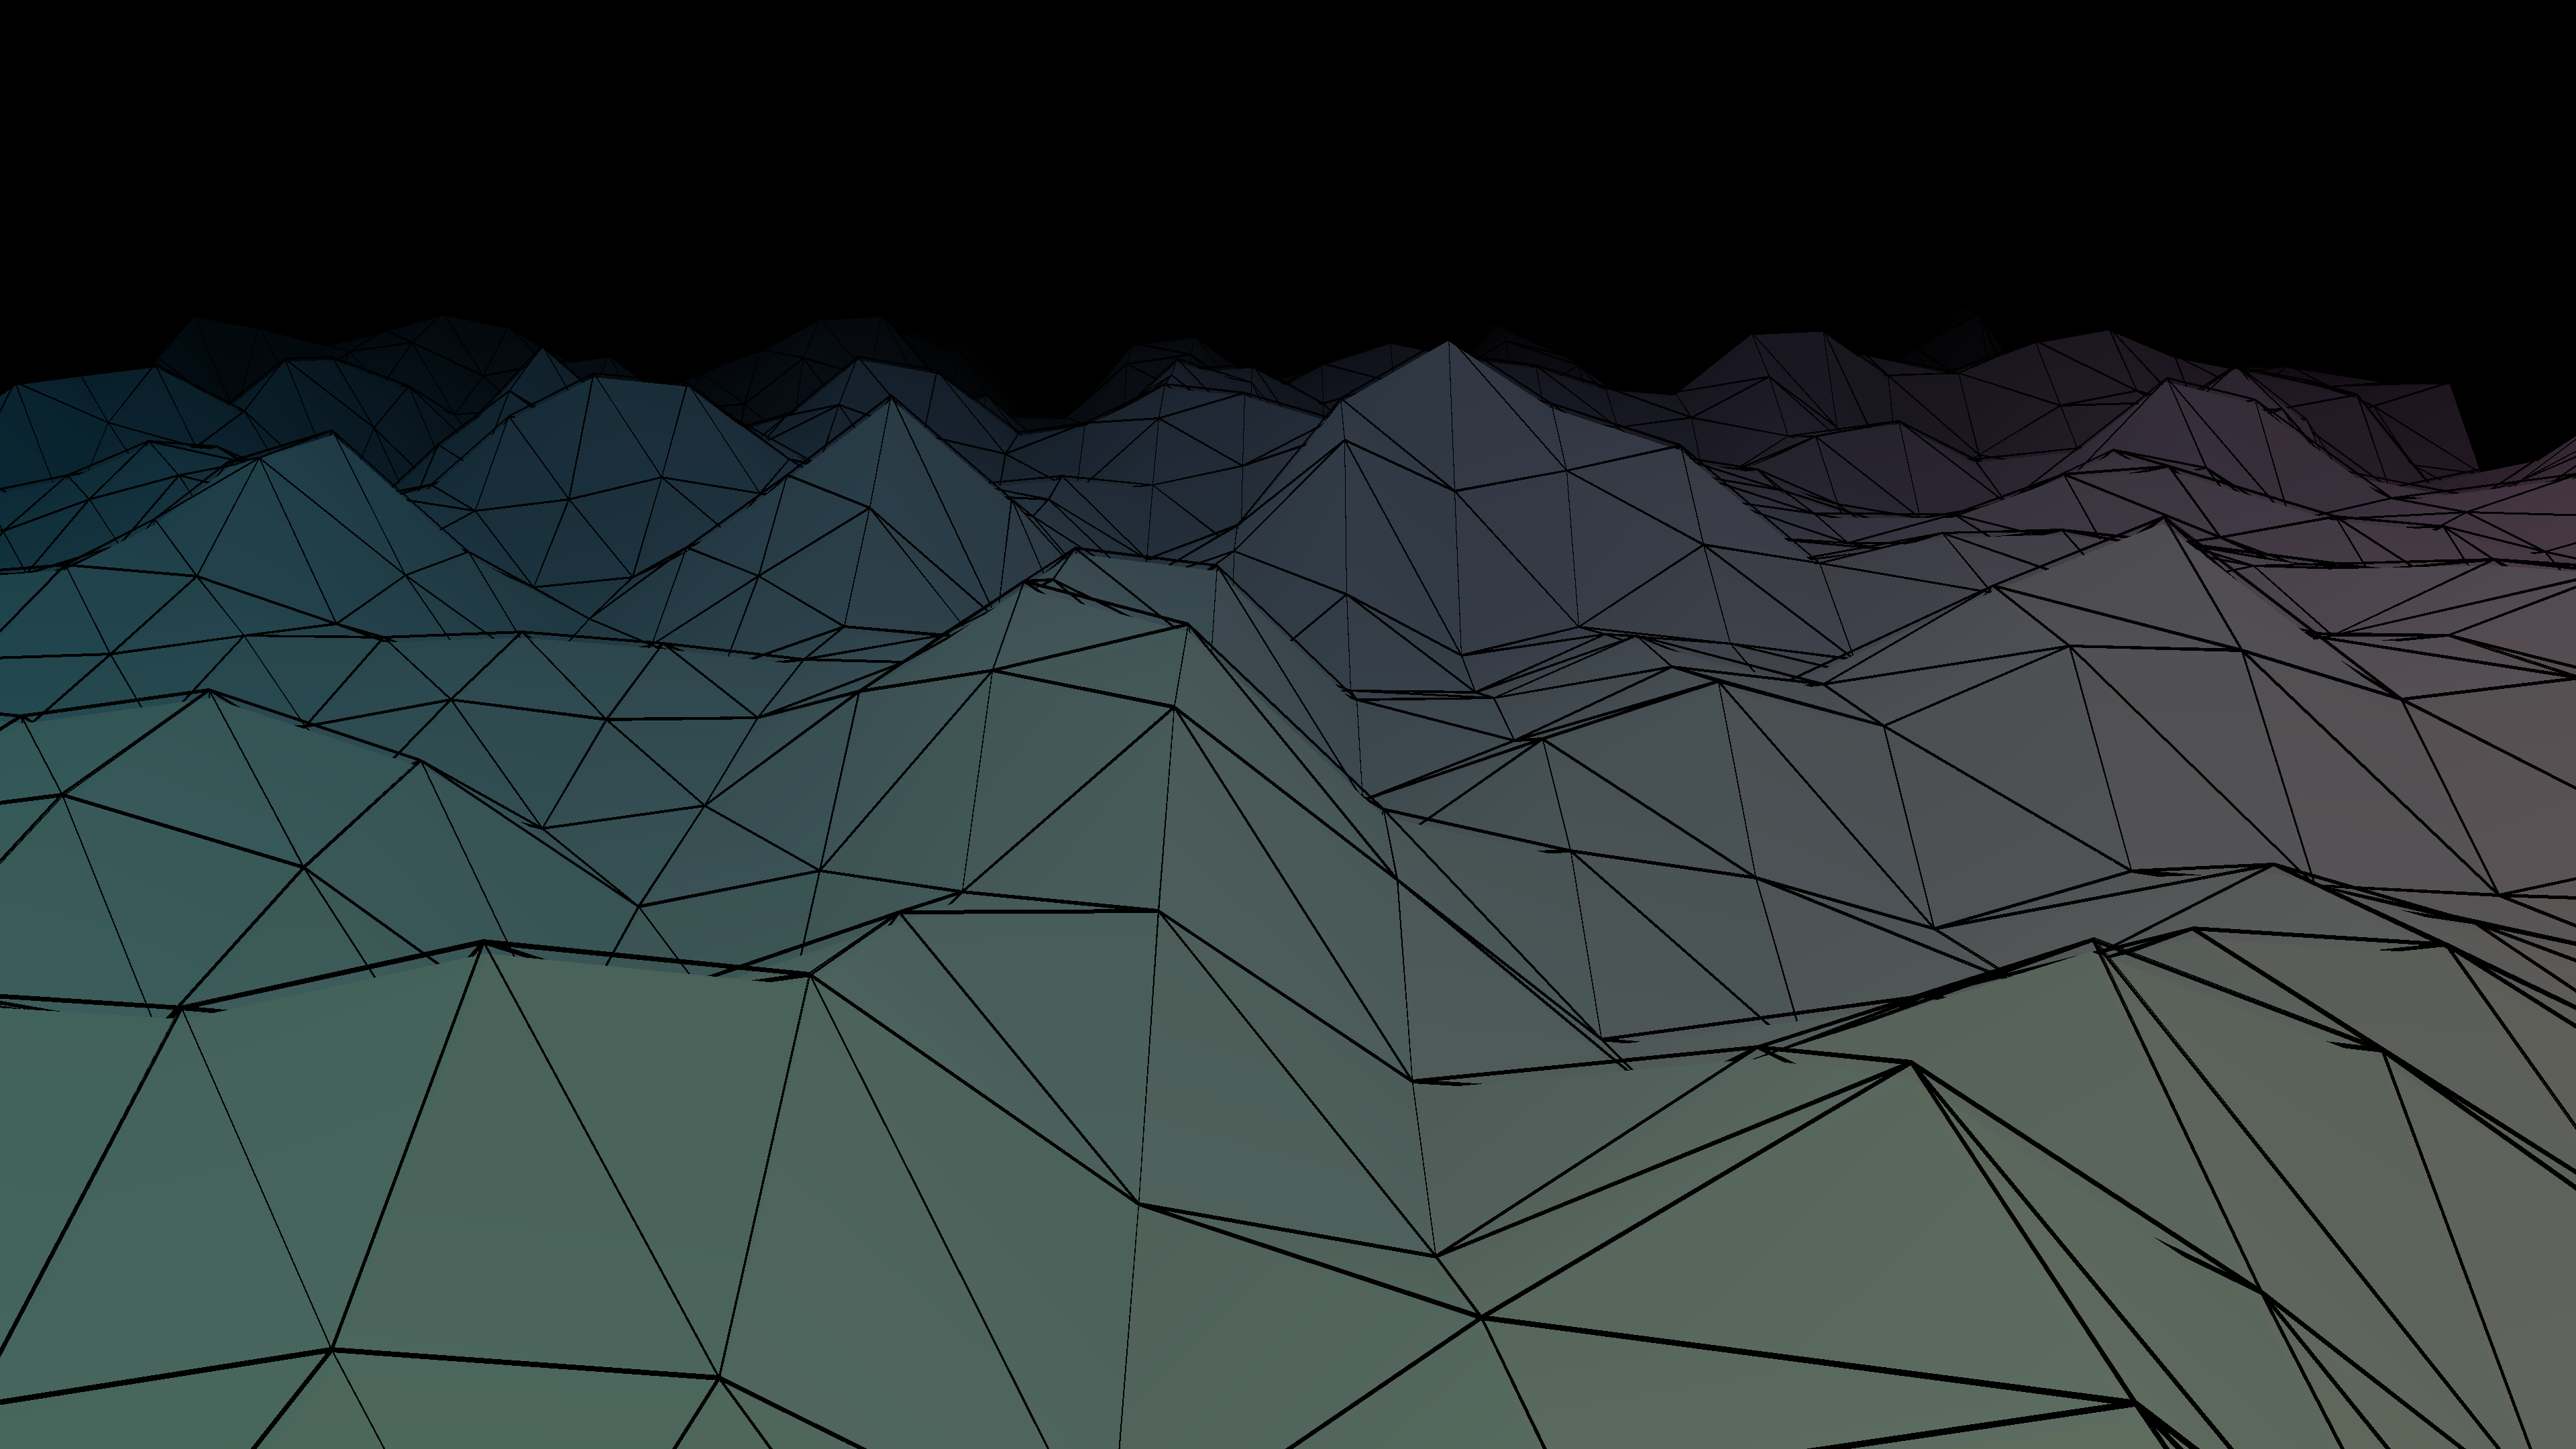
terminalCanvas is a Python library intended for creating and displaying raster graphics on the terminal, capable of rendering 2D and 3D scenes.
Installation & Requirements
Install terminalCanvas through PyPI (change the py alias if needed):
py -m pip install terminalCanvas
Or, if you want to install it using Git:
py -m pip install git+https://github.com/RandomMaerks/terminalCanvas.git
The terminalCanvas module currently requires Python of version 3.10 and up, although I've only tested on Python 3.11.
The module uses Pillow for image processing, as well as NumPy for image-to-array conversion and other array-related operations. They should automatically install along with the main installation.
How it works
Because most monospaced fonts are quite narrow (width:height ratio is about 1:2), we can use the half-box character ▀ to represent one squarish pixel, along with the other empty half to represent another pixel below it.
Additionally, some terminal support changing colours independently for a character (called the foreground) and its own background using ANSI escape sequences, so we're able to fully simulate two whole pixels whose colours can be independently changed.
To create an entire canvas, we just need to fill up every space in the terminal with this character. Since one single character is able to represent two pixels, the total number of characters used should be width * (height // 2), where width and height are the possible number of lines and columns respectively to write text for any given window size.
Basic usage
The information below is only showing the very basics. For more info, please consult the wiki (doesn't exist yet lol).
Start by importing the main module. For convenience, set a short alias for the module, tc for example.
import terminalCanvas as tc
All classes and functions provided by the public API will now be called using the syntax tc.<class_name> or tc.<function_name>(), with the prefix tc..
● 2D rendering
terminalCanvas has a class for 2D rendering called TCanvas. Create a new instance of TCanvas and assign it to a variable with a memorable name, such as canvas:
canvas = tc.TCanvas()
This is the canvas you'll be using to draw. You can get the resolution of the canvas by calling canvas.width or canvas.height, as well as the precalculated canvas.wCenter and canvas.hCenter for the centres.
Some properties of the canvas can be changed. For example, to change the background colour, use the background() method of TCanvas, which requires a three-item tuple representing the desired RGB value.
canvas.background((125, 170, 245))
To resize the canvas, use:
canvas.resize()
This should come in handy when you need to resize the terminal window during runtime. The canvas will not change resolution by itself.
To create a graphical object such as a line, you can call the Line class to create a new instance. Assign it to another variable like line.
line = tc.Line(0, 0, canvas.width, canvas.height, color=(255, 0, 0))
This will create an instance of the Line class with:
- two points, one at
(0, 0)and the other at(canvas.width, canvas.height); - colour (RGB value) of
(255, 0, 0), which is red.
There are other geometric shapes like Triangle and Rectangle, as well as other useful objects such as Text or Image.
Anyway, we've created an object, but it's not on the canvas yet. To actually draw the line, use the draw() method, and put the desired object as the argument:
canvas.draw(line)
This will put all the pixels from the object into the main canvas.
Now, to show the canvas and see what you've drawn, use:
canvas.show()
This will print everything in our canvas to the terminal.
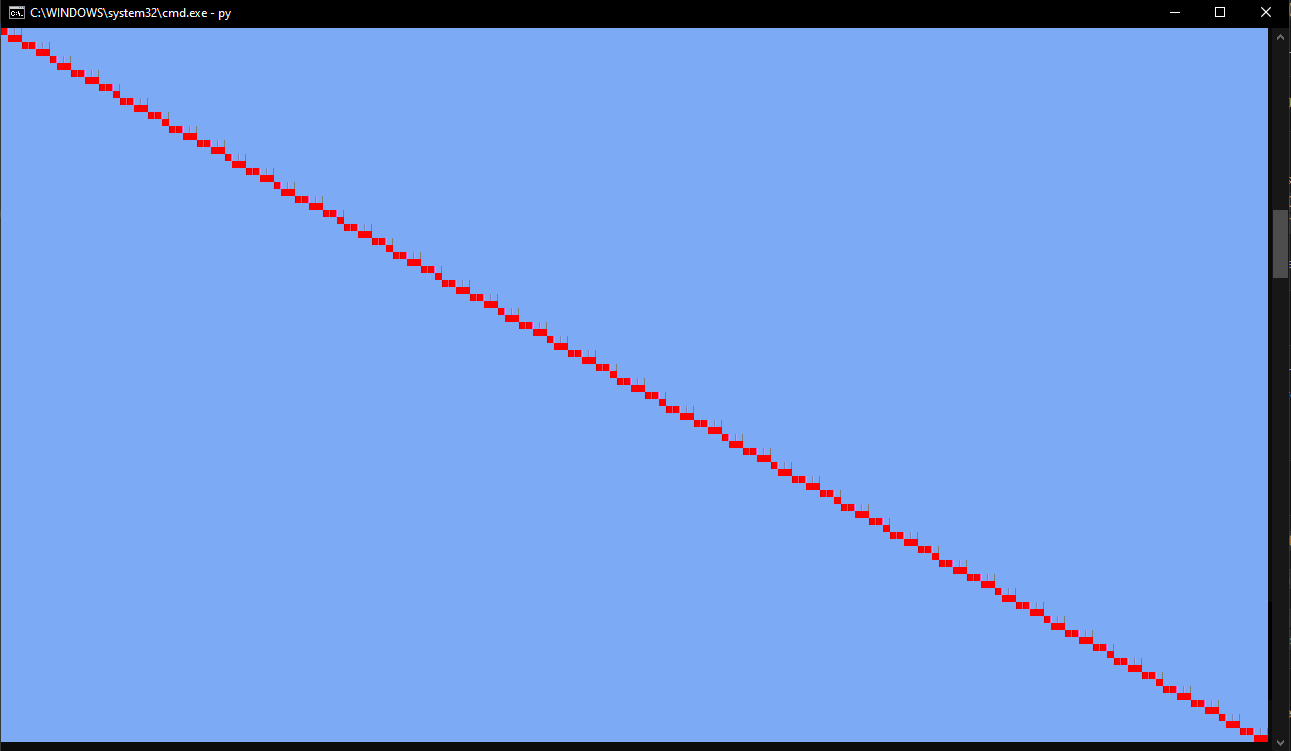
However, canvas.show() only shows the canvas once. You can put it in a loop to keep it running, along with keyPressed() to stop the loop using keyboard input:
while True:
    if canvas.keyPressed("ESC"):
        break

    canvas.clear()

    # all the drawing stuff

    canvas.show()
The if-condition checks if the escape key is pressed, and breaks out of the while loop when the condition is true. You can use other keys if you want.
The clear() method allows the canvas to be completely clean before redrawing anything for the next frame. Without calling this method, anything in the last frame will still be visible on the next. Especially with moving objects, there will be a "trailing" effect which you may or may not want.
Lastly, you should put canvas.end() after everything to properly erase everything and restore the cursor.
The whole thing should be something like this:
import terminalCanvas as tc

canvas = tc.TCanvas()
canvas.background((125, 170, 245))

line = tc.Line(
    0, 0,
    canvas.width, canvas.height,
    color=(255, 0, 0)
)

while True:
    if canvas.keyPressed("ESC"):
        break

    canvas.clear()
    canvas.draw(line)
    canvas.show()

canvas.end()
● 3D rendering
TCanvas also supports 3D rendering, so we can keep using our canvas instance.
There are 3D objects such as Point3D, Line3D, and Triangle3D. These are very similar to their 2D counterparts, though with the addition of the third dimension added for each vertex.
You can simply create an instance just like with any other classes we've looked at:
line = tc.Line3D(0, 0, 0, canvas.width, canvas.height, 1, color=(255, 0, 0))
However, when we draw this on the canvas, it does not look very impressive.
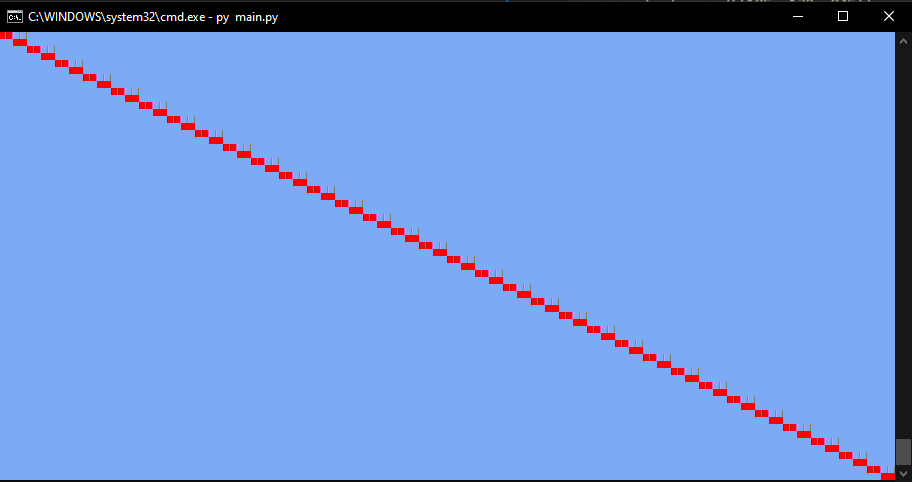
TCanvas interprets the "third dimension" as an indicator for "distance". Basically, the lower the z-value, the "closer" the object, and the higher the z-value, the "further".
You can then change the z-value for each object to control which one appears in front of the other. Occasionally, if objects (like triangles) have vertices with different z-values, you can have them "intersect" with each other.
Now, this is cool and all, but we're not really in 3D, are we? When the term "3D rendering" is used, you'd expect an actual 3D scene with 3D objects where you can move around and see everything in 3D.
This is where we'll bring in a new class to the scene: Camera. The camera will be the one performing 3D transformation and projection, and we can use this camera to look around and explore our environment.
To start, make an instance of the class Camera:
camera = tc.Camera()
Put this right below the canvas = tc.TCanvas() line. You can also create multiple cameras for different purposes.
By default, the camera will be at (0, 0, 0) and facing +z with the angle (0, 0, 0). You can set its position and angle during initialisation (e.g. tc.TCanvas(1, 2, 2)) or use the methods set_position() and set_angle() after initialisation (e.g. camera.set_position(1, 2, 2)).
Now, before we start drawing our objects with the camera, we'll need to consider one thing. When we drew 2D objects on the canvas, the coordinates were in pixel units. However, when we put our 3D objects through the camera, the coordinates will be in a different unit. A 2D line on the canvas with coordinates (0, 0) - (canvas.width, canvas.height) will look very big if it were a 3D line in a 3D environment, and vice versa.
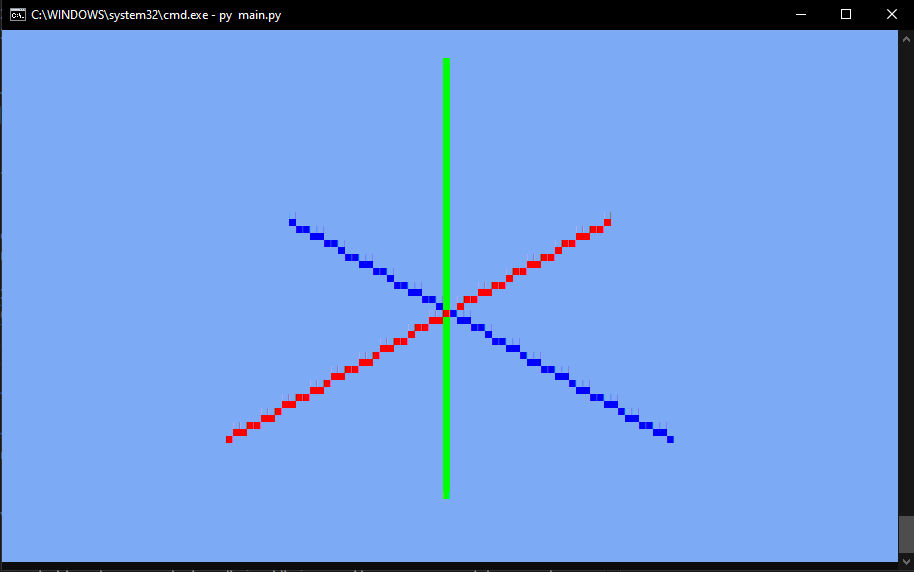
For now, let's make our 3D line a bit more reasonably sized. In fact, let's make 3 lines representing the 3 axes:
x_axis = tc.Line3D(-1, 0, 0, 1, 0, 0, color=(255, 0, 0))
y_axis = tc.Line3D(0, -1, 0, 0, 1, 0, color=(0, 255, 0))
z_axis = tc.Line3D(0, 0, -1, 0, 0, 1, color=(0, 0, 255))
Now, if we want to draw our 3D objects using the camera, we must add a second argument to our draw() method, which is the camera itself:
canvas.draw(x_axis, camera)
The camera will transform and project our 3D line, then it will feed the projected line to our canvas to draw.
Now, do this for the other lines. When we set the camera at position (2.0, 2.0, 2.0) and with an angle of (-0.6, 2.35, 0.0), we should have:
Remember the while loop from before? After our escape key press check, let's add:
camera.detectInput(canvas)
This method from Camera will have a variety of predefined keys associated with camera movement and rotation:
WandS: forwards and backwardsAandD: left and rightQandE: up and down (not jumping; there is no gravity)IandK: look up and downJandL: turn left and rightUandO: spin counterclockwise and clockwise (don't use this often)
You can also change the movement and rotation speed by doing camera.detectInput(canvas, movementSpeed=0.5, rotationSpeed=0.3).
The whole script should now look like this:
import terminalCanvas as tc

canvas = tc.TCanvas()
canvas.background((125, 170, 245))

camera = tc.Camera()
camera.set_position(2.0, 2.0, 2.0)
camera.set_angle(-0.6, 2.35, 0)

x_axis = tc.Line3D(-1, 0, 0, 1, 0, 0, color=(255, 0, 0))
y_axis = tc.Line3D(0, -1, 0, 0, 1, 0, color=(0, 255, 0))
z_axis = tc.Line3D(0, 0, -1, 0, 0, 1, color=(0, 0, 255))

while True:
    if canvas.keyPressed("ESC"):
        break

    camera.detectInput(canvas)

    canvas.clear()
    canvas.draw(x_axis, camera)
    canvas.draw(y_axis, camera)
    canvas.draw(z_axis, camera)
    canvas.show()

canvas.end()
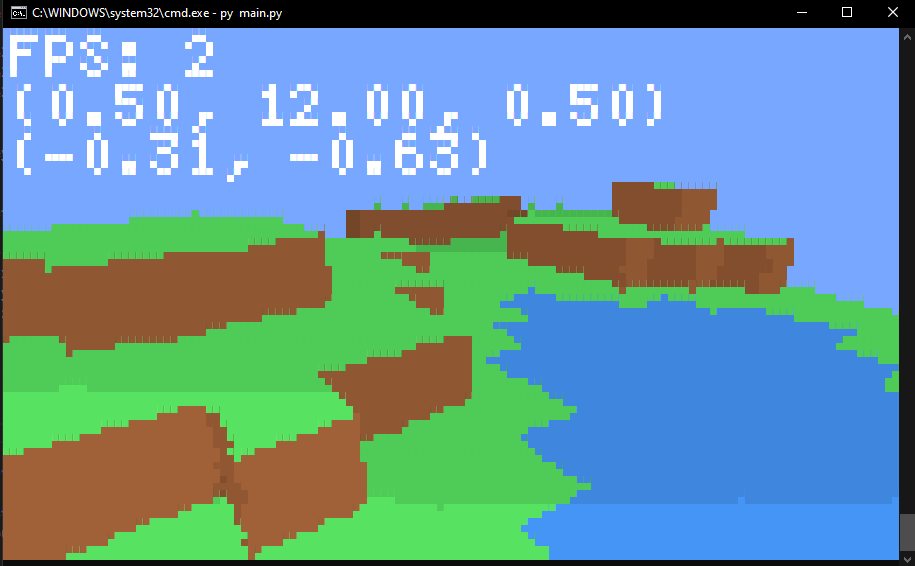
Here's an example of a voxel-based world drawn using the 3D renderer (ignore the abysmal performance):
● User interface
terminalCanvas also has a canvas dedicated to "user interface", although it is very limited. You can use it by calling TCanvasUI instead of TCanvas:
canvas = tc.TCanvasUI()
TCanvasUI fundamentally changes what a "pixel" is on the canvas and how each pixel is represented. In TCanvas, each pixel represents one color, takes up half of a character's bounding box, and the glyph used in this character space is specifically the half-box character ▀. In TCanvasUI, however, each pixel represents one character, and the glyph is either a letter from a textbox or part of a rectangular frame.
By default, the background color of TCanvasUI will be entirely black, as opposed to TCanvas being white. You can still change it using background().
There are two custom graphical objects for TCanvasUI: RectangleUI and TextUI.
You can use it like the other objects:
tc.RectangleUI(
    0, 0,
    canvas.width - 1, canvas.height - 1,
    color=(255, 0, 0),
    mode="frame",
)
While non-UI objects are usable in TCanvasUI, they will not be displayed in the same manner as in TCanvas.
TCanvasUI also has all the essential methods like draw() and show().
Credits & honourable mentions
Massive thanks to ConnerWill for his ANSI escape sequence cheatsheet. Without this cheatsheet, I wouldn't have been able to make this module possible (and, honestly, I wouldn't have known that this entire thing was possible).
Another huge thanks to Gabriel Gambetta for writing the book Computer Graphics from Scratch. All my rasterisation work closely follow his guidance.
I'd also like to mention Mr. Shiffman, Daniel Shiffman from The Coding Train for inspring me to do programming with all his fascinating coding challenges.
Some honourable mentions:
Other credits:
1 maintainer

Release files for terminalCanvas 0.5.2
For a detailed explanation of source distributions (sdists) and built distributions (wheels), please see the package formats documentation.
Source distribution (sdist)
| File | Size | Uploaded | |
|---|---|---|---|
| terminalcanvas-0.5.2.tar.gz | 720.2 kB | Details |
Built distribution (wheel)
| File | Interpreter | ABI | Platform | Reset |
|---|---|---|---|---|
| terminalcanvas-0.5.2-py3-none-any.whl | Python 3 | none | any | Details |
Total release size: 814.5 kB
Release files / terminalcanvas-0.5.2.tar.gz
| Download URL | terminalcanvas-0.5.2.tar.gz |
|---|---|
| Size | 720.2 kB |
| Tags | Source |
|
SHA-256 checksum How to use checksums |
e1dc4e687894f4e0e4c68beb3b32c69f2ce0a4a2a6449624e78c9ce7d85924ca
|
|
BLAKE2b-256 checksum How to use checksums |
ba3f6393f02a71faf5f50e838d1516d329c3e2fe5f83fa066e0390df982fd53f
|
| Upload date | |
|
Uploaded using Trusted Publishing? What is trusted publishing? |
No |
| Uploaded via |
twine/7.0.0 CPython/3.14.3
|
Release files / terminalcanvas-0.5.2-py3-none-any.whl
| Download URL | terminalcanvas-0.5.2-py3-none-any.whl |
|---|---|
| Size | 94.3 kB |
| Tags | Python 3 |
|
SHA-256 checksum How to use checksums |
8b1ba0f2c6d6393a78b1487dbb925e9d5f9f967d02fef70de9d8544181cb5c7d
|
|
BLAKE2b-256 checksum How to use checksums |
6f653f4368b01494f7bc610d8989cb3be9533614a17eb0322bcb2e380ac69f5f
|
| Upload date | |
|
Uploaded using Trusted Publishing? What is trusted publishing? |
No |
| Uploaded via |
twine/7.0.0 CPython/3.14.3
|














