
This release is a pre-release and may not be stable for production use.
☯️ Ubo App







📑 Table of Contents
- 🌟 Overview
- 🚧 Disclaimer
- ⚙️ Notable Features
- 📋 Requirements
- Installation
- 🤝 Contributing
- 🐞 Debugging
- 🛠️ Hardware
- 🏗️ Architecture
- 📦 Notable dependencies
- 🗺️ Roadmap
- 🔒 License
🌟 Overview
Ubo App provides a unified and universal interface (across web, mobile, watch, embedded) and tools for developing and running agentic hardware-integrated experiences.
It is optimized for Raspberry Pi (4 & 5, Zero for detached satellites) devices, but support for other SBCs, the Nvidia Jetson family, and x86 devices is under way.
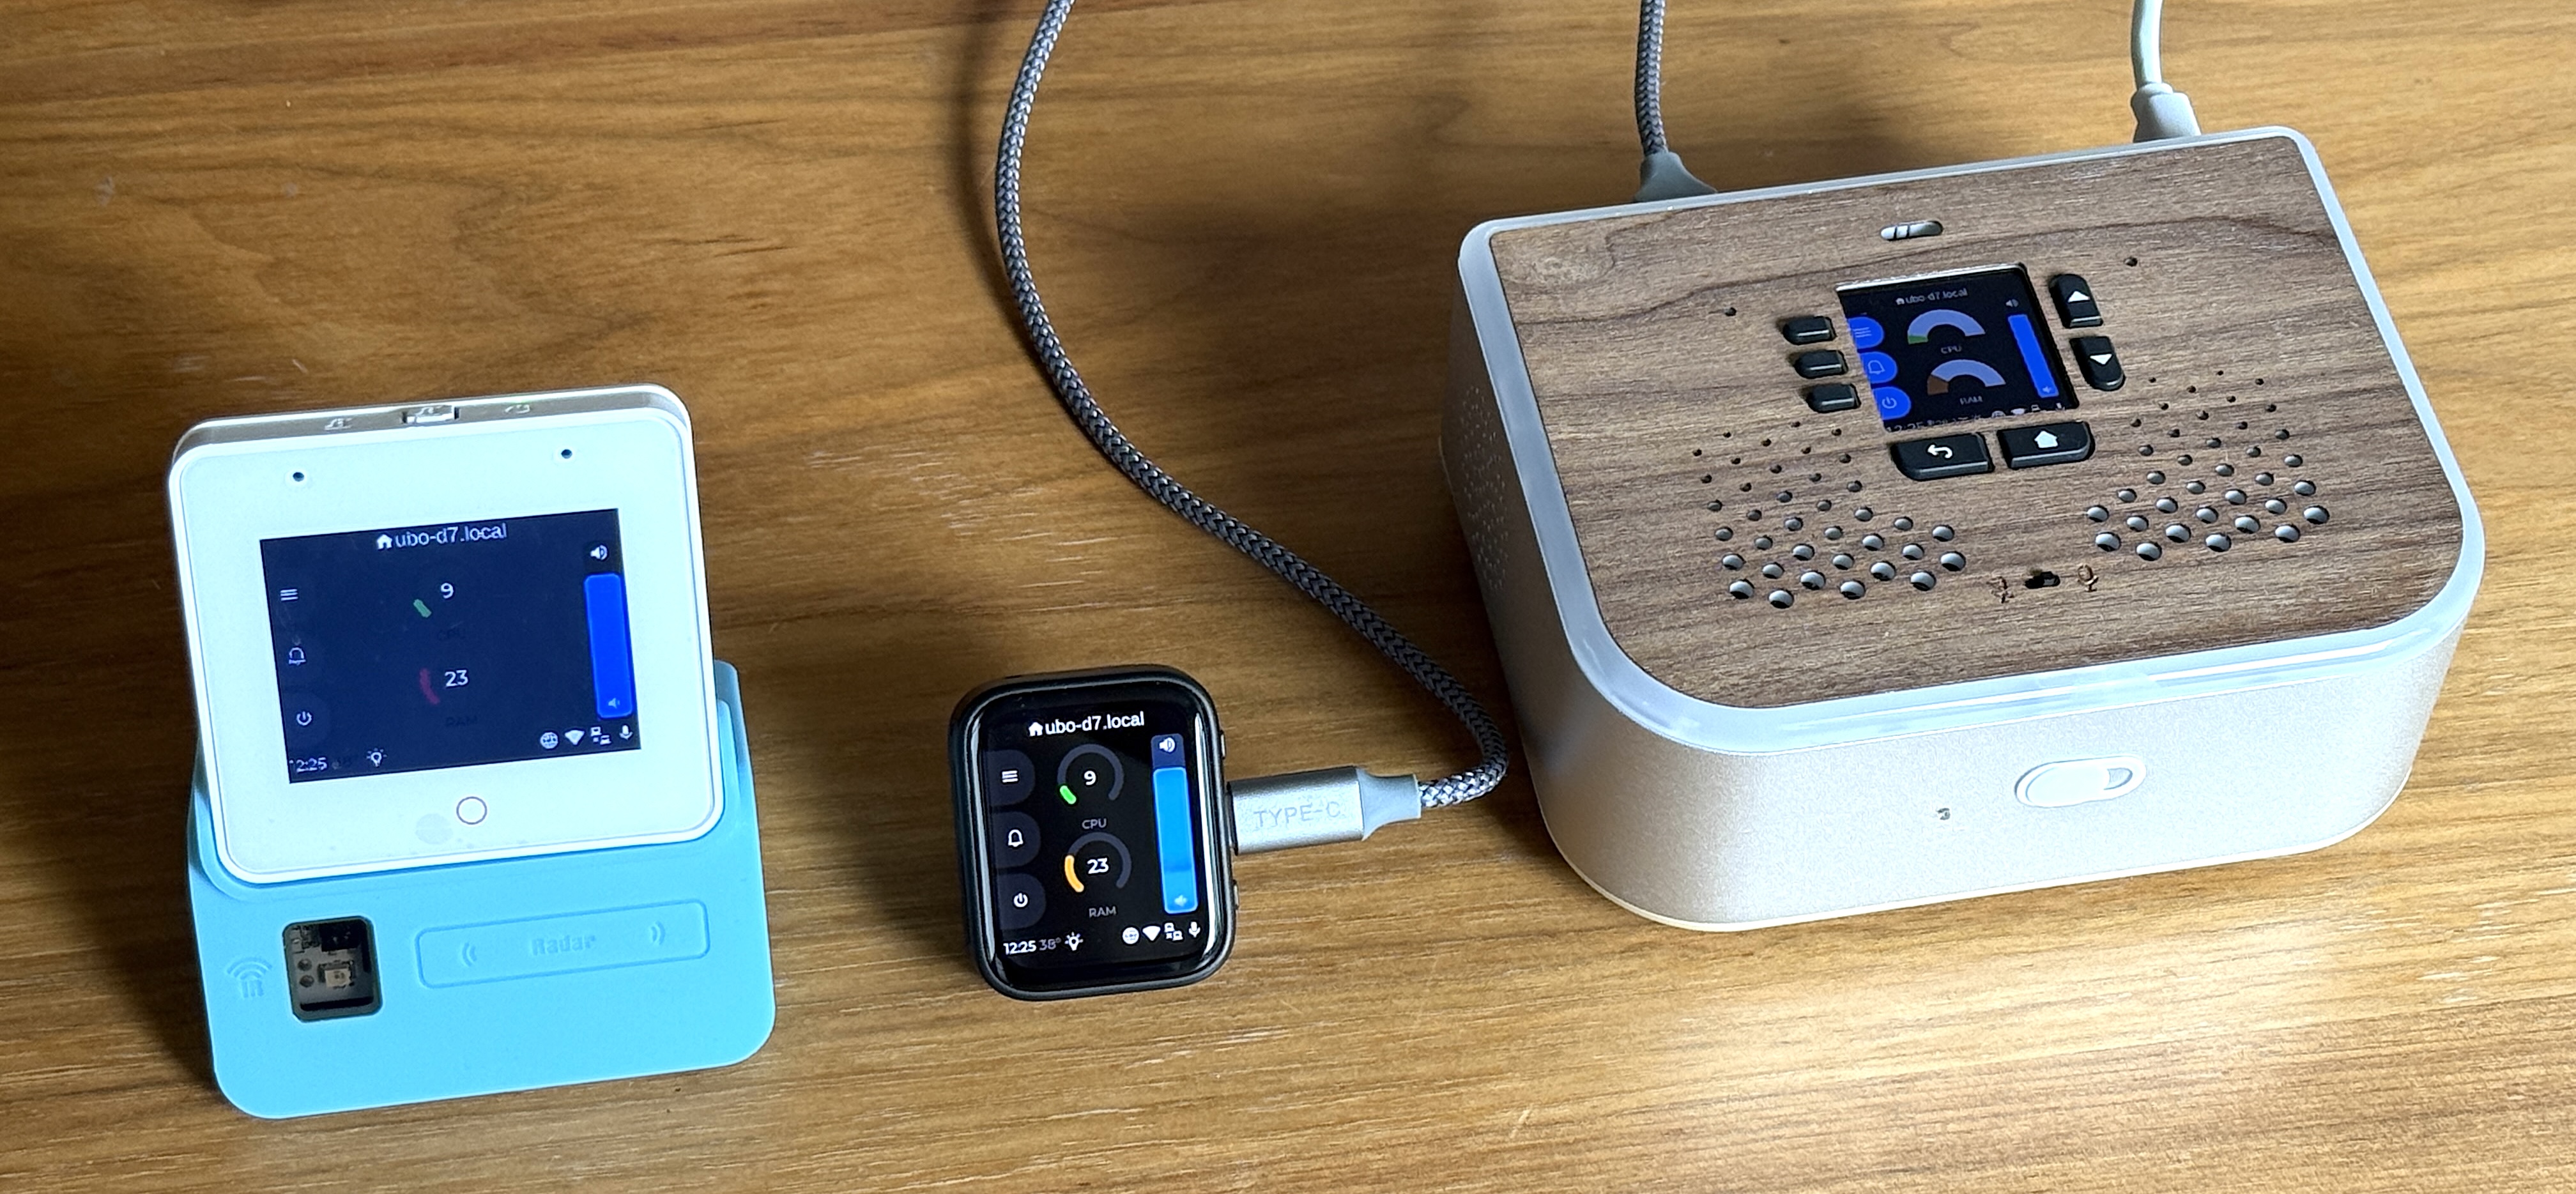
We designed and manufactured Ubo Pod (open source developer kit edition) to give developers all necessary hardware peripherals for supporting various interaction modes and sensory, context-aware UX.
These capabilities include built-in display/GUI, dual mics/speakers, infrared send/receive, light and temperature sensors, addressable RGB LED ring, sensor connector, etc.
The pod is not the only surface. ESP32 satellites are companion boards that extend a pod with an extra screen, audio and more, over WiFi or USB, and experimental phone and watch apps for iOS, watchOS, Android and Wear OS provide detached hardware remotely. The apps are not yet available on App Store or Google Play yet but you can build from source or join our Discord for beta install link (via TestFlight, etc).
You can purchase the kit here which supports both Raspberry Pi 4 and 5. Your purchase can help us fund further development of this open source platform. These repos contain the PCB design and mechnical design files.
Alternatively, you can run the software on a bare Raspberryu Pi and use mobile/watch/esp32 apps to interface with it. You can check out hardware DIY section below if you are considering a DIY build.
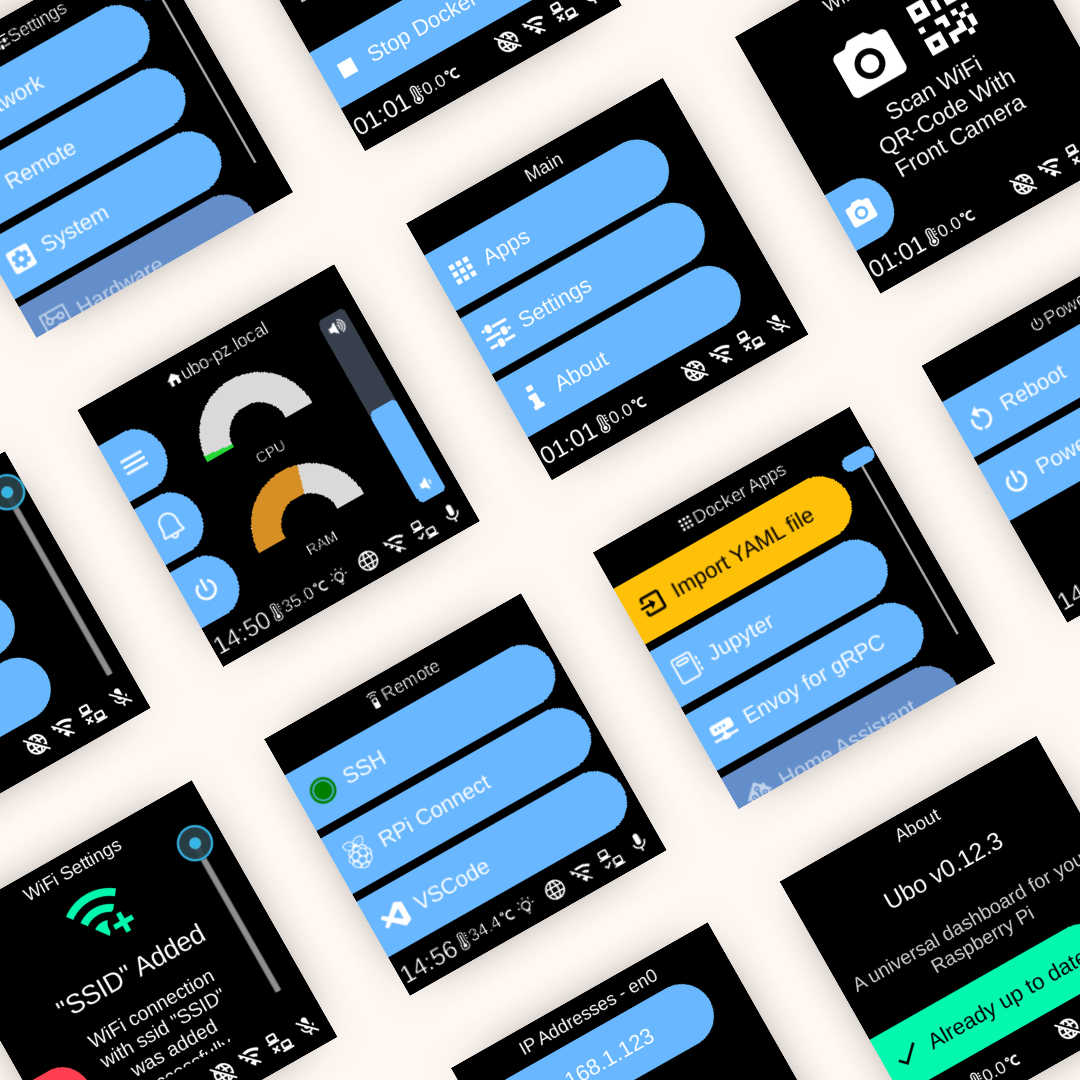
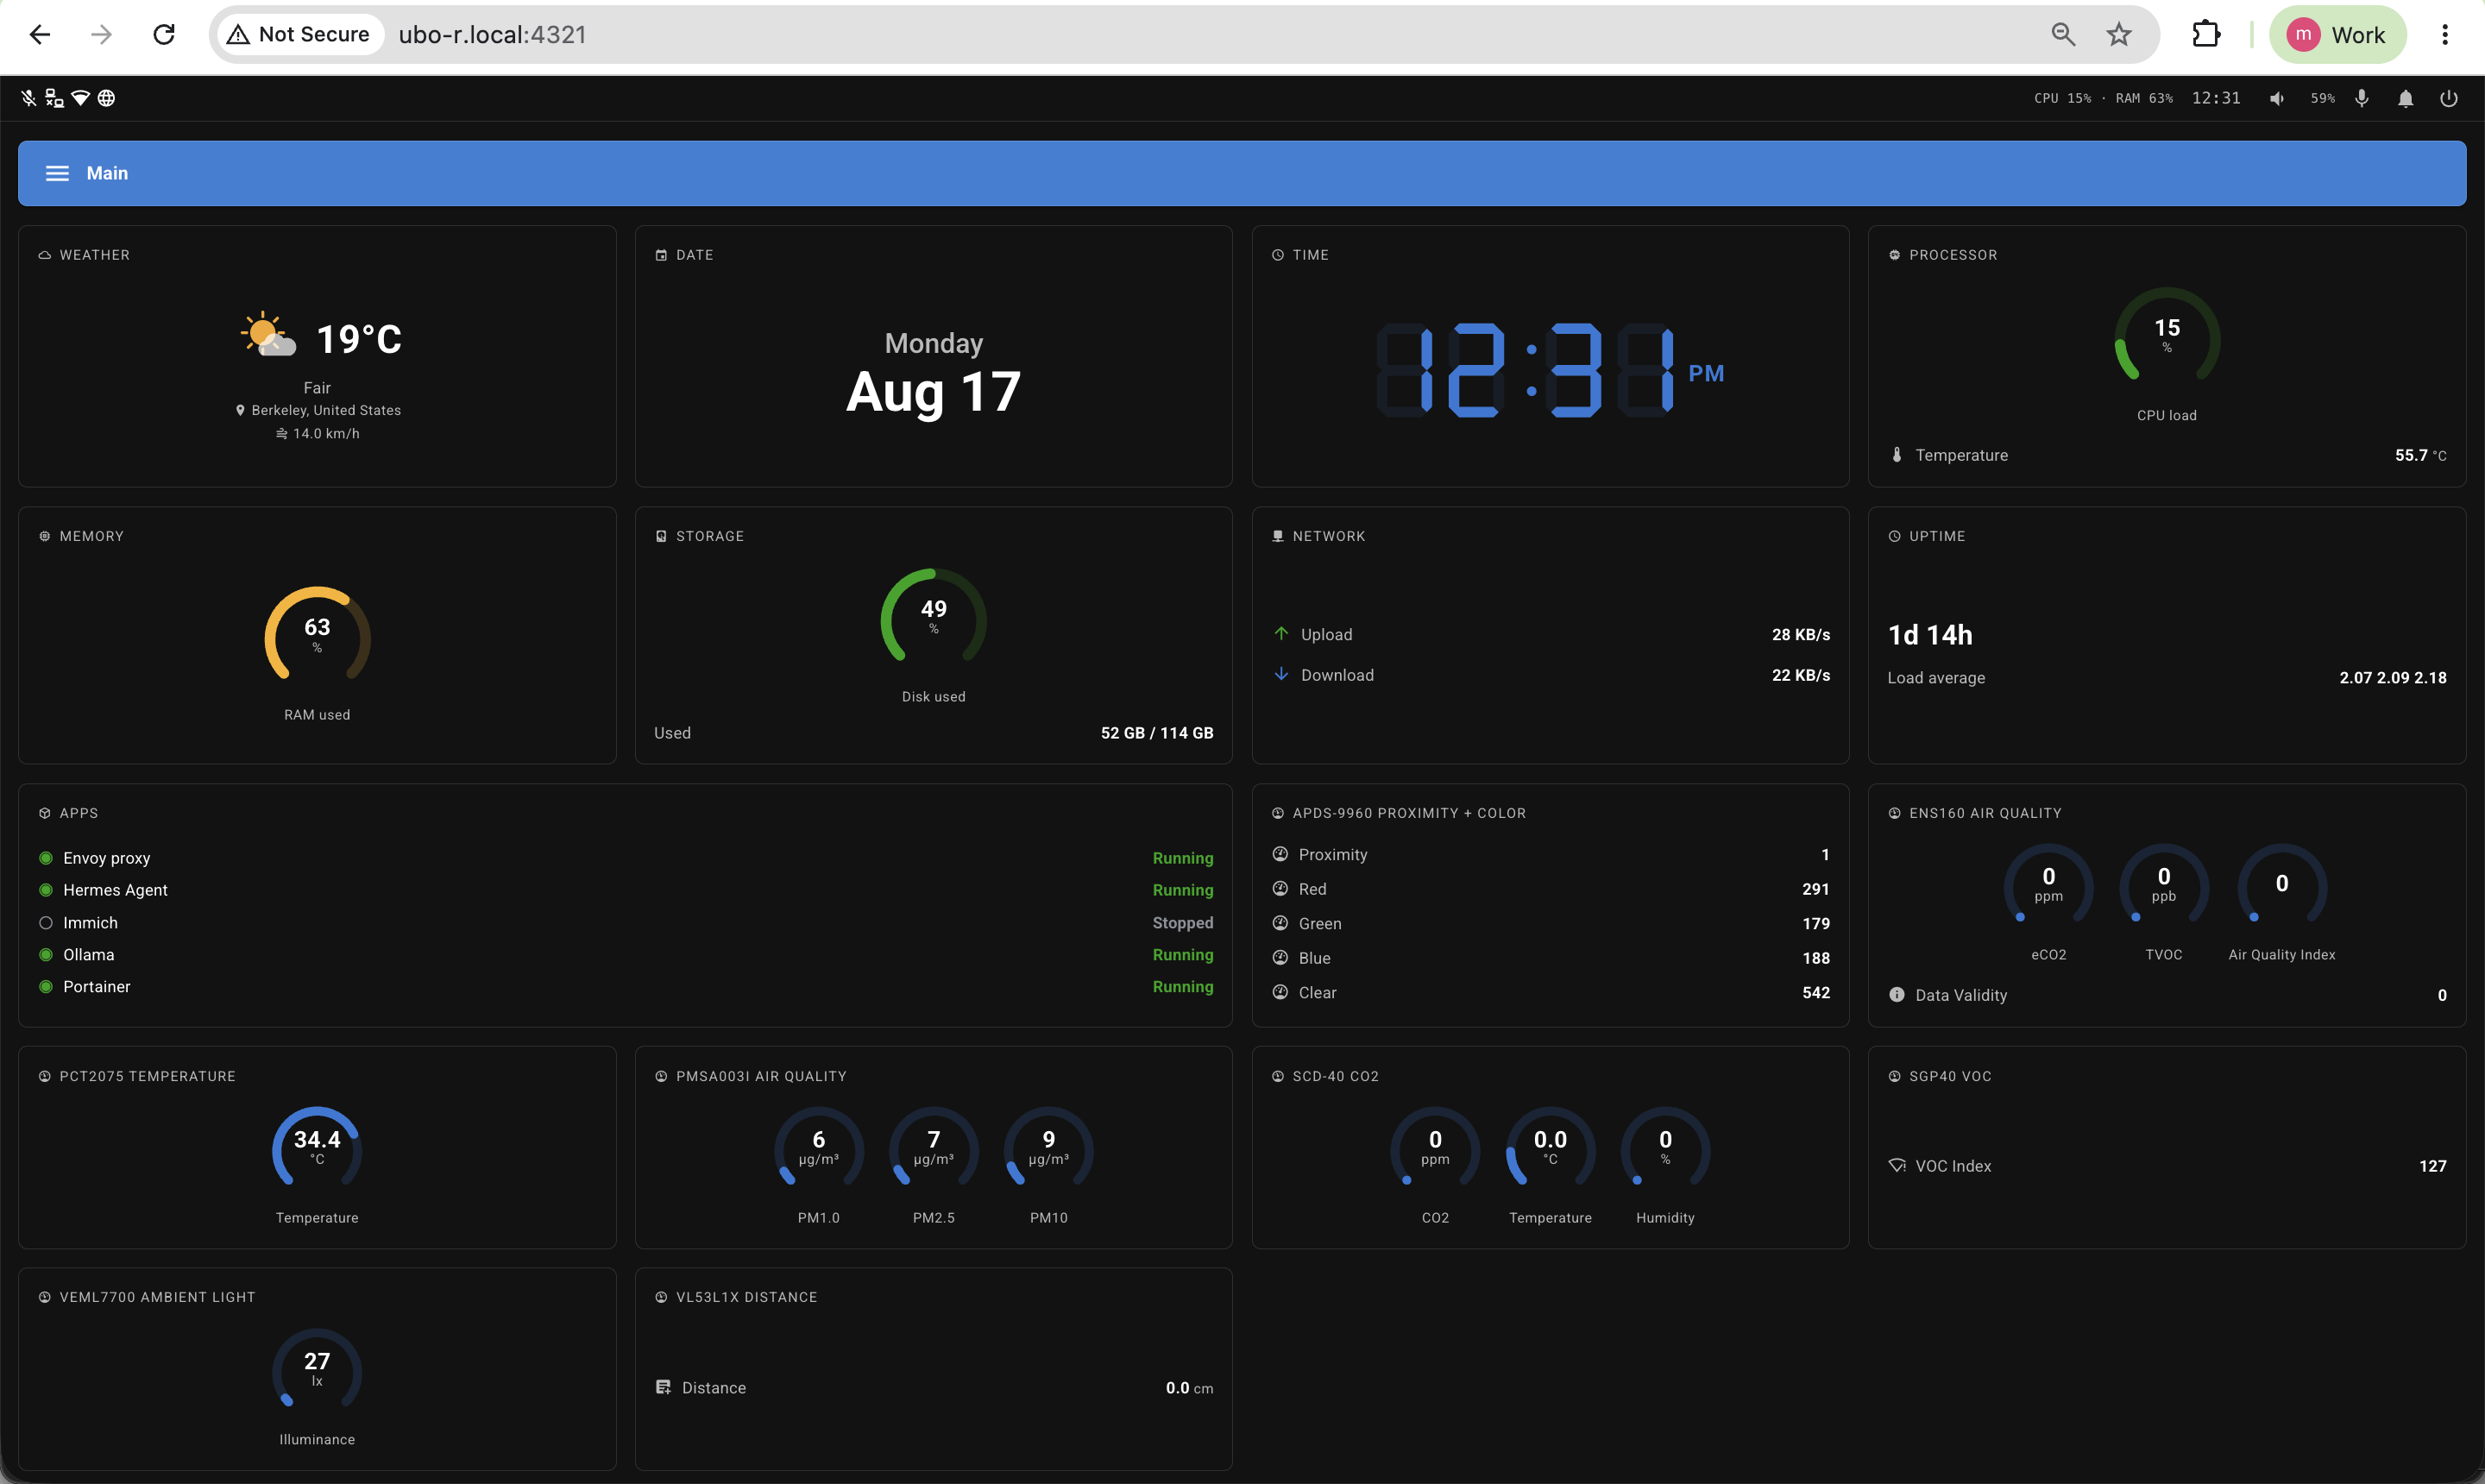
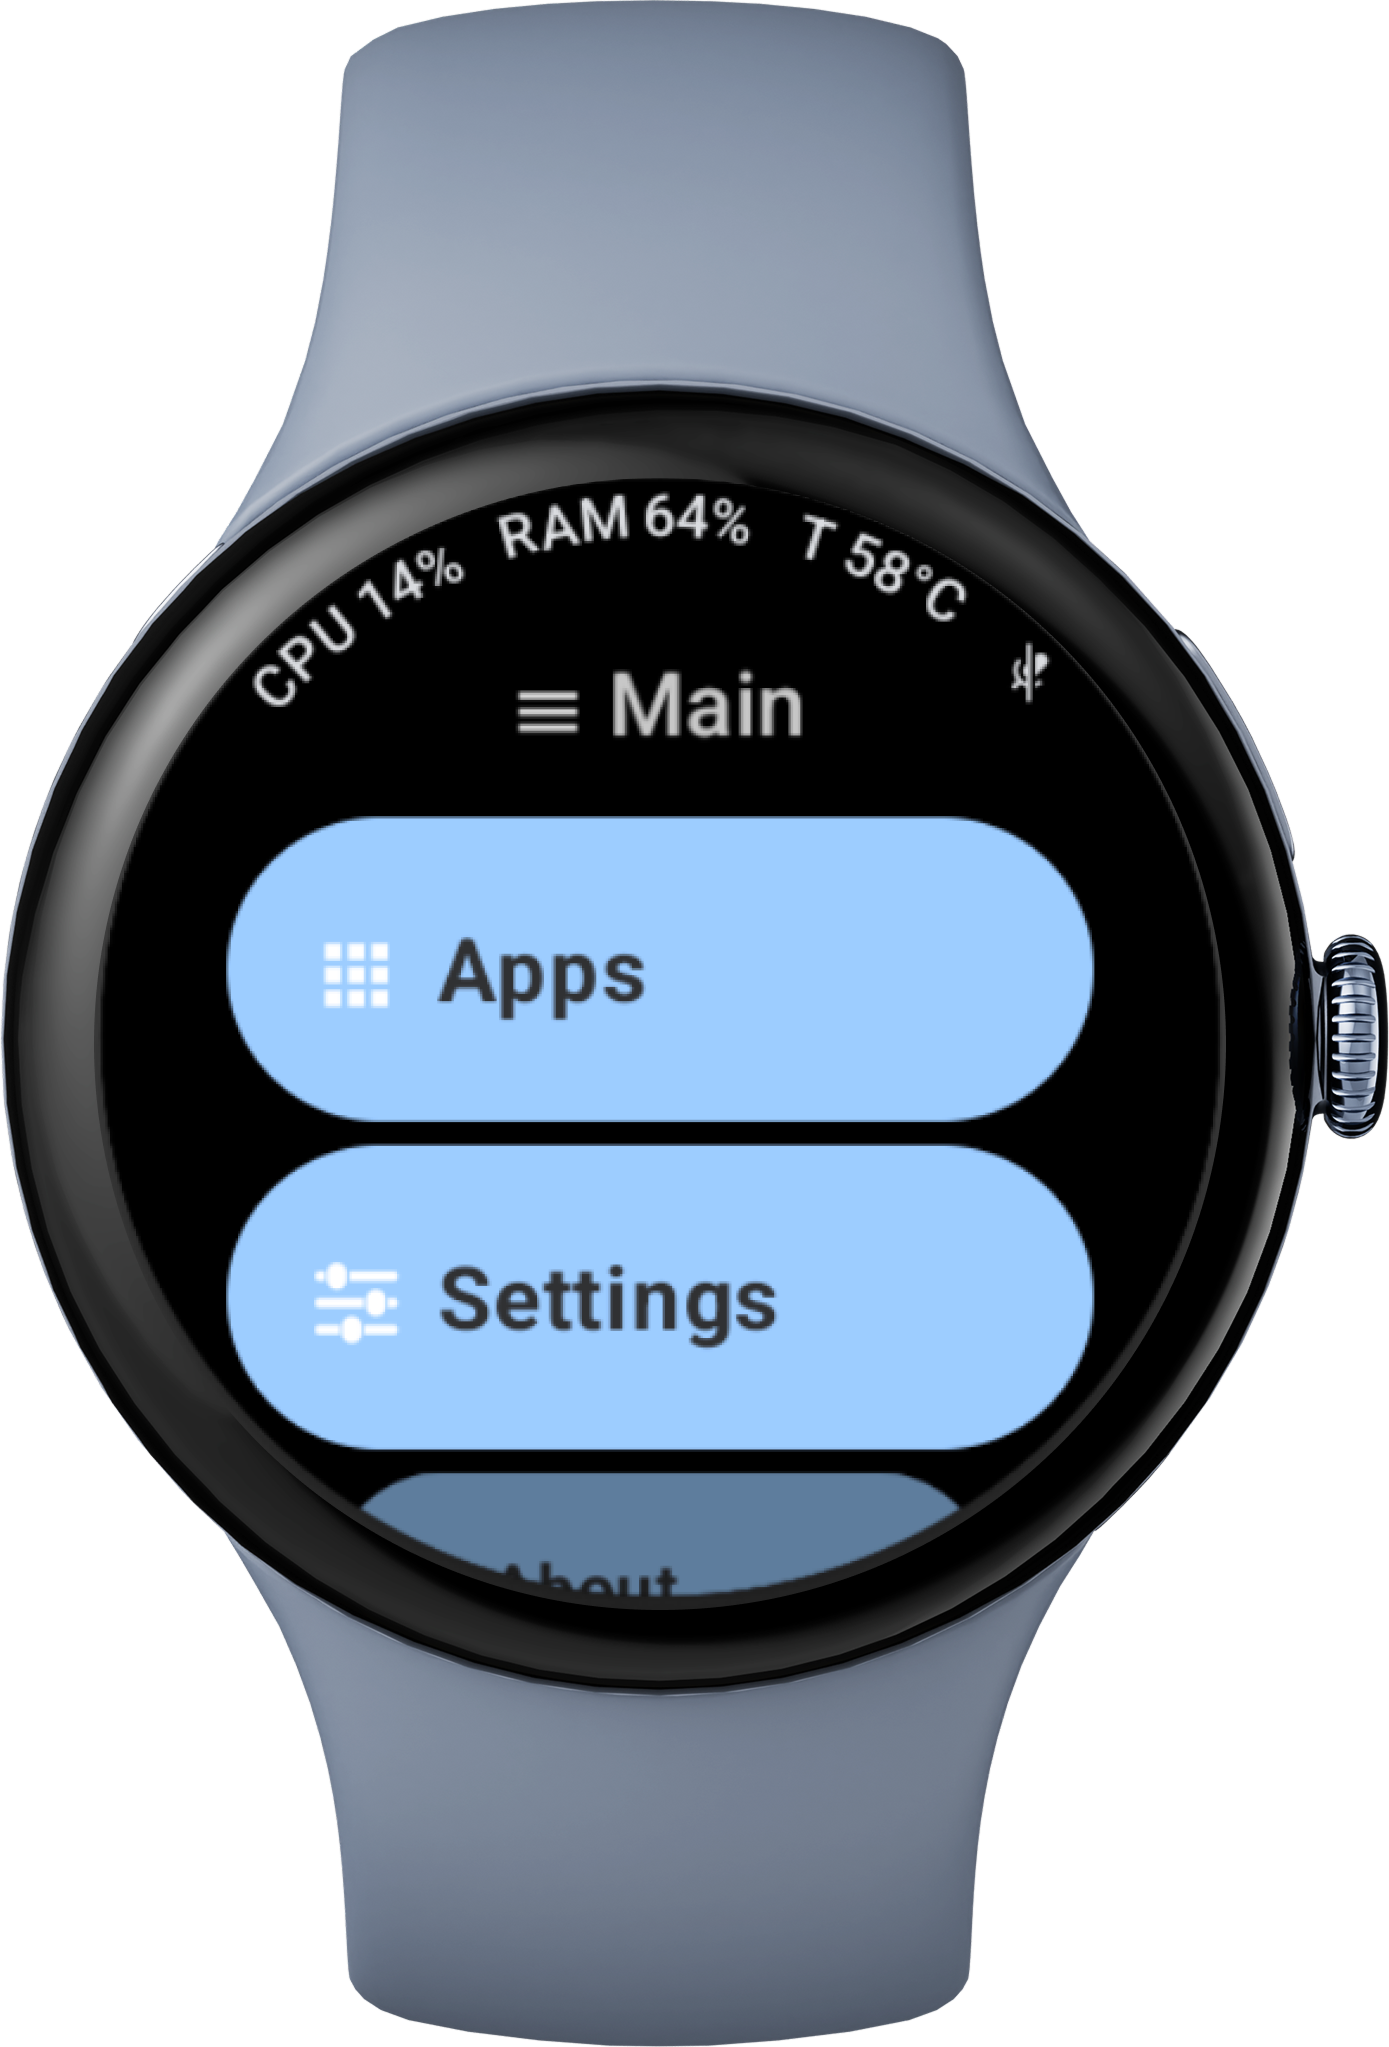
Example Interface Screenshots
| On-device GUI | Web UI | ||
|---|---|---|---|
 |
 |
||
| Android app | iOS app | ||
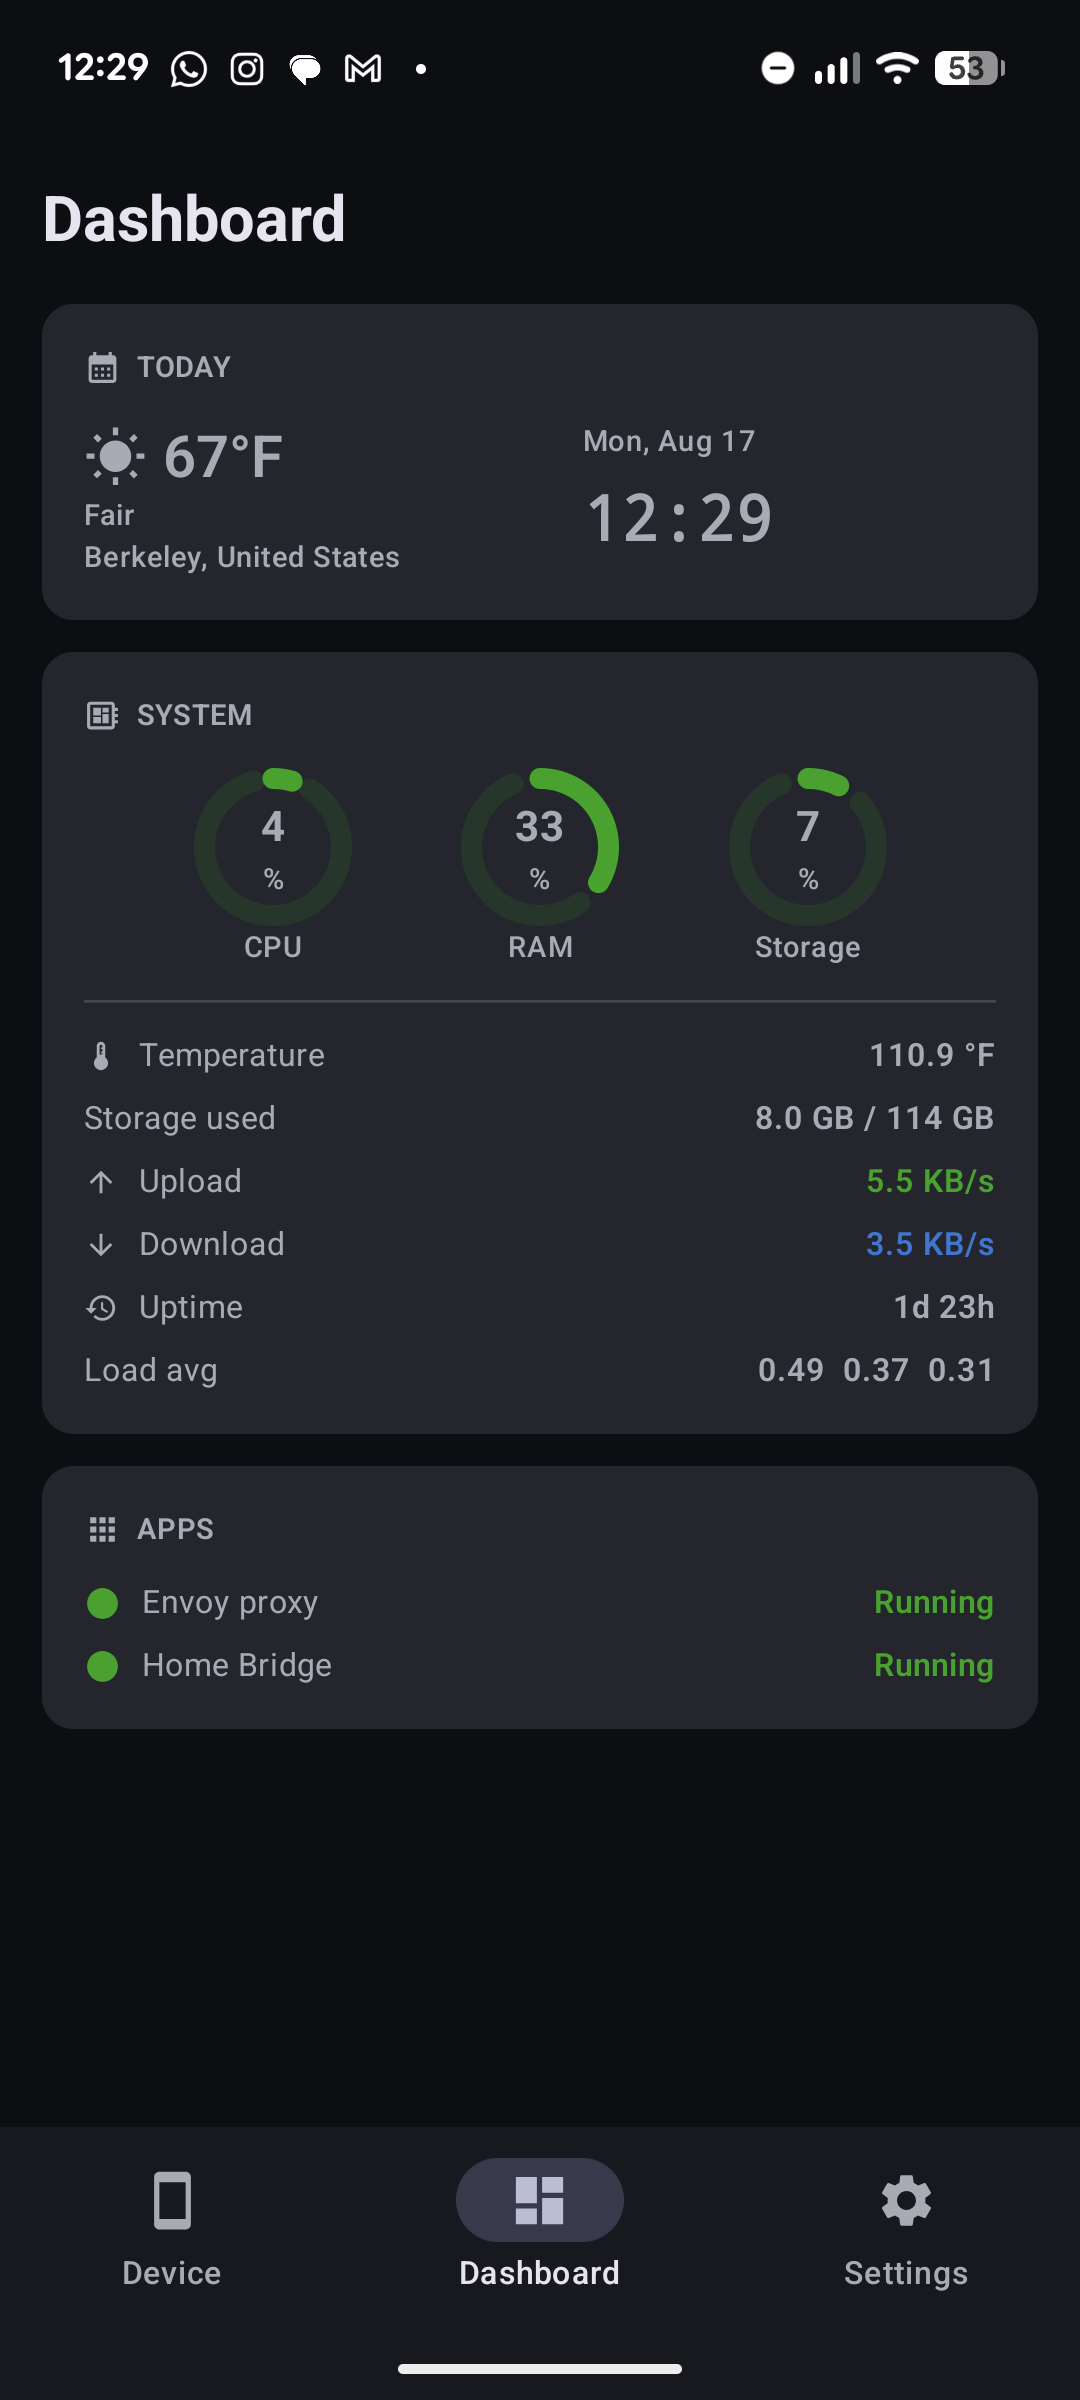 Dashboard |
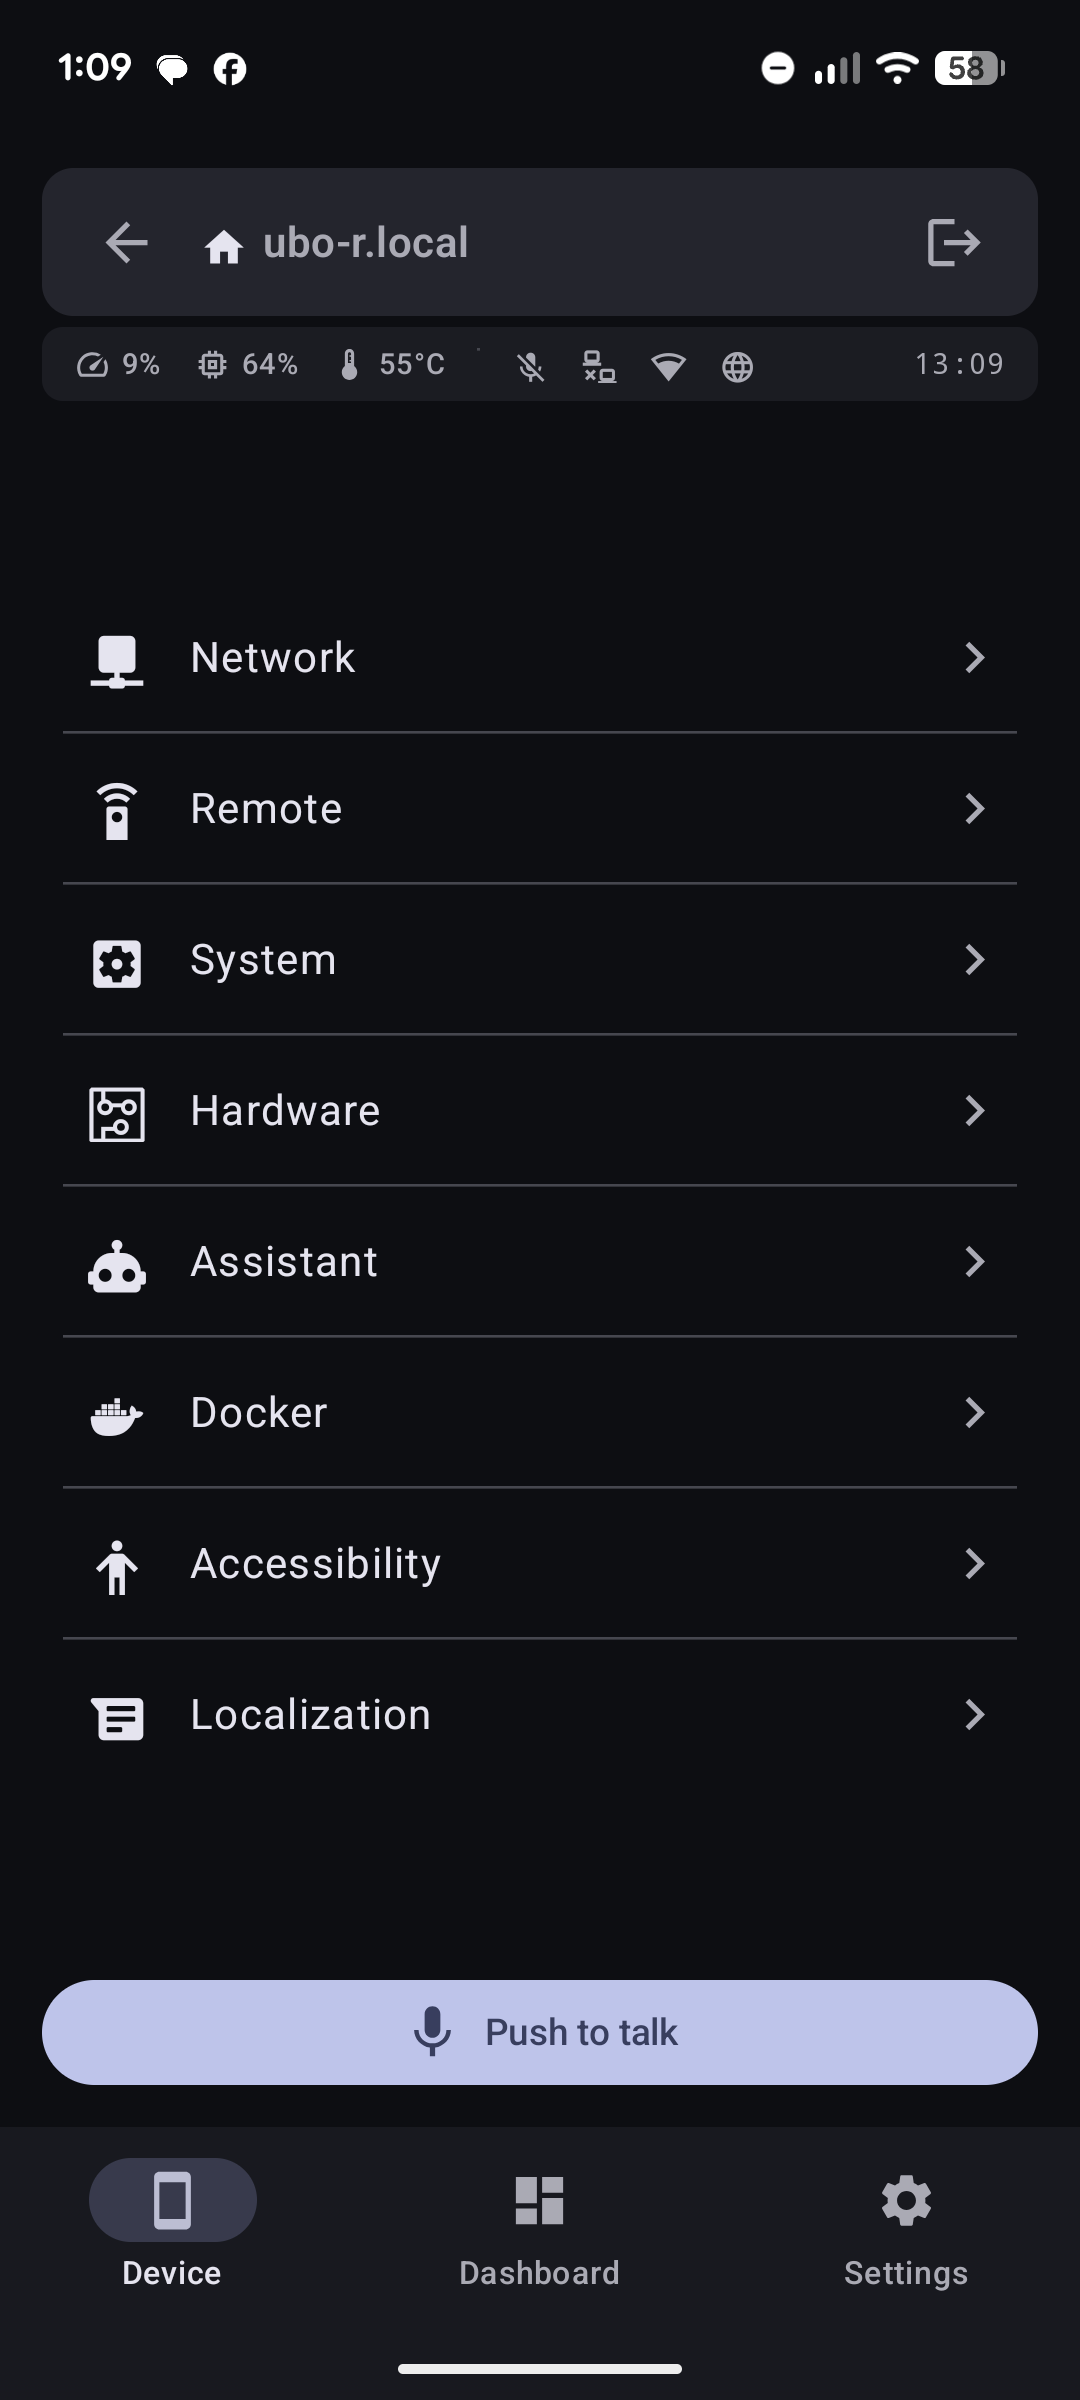 Menu |
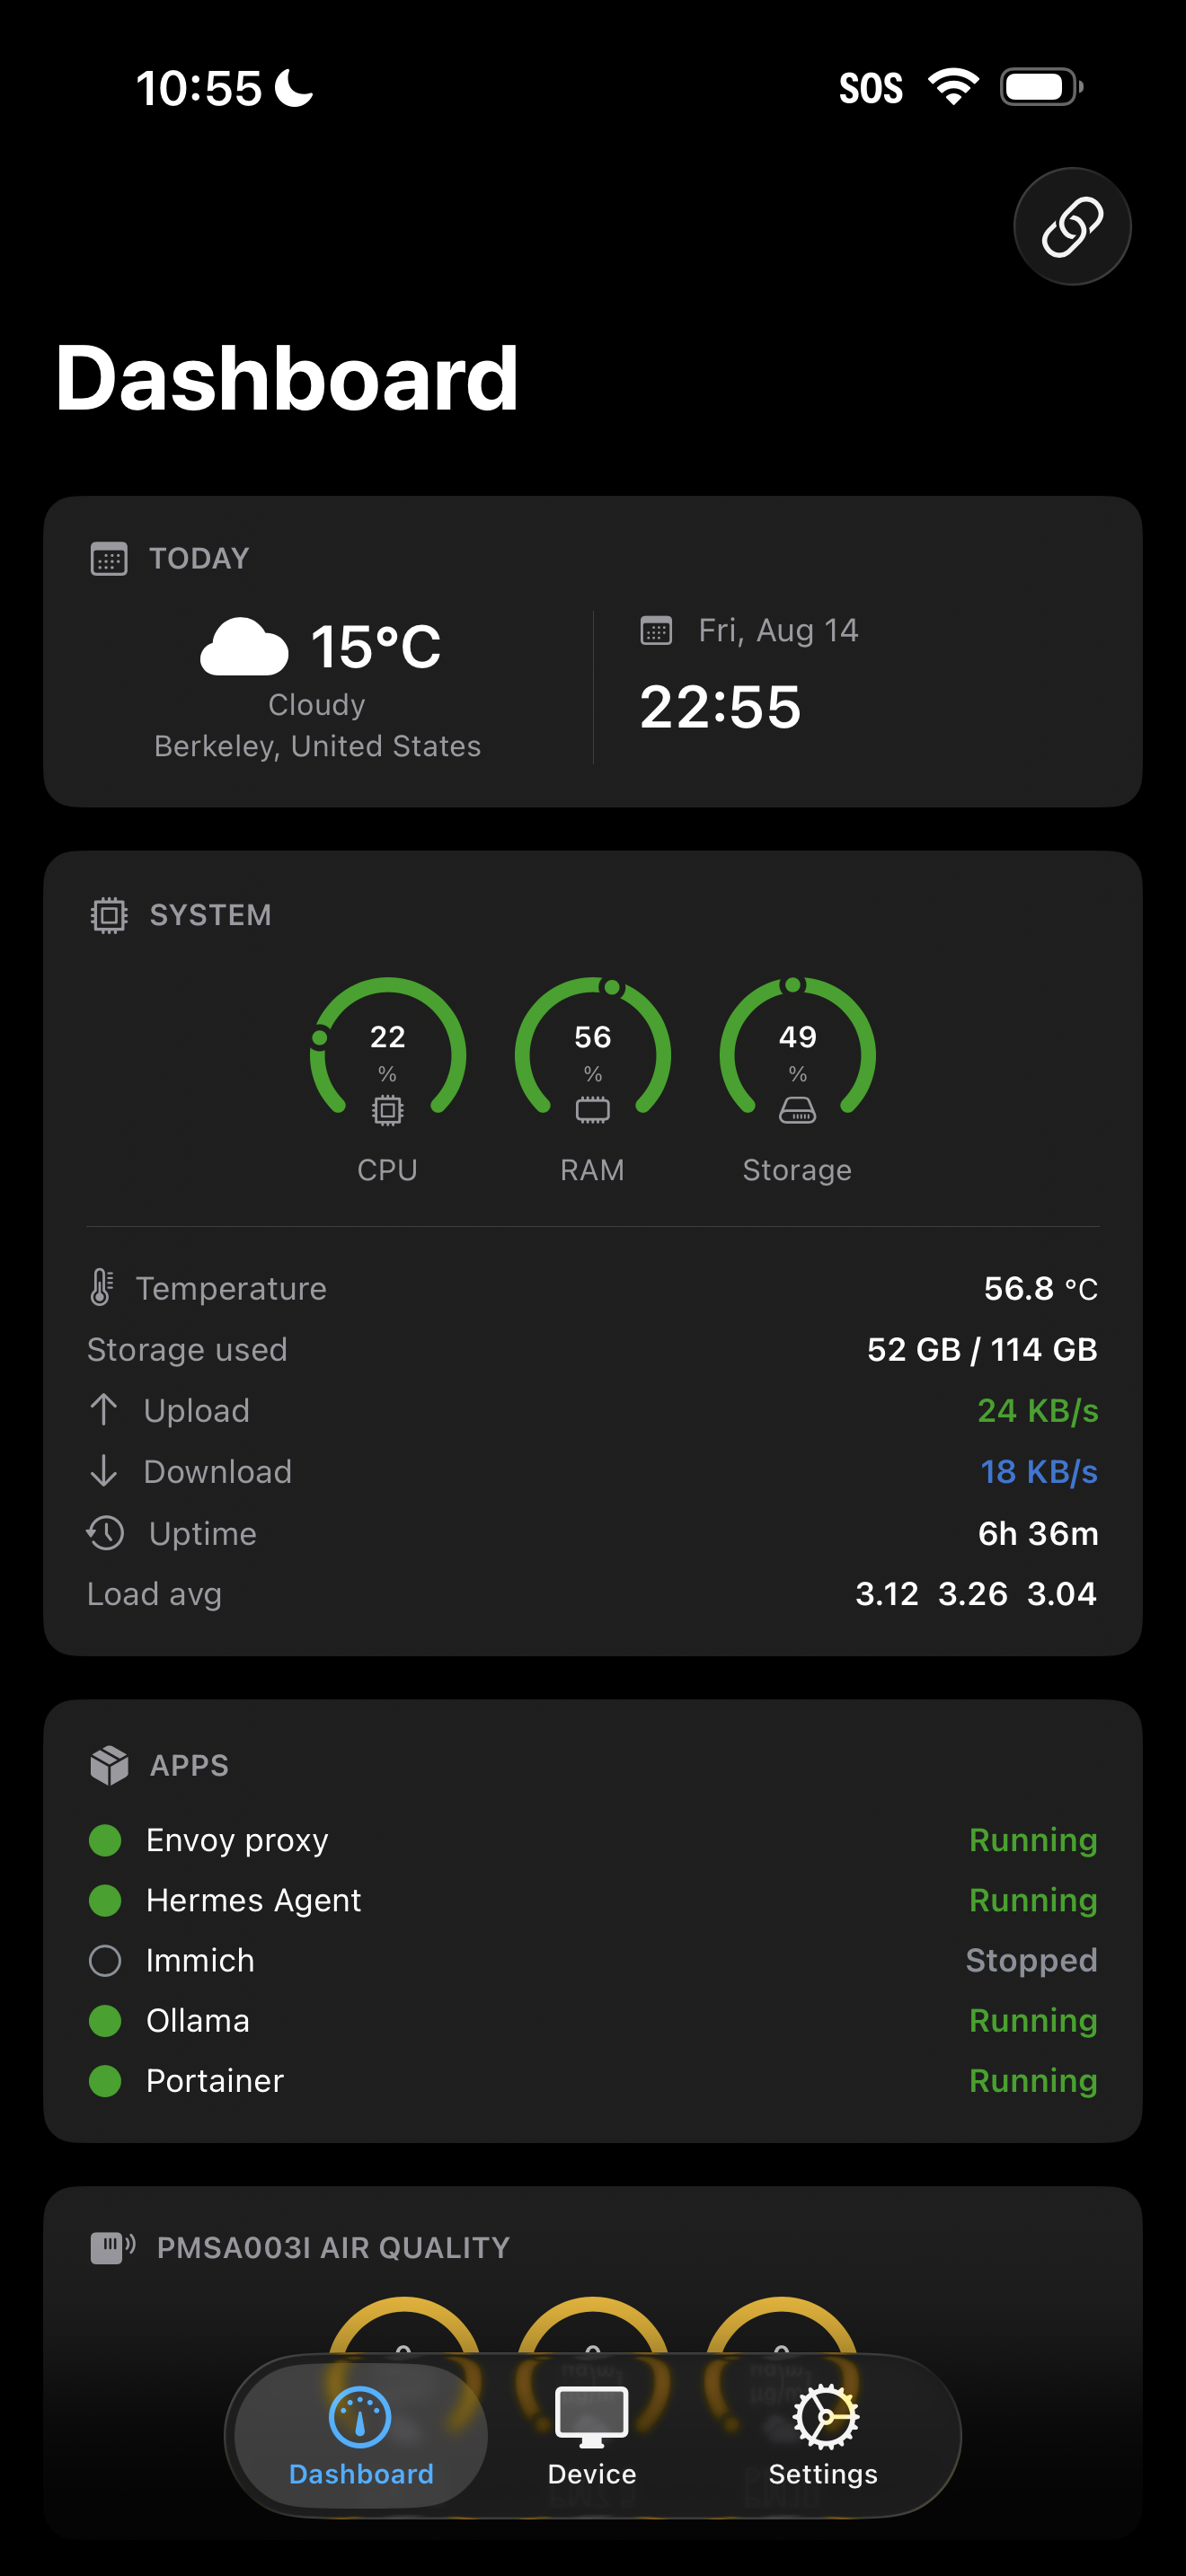 Dashboard |
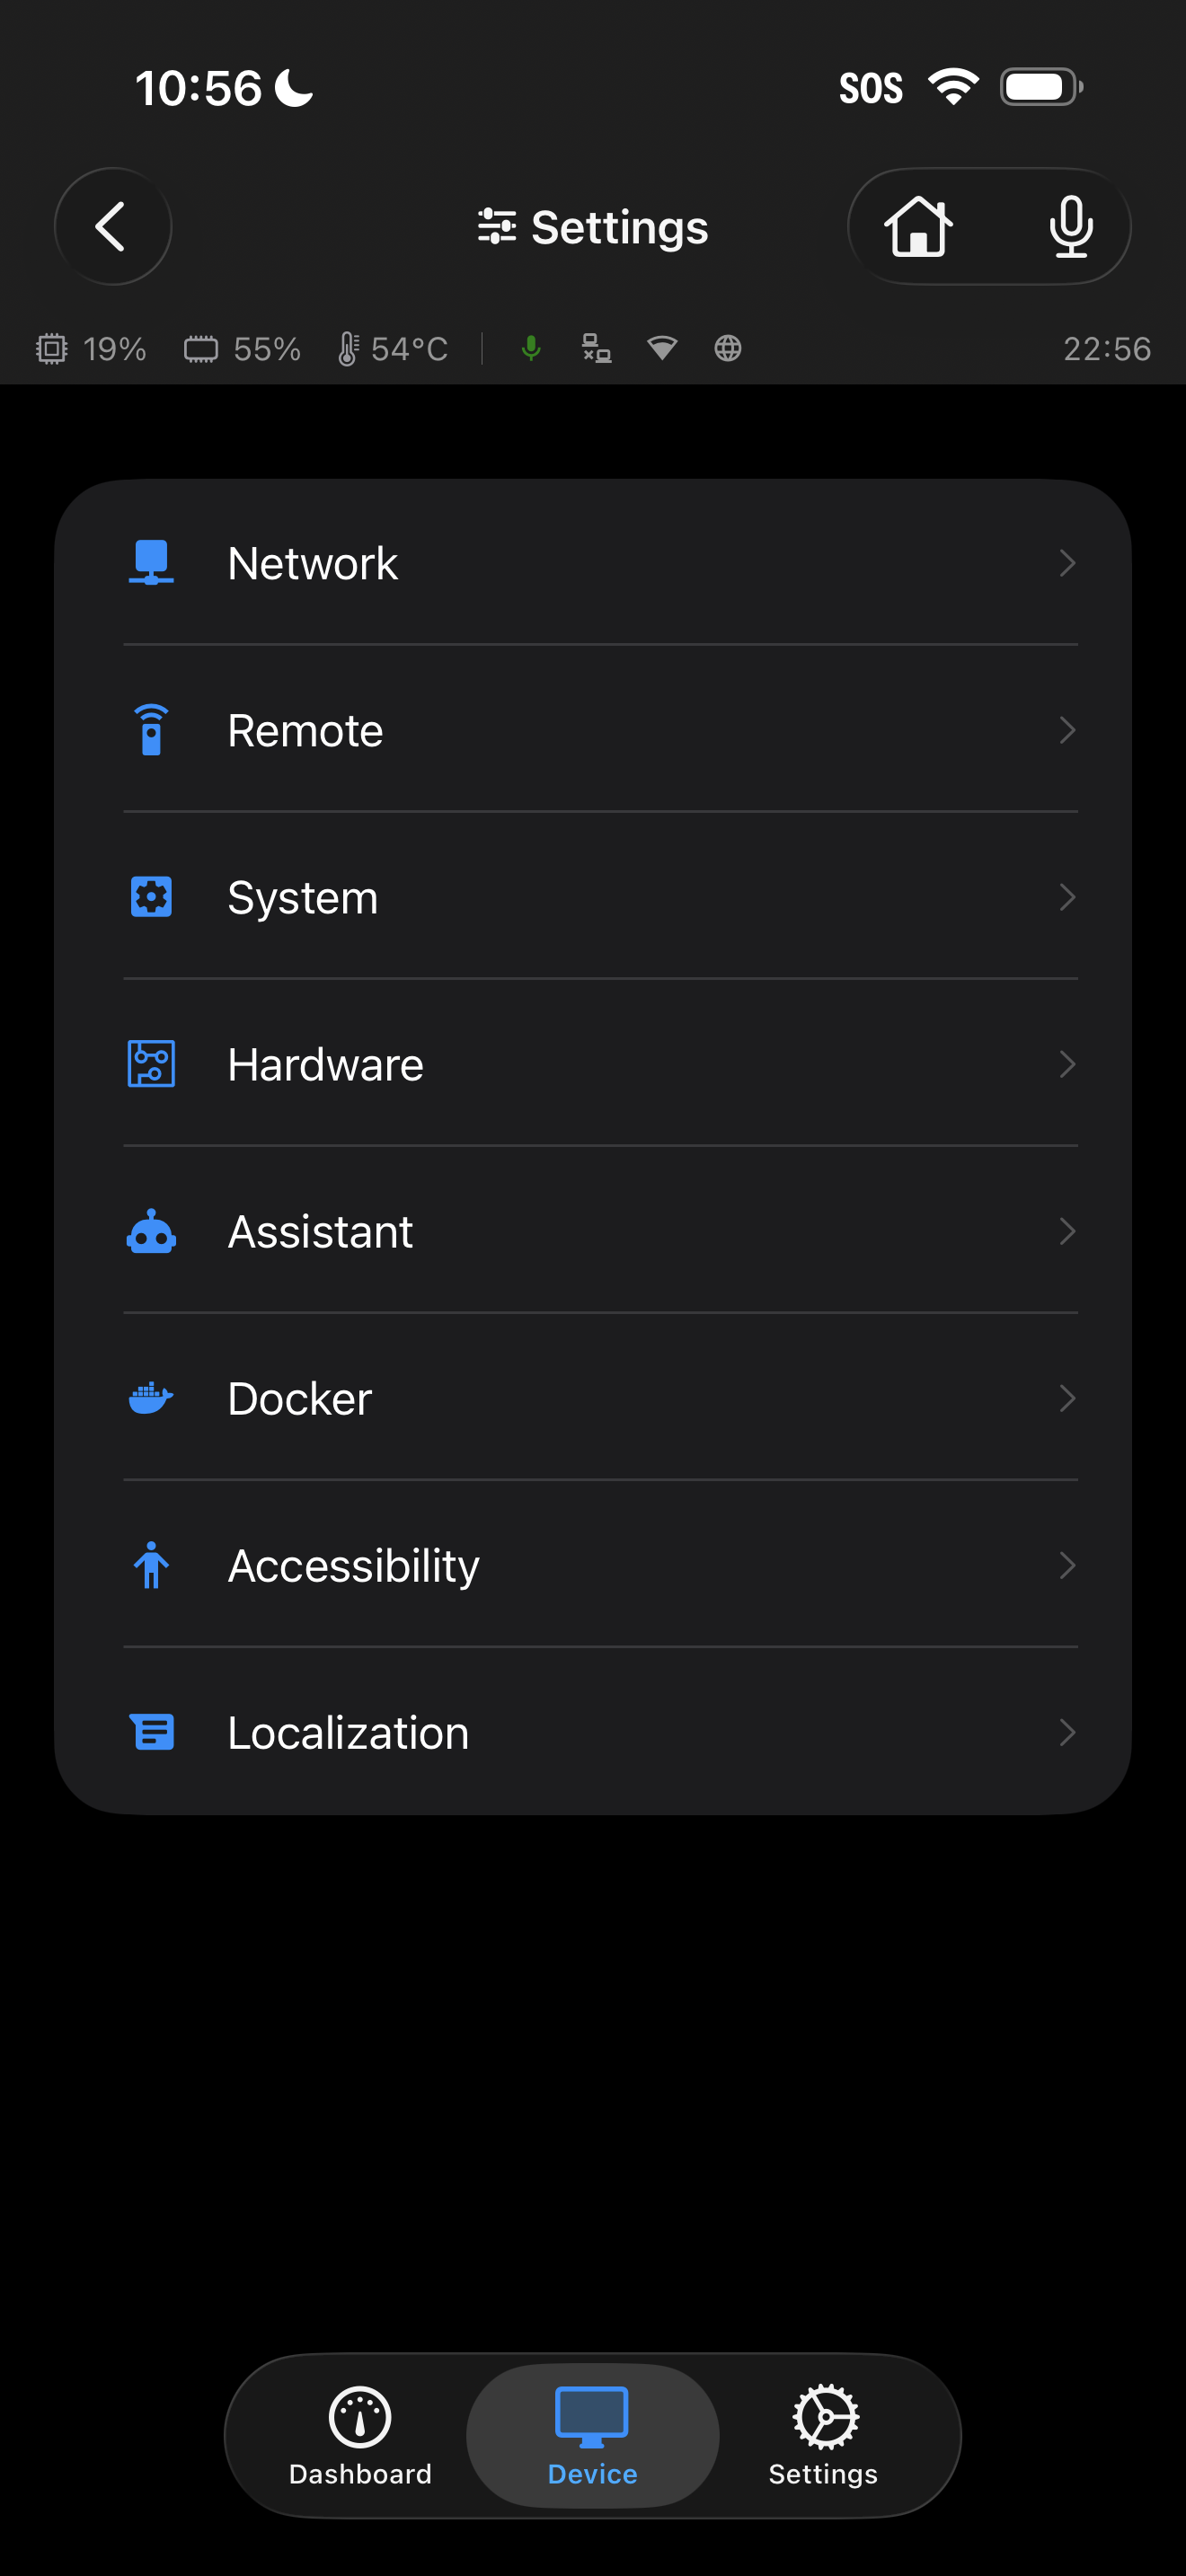 Menu |
| watchOS app | Wear OS app | ||
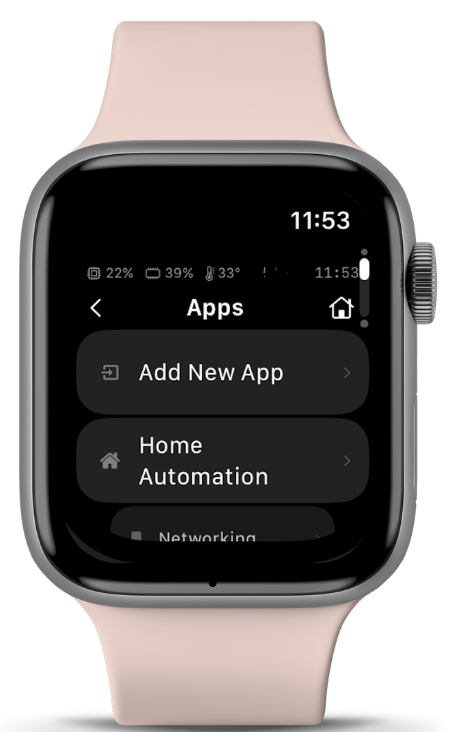 |
 |
||
Goals
The design is centered around the following goals:
- Making hardware-integrated UX development easier
- Offer no-code/no-terminal UI/UX options to developers and end-users of their apps
- Give developers and agents tools to build multi-modal UX
- Leverage tight hardware and software co-development to unlock new potentials
- Let users focus on their app logic while Ubo App handles the rest (hardware abstractions, UI, etc.)
- Hot-pluggable services
- Modular and friendly to AI tool-calling
- Remote API access (gRPC)
⚠️ Due to limited development resources, we are not able to support every single-board computer (SBC), operating system, and hardware configuration.
If you are willing to help support other SBCs or operating systems, please consider contributing to the project.
🚧 Disclaimer
Be aware that at the moment, Ubo App sends crash reports to Sentry. Soon we will allow users to easily opt-out in the settings.
⚙️ Notable Features
- Easy WiFi onboarding with QR code or hotspot
- Headless (no monitor/keyboard) remote access setup
- SSH
- VS Code tunnel
- Raspberry Pi Connect
- Tailscale
- Pangolin/Twingate/Ngrok (under apps)
- Kiosk-mode control on two optional HDMI monitors
- Support for Home Assistant (HA) Wymoning and MQTT events
- Install and run Dockerized apps headlessly
- One-click install
- Hermes, OpenClaw, n8n, Home Assistant, Pangoline, Twingate, Ollama, Immich etc
- Local and Cloud full-stack voice control (VOSK, Moonshine, Piper, KoKoro for local voice)
- Configurable wake words and trigger sources
- MCP tool hosting and gateway
- Access and control basic Linux utilities and settings
- User management
- Network management
- File system operations
- Natural language interactions for tool calling (voice AI)
- Offline-online hybrid user-defined voice commands to bindable actions
- Web UI
- Infrared remote control (send/receive), including Web UI assignment of registered IR keys to bindable actions
- gRPC API for remote control - find sample clients here
- ESP32 satellites - companion boards (Waveshare ESP32-C6-Touch-AMOLED-1.8, Espressif ESP32-S3-BOX-3) that extend the pod over WiFi or USB: the same GUI rendered natively in C/LVGL with touch navigation, audio playback and capture, on-device WiFi setup via a captive portal, and more.
- Native phone and watch clients for iOS, watchOS, Android and Wear OS (including an Android Glance widget) - experimental/beta, build from source
Check roadmap section below for upcoming features.
📋 Requirements
At minimum you need a Raspberry Pi 4 or 5 to run Ubo App.
To run LLM models locally, we recommend a Raspberry Pi 5 with at least 8GB of RAM.
For features that require add-on hardware that is not natively supported by Raspberry Pi (such as audio, infrared rx/tx, sensors, etc.), you can:
- Purchase an Ubo Pod Development Kit
- DIY the hardware
- Stream video/audio/sensor data from/to phone/laptop/watch/satellites (detached hardware).
For more details check out the hardware section below.
🙏 Please consider supporting this project by ordering an Ubo Pod Dev Edition. This project was orginally successfully funded on Kickstarter.
The sales proceeds from the hardware will be used to support continued development and maintenance of Ubo App and its open source dependencies.
Note : The app still functions even if some special hardware elements (audio, infrared rx/tx, sensors, etc.) are not provided. The features that rely on these hardware components simply won't function.
Installation
Pre-packaged image
Ubo Pod ships with a pre-flashed MicroSD card that has the app installed on it by default.
If you don't have it, or you just want to set up a fresh device, then:
- Download one of the images from the release section
- Use Raspberry Pi Imager and choose
custom imageto provide the downloaded image file. - Write the image
- Use the image to boot your Ubo Pod or Raspberry Pi
This is the fastest, easiest, and recommended way to get started with Ubo App.
🙋♂️ If this is the first time you are flashing an image for Raspberry Pi, we recommend following the more detailed steps here.
To run the app on a bare Raspberry Pi, you can watch this short demo video.
Install on existing OS
If you want to install the app on an existing Raspberry Pi OS (Bookworm / Debian 12 only supported right now), then read on. Otherwise, skip this section.
⚠️ Executing scripts directly from the internet with root privileges poses a significant security risk. It's generally a good practice to ensure you understand the script's content before running it. You can check the content of this particular script here before running it.
To install ubo, run this command in a terminal shell:
curl -sSL https://raw.githubusercontent.com/ubopod/ubo-app/main/ubo_app/system/scripts/install.sh | sudo bash
If you don't want to install the Docker service, you can set the WITHOUT_DOCKER environment variable to true:
curl -sSL https://raw.githubusercontent.com/ubopod/ubo-app/main/ubo_app/system/scripts/install.sh | sudo WITHOUT_DOCKER=true bash
The installer also provisions the uv/uvx and Node.js/npx runtimes (under the ubo user) so the MCP gateway can launch stdio-based MCP servers. To skip either, set the WITHOUT_UV or WITHOUT_NODE environment variable to true:
curl -sSL https://raw.githubusercontent.com/ubopod/ubo-app/main/ubo_app/system/scripts/install.sh | sudo WITHOUT_UV=true WITHOUT_NODE=true bash
To install a specific version of ubo, you can set the TARGET_VERSION environment variable to the desired version:
curl -sSL https://raw.githubusercontent.com/ubopod/ubo-app/main/ubo_app/system/scripts/install.sh | sudo TARGET_VERSION=0.0.1 bash
Note that as part of the installation process, these Debian packages are installed:
- accountsservice
- dhcpcd
- dnsmasq
- git
- hostapd
- i2c-tools
- ir-keytable
- libasound2-dev
- libcap-dev
- libegl1
- libgl1
- libmtdev1
- libzbar0
- python3-alsaaudio
- python3-apt
- python3-dev
- python3-gpiozero
- python3-libcamera
- python3-picamera2
- python3-pip
- python3-virtualenv
- rpi-lgpio
Also be aware that ubo-app only installs in /opt/ubo, and this is not customizable
at the moment.
ESP32 satellites
An ESP32 satellite is a companion board for an existing Ubo Pod (or any host running ubo-app) — it is not a standalone install. Set up the pod first, then flash the satellite.
Supported boards:
| Board | Hardware | Status |
|---|---|---|
| Waveshare ESP32-C6-Touch-AMOLED-1.8 | SH8601 368×448 AMOLED, FT3168 touch, ES8311 audio in/out | complete, verified on-device |
| Espressif ESP32-S3-BOX-3 | ILI9341 320×240 LCD, GT911 touch, ES8311 out + ES7210 2-mic array, wake word | bring-up in progress |
No toolchain required. Every release ships a prebuilt merged firmware image:
- Download
ubo-lvgl-esp32c6-<version>-merged.binfrom the Releases page. Pick the release matching your installed ubo-app version — the client's protobuf schema must match the core it talks to. - Connect the board over USB and open ESPConnect in Chrome or Edge (Web Serial), then select the board's serial port.
- In the Flash tab, choose the
.bin, set the offset to0x0, enable Erase before flash, and flash. - After the reboot, join the open
ubo-setupWiFi access point from a phone; the captive portal asks for your network and, optionally, the ubo-core host/port. The device saves them and reboots onto your network.
To move the board to a different network later, hold the BOOT button for ~8 seconds to
clear the stored credentials and return to ubo-setup.
Boards cabled to an Ubo Pod can carry their traffic over the USB cable itself (PPP
over USB) instead of WiFi — the ppp firmware profile, which is what the pod build
ships.
Full details — pin maps, the WiFi setup journey, the USB/PPP link, wake word setup, and
per-board status — are in ubo_lvgl/esp32/README.md.
Mobile and wearable apps
⚠️ These apps are experimental and still in beta. They are not published on the App Store or Google Play, and there is no timeline for that yet. The only way to try them today is to build them from source yourself, which means a working Xcode or Android Studio setup and a developer account for on-device installs.
You can also join our Discord to ask for private beta links on TestFlight, etc.
Expect rough edges, breaking changes, and features that only work against a matching ubo-app version.
Native clients that connect to an Ubo Pod over the gRPC API
(port 50053) and render the same UI remotely — they are thin renderers, so all logic
stays on the pod. Each platform is split into a bindings package (generated from this
repo's protobuf definitions, plus hand-written wrappers) and the app itself:
| Platform | App | gRPC bindings |
|---|---|---|
| iOS + watchOS (SwiftUI) | ubo-swift-app |
ubo-swift-grpc |
| Android + Wear OS, incl. a Glance widget (Kotlin) | ubo-kotlin-apps |
ubo-kotlin-grpc |
The app repos pull in their bindings package as a dependency, so for a plain build you only need the app repo — clone the bindings repo too if you want to build against local protobuf changes. Build instructions live in each repository.
Toolchain and deployment targets: iOS 18 / watchOS 11 (Xcode, SwiftPM) and Android minSdk 31 / target SDK 34 (JDK 17 + Android SDK 34, Gradle).
The apps need to reach the pod's gRPC port. Usually that means being on the same LAN as the device, but it does not have to be — you can reach the pod remotely through a reverse proxy or tunnel (Pangolin, Twingate and ngrok all ship as one-click Docker apps).
⚠️ The gRPC API has no authentication layer yet. Anything that can reach the port has
full control of the device, so exposing it to the public internet is strongly discouraged
— and if you tunnel to it, put the access control in the tunnel. Even on a LAN, treat the
port as unprotected and only run it on a network you trust. You can close off gRPC Access by going to Settings → System → General.
🤝 Contributing
Contributions following Python best practices are welcome.
New contributor? Start with CONTRIBUTING.md — it walks through the branch model, the local quality gate (
uv run poe sanity), and the optional ubo-claude Claude Code tooling (specialized agents,/onboard,/pr-preflight).
ℹ️️ Conventions
- Use
UBO_prefix for environment variables. - Use
ubo:prefix for notification ids used in ubo core and<service_name>:prefix for notification ids used in services. - Use
ubo:prefix for icon ids used in ubo core and<service_name>:prefix for icon ids used in services.
Development
Setting up the development environment
Quick start (automated)
After cloning the repository, you can set up the whole development environment with a single script. It detects your platform (macOS or Raspberry Pi/Linux), installs the required tooling (uv, buf, git-lfs, node), and bootstraps the project (virtual env, dependencies, protobuf, web app). It is safe to re-run and never requires sudo on the Raspberry Pi (run it as the ubo user):
./scripts/setup-dev.sh
Useful flags: --tools-only (install tools, skip project bootstrap), --skip-web (skip the web app build), --help. Pinned tool versions can be overridden via environment variables (e.g. NODE_VERSION=22 ./scripts/setup-dev.sh).
When it finishes, it prints the command to run the app in development mode.
Manual setup
Only follow these steps if you don't want to run the above dev setup script.
To set up the development environment manually, you need to have uv installed.
First, clone the repository (you need to have git-lfs installed):
git clone https://github.com/ubopod/ubo_app.git
git lfs install
git lfs pull
In environments where some Python packages are installed system-wide, like Raspberry Pi OS, you need to run the following command to create a virtual environment with system site packages enabled:
uv venv --system-site-packages
Then, navigate to the project directory and install the dependencies:
uv sync --dev
Next, you need to compile protobuf files and build the web application. You only need to do this once or whenever you update store actions/events or the web app. Please refer to Generating the protobuf files and Building the web application sections for the steps.
Now you can run the app with:
HEADLESS_KIVY_DEBUG=true uv run ubo
Run the app on the physical device
Add ubo-development-pod host in your ssh config at ~/.ssh/config:
Host ubo-development-pod
  HostName <ubopod IP here>
  User pi
⚠️Note: You may want to add the ssh public key to the device's authorized keys (~/.ssh/authorized_keys) so that you don't need to enter the password each time you ssh into the device. If you decide to use a password instead, you need to reset the password for the pi user first using the GUI on the device by going to Hamburger Menu -> Settings -> System -> Users and select pi user
Before you deploy the code onto the pod, you have to run the following command to generate the protobuf files and compile the web application.
Generating the protobuf files
Please make sure you have buf library installed locally. If you are developing on a Mac or Linux, you can install it using Homebrew:
brew install bufbuild/buf/buf
Then, run the following command to generate the protobuf files whenever an action or event changes:
uv run poe proto
This is a shortcut for running the following commands:
uv run poe proto:generate # generate the protobuf files based on the actions/events defined in python files
uv run poe proto:compile  # compile the protobuf files to python files
Building the web application
If you are running it for the first time, you first need to install the dependencies for the web application:
cd ubo_app/services/090-web-ui/web-app
npm install # Only needed the first time or when dependencies change
Then, you need to compile the protobuf files and build the web application:
cd ubo_app/services/090-web-ui/web-app
npm run proto:compile
npm run build
If you are modifying web-app typescript files, run npm run build:watch and let it stay running in a terminal. This way, whenever you modify web-app files, it will automatically update the built files in the dist directory as long as it stays running.
If you ever add, modify, or remove an action or an event, you need to run poe proto and npm run proto:compile again manually.
Then you need to run this command once to set up the pod for development:
uv run poe device:deploy:complete
After that, you can deploy the app to the device with:
uv run poe device:deploy
To run the app on the device, you can use either of these commands:
uv run poe device:deploy:restart # gracefully restart the app with systemctl
uv run poe device:deploy:kill    # kill the process, which will be restarted by systemd if the service is not stopped
Running unit tests
Pure unit tests for store logic, navigation, and view computation can be run locally without Docker, Kivy, or Raspberry Pi hardware:
uv run poe test:unit
This runs all the tests in tests/store/ and tests/navigation/ (~2000 tests, takes about a minute).
To run them inside Docker:
uv run poe docker:test:unit
Running tests on desktop
The easiest way to run the tests is to use the provided Dockerfiles. To run the tests in a container, you first need to create the development images by running:
uv run poe build-docker-images
Then you can run the tests with:
docker run --rm -it --name ubo-app-test -v .:/ubo-app -v ubo-app-dev-uv-cache:/root/.cache/uv ubo-app-test
To run a specific test file or a single test, use docker:test:raw rather than
passing pytest args directly to ubo-app-test — the default entrypoint task
runs the unit and app test tiers as two separate pytest invocations (see
scripts/run_test_tiers.py), so extra args get appended to both tiers' fixed
directory lists instead of replacing them:
uv run poe docker:test:raw tests/reproduction/test_menu.py -v
uv run poe docker:test:raw tests/integration/test_services.py::test_all_services_register -v -x
If this fails with a setuptools-scm/version-detection error from the
bind-mounted repo, pass PRETEND_VERSION through from your shell:
PRETEND_VERSION=0.0.0.dev0 uv run poe docker:test:raw tests/reproduction/test_menu.py -v
To pass command line options to the full suite, add a double-dash before the options:
docker run --rm -it -v .:/ubo-app -v ubo-app-dev-uv-cache:/root/.cache/uv -v ubo-app-dev-uv-local:/root/.local/share/uv -v ubo-app-dev-uv-venv:/ubo-app/.venv ubo-app-test -- -svv --make-screenshots --override-store-snapshots --override-window-snapshots
Useful pytest options for snapshot testing:
--make-screenshots- Generate PNG screenshot files alongside hash files. When a test fails due to snapshot mismatch, this creates.mismatch.pngfiles showing the actual rendered output for debugging.--override-window-snapshots- Update window snapshot hash files to match current output (use after verifying the visual changes are correct).--override-store-snapshots- Update store snapshot files to match current state.
For example, to debug a failing snapshot test:
uv run poe docker:test:raw --make-screenshots tests/integration/
Then check the generated .mismatch.png files in tests/integration/results/ to see what changed.
You can also run the tests in your local environment by running:
uv run poe test
⚠️Note: When running the tests in your local environment, the window snapshots produced by tests may mismatch the expected snapshots. This is because the snapshots are taken with a certain DPI and some environments may have different DPI settings. For example, we are aware that the snapshots taken on macOS have different DPI settings. If you encounter this issue, you should run the tests in a Docker container as described above.
Running tests on the device
You need to install the dependencies with the following commands once:
uv run poe device:test:copy
uv run poe device:test:deps
Then you can use the following command each time you want to run the tests:
uv run poe device:test
Running linter
To run the linter, run the following command:
uv run poe lint
To automatically fix the linting issues, run:
uv run poe lint:fix
Running type checker
To run the type checker, run the following command on the pod:
uv run poe typecheck
⚠️Note: typecheck needs all packages to be present. To run the above command on the pod, you need to clone the ubo-app repository on the pod, apply your changes on it, have uv installed on the pod and install the dependencies.
If you prefer to run typecheck on the local machine, clone the stubs repository (which includes typing stubs for third-party packages) and place the files under the typings directory. Then run the poe typecheck command.
Adding new services
It is not documented at the moment, but you can see examples in the ubo_app/services directory.
⚠️Note: To make sure your async tasks are running in your service's event loop and not in the main event loop, you should use the create_task function imported from ubo_app.utils.async_ to create a new task. Using await inside async functions is always fine and doesn't need any special attention.
⚠️Note: Your service's setup function, if async, should finish at some point, this is needed so that ubo can know the service has finished its initialization and is ready to be used. So it should not run forever, by having a loop at the end, or awaiting an ongoing async function or similar patterns. Running a never-ending async function using create_task imported from ubo_app.utils.async_ is alright.
QR code
In the development environment, the camera is probably not working, as it relies on picamera2, so it may be challenging to test the flows relying on QR code input.
To address this, the camera module, in non-RPi environments, will try reading from /tmp/qrcode_input.txt and /tmp/qrcode_input.png too. So, whenever you encounter a QR code input, you can write the content of the QR code in the text file path or put the QR code image itself in the image file path and the application will read it from there and continue the flow.
Alternatively, you may be able to provide the input in the web UI (needs a refresh at the moment) or provide it with an InputProvideAction over the gRPC channel.
LVGL GUI client and ESP32 satellite firmware
The C/LVGL renderer under ubo_lvgl/ is one codebase with three
targets: a desktop SDL window, the Raspberry Pi ST7789 SPI panel, and the ESP32
satellite boards. The same renderer and the same transport code are compiled for all
three; only the display backend and the transport's host layer differ.
First fetch the submodules (LVGL itself and nanopb):
git submodule update --init ubo_lvgl/lvgl ubo_lvgl/third_party/nanopb
Build the renderer and the native C client for the desktop (needs CMake ≥ 3.15 and
SDL2 — brew install sdl2 / apt install libsdl2-dev):
cmake -S ubo_lvgl -B ubo_lvgl/build -DCMAKE_PREFIX_PATH=/opt/homebrew  # macOS/brew
cmake --build ubo_lvgl/build -j8
ctest --test-dir ubo_lvgl/build                                        # C unit tests
Run the LVGL client instead of the Kivy one — either on the desktop against a live core, or on a device by setting the supervisor's backend env var:
uv run ubo-core                                       # core, gRPC only, no GUI
UBO_LVGL_ASSETS_DIR=ubo_lvgl/assets \
  ubo_lvgl/build/client/ubo_lvgl_client --backend sdl --web-grpc-url localhost:50054

UBO_GUI_BACKEND=lvgl UBO_LVGL_BACKEND=st7789 ubo      # on a pod, LVGL on the panel
The C client talks to the core over tcp-lite, a lightweight raw-TCP protocol served
by ubo_app/rpc/mcu_server.py on port 50054 — no HTTP and no Envoy, which is what
makes it fit comfortably on an MCU. gRPC-Web over Envoy is still supported as a
build-time alternative.
Build and flash the ESP32 firmware (needs ESP-IDF v6; the poe tasks resolve the toolchain environment, per-board build directory, and sdkconfig for you):
uv run poe esp32:build   --board c6                        # or --board s3
uv run poe esp32:flash   --board s3 --port /dev/cu.usbmodem1101
uv run poe esp32:monitor --board c6 --profile wifi         # Ctrl-] to exit
--board is required (c6 = Waveshare ESP32-C6-Touch-AMOLED-1.8, s3 = Espressif
ESP32-S3-BOX-3). --profile defaults to ppp, the shipping USB/PPP build, which has
no USB console — pass --profile wifi for the debug build esp32:monitor can
actually read.
⚠️Note: the C client uses a curated protobuf schema
(ubo_lvgl/client/proto/ubo_client.proto) whose oneof field numbers must match the
running core's bindings exactly. uv run poe proto includes proto:lvgl:generate,
which checks the tags and regenerates the nanopb output — so run it after changing any
action or event, and don't hand-edit the generated .pb.{c,h} files.
Further reading:
ubo_lvgl/README.md— architecture, build options, transports, headless snapshots, and how the renderer mirrorsubo_gui's layoutubo_lvgl/client/README.md— the native C client: framing, nanopb decode, view translation, threadingubo_lvgl/esp32/README.md— board pin maps, ESP-IDF toolchain setup, captive-portal provisioning, USB/PPP, FreeRTOS task and memory budgets, per-board statusubo_lvgl/esp32/AFE-FAR-FIELD.md— far-field audio front end and wake word on the ESP32-S3-BOX-3
Mobile and wearable app bindings
The Swift and Kotlin client apps (see mobile and wearable apps) live in their own repositories, but their gRPC bindings are generated from this repo's protobuf definitions. Check the bindings repos out beside the core, then regenerate after changing any action or event:
uv run poe proto:swift     # → ../ubo-swift-grpc  (needs protobuf, swift-protobuf, grpc-swift)
uv run poe proto:kotlin    # → ../ubo-kotlin-grpc (needs JDK 17 + Android SDK 34)
uv run poe proto:complete  # Python + Swift + Kotlin in one go
proto:swift:check and proto:kotlin:check verify the committed generated sources still
match a fresh regen. Never hand-edit generated files.
⚠️Note: unlike the LVGL client, these clients regenerate the whole proto, so they never suffer field-tag drift — but a new action needs a matching branch in each client's hand-written action mapping. Kotlin catches a missing branch at compile time; Swift does not, and a missing case dispatches silently as a no-op.
🐞 Debugging
This section covers the running system: which process is which, how to stop and start it, where it writes its logs, and which environment variables to reach for when something misbehaves.
Process model
Understanding the processes makes the system much easier to debug and troubleshoot.
| Component | Process | Listens on | Logs to |
|---|---|---|---|
| Supervisor | ubo (ubo_app/main.py) |
— | journal |
| Core — Redux store, all services, web UI, gRPC | ubo-core (ubo_app/main_headless.py) |
gRPC 127.0.0.1:50051, tcp-lite 0.0.0.0:50054, web UI 0.0.0.0:4321 |
/opt/ubo/ubo-app.log |
| Kivy GUI client | ubo-gui-client (own venv, /opt/ubo/gui-client/) |
dials 50051 |
journal (stderr) |
| Assistant | bin/ubo-assistant (own venv) |
— | /opt/ubo/ubo-assistant.log |
| MCP gateway | bin/ubo-mcp-gateway (own venv) |
0.0.0.0:4322 |
/opt/ubo/ubo-mcp-gateway.log |
| System manager | ubo-system (root) |
unix socket /run/ubo/system_manager.sock |
/opt/ubo/system-manager.log |
| Envoy (only with gRPC Access on) | Docker container | 50052 gRPC-web, 50053 native proxy |
docker logs |
Three consequences worth internalizing:
ubois a supervisor, not the app. It picks the GUI backend, spawns the GUI client first (so the splash appears while the core boots), then spawnsubo-core, and forwards signals to both.- Services are threads, not processes. Every service in
ubo_app/services/runs as a thread with its own asyncio loop inside the core, so a service failure lands inubo-app.log— there is no per-service log file. The assistant and the MCP gateway are the two exceptions: each is spawned as a real subprocess in its own venv, and each writes its own log. - Clients are dumb renderers. The GUI, web, TUI, LVGL, iOS, Android clients hold no state; they render what the core streams them over gRPC and dispatch actions back. See the architecture section.
Starting and stopping services
⚠️Note: ubo-app is a user unit and ubo-system is a system unit.
Forgetting --user (or adding it where it doesn't belong) is the most common
first mistake.
# The app itself — user unit, runs as the `ubo` user
systemctl --user status ubo-app
systemctl --user restart ubo-app
systemctl --user stop ubo-app

# The root system manager — system unit (run under pi user or other sudo users)
sudo systemctl status ubo-system
sudo systemctl restart ubo-system
If you are logged in over SSH as a different user than ubo, a user unit needs the ubo
user's session bus:
sudo XDG_RUNTIME_DIR=/run/user/$(id -u ubo) -u ubo systemctl --user restart ubo-app
or
sudo su ubo && systemctl --user restart ubo-app
The remaining units are installed but disabled — they are activated on demand, not run by hand:
| Unit | Scope | Activated by |
|---|---|---|
ubo-hotspot |
system (root) | ubo-system, when the hotspot is switched on |
ubo-kiosk |
system (root) | the kiosk service; runs weston on tty2 |
ubo-esp32-ppp |
system (root) | udev, when an ESP32 satellite is plugged in over USB |
From your development machine, the deploy tasks wrap the same commands:
uv run poe device:deploy:restart # restart ubo-system and ubo-app
uv run poe device:deploy:kill    # kill the app; systemd restarts it
Logs
Log files are written relative to the process's working directory, and the
systemd units set that to the installation path. So on a device every log is in
/opt/ubo/, while in a development checkout they land in the repo root.
| File | Written by | Level variable | Rotation |
|---|---|---|---|
ubo-app.log |
core process and all service threads | UBO_LOG_LEVEL |
1 MB × 3 |
system-manager.log |
ubo-system (root) |
UBO_LOG_LEVEL |
1 MB × 3 |
ubo-assistant.log |
assistant subprocess | UBO_ASSISTANT_LOG_LEVEL |
1 MB × 3 |
ubo-mcp-gateway.log |
MCP gateway subprocess | UBO_MCP_GATEWAY_LOG_LEVEL |
1 MB × 3 |
headless-kivy.log |
GUI client, only when HEADLESS_KIVY_DEBUG=true |
— | none |
tail -f /opt/ubo/ubo-app.log
Three traps that cost real debugging time:
- Assistant errors are not in
ubo-app.log. The assistant is a separate process with a separate log file and a separate level variable — raisingUBO_LOG_LEVELdoes nothing for it. The same applies to the MCP gateway. - The GUI client has no log file. It logs to stderr, which systemd captures
into the user journal. Pass
-vto the client for DEBUG output. - An empty log file is not a symptom.
ubo-gui.logis only written if the core loads theubo_guiwidget library, which the headless core normally does not — so it stays empty, as doesheadless-kivy.logunlessHEADLESS_KIVY_DEBUG=true.
Use journalctl — not tail — for anything that logs to stdout/stderr rather
than a file:
| What | Command |
|---|---|
| Supervisor, GUI/LVGL client output, crashes before logging is set up | journalctl --user -u ubo-app -f |
| System manager stderr | sudo journalctl -u ubo-system -f |
| Hotspot captive portal | sudo journalctl -u ubo-hotspot -f |
| Kiosk (weston) | sudo journalctl -u ubo-kiosk -f |
| ESP32 USB/PPP link | sudo journalctl -u ubo-esp32-ppp -f |
Running from the command line
Running the app in the foreground gives you logs on stdout and a place to attach a debugger. In a development checkout:
UBO_LOG_LEVEL=DEBUG HEADLESS_KIVY_DEBUG=true uv run ubo
To run only the core and attach clients yourself — useful when debugging a client, or when you want the core without a display:
UBO_LOG_LEVEL=DEBUG uv run ubo-core
On a device, stop the service first; otherwise two instances fight over the display and other recources:
systemctl --user stop ubo-app
UBO_LOG_LEVEL=DEBUG /opt/ubo/env/bin/ubo
⚠️Note: UBO_LOG_LEVEL=DEBUG is genuinely usable — the HTTP/2 libraries behind
gRPC (hpack, hyperframe, grpclib, h2) are pinned to WARNING on
startup, so DEBUG doesn't drown in protocol frames. VERBOSE is also accepted,
and is even more detailed than DEBUG.
To set variables persistently instead of prefixing every command, put them in
ubo_app/.env (or ubo_app/.dev.env) — both are loaded at startup.
Environment variables
The ones worth reaching for when something is broken; defaults in parentheses where relevant.
Log levels
| Variable | Effect |
|---|---|
UBO_LOG_LEVEL (INFO) |
Core and system manager. Accepts VERBOSE, DEBUG, INFO, WARNING, ERROR |
UBO_ASSISTANT_LOG_LEVEL (INFO) |
Assistant subprocess — independent of the above |
UBO_MCP_GATEWAY_LOG_LEVEL (INFO) |
MCP gateway subprocess |
UBO_GUI_LOG_LEVEL (INFO) |
The ubo_gui widget library inside the core |
HEADLESS_KIVY_DEBUG (unset) |
Display-pipeline debug output from the GUI client |
UBO_ASSISTANT_LOG_PATH and UBO_MCP_GATEWAY_LOG_PATH relocate those two log
files if you want them somewhere other than the working directory.
Debug flags (all default to False)
| Variable | Effect |
|---|---|
UBO_DEBUG_TASKS |
Record a creation stack for every asyncio task, so task errors show where the task came from |
UBO_DEBUG_SCHEDULER |
Detect store-scheduler freezes, time each callback, print a summary on shutdown |
UBO_DEBUG_MENU |
Menu/navigation debugging |
UBO_DEBUG_VISUAL |
Kivy visual debug overlay |
UBO_DEBUG_PDB_SIGNAL |
Attach a debugger by sending a signal |
UBO_DEBUG_DOCKER |
Verbose docker app behavior |
UBO_WEB_UI_DEBUG_MODE |
Quart debug mode for the web UI |
Narrowing down the problem
| Variable | Effect |
|---|---|
UBO_DISABLED_SERVICES |
Comma-separated service ids to skip — the fastest way to bisect a misbehaving service |
UBO_ENABLED_SERVICES |
Comma-separated allowlist; everything else is skipped |
UBO_FORCE_HARDWARE |
Pretend the Ubo Pod HAT is present, for running on a machine without it |
UBO_GUI_BACKEND (kivy) |
kivy or lvgl — which GUI client the supervisor spawns |
UBO_LVGL_BACKEND (st7789) |
Display backend for the LVGL client; use sdl on a desktop |
UBO_DISABLE_GRPC |
Start the core without the gRPC server |
UBO_DISABLE_MCU_SERVER |
Start the core without the tcp-lite listener for ESP32 satellites |
ubo_app/constants/__init__.py is the source of truth for every variable and
its default — the table above is only the debugging-relevant subset.
For problems specific to a subsystem, see
ubo_app/services/090-mcp/README.md for
the MCP gateway, and ubo_lvgl/README.md plus
ubo_lvgl/esp32/README.md for the LVGL client and
the ESP32 satellites.
🛠️ Hardware
This section presents different hardware or emulation options that you can use with Ubo App.
Emulation
To remove barriers to adoption as much as possible and allow developers to use Ubo App without hardware dependencies, we are currently emulating the physical GUI in the browser.
The audio playback is also streamed through the browser.
We plan to emulate camera and microphone with WebRTC in the future.
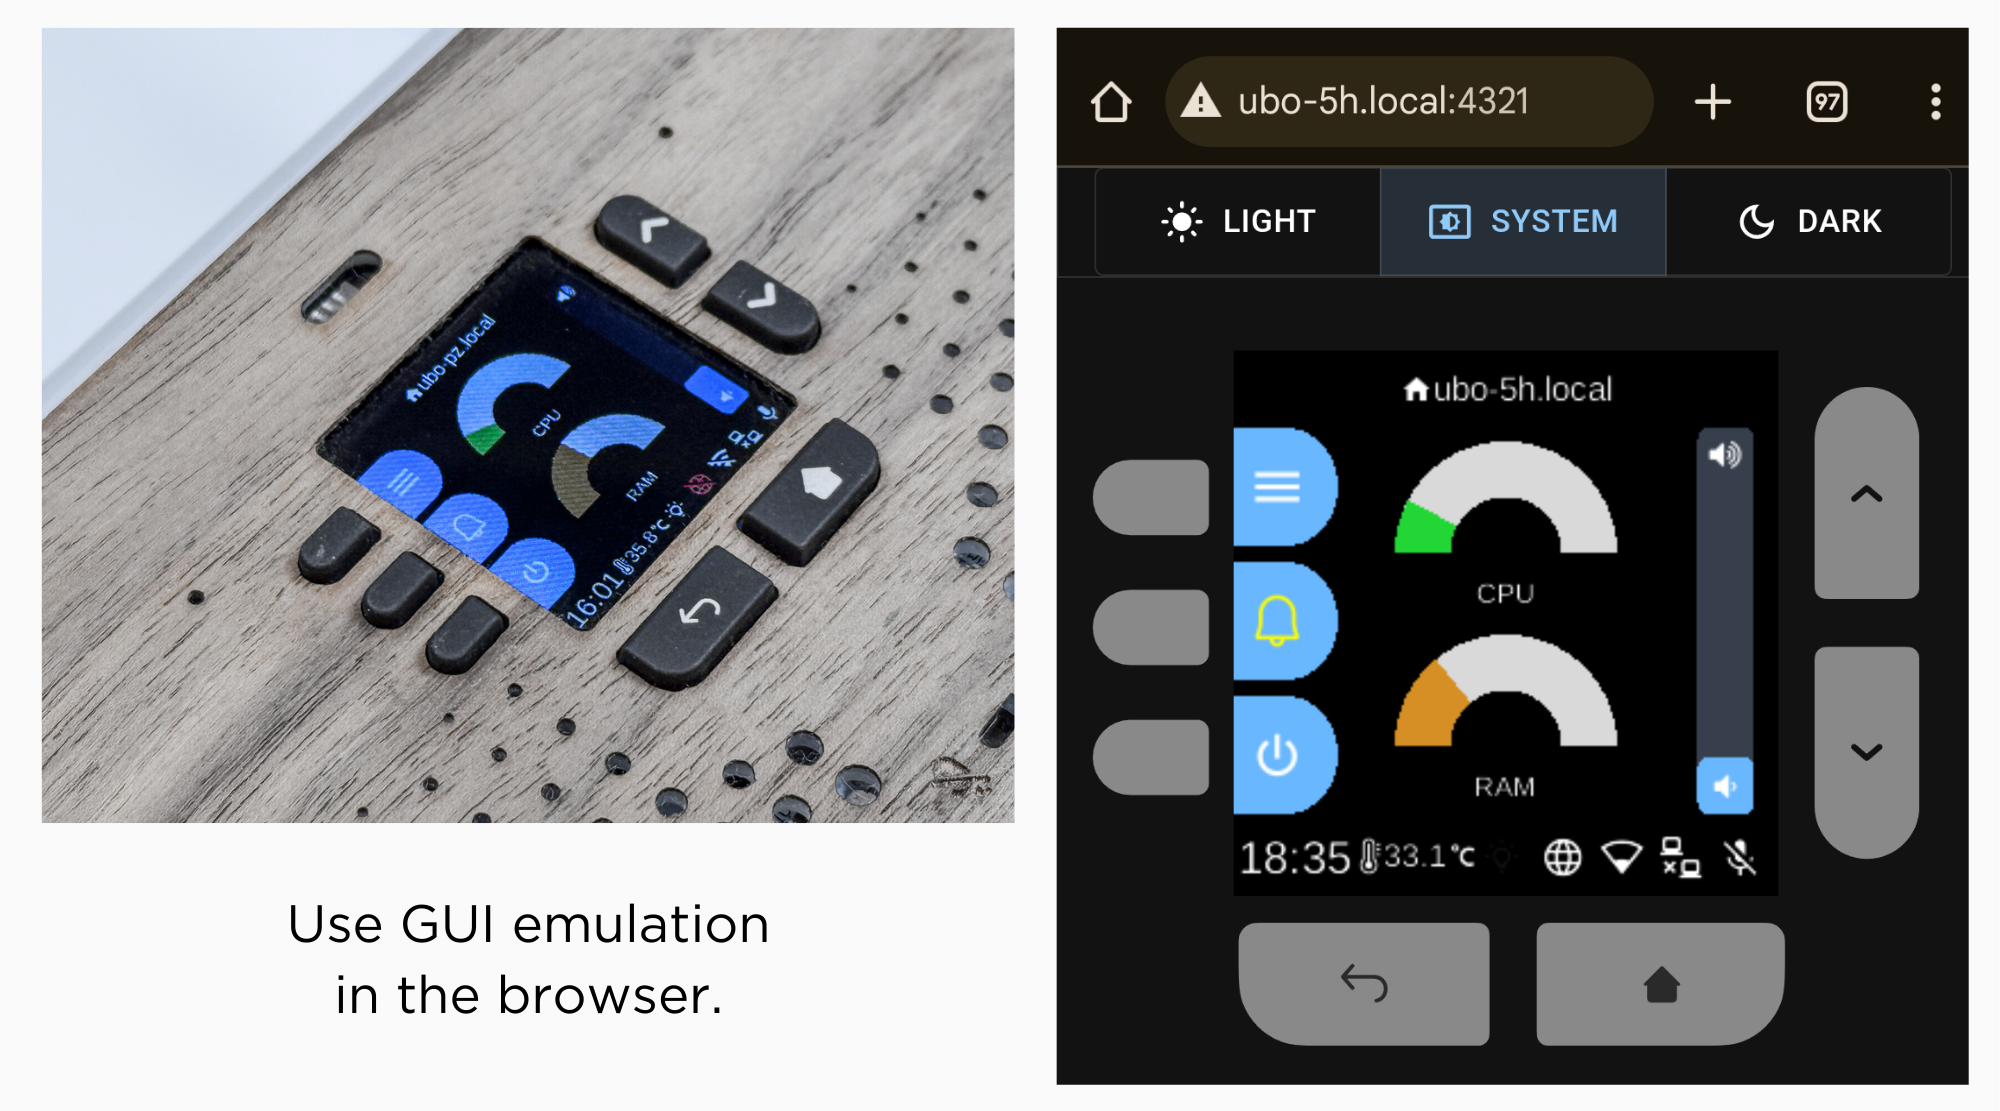
However, other specialized hardware components (sensors, infrared rx/tx, etc.) cannot be emulated.
Ubo Pod
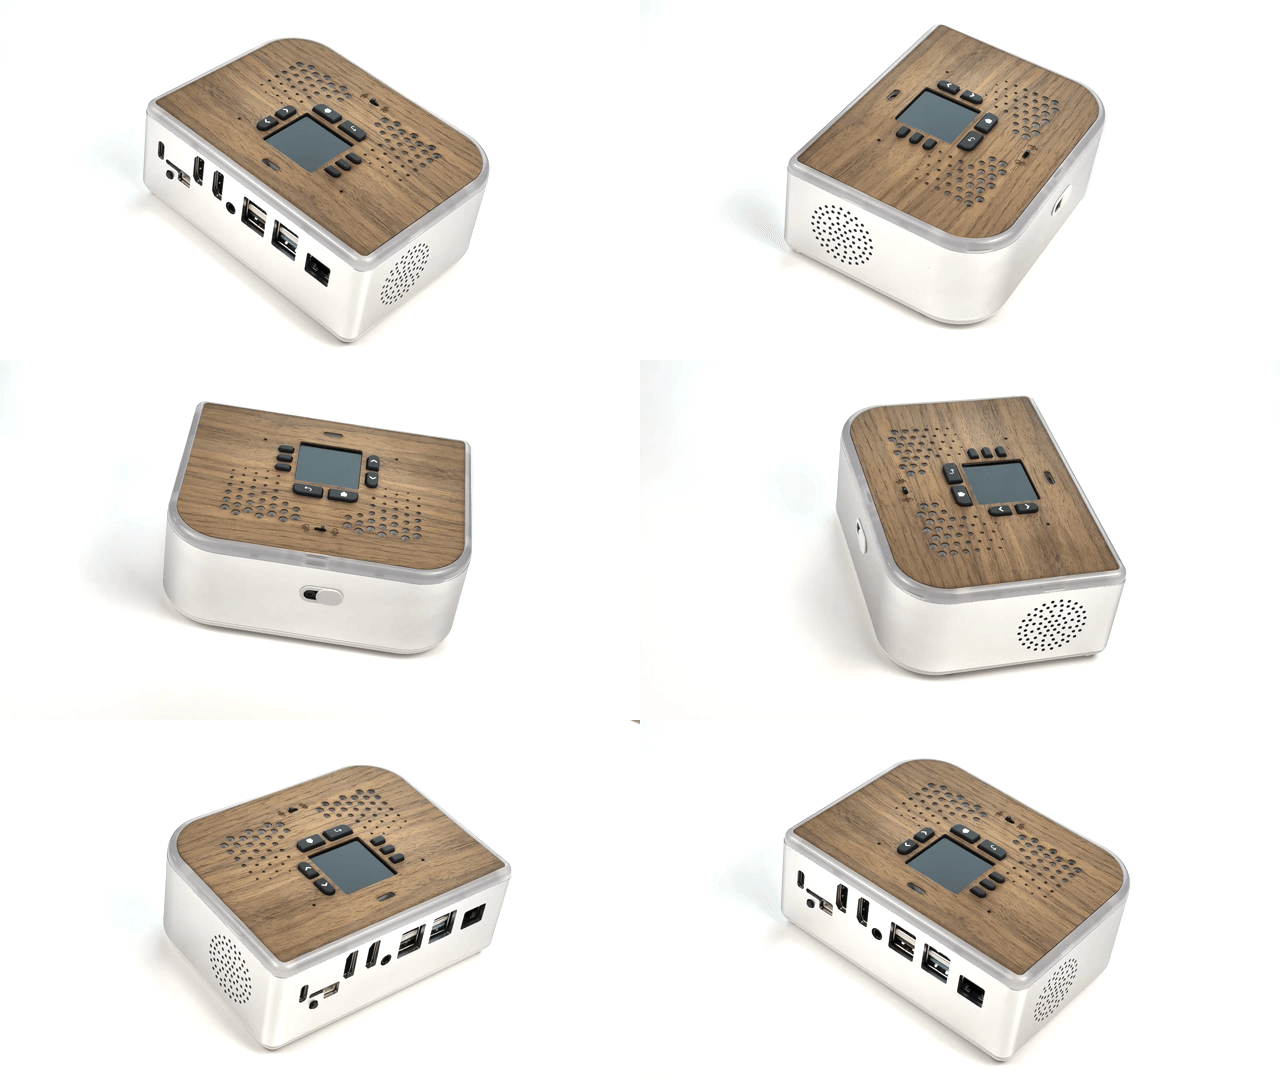
Ubo Pod is open hardware that includes the following additional hardware capabilities, all supported by Ubo App out of the box:
- A built-in minimal GUI (color LCD display and keypad)
- Stereo microphone and speakers (2W)
- Camera (5MP)
- LED ring (27 addressable RGB LEDs)
- Sensors
- Ambient light sensor
- Temperature sensor
- STEMMA QT / Qwiic connector for additional sensors
- Infrared
- Receiver (wideband)
- Transmitter (4 high power LEDs)
- 2 full HDMI ports
- Power/reset button
- NVMe storage (Pi 5 only)
For more information on the hardware specs, see the website getubo.com.
This is open hardware. You can access the mechanical design files here and electrical design files here.
DIY path
You can also buy different HATs from different vendors to DIY the hardware. Future plans include supporting USB microphones, speakers, and cameras as well, with a headless setup.
This, however, involves having to purchase multiple HATs from different vendors and the process may not be the easiest and most frictionless. You may have to dig into the code and make some small changes to certain setups and configurations.
The table below shows options for audio, cameras, and other sub-components:
| Function | Options |
|---|---|
| Audio | Respeaker 2-Mic Audio HAT, Adafruit Voice Bonnet, Waveshare WM8960 Hat, Adafruit BrainCraft HAT |
| Speakers | 1 or 2W, 8 Ohm |
| Camera | Raspberry Pi Camera Modules V1.3, V2, or V3 |
| LCD (also emulated in the browser) | 240x240 TFT Display, Adafruit BrainCraft HAT |
| Keypad | AW9523 GPIO Expander |
| LED ring | Neopixel LED ring |
| Ambient Light Sensor | VEML7700 Lux Sensor |
| Temperature Sensor | PCT2075 Temperature Sensor |
🏗️ Architecture
The architecture is fundamentally event-driven and reactive, built around a centralized Redux store that coordinates all system interactions through immutable state updates and event dispatching.
Services communicate exclusively through Redux actions and events rather than direct method calls, with each service running in its own isolated thread while subscribing to relevant state changes and events.
The system uses custom event handlers that automatically route events to the appropriate service threads, enabling reactive responses to state changes across hardware interfaces, user interactions, and system events.
This reactive architecture allows components like the web UI to subscribe to display render events and audio playback events in real time, creating a responsive system where changes propagate automatically through the event stream without tight coupling between components.
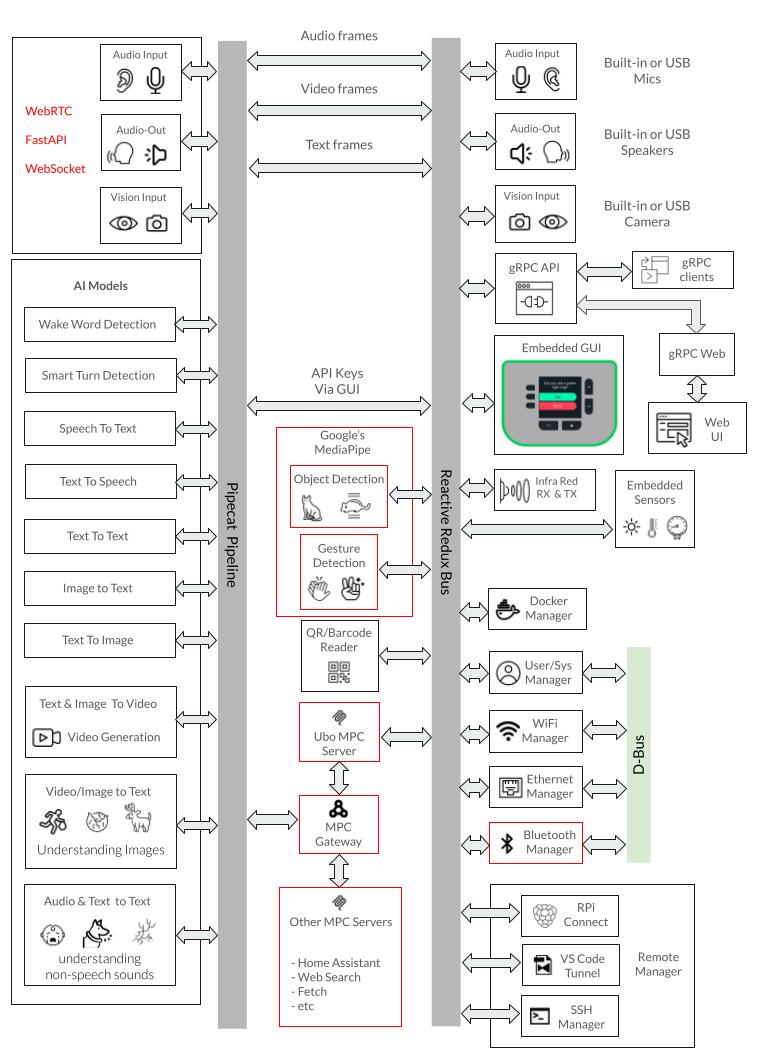
The following is a summary of key architecture components.
-
Redux-Based State Management: Central
UboStoremanages all application state through immutable state trees, with each service contributing its own state slice (audio, camera, display, docker, wifi, etc.) and communicating via actions and events. -
Modular Service Architecture: 30+ core services run in isolated threads with dedicated event loops, organized by priority band (
000-hardware drivers,010-core system,020-input,030-networking,040-sensors,050-system integration,080-containers,090-apps and extensions), each with its own setup.py, reducer.py, and ubo_handle.py files. -
Hardware Abstraction Layer: Comprehensive abstraction for Raspberry Pi components (ST7789 LCD, WM8960 audio, GPIO keypad, sensors, camera, RGB ring) with automatic environment detection and mock implementations for development on non-RPi systems.
-
Multi-Interface Access: Supports web browser access (port 4321 for direct bootstrap/recovery, Envoy's gRPC-web frontend port for the full live UI), gRPC API (port 50051), SSH access, and direct hardware interaction, with a web UI service providing hotspot configuration and dashboard functionality.
-
System Integration: Integrates with
systemdandd-busfor service management, Docker for container runtime, andNetworkManagerfor network configuration, with a separate system manager process handling root-privilege operations via Unix sockets.
Notes:
The application follows a structured initialization sequence through ubo_app/main.py and uses the uv package manager for dependency management.
The architecture supports both production deployment on Raspberry Pi devices and development environments with comprehensive mocking systems, making it suitable for cross-platform development while maintaining hardware-specific capabilities.
DeepWiki pages you might want to explore:
📦 Notable dependencies
Here are the key dependencies organized by category:
Core Framework & State Management
python-redux: Redux-based state management system for the entire appubo-gui: Custom GUI framework built on Kivy for the user interfaceheadless-kivy: Headless Kivy implementation for supporting LCD display over SPI
Hardware Control (Raspberry Pi)
adafruit-circuitpython-rgb-display: ST7789 LCD display driveradafruit-circuitpython-neopixel: RGB LED ring controladafruit-circuitpython-aw9523: I2C GPIO expander for keypadadafruit-circuitpython-pct2075: Temperature sensor driveradafruit-circuitpython-veml7700: Light sensor driverrpi-lgpio: Low-level GPIO access for Raspberry Pigpiozero: GPIO abstraction layerrpi-ws281x: WS281x LED strip control librarypyalsaaudio: ALSA audio interface for Linux audio controlpulsectl: PulseAudio control for audio managementsimpleaudio: Simple audio playback functionality
Voice AI
piper-tts: Text-to-speech synthesis enginevosk: Speech recognition librarypvorca: Picovoice text-to-speech synthesis enginepipecat-ai: Framework for building real-time voice and multimodal conversational agents
Networking & Services
aiohttp: Async HTTP client/server for web servicesquart: Async web framework for the web UI servicesdbus-networkmanager: NetworkManager D-Bus interface for WiFinetifaces: Network interface enumerationdocker: Docker API client for container management
QR Codes
pyzbar: QR code and barcode scanning library
System Utilities
psutil: System and process monitoring utilitiesplatformdirs: Platform-specific directory pathstenacity: Retry logic and error handlingfasteners: File locking and synchronization
Development Environment Abstraction
python-fake: Mock hardware components for development
gRPC Communication
betterproto: Protocol buffer compiler and runtime
Notes:
The project uses platform-specific dependencies with markers like platform_machine=='aarch64' for Raspberry Pi-specific libraries and sys_platform=='linux' for Linux-only components. The python-fake library enables development on non-Raspberry Pi systems by providing mock implementations of hardware components.
🗺️ Roadmap
Delivered items are checked off; the rest is tentative and subject to change.
- Emulation for camera and microphone inside browser (requires SSL certificate for browser permissions)
- Allow users to pick their soundcard for play and record via GUI (e.g. USB audio) — playback output selection shipped in 2.1; capture/record selection is still open
- Support for NVIDIA Jetson Nano Orin
- Support for Radxa X4 and X5
- Support for LattePanda
- Ansible deployment
- Allow users to pick their camera for video via GUI (e.g. USB camera) — shipped in 2.0
- Option to turn Ubo Pod into a voice satellite with the Wyoming protocol and Home Assistant — shipped in 2.1
- Make all on-board sensors and infrared discoverable and accessible by Home Assistant — shipped in 2.1
- Expose
pipecat-aipreset pipeline configuration via GUI - Support for Debian Trixie (13)
If you have any suggestions or feature requests, please open a discussion here.
🔒 License
This project is released under the Apache-2.0 License. See the LICENSE file for more details.
That license covers the source in this repository. It does not cover the third-party software Ubo App depends on, bundles in the pre-packaged images, or downloads onto the device at your direction — each of those remains under its own license and copyright, including several copyleft ones. Consult the license shipped with each component for its terms.
Metadata
Release files for ubo-app 2.0.1.dev260819103102489955
For a detailed explanation of source distributions (sdists) and built distributions (wheels), please see the package formats documentation.
Source distribution (sdist)
| File | Size | Uploaded | |
|---|---|---|---|
| ubo_app-2.0.1.dev260819103102489955.tar.gz | 5.6 MB | Details |
Built distribution (wheel)
| File | Interpreter | ABI | Platform | Reset |
|---|---|---|---|---|
| ubo_app-2.0.1.dev260819103102489955-py3-none-any.whl | Python 3 | none | any | Details |
Total release size: 11.5 MB
Release files / ubo_app-2.0.1.dev260819103102489955.tar.gz
| Download URL | ubo_app-2.0.1.dev260819103102489955.tar.gz |
|---|---|
| Size | 5.6 MB |
| Tags | Source |
|
SHA-256 checksum How to use checksums |
0c51250ad2fbda583ad85665bd0a625e68441b76dc5725208acd2b22031ac8f1
|
|
BLAKE2b-256 checksum How to use checksums |
bd9e1e94c6536cbf1e5e43ab80aec9c50d8eee8834c1799ad8d9a5698373387f
|
| Upload date | |
|
Uploaded using Trusted Publishing? What is trusted publishing? |
Yes |
| Uploaded via |
twine/7.0.0 CPython/3.13.14
|
Provenance
Provenance describes where a file came from. On PyPI, provenance is shared via attestations, which provide a verifiable record of the build or publishing details. View details, limitations and caveats.


PyPI Publish Attestation
PyPI verified that this artifact, at this checksum, originated from the publisher listed below.
Signed by GitHub Actions, verified by PyPI on Aug 20, 2026.
Transparency logRelease files / ubo_app-2.0.1.dev260819103102489955-py3-none-any.whl
| Download URL | ubo_app-2.0.1.dev260819103102489955-py3-none-any.whl |
|---|---|
| Size | 5.9 MB |
| Tags | Python 3 |
|
SHA-256 checksum How to use checksums |
8090268260c6c859aae5ccca4f659ef2d26f36af3a3caef538f1e6f16437c8c0
|
|
BLAKE2b-256 checksum How to use checksums |
1e7601089a35ade2f1455165295116483b232c095709ebb64fef8347ace14c68
|
| Upload date | |
|
Uploaded using Trusted Publishing? What is trusted publishing? |
Yes |
| Uploaded via |
twine/7.0.0 CPython/3.13.14
|
Provenance
Provenance describes where a file came from. On PyPI, provenance is shared via attestations, which provide a verifiable record of the build or publishing details. View details, limitations and caveats.
PyPI Publish Attestation
PyPI verified that this artifact, at this checksum, originated from the publisher listed below.
Signed by GitHub Actions, verified by PyPI on Aug 20, 2026.
Transparency log













