
vMark-node by Pathgate
World's first open source Ethernet software-based demarcation NID.
Latest version: 0.3.9 / Release notes: Link / News at: LinkedIn
🚀 Features:
- Modular tree-style CLI with tab autocompletions and '?' helper.
- Shell/Dispatcher/Modules/Plugins architecture.
- Complete Interface management.
- GPLv3 License.
- Add & delete sub.interfaces (QinQ / dual-tags supported) (v0.2)
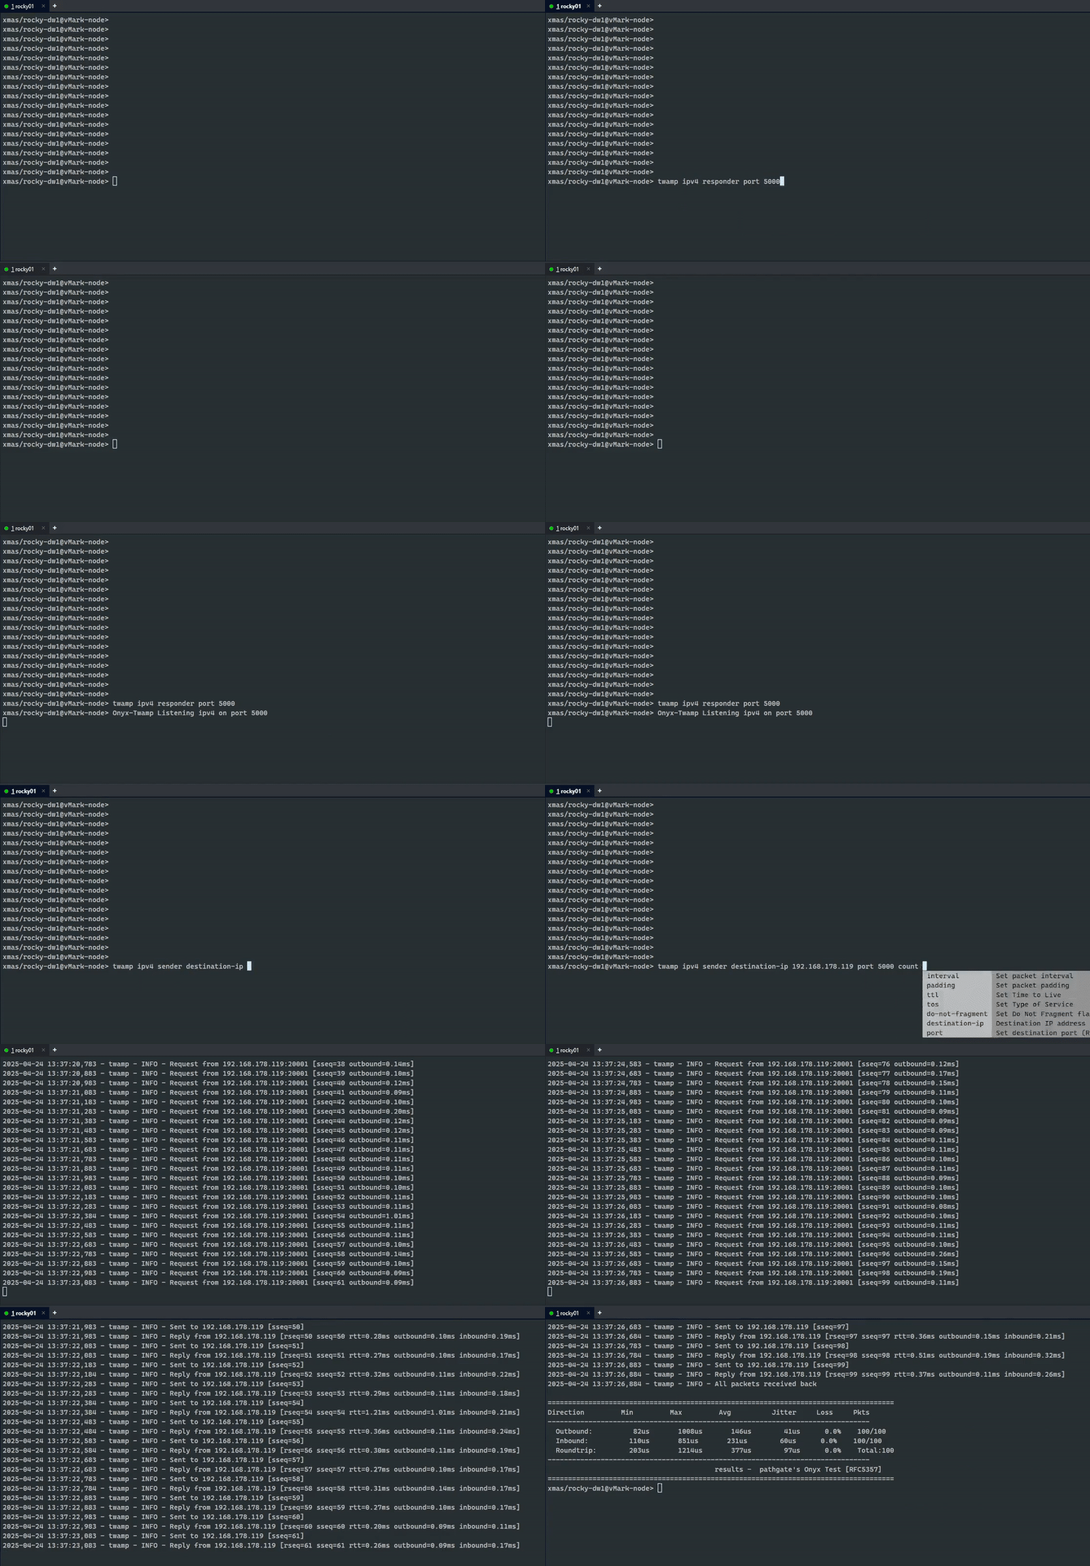
- TWAMP (RFC5357) implementation for End-to-End L3 tests. (ipv4 & ipv6, sender/responder modes). (v0.3)
- Pypi (pip) packaging. (v0.3.1)
- Remote Management via vMark. (v0.3.4)
- XDP-Switch (eBPF) based MEF-compliant transparent Ethernet switching (v0.3.9)
🔧 Feature roadmap:
- Ethernet OAM. (IEEE 802.1ag / Y.1731)
- Timing protocols support (ITU-T G.8262 Sync-E and IEEE 1588v2)
- Automated MEF3 Service WAN failover.
- Remote loop testing with automatic timeout.
- RFC2544 Service Activation testing and reflector.
- open-BFDD implementation for service session assurance.
- fiber-interface management and optic levels monitoring.
- SNMP Support.
- Multi-vendor IPSec Tunnel support.
- VXLAN Tunneling.
# Overview
vMark-node is a software-based open-source Ethernet demarcation NID designed for flexibility and democratization in the Carrier industry.
The "-node"** refers to this being the client-side of vMark server. (vMark-node doenst need vMark to work).

# Architecture
Shell: Provides command-line auto-completion, some help-related features and dynamically builds the command tree based on the modules and installed plugins. This enables a modular, scalable and re-usable interactive CLI experience.
Dispatcher: Interprets user commands, determines the appropriate module to handle each command, and routes execution accordingly. The dispatcher acts as the central coordinator between the shell and the available modules/plugins, Web-UI and API interactions talk directly with the Dispatcher.
Modules: Shell modules encapsulate core command logic and define the command tree structure. Examples: 'show', 'config', and 'system', each representing a set of related commands and subcommands with item descriptions.
Plugins: Integrate external libraries or tools to extend functionality. For example, plugins can provide access to third-party systems such as OpenBFDD, allowing seamless integration with external services.
📎 Installation methods
System Requirements
-
Python 3.9+
-
bpftool
-
pkg-config
-
libnl-3-dev and libnl-route-3-dev (Debian/Ubuntu)
-
libnl3-devel (Fedora/RHEL/CentOS)
-
Ubuntu/Debian:
sudo apt update
sudo apt install -y python3.9 python3.9-venv python3-pip build-essential pkg-config libnl-3-dev libnl-route-3-dev python3-dev ethtool
- Fedora/RHEL/CentOS:
sudo dnf install -y python3.9 python3-pip gcc pkgconfig libnl3-devel python3-devel ethtool
Quick Install
git clone https://github.com/xmas-ar/vMark-node
cd vMark-node/vMark-node
pip3 install -r requirements.txt
python3 main.py
PIP Install (recommended)
(Might need one of these two lines previous to install pip:)
sudo dnf install -y pkgconfig libnl3-devel gcc python3-devel
sudo apt install -y pkg-config libnl-3-dev python3-dev build-essential
Then do:
pip install vmark-node
~/.local/bin/vmark-node
🔄 Running as a Background Service (Production)
To ensure vmark-node stays running in the background (e.g., to keep the API server accessible by vMark), you can use systemd or tmux.
✅ Option 1: systemd Service (Recommended for Linux)
- Create a service file:
bash
sudo nano /etc/systemd/system/vmark-node.service
Paste this configuration:
[Unit]
Description=vMark-node Service
After=network.target

[Service]
Type=simple
ExecStart=/usr/local/bin/vmark-node
WorkingDirectory=/opt/vmark-node
Restart=always
RestartSec=3
User=nobody

[Install]
WantedBy=multi-user.target
⚠️ Replace /usr/local/bin/vmark-node and /opt/vmark-node with your actual install path (check with which vmark-node if installed via pip).
- Enable and start the service:
sudo systemctl daemon-reload
sudo systemctl enable vmark-node
sudo systemctl start vmark-node
- Useful commands:
sudo systemctl status vmark-node
sudo journalctl -u vmark-node -f
✅ Option 2: TMUX (Simpler option)
- Install tmux and launch vmark (after installed with pip):
sudo apt install tmux
tmux
vmark-node
- Then press:
Ctrl + B, then D
👉 That detaches the session, leaving vmark-node running.
- To resume later:
tmux attach
1 maintainer

Metadata
1 maintainer
Release files for vmark-node 0.3.9
For a detailed explanation of source distributions (sdists) and built distributions (wheels), please see the package formats documentation.
Source distribution (sdist)
| File | Size | Uploaded | |
|---|---|---|---|
| vmark_node-0.3.9.tar.gz | 163.9 kB | Details |
Built distribution (wheel)
| File | Interpreter | ABI | Platform | Reset |
|---|---|---|---|---|
| vmark_node-0.3.9-py3-none-any.whl | Python 3 | none | any | Details |
Total release size: 338.4 kB
Release files / vmark_node-0.3.9.tar.gz
| Download URL | vmark_node-0.3.9.tar.gz |
|---|---|
| Size | 163.9 kB |
| Tags | Source |
|
SHA-256 checksum How to use checksums |
d49167a8d95e2dcd33678cabcb945db17f0b4ba440338d8b3b56b86c295d8fa8
|
|
BLAKE2b-256 checksum How to use checksums |
c64983b49ee70175c3522c03cedc241214596fc251b20f4139f32e89a8ab6952
|
| Upload date | |
|
Uploaded using Trusted Publishing? What is trusted publishing? |
No |
| Uploaded via |
twine/6.1.0 CPython/3.9.21
|
Release files / vmark_node-0.3.9-py3-none-any.whl
| Download URL | vmark_node-0.3.9-py3-none-any.whl |
|---|---|
| Size | 174.5 kB |
| Tags | Python 3 |
|
SHA-256 checksum How to use checksums |
4ca03f8268c60c4ebb25597de625371880054e20acfd28f161cfc7ad78f9f203
|
|
BLAKE2b-256 checksum How to use checksums |
bd6b6f57f213df98e868bca1a171e622efdba7ef5e91cb42b7274160559c0576
|
| Upload date | |
|
Uploaded using Trusted Publishing? What is trusted publishing? |
No |
| Uploaded via |
twine/6.1.0 CPython/3.9.21
|














