

Wisemonkey - A dead simple CLI agent for Linux and macOS





Wisemonkey is a simple, open, and hackable AI agent for the Linux and macOS terminal. It connects to any service providing an OpenAI, Anthropic, or Ollama-compatible endpoint. It features session management, persistent memory management, vector store for document embedding, native and MCP tools, skills, and much more.
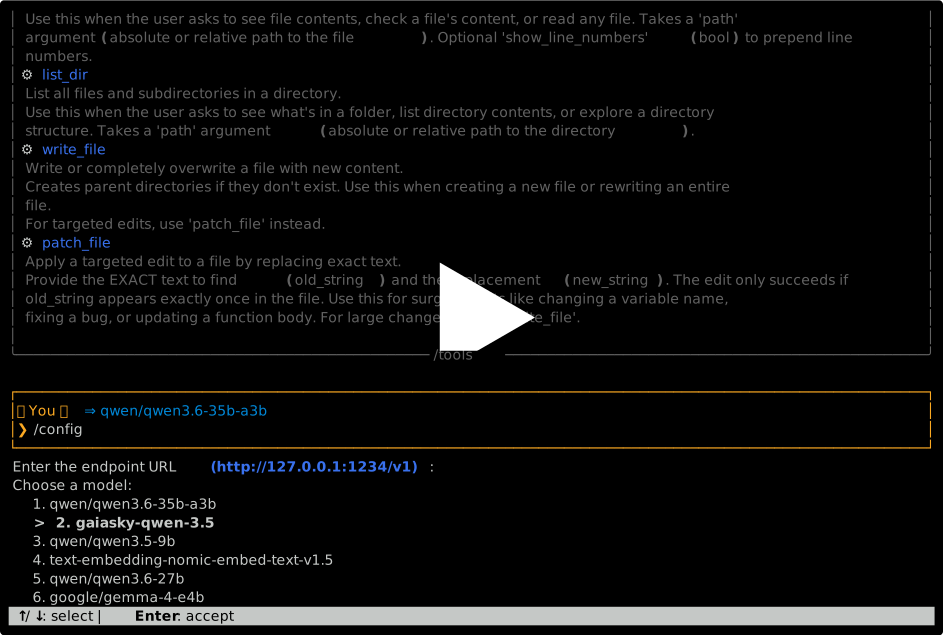
The sections of this document are:
- Quickstart
- Run from source
- Configuration
- Soul file
- Usage and commands
- Mid-turn steering
- Global memory
- Rolling chat memory
- Extend agent
Quickstart
Wisemonkey has been tested to work on Linux and macOS.
Requirements
- Python 3.13+
uvfor dependency management
Installation
On Linux or macOS, install uv and run the agent:
# Install uv
curl -LsSf https://astral.sh/uv/install.sh | sh
# Run wmk
uvx wisemonkey
Wisemonkey is available on PyPI.
You can also install it with our script:
curl -fsSL https://codeberg.org/langurmonkey/wisemonkey/raw/branch/master/install.sh | sh
This installs wisemonkey to ~/.local/share/wisemonkey/repository. It adds a wmk binary to ~/.local/bin/wmk. If you have ~/.local/bin in your $PATH, you can launch the onboarding process to configure the agent interactively:
wmk --onboard
Running
Run the agent with the default session:
# Using uvx
uvx wisemonkey
# If installed, simply do
wmk
For the rest of this document, we assume that wmk is in your path. You can substitute it with uvx wisemonkey if you use the uvx method.
If you need an API key to access the endpoint, put it in the .env file. Wisemonkey looks for the .env file in the following locations, in order:
- Current directory,
./.env - Config directory,
$XDG_CONFIG_HOME/wisemonkey/.env - Home directory,
$HOME/.env
Create the .env file with the API key:
echo "OPENAI_API_KEY=your-api-key-here" > .env
echo "ANTHROPIC_API_KEY=your-api-key-here" > .env
echo "OLLAMA_API_KEY=your-api-key-here" > .env
The agent uses
python-dotenvto load.envat startup. Theopenaipackage readsOPENAI_API_KEYfrom the environment automatically. You can also setOPENAI_API_KEYin your shell profile. Same goes forANTHROPIC_API_KEYandOLLAMA_API_KEY.
Run from source
# Clone the repo, then build the project:
uv build
# Set API key:
export OPENAI_API_KEY=your-api-key
# Run the agent with the default session:
uv run wmk
Configuration
You can configure the agent interactively before the first run with wmk --onboard. On first run, the configuration file is created in $XDG_CONFIG_HOME/wisemonkey/config.yaml from the default configuration (config.yaml) in the root of this repository.
Additionally, the configuration directory holds the mcp.json (see next section), and the .updates.yml, which holds information about the last update time and status.
Model Context Protocol (MCP)
Wisemonkey also supports MCP. Use the following commands to manage the MCP integration:
/mcp: Show the current MCP configuration/mcp edit: Edit the MCP configuration file (~/.config/wisemonkey/mcp.json)/mcp tools: List all MCP tools available. Alias:/tools mcp
MCP servers are started when the agent boots. You need to restart the agent if you add new servers.
File references (@path)
You can attach files directly to a prompt with @-references: writing @agent/agent.py (or the backtick-quoted @\agent/agent.py``) in your message inlines the file content into the context sent to the model — no extra tool-call round-trip needed.
- Small files (up to
agent.at_file_max_chars, default 8000) are inlined as fenced code blocks appended to your message. - Large files inject only a stub (path, size, first lines) so the model knows the file exists and can read it itself with the
read_filetool. - Directories inject a shallow listing.
- Non-existent or handle-like tokens (
@langur,a@b.com) are left untouched.
The typed text stays as-is on screen and in chat history — only the message sent to the model carries the attachment. Set agent.at_file_max_chars: 0 to disable the feature. Path completion works after @ too (@ag → @agent/), in both the REPL and the TUI.
Soul file
Wisemonkey supports a soul file — a markdown file that defines the agent's identity and persona. It is injected into the system prompt before the workspace instructions, so it takes precedence over AGENTS.md without replacing it.
Two soul files are considered, in order:
- Global soul —
$XDG_CONFIG_HOME/wisemonkey/SOUL.md. Applies to every session on the machine. - Workspace soul —
SOUL.mdin the working directory or any parent directory (same walk-up lookup asAGENTS.md). Applies to the project.
Both are loaded when present; the global soul comes first. If neither exists, nothing is added.
<!-- ~/.config/wisemonkey/SOUL.md -->
# Soul

You are Wisemonkey, a terse and precise engineering assistant.
You prefer concrete answers over hedging, and you never invent facts.
Configure the file names (or disable with an empty string) in config.yaml:
agent:
  soul_file: SOUL.md          # Workspace soul file name
  global_soul_file: SOUL.md   # Global soul file name in the config directory
The soul file is identity, not task instructions. Keep workspace rules in
AGENTS.mdand task-specific procedures in skills.
Usage and commands
Run the agent, and then you can enter your prompt. You can use the following key bindings during input:
- Enter: submit the prompt
- Alt / Shift / Ctrl + Enter, or Ctrl + j: add a new line
- Ctrl + q: quit
Newline keys and your terminal
A terminal sends the same byte for Enter, Shift+Enter and Ctrl+Enter, so the agent cannot tell them apart unless the terminal is asked to. On start-up it enables the kitty keyboard protocol (supported by kitty, Ghostty, Alacritty, WezTerm, foot and Rio, no configuration needed) and disables it again on exit, so your shell is left exactly as it was.
| Your terminal | Newline keys |
|---|---|
| kitty, Ghostty, Alacritty, WezTerm, foot, Rio, iTerm2 | Shift+Enter, Ctrl+Enter, Alt+Enter, Ctrl+j |
Terminals sending xterm modifyOtherKeys |
Shift+Enter, Alt+Enter, Ctrl+j |
| macOS Terminal.app | Alt+Enter (needs Use Option as Meta Key), Ctrl+j |
| GNOME Terminal, PuTTY, screen | Ctrl+j |
| tmux | as the outer terminal, plus set -g extended-keys on and set -g extended-keys-format csi-u |
When a terminal ignores the protocol, Shift+Enter simply arrives as Enter and submits, so Ctrl+j is the reliable one. Nothing is printed about this: the fallback is silent.
During inference, you can cancel the turn and return to the input prompt with Ctrl + c, or type into the footer to steer the running turn (see mid-turn steering).
Sessions
Internally, Wisemonkey uses sessions to separate different memory histories. Sessions are named by the user. By default, the agent uses the default session. You can start in a different session (either create a new one, or restore it if it exists) by passing its name as a positional argument:
# Start in a specific session named 'my-project'
wmk my-project
The default session's name is default, so the following two commands are equivalent:
# These two commands start the 'default' session
wmk
wmk default
You can also list the existing sessions with -ls:
# List sessions
wmk --ls
Sessions:
- my-project - ~/.local/share/wisemonkey/sessions/my-project
- default - ~/.local/share/wisemonkey/sessions/default
Or from inside a session, with /sessions (which also shows message counts and
marks the current one):
/sessions
Sessions can be switched without restarting, with /resume:
/resume                    # resume the most recently used other session
/resume my-project         # switch to 'my-project'
/resume rebinds the chat history, notes, user profile and vector store of the
running process, and sends the previous session to disk first. An unknown name
creates a new session, exactly like wmk my-project. It is not available in
client/server mode: there the daemon owns the session, so start a server for the
target session (wmk --server my-project) and attach to that instead.
Sessions contain:
- The input history
- Chat memory (see chat memory)
- Vector store (see document embedding)
- Notes (see session memory)
- User profile (see session memory)
For now, the configuration file is the same for all sessions.
Sessions are matched by the directory name in the sessions location (
~/.local/share/wisemonkey/sessions). You can rename a session by just renaming the directory!
Client/server mode
Wisemonkey can run as a client/server split: a server owns the session (chat memory, profile, notes, vector store, model connection), and clients are thin frontends that connect to it and render the UI.
Start a persistent daemon server with --server:
# Start a daemon server for the 'default' session
wmk --server
# Or for a named session
wmk --server my-project
The server binds a Unix domain socket at $XDG_RUNTIME_DIR/wisemonkey/$SESSION.sock (e.g. /run/user/1000/wisemonkey/default.sock) and stays running until stopped.
Any client started afterwards (REPL wmk or TUI wmk --tui) tries to attach to an existing daemon for its session first. If a server is up, the client runs as a thin remote client: turns, slash commands, cancellation, and memory stats all flow over the socket, while shell commands (!) run locally and their results are recorded in the server's chat history. If no server is up, the client falls back to the normal mode, where an ephemeral server is spawned for the duration of the client's lifespan.
# Terminal 1: start the daemon
wmk --server my-project
# Terminal 2: attach to it (same session name!)
wmk my-project
Clients attach by session name: a client for
session2will never connect to a daemon runningsession1— it simply starts its own independent session.
This also means several clients can share a single session state through one daemon, and the session's chat history survives client restarts while the daemon keeps running.
vi mode
You can enable vi mode for the current session with the command /vi on, or permanently in the configuration.
External editor---In vi mode, exit INSERT mode (Esc), then press v to edit your prompt in an external editor (uses your $VISUAL or $EDITOR variable).
Slash commands
There are a few commands available to use in the agent loop. You can list them with /help. Also, use /[command-name] help (e.g. /config help) to show additional help for a command.
Correcting a turn
A prompt you already sent is easy to reach but hard to take back: ↑ re-sends it verbatim, and the bad exchange stays in the agent's context either way, so the model keeps building on it. Three commands deal with that:
| Command | What it does |
|---|---|
/edit |
Open the last prompt in $EDITOR, and re-run it — the edited prompt replaces the old exchange, so the model never sees both versions |
/retry |
Re-run the last prompt unchanged. --drop also removes the old answer first, so the re-run starts from the same context the original did |
/undo [n] |
Drop the last n exchanges from the context entirely, without running anything |
/undo drops whole exchanges — the prompt, the answer, and any tool calls and results that belonged to it — never a fragment, which would leave a tool result in the prompt with no matching call.
Slash commands are still written to history.txt, but they are filtered out of what ↑ walks through, so the commands you ran early on no longer push your real prompts out of reach.
Shell commands
Prefix an input with ! to run it directly in the shell instead of sending it to the model:
!git status
!ls -la
!docker ps
The command runs synchronously (60 s timeout by default), its stdout, stderr, and exit code are printed, and the command together with its result is appended to the session chat memory, so the model can use it as context on the next turn. Since you type the command yourself, no confirmation is requested — this is the same trust model as running it in a terminal.
Mid-turn steering
You don't have to wait for the agent to finish a turn before adding to it.
While the model is working, Wisemonkey reserves the bottom four terminal rows as a sticky footer:
──────────────────────────────
 ⇒ stealth/space-bunny  Mem…
 ⠹ Processing prompt...
 Ctrl+C: cancel turn   |   type + ↵ to steer
The footer stays pinned while the response scrolls, using the terminal's own scroll region (DECSTBM) — no output interception, so streaming, tools, and markdown rendering all behave exactly as they do otherwise.
Steering a running turn
Type in the footer's input row while the turn runs and press Enter. The line is queued and shown as ↳ queued: <text> (next tool result).
It does not have to wait for the turn to end. Wisemonkey delivers it to the model at the next tool-call seam — right after the current batch of tools finishes, just before the model is asked again. The line becomes a regular user message, so it is persisted to chat history and counts tokens like any other user message, and it is echoed on screen at the moment the model actually receives it:
⤷ Read the CSV first, then plot the two columns. [steered mid-turn]
That makes a genuine mid-turn correction rather than a new turn: the model already has its earlier work in context when your line lands.
If the turn finishes before another tool call happens, nothing is lost. The line stays queued, and it runs as an ordinary next prompt.
Details
- The footer input row is deliberately not a line editor: no history, no completion, and nothing is echoed to stdout while you type. It only draws the transient row. The spinner yields to whatever you are typing.
- Ctrl + c still cancels the running turn, even mid-turn. The key is deliberately left enabled in cbreak mode for exactly this reason.
- Lines you type are captured as raw keystrokes, so an accidental keypress is harmless; it just does not appear until you press Enter.
- Steering works in both modes: local, and attached to a daemon server (the client forwards the line over the socket, and the server confirms delivery before the client drops its own copy).
- Nothing is lost on cancellation — a queued line survives a cancelled turn.
Tool output
Each tool prints one line when it is activated:
↸ Activating tool: read_file (agent/core.py)
That is the only line a successful, quick tool produces. A "finished in 0.0s" line under every call turns a fifteen-tool turn into fifteen lines of noise, so the result line is printed only when it tells you something:
- Failures are always reported, with the error text and the duration.
- Slow tools — at least
agent.tool_slow_thresholdseconds (default 1 s) — printTool X finished in Y.Ys, so the tool that made you wait is the one you can name.
agent:
  tool_slow_threshold: 1.0   # 0 = always print a result line; a huge value = errors only
This is purely about what you see. The tool's full result still goes to the model and into chat history either way.
You can turn the whole thing off with agent.steer_midturn: false in the configuration.
If your terminal renders the footer oddly, set
agent.footer_debug_bytes: trueand look at$XDG_STATE_HOME/wisemonkey/footer.log, which records every byte the footer writes.
Session memory
Persistent memory follows XDG Base Directory spec in ~/.local/share/wisemonkey/session/$SESSION_NAME:
user_profile.json---User informationnotes.json---Persistent notes (added viasave_notetool)
Lifecycle:
- Memory is loaded into the system prompt each turn
save_notetool adds notes during a sessionsave_memorytool explicitly persists memory to disk- Memory is auto-saved when the agent exits (interactive mode)
Document embedding
Wisemonkey can embed documents into a per-session vector store, allowing the agent to search and reference their contents during conversation. Use /embed to add a document:
/embed ~/documents/research_paper.pdf
/embed ./notes.md
The agent uses the search_knowledge tool to query embedded documents when answering questions about previously indexed files. Supported formats include PDF, Markdown, and plain text. Embeddings are powered by the configured embedding model and stored in the session directory under vectordb/.
Chat history
In addition to persistent memory, the agent maintains a chat history of recent user input and assistant output pairs. This provides context that survives beyond the LLM's context window. Here is how it works:
- Each user message and assistant response is stored in memory
- Reasoning is omitted from chat memory
- Automatically compacted when exceeding the configured character limit
- The user can trigger the compaction any time with
/history compact - Chat memory is attached to the system prompt on each turn, as the last section (after identity, workspace instructions, memory, and skills) so the static prompt prefix stays stable and provider prompt caches are not invalidated on every turn
- The agent displays the last 10 exchanges, with long messages truncated
- Tool results are truncated in the formatted history unless
chat_history_full_tool_resultsis enabled (see below) - Large file reads can be limited with the
read_filetool'smax_linesparameter (likehead), or read as a window withoffset(a 1-based start line, liketail -n +N) - Targeted edits use
patch_file, which can match text (whitespace-tolerant, exact-match required) or patch by line range withstart_line/end_line search_contentsearches file contents by literal substring (default) or by Python regular expression (regex: true), with context lines, glob filters, depth limits and a reported result cap- All colour comes from one palette (
agent/palette.py); the Rich theme, the prompt, the sticky footer and the TUI are generated from it and cannot drift apart - Long-running commands can be backgrounded with
spawn, watched incrementally withpoll_job, and stopped withkill_job(which signals the whole process group and returns the output printed before death)
Persistence:
- Chat history is persisted to
~/.local/share/wisemonkey/session/$SESSION_NAME/chat_history.json - Automatically loaded on startup
- Saved after every exchange (user input or assistant response)
- Compacted history is also persisted to disk
Configuration:
agent:
  max_chat_history: 80000                     # Maximum history tokens to keep for context
  chat_history_full_tool_results: false       # Include full tool call/result content in the prompt
  chat_history_tool_result_max_chars: 500     # Max chars per tool result when the above is false
Chat history is accounted in tokens, counted exactly with tiktoken (o200k encoding) when available, falling back to a chars/4 estimate otherwise. The token accounting used for compaction matches what is actually injected into the prompt: when
chat_history_full_tool_resultsisfalse, tool results are counted (and injected) truncated tochat_history_tool_result_max_chars, so a single large tool result does not trigger premature compaction.
Protocol
The client/server wire protocol (Unix domain socket, newline-delimited JSON) is specified in docs/PROTOCOL.md. It is stable enough to build third-party frontends against: attach to a session's socket, send an attach request, and drive turns via prompt while streaming events come back.
Structure
Wisemonkey is built to be modular and hackable. Here is an overview of the main parts and their mapping to the file system.
wisemonkey/
├── agent/                  # Core agent code.
│   ├── agent.py            # REPL frontend: agent loop, prompt handling, key bindings.
│   ├── tui.py              # Textual TUI frontend.
│   ├── client.py           # Client-side connection to a daemon server.
│   ├── server.py           # Daemon server (UDS) owning the session Core.
│   ├── ipc.py              # IPC protocol: messages, payloads, transports.
│   ├── emitter.py          # Turn event emitter: core callbacks -> IPC events.
│   ├── commands.py         # Slash commands (e.g. /embed, /quit).
│   ├── completion.py       # Smart path completion for the prompt.
│   ├── at_files.py         # @file/@dir reference expansion.
│   ├── shellcmd.py         # `!` shell command handling.
│   ├── startup.py          # Startup banner and info rendering.
│   ├── tokens.py           # Token counting (tiktoken).
│   ├── history.py          # Input history handling.
│   ├── config.py           # Configuration loading and handling.
│   ├── console.py          # Rich console output with themed formatting.
│   ├── output.py           # Output adapter protocol (REPL, TUI, IPC).
│   ├── footer.py           # Sticky footer (DECSTBM scroll region) + spinner.
│   ├── steer.py            # Mid-turn steering input (cbreak key capture).
│   ├── keys.py             # Terminal key protocol (modified Enter, kitty keys).
│   ├── core.py             # Core agent functions, like API connection and tool calls.
│   ├── mcp.py              # MCP server support.
│   ├── mdstream.py         # Streaming markdown renderer for the REPL.
│   ├── memory.py           # Session memory, paste file creation.
│   ├── router.py           # API router implementation for OpenAI, Ollama, and Anthropic.
│   ├── skills.py           # Skill loading and management.
│   ├── tools.py            # Tool definitions.
│   ├── update.py           # Update management.
│   ├── utils.py            # Utility functions.
│   └── vectorstore.py      # Vector store wrapper.
├── tools/                  # Tool implementations available to the model.
│   ├── basic.py            # Basic and example tools.
│   ├── files.py            # File read/write tools.
│   ├── memory.py            # search_knowledge tool.
│   ├── network.py          # URL fetching.
│   ├── screenshot.py       # Screen capture tool (base64 JPEG, user-confirmed).
│   ├── terminal.py         # Shell command execution.
│   └── vectorstore.py      # Vector store tool handler.
├── skills/                 # Skill definitions. Add new skills here.
│   ├── example.md
│   └── rolldice.md
├── tests/                  # Contains all `unittest` tests.
│   └── [...]
├── config.yaml             # Default config file.
├── README.md
├── pyproject.toml
├── install.sh              # Installer script.
└── .env.example
Extend the agent
This agent is simple enough that it can be easily customized and extended by adding new tools, commands, and skills.
If you create a cool new tool, skill, or slash command, consider contributing it via a merge request!
Adding tools
Create a file in tools/ or use one of the existing ones. To create a tool,
create a method and decorate it with @tool(name, description, params):
from agent.tools import tool

@tool(
    name="my_tool",
    description="Does something useful. Be exhaustive here, as it is what the LLM will read to know about your tool.",
    parameters={
        "type": "object",
        "properties": {
            "input": {
                "type": "string",
                "description": "The input parameter."
            }
        },
        "required": ["input"],
    },
)
def my_handler(args):
    input = args.get("input", "no input provided")
    return {"result": f"{input}"}
Tools are auto-discovered on startup.
Adding slash commands
The process is very similar to tools. You need to create your method, preferably in agent/commands.py, and decorate it with @cmd(name, description, aliases, examples, can_complete).
A slash command must return, in that order, ok:bool, msg:str, content:str, markdown:str:
ok: aboolindicating if the command succeeded or failed.msg: an optional short status message. It is printed withOKorERROR.content: an optionalstrwith the Python Rich-formatted content, it is printed to the output.markdown: an optionalstrformatted in Markdown, it is printed to the output.
@cmd(
    "/my-command",
    "This is the description",
    aliases=["/mycmd"],
)
def _cmd_my_command(agent, params) -> (bool, str, str, str):
    """This command returns a message but no content"""
    return True, "This is awesome!", None, None
Decorated commands are automatically registered, and auto-completed in the input prompt.
Adding skills
Skills are loaded from the skills/ directory of the wisemonkey project, as well as the ./skills/ folder within the current working directory. Skill loading can be disabled entirely with agent.skills: false in the config — no skills directories are created or scanned, and no skills enter the system prompt.
To create a new skill, add a .md file in skills/ with YAML front matter, following the agentskills.io standard:
---
name: my-skill
description: What this skill does
---

# My skill

## When to use

...

## Steps

1. ...
The front matter name and description are parsed and shown in the
skills list. The body is injected into the system prompt.
1 maintainer

Metadata
1 maintainer
Release files for wisemonkey 2026.10.5
For a detailed explanation of source distributions (sdists) and built distributions (wheels), please see the package formats documentation.
Source distribution (sdist)
| File | Size | Uploaded | Provenance | Actions |
|---|---|---|---|---|
| wisemonkey-2026.10.5.tar.gz | 996.3 kB | Without provenance | Details for wisemonkey-2026.10.5.tar.gz |
Built distribution (wheel)
| File | Interpreter | ABI | Platform | Actions Reset |
|---|---|---|---|---|
| wisemonkey-2026.10.5-py3-none-any.whl | Python 3 | none | any | Details for wisemonkey-2026.10.5-py3-none-any.whl |
Total release size: 1.2 MB
Release files / wisemonkey-2026.10.5.tar.gz
| Download URL | wisemonkey-2026.10.5.tar.gz |
|---|---|
| Size | 996.3 kB |
| Tags | Source |
|
SHA-256 checksum How to use checksums |
bdb34bc3d1569d8a53d7b078a990b79c9905bf1bb5512bd39821ef8f392d2e81
|
|
BLAKE2b-256 checksum How to use checksums |
49c2c9b40da961c9c659f403dc98be8dfe2963c2b621830af6f710fabe0384c4
|
| Upload date | |
|
Uploaded using Trusted Publishing? What is trusted publishing? |
No |
| Uploaded via |
uv/0.12.23 {"installer":{"name":"uv","version":"0.12.23","subcommand":["publish"]},"python":null,"implementation":{"name":null,"version":null},"distro":{"name":"Arch Linux","version":null,"id":null,"libc":null},"system":{"name":null,"release":null},"cpu":null,"openssl_version":null,"setuptools_version":null,"rustc_version":null,"ci":null}
|
Release files / wisemonkey-2026.10.5-py3-none-any.whl
| Download URL | wisemonkey-2026.10.5-py3-none-any.whl |
|---|---|
| Size | 195.1 kB |
| Tags | Python 3 |
|
SHA-256 checksum How to use checksums |
bcda796e8f6559e0be529d22d173444a0fd3523547250044a622e713bd52da19
|
|
BLAKE2b-256 checksum How to use checksums |
3a68aeffd506e39029eb1124a4bf4088a609a5b58cf9fa6d93904dd8d065725a
|
| Upload date | |
|
Uploaded using Trusted Publishing? What is trusted publishing? |
No |
| Uploaded via |
uv/0.12.23 {"installer":{"name":"uv","version":"0.12.23","subcommand":["publish"]},"python":null,"implementation":{"name":null,"version":null},"distro":{"name":"Arch Linux","version":null,"id":null,"libc":null},"system":{"name":null,"release":null},"cpu":null,"openssl_version":null,"setuptools_version":null,"rustc_version":null,"ci":null}
|
Security for wisemonkey 2026.10.5
Provenance
Provenance describes where a file came from. On PyPI, provenance is shared via attestations, which provide a verifiable record of the build or publishing details. View details, limitations and caveats.
No provenance found
None of the files in this release were uploaded with provenance metadata.
A note on package security
PyPI is a repository for distributing packages, not a service for auditing them. While third-party security researchers and our staff do their best to detect and remove malicious packages, PyPI cannot guarantee the quality, security or suitability of any given package.
To learn more about protecting yourself from malicious actors, visit our package security documentation.














