fast image augmentation library and easy to use wrapper around other libraries

Project description
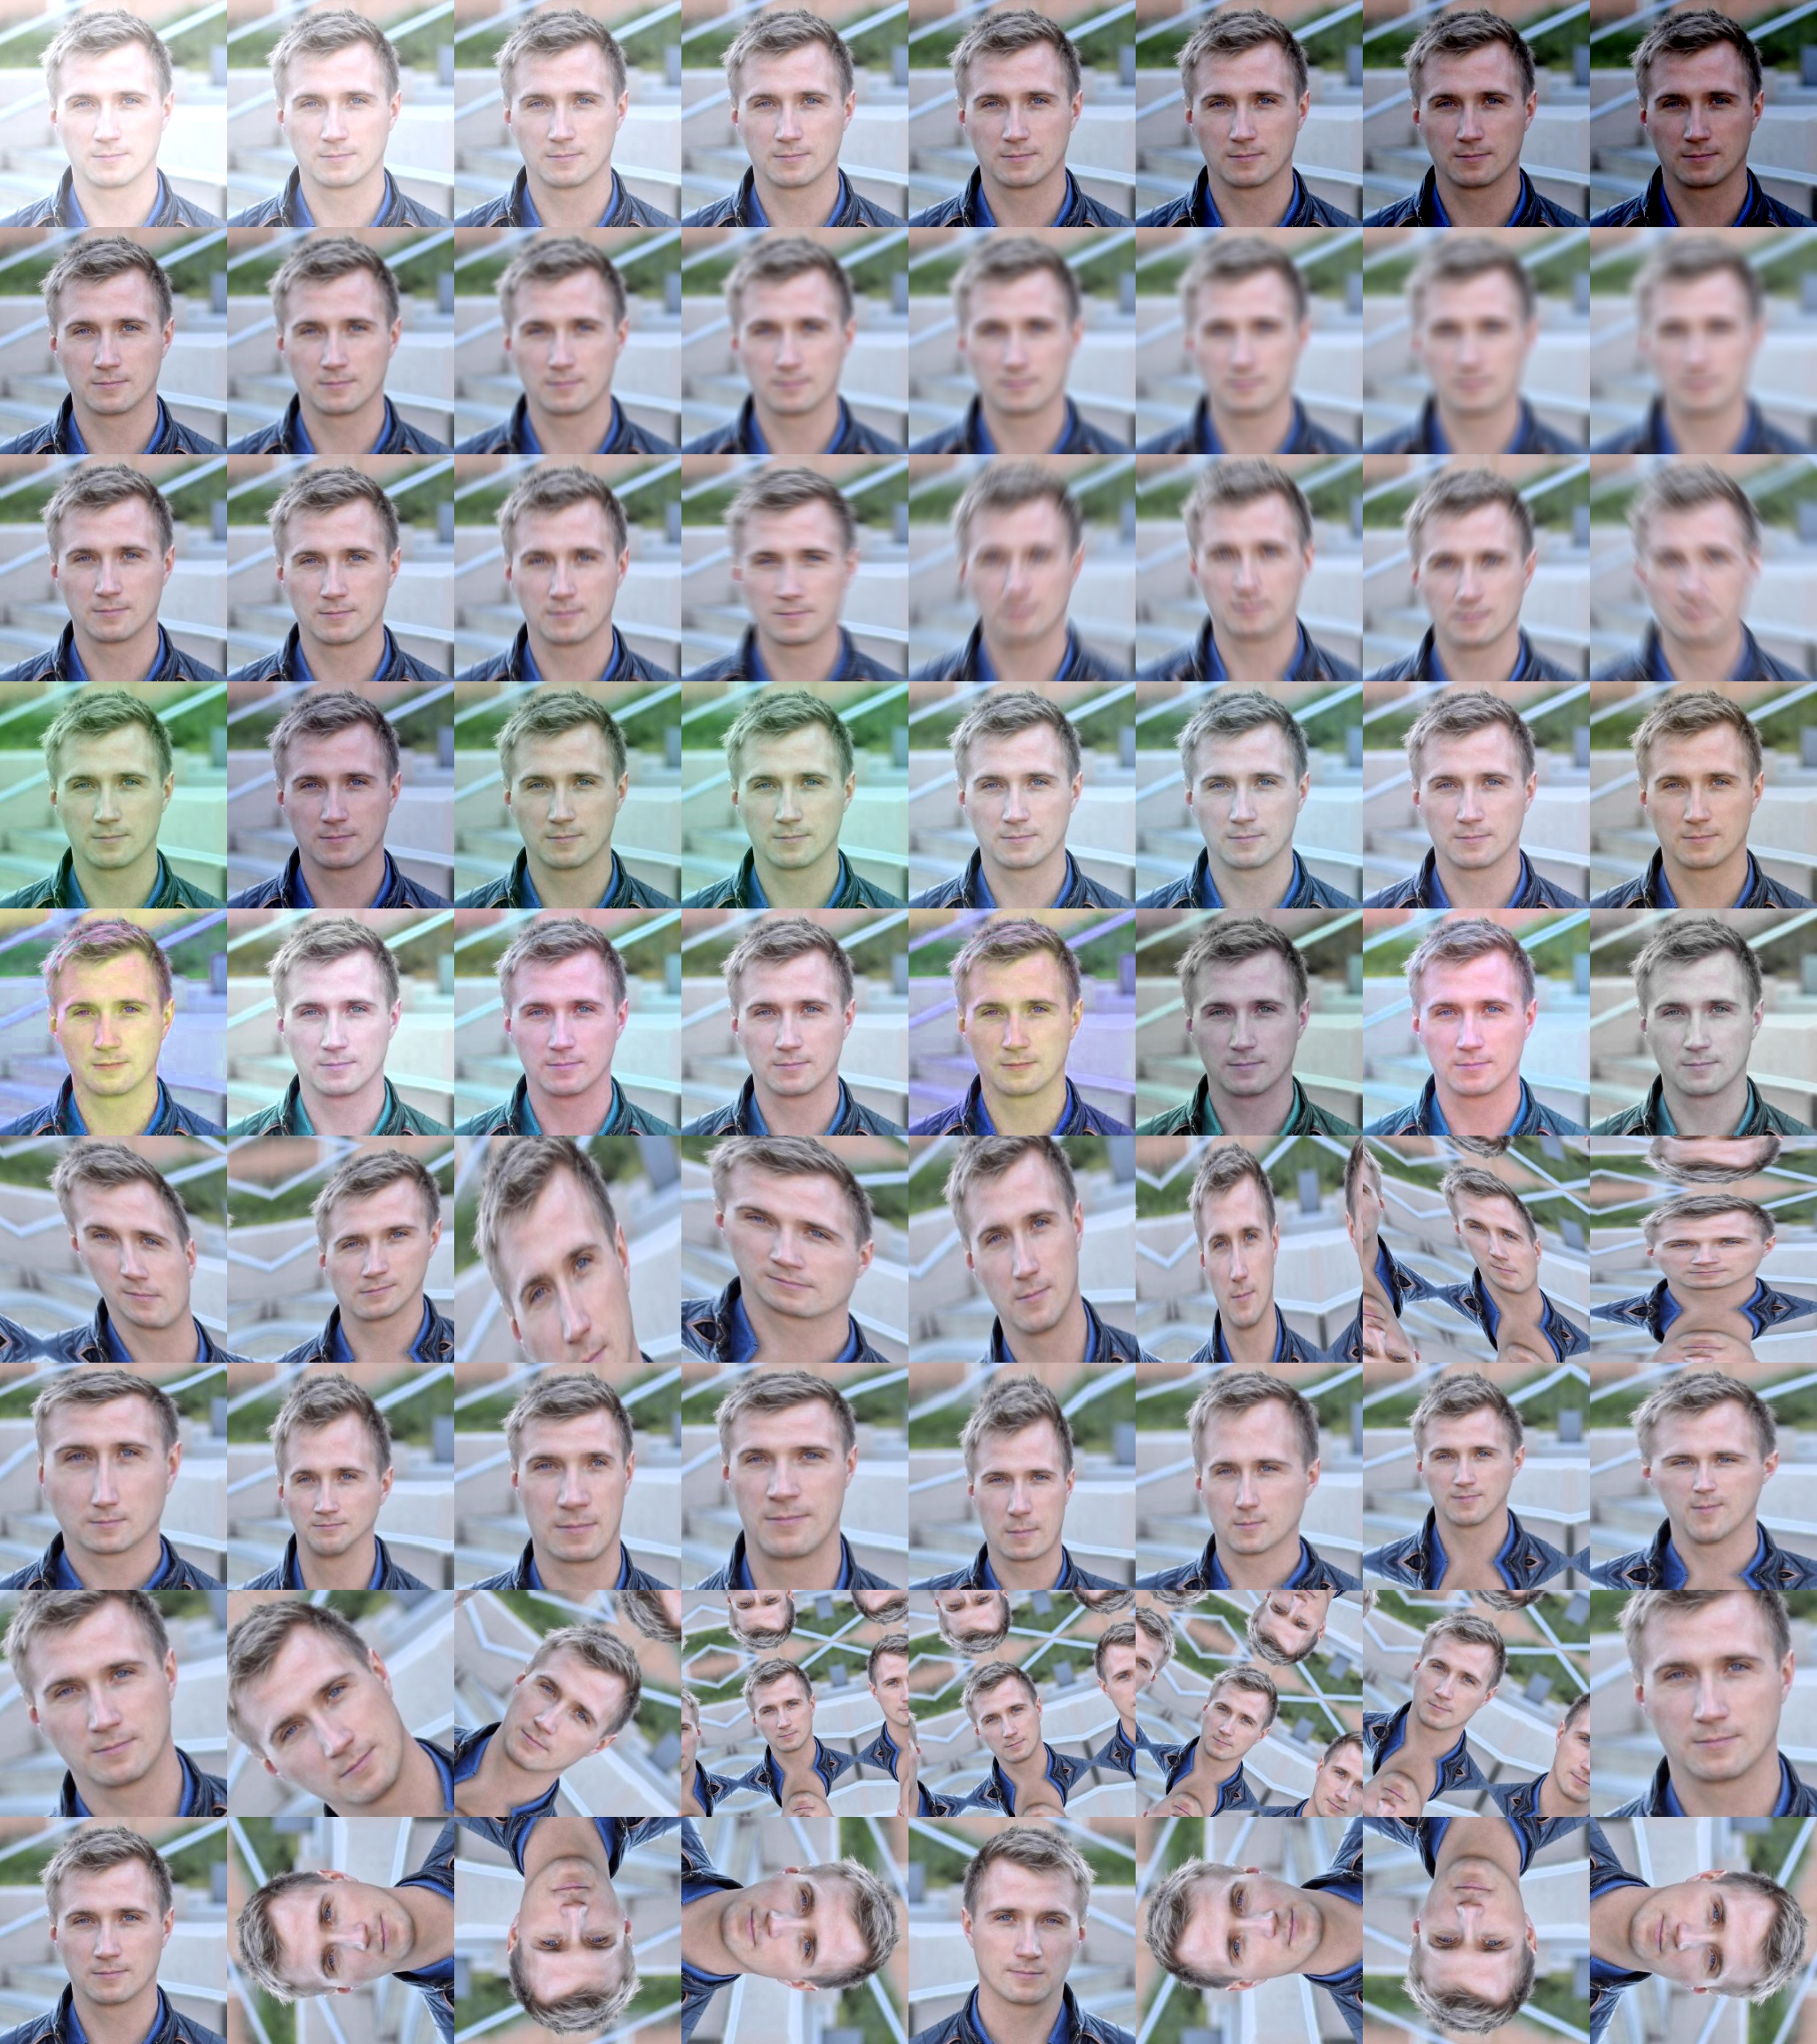
Albumentations


- Great fast augmentations based on highly-optimized OpenCV library
- Super simple yet powerful interface for different tasks like (segmentation, detection, etc.)
- Easy to customize
- Easy to add other frameworks
Authors
Example usage
from albumentations import (
    CLAHE, RandomRotate90, Transpose, ShiftScaleRotate, Blur, OpticalDistortion,
    GridDistortion, HueSaturationValue, IAAAdditiveGaussianNoise, GaussNoise, MotionBlur,
    MedianBlur, IAAPiecewiseAffine, IAASharpen, IAAEmboss, RandomContrast, RandomBrightness,
    Flip, OneOf, Compose
)
import numpy as np

def strong_aug(p=0.5):
    return Compose([
        RandomRotate90(),
        Flip(),
        Transpose(),
        OneOf([
            IAAAdditiveGaussianNoise(),
            GaussNoise(),
        ], p=0.2),
        OneOf([
            MotionBlur(p=0.2),
            MedianBlur(blur_limit=3, p=0.1),
            Blur(blur_limit=3, p=0.1),
        ], p=0.2),
        ShiftScaleRotate(shift_limit=0.0625, scale_limit=0.2, rotate_limit=45, p=0.2),
        OneOf([
            OpticalDistortion(p=0.3),
            GridDistortion(p=0.1),
            IAAPiecewiseAffine(p=0.3),
        ], p=0.2),
        OneOf([
            CLAHE(clip_limit=2),
            IAASharpen(),
            IAAEmboss(),
            RandomContrast(),
            RandomBrightness(),
        ], p=0.3),
        HueSaturationValue(p=0.3),
    ], p=p)

image = np.ones((300, 300, 3), dtype=np.uint8)
mask = np.ones((300, 300), dtype=np.uint8)
whatever_data = "my name"
augmentation = strong_aug(p=0.9)
data = {"image": image, "mask": mask, "whatever_data": whatever_data, "additional": "hello"}
augmented = augmentation(**data)
image, mask, whatever_data, additional = augmented["image"], augmented["mask"], augmented["whatever_data"], augmented["additional"]
See example.ipynb
Installation
You can use pip to install albumentations:
pip install albumentations
If you want to get the latest version of the code before it is released on PyPI you can install the library from GitHub:
pip install -U git+https://github.com/albu/albumentations
Documentation
The full documentation is available at albumentations.readthedocs.io.
Demo
You can use this Google Colaboratory notebook to adjust image augmentation parameters and see the resulting images.
Working with non-8-bit images
example_16_bit_tiff.ipynb shows how albumentations can be used to work with non-8-bit images (such as 16-bit and 32-bit TIFF images).
Benchmarking results
To run the benchmark yourself follow the instructions in benchmark/README.md
Results for running the benchmark on first 2000 images from the ImageNet validation set using an Intel Core i7-7800X CPU. All times are in seconds, lower is better.
| albumentations | imgaug | torchvision (Pillow backend) |
torchvision (Pillow-SIMD backend) |
Keras | |
|---|---|---|---|---|---|
| RandomCrop64 | 0.0017 | - | 0.0182 | 0.0182 | - |
| PadToSize512 | 0.2413 | - | 2.493 | 2.3682 | - |
| HorizontalFlip | 0.7765 | 2.2299 | 0.3031 | 0.3054 | 2.0508 |
| VerticalFlip | 0.178 | 0.3899 | 0.2326 | 0.2308 | 0.1799 |
| Rotate | 3.8538 | 4.0581 | 16.16 | 9.5011 | 50.8632 |
| ShiftScaleRotate | 2.0605 | 2.4478 | 18.5401 | 10.6062 | 47.0568 |
| Brightness | 2.1018 | 2.3607 | 4.6854 | 3.4814 | 9.9237 |
| ShiftHSV | 10.3925 | 14.2255 | 34.7778 | 27.0215 | - |
| ShiftRGB | 2.6159 | 2.1989 | - | - | 3.0598 |
| Gamma | 1.4832 | - | 1.1397 | 1.1447 | - |
| Grayscale | 1.2048 | 5.3895 | 1.6826 | 1.2721 | - |
Contributing
- Clone the repository:
git clone git@github.com:albu/albumentations.git
cd albumentations
- Install the library in development mode:
pip install -e .[tests]
- Run tests:
pytest
Building the documentation
- Go to
docs/directory
cd docs
- Install required libraries
pip install -r requirements.txt
- Build html files
make html
- Open
_build/html/index.htmlin browser.
Alternatively, you can start a web server that rebuilds the documentation
automatically when a change is detected by running make livehtml
Comments
In some systems, in the multiple GPU regime PyTorch may deadlock the DataLoader if OpenCV was compiled with OpenCL optimizations. Adding the following two lines before the library import may help. For more details https://github.com/pytorch/pytorch/issues/1355
cv2.setNumThreads(0)
cv2.ocl.setUseOpenCL(False)
Thanks:
Special thanks to @creafz for refactoring, documentation, tests, CI and benchmarks. Awesome work!
Release history Release notifications | RSS feed


Download files
Download the file for your platform. If you're not sure which to choose, learn more about installing packages.
Source Distribution
File details
Details for the file albumentations-0.0.8.tar.gz.
File metadata
- Download URL: albumentations-0.0.8.tar.gz
- Upload date:
- Size: 32.2 kB
- Tags: Source
- Uploaded using Trusted Publishing? No
- Uploaded via: twine/1.11.0 pkginfo/1.4.2 requests/2.19.1 setuptools/39.2.0 requests-toolbelt/0.8.0 tqdm/4.23.3 CPython/3.6.6
File hashes
| Algorithm | Hash digest | |
|---|---|---|
| SHA256 |
704321930e9204ed853fae95534f7c4fb31d9e4078f8e7aee8db60cae6d2ff44
|
|
| MD5 |
5c1f10adaf90b3458a90ee6a1206ef08
|
|
| BLAKE2b-256 |
ede261d9e787f9c00bfa9536c0261d2849500f4a68f638ad0c5bfcd37b5cf1d6
|


