mh_z19 CO2 concentration sensor library for Raspberry Pi

Project description
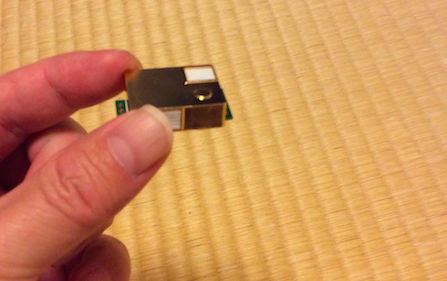
mh-z19
Read CO2 concentration from mh-z19 sensor& send to MONITOR server
install
download from release
or
git clone https://github.com/UedaTakeyuki/mh-z19.git
setup
Setup environment & install prerequired modules by
./setup.sh
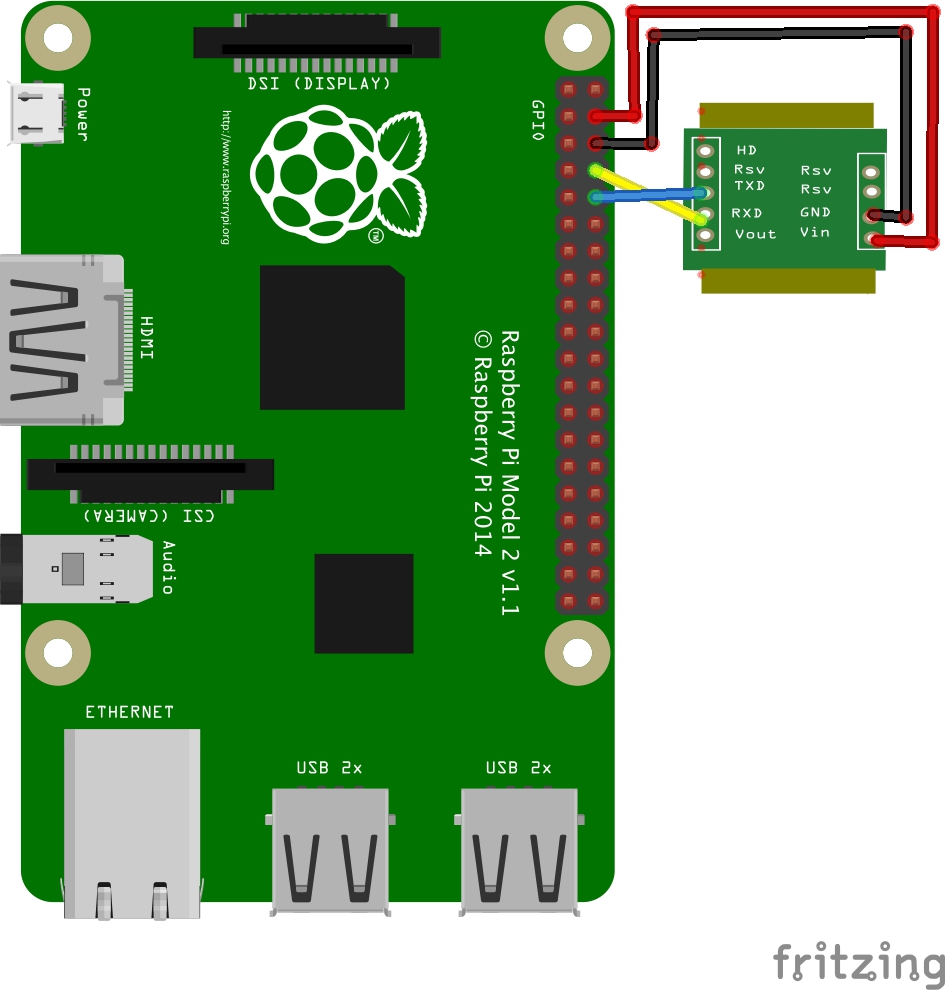
cabling
Connect RPi & mh-z19 as:
- 5V on RPi and Vin on mh-z19
- GND(0v) on RPi and GND on mh-z19
- TxD and RxD are connect to cross between RPi and mh-z18
Followings are example of cabling, but you can free to use other 5v and 0v Pin on the RPi.
pi@raspberrypi:~/mh-z19 $ gpio readall
 +-----+-----+---------+------+---+---Pi B+--+---+------+---------+-----+-----+
 | BCM | wPi |   Name  | Mode | V | Physical | V | Mode | Name    | wPi | BCM |
 +-----+-----+---------+------+---+----++----+---+------+---------+-----+-----+
 |     |     |    3.3v |      |   |  1 || 2  |   |      | 5v      |     |     |
 |   2 |   8 |   SDA.1 |   IN | 1 |  3 || 4  |   |      | 5v      |     |     |  <---- with Vin on mh-z19
 |   3 |   9 |   SCL.1 |   IN | 1 |  5 || 6  |   |      | 0v      |     |     |  <---- with Gnd on mh-z19
 |   4 |   7 | GPIO. 7 |   IN | 1 |  7 || 8  | 1 | ALT0 | TxD     | 15  | 14  |  <---- with RxD on mh-z19
 |     |     |      0v |      |   |  9 || 10 | 1 | ALT0 | RxD     | 16  | 15  |  <---- with TxD on mh-z19
 |  17 |   0 | GPIO. 0 |   IN | 0 | 11 || 12 | 0 | IN   | GPIO. 1 | 1   | 18  |
 |  27 |   2 | GPIO. 2 |   IN | 0 | 13 || 14 |   |      | 0v      |     |     |
 |  22 |   3 | GPIO. 3 |   IN | 0 | 15 || 16 | 0 | IN   | GPIO. 4 | 4   | 23  |
 |     |     |    3.3v |      |   | 17 || 18 | 0 | IN   | GPIO. 5 | 5   | 24  |
 |  10 |  12 |    MOSI |   IN | 0 | 19 || 20 |   |      | 0v      |     |     |
 |   9 |  13 |    MISO |   IN | 0 | 21 || 22 | 0 | IN   | GPIO. 6 | 6   | 25  |
 |  11 |  14 |    SCLK |   IN | 0 | 23 || 24 | 1 | IN   | CE0     | 10  | 8   |
 |     |     |      0v |      |   | 25 || 26 | 1 | IN   | CE1     | 11  | 7   |
 |   0 |  30 |   SDA.0 |   IN | 1 | 27 || 28 | 1 | IN   | SCL.0   | 31  | 1   |
 |   5 |  21 | GPIO.21 |   IN | 1 | 29 || 30 |   |      | 0v      |     |     |
 |   6 |  22 | GPIO.22 |   IN | 1 | 31 || 32 | 0 | IN   | GPIO.26 | 26  | 12  |
 |  13 |  23 | GPIO.23 |   IN | 0 | 33 || 34 |   |      | 0v      |     |     |
 |  19 |  24 | GPIO.24 |   IN | 0 | 35 || 36 | 0 | IN   | GPIO.27 | 27  | 16  |
 |  26 |  25 | GPIO.25 |   IN | 0 | 37 || 38 | 0 | IN   | GPIO.28 | 28  | 20  |
 |     |     |      0v |      |   | 39 || 40 | 0 | IN   | GPIO.29 | 29  | 21  |
 +-----+-----+---------+------+---+----++----+---+------+---------+-----+-----+
 | BCM | wPi |   Name  | Mode | V | Physical | V | Mode | Name    | wPi | BCM |
 +-----+-----+---------+------+---+---Pi B+--+---+------+---------+-----+-----+
set view_id
Make sure your view_id on your account of the MONITOR, let's say it was ABCDEF, set it by setid.sh as
./setid.sh ABCDEF
test for getting CO2 Sensor value
sudo python mh_z19.py
In case succeeded, espected response is as follows:
pi@raspberrypi:~/mh-z19 $ sudo python mh_z19.py
{'co2': 420}
In case everything succeeded, expected response is consist of the log of taking photo, sending it, and {"ok":true} as follows:
or, return None in case
- Cabling between RPi & sensor is not correct.
- Sensor is no work.
- setup mentioned before is not finished, or not rebooted after setup.
test for sending CO2 Sensor value
sudo python read.py
In case something wrong, response finished with {"ok":false,"reason":"XXX"}. For Example:
{"ok":false,"reason":"ViewID not valid"}
In case, you should make sure if correct view_is was set by setid.sh command.
setting for automatically run view.sh at 5 minute interval
You can do it both by setting crontab if you're used to do so, or you can use autostart.sh command as follows:
# set autostart on
./autostart.sh --on

# set autostart off
./autostart.sh --off
Tecknically speaking, autostart.sh doesn't use crontab, instead, prepare service for interval running of view.sh named view.service . You can confirm current status of view.service with following command:
sudo systemctl status view.service
In case view.service is running, you can see the log of current status and taking & sending photo as follows:
pi@raspberrypi:~/view-v_1.1.1 $ sudo systemctl status view.service
● view.service - Take photos & Post to the monitor
   Loaded: loaded (/home/pi/view-v_1.1.1/view.service; enabled; vendor preset: e
   Active: active (running) since Thu 2018-08-23 19:07:24 JST; 4min 40s ago
 Main PID: 777 (loop.sh)
   CGroup: /system.slice/view.service
           ├─777 /bin/bash /home/pi/view-v_1.1.1/loop.sh
           └─820 sleep 5m

Aug 23 19:07:26 raspberrypi loop.sh[777]: --- Capturing frame...
Aug 23 19:07:26 raspberrypi loop.sh[777]: Skipping 20 frames...
Aug 23 19:07:28 raspberrypi loop.sh[777]: Capturing 1 frames...
Aug 23 19:07:28 raspberrypi loop.sh[777]: Captured 21 frames in 1.73 seconds. (1
Aug 23 19:07:28 raspberrypi loop.sh[777]: --- Processing captured image...
Aug 23 19:07:29 raspberrypi loop.sh[777]: Writing JPEG image to '/tmp/2018082319
Aug 23 19:07:29 raspberrypi loop.sh[777]:   % Total    % Received % Xferd  Avera
Aug 23 19:07:29 raspberrypi loop.sh[777]:                                  Dload
Aug 23 19:07:53 raspberrypi loop.sh[777]: [2.0K blob data]
Aug 23 19:07:53 raspberrypi loop.sh[777]:      0
lines 1-18/18 (END)
In case afte service set as off, you can see followings:
pi@raspberrypi:~/view-v_1.1.1 $ sudo systemctl status view.service
Unit view.service could not be found.
Q&A
Any questions, suggestions, reports are welcome! Please make issue without hesitation!
Release history Release notifications | RSS feed


Download files
Download the file for your platform. If you're not sure which to choose, learn more about installing packages.
Source Distribution
File details
Details for the file mh_z19-0.1.1.tar.gz.
File metadata
- Download URL: mh_z19-0.1.1.tar.gz
- Upload date:
- Size: 4.6 kB
- Tags: Source
- Uploaded using Trusted Publishing? No
- Uploaded via: twine/1.11.0 pkginfo/1.4.2 requests/2.20.0 setuptools/40.4.1 requests-toolbelt/0.8.0 tqdm/4.26.0 CPython/2.7.13
File hashes
| Algorithm | Hash digest | |
|---|---|---|
| SHA256 |
f840f291e59e0ffa1a057c0c03766575d7ab1c29a068a9c519d9dc40d7b7bdf7
|
|
| MD5 |
e3a65ad7b5d7ef0cd449bb51b66b62a8
|
|
| BLAKE2b-256 |
897e5625b1a85dfef502bcc2ade15493f0cb160e7d9be84088dbc8be663c4733
|


