A Napari plugin to measure the density of bacteria vs the distance within tubular organs

Project description
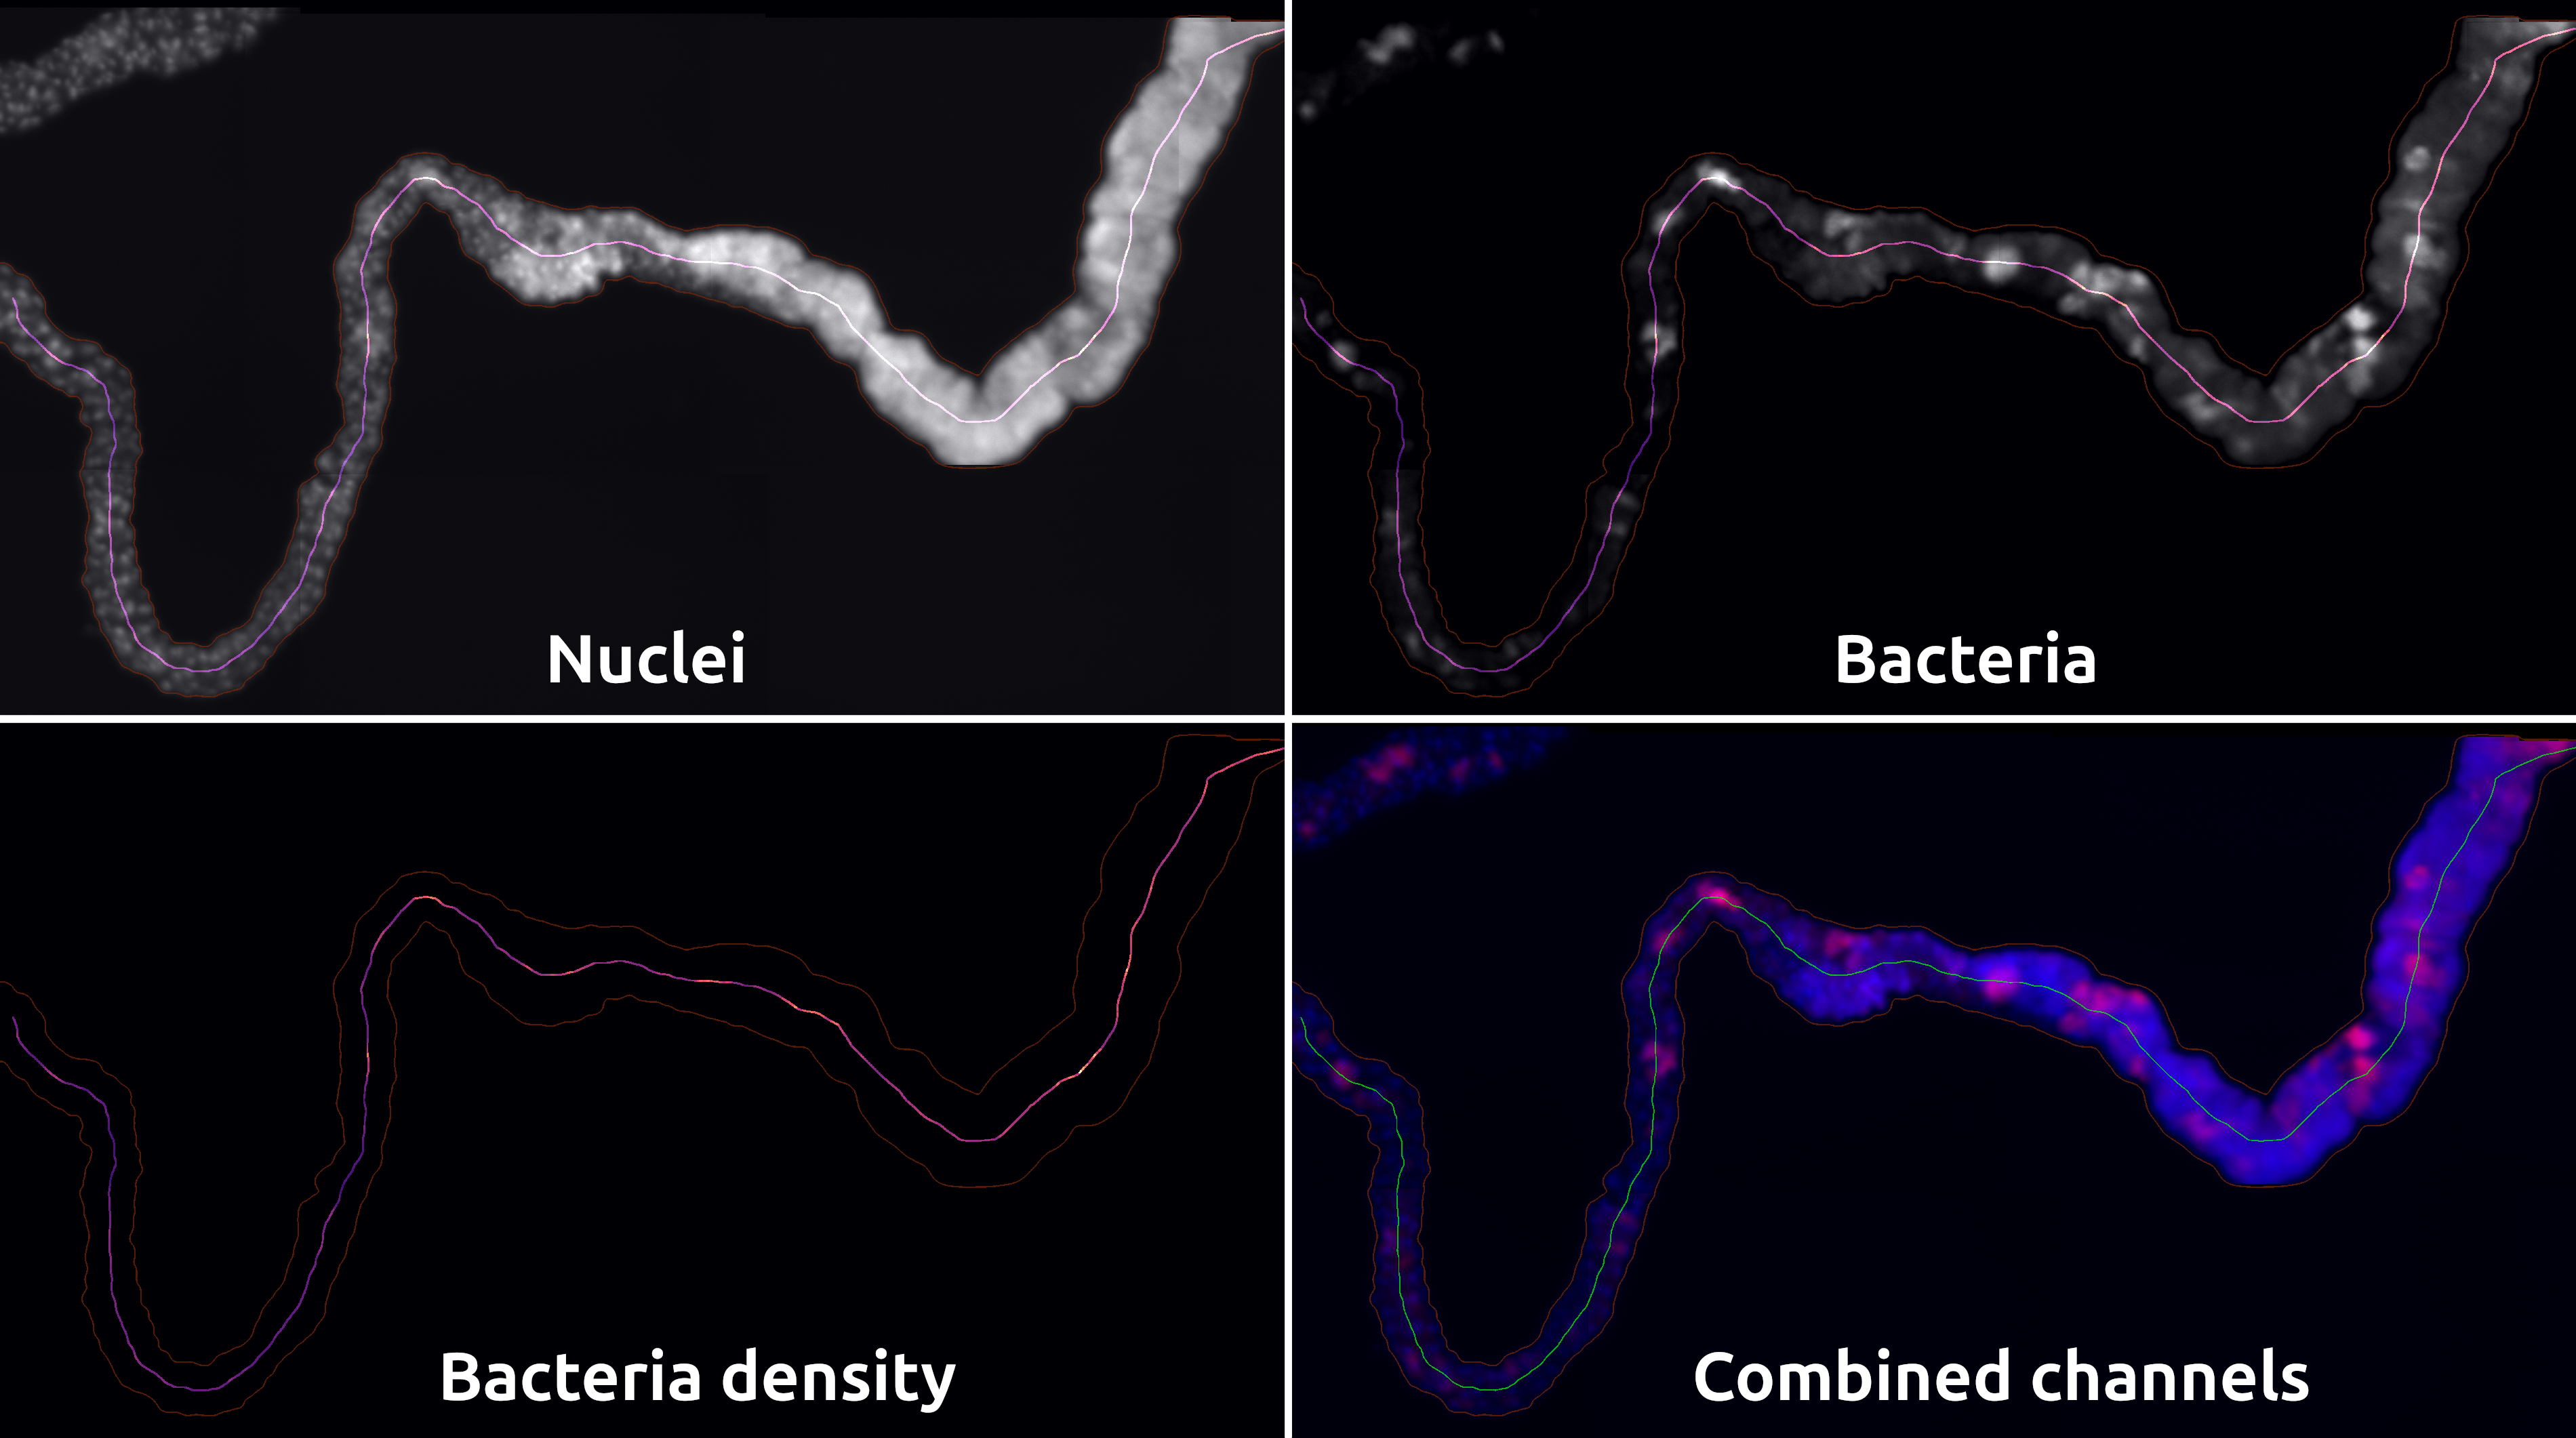
Napari bacteria density
Install
- Make sure that you installed Git on your system.
- Make sure that you installed a Python environments manager (like Miniconda).
- Open a terminal and create a new environment using the command
conda create -n bacteria-density -y python=3.10. - Activate the newly created environment using
conda activate bacteria-density. - Install the development version of the plugin using
pip install git+https://github.com/MontpellierRessourcesImagerie/bacteria-density.git. - If you want to use it through a GUI, install Napari alongside it with
pip install napari[all]. - To calibrate your images, you will need to install the calibration tool using
pip install set-calibration. - If your images are not TIFF, you will need to install ImageJ's bridge using
pip install napari-imagej.
Usage
- Open a new terminal and activate the environment containing Napari using
conda activate bacteria-density. - Launch Napari with the command
napari. - In the top-bar, within the "Plugins" menu, you should find
ImageJ2,Scale tool&Density vs. distance. - Start by using
ImageJ2to open your image and import it in Napari. In the left column, you should now see one layer per channel. You can rename them as you wish. - You can now close the
ImageJ2panel. - You should now open
Scale toolto provide the physical size of voxels. Don't forget that in Napari, the order is ZYX instead of XYZ. - Once you're done providing the scale, you can close the
Scale toolpanel. - You can now open the
Density vs. distancepanel.
Process the image
1. Segmentation
- In the dropdown menu, select the layer corresponding to the nuclei.
2. Measures
- For each channel in which you want to make intensity measurements, indicate the layer (in the dropdown menu) and provide a name for what it contains (instead of the "---" in the box on the right). This name is used to name the columns in the results table.
3. ROIs
- Above the "layers list" panel, add a new "Shape layer".
- Add polygons for each region that you would like to process.
- Use the
F1,F2,F3&F4buttons to change the edge color of these polygons. Each color represents a filament. If several areas share a same color, it means that they are part of the same filament and were cut for some reason (obstacle, crossing, ...).- 1: Red
- 2: Green
- 3: Blue
- 4: Yellow
- Add a new "Points layer". In the "layers control" panel, switch to the "Add points" mode.
- For each filament (each color), add a point approximately where the filament starts. There should be exactly one point per color.
- In the dropdown menus of the ROIs box of the plugin, provide the new shape and point layers.
4. Settings
- Using the "Set output folder", provide the path to an empty directory.
- Select the binning length using the input below (binning of measures along the skeleton).
- Select the list of measurements that you would like to process.
5. Workflow
- From this point, you can click on each button from top to bottom:
- Chunk images: Will export a copy of each selected area in the working directory.
- Skeletonize: Will create a mask and a skeleton of the corresponding branch. An outline of the mask will be displayed.
- Make medial path: Will process the path over the organ and assemble the fragments. You can check the result by searching for the middle of the stack using the slider under the image.
- Measure: Will perform the measures and export the CSV.
- Create Plots: Export the plots as PNG with a dashed-line between segments.
Release history Release notifications | RSS feed

Download files
Download the file for your platform. If you're not sure which to choose, learn more about installing packages.
Source Distribution
Built Distribution
Filter files by name, interpreter, ABI, and platform.
If you're not sure about the file name format, learn more about wheel file names.
Copy a direct link to the current filters
File details
Details for the file napari_bacteria_density-1.0.0.tar.gz.
File metadata
- Download URL: napari_bacteria_density-1.0.0.tar.gz
- Upload date:
- Size: 1.1 MB
- Tags: Source
- Uploaded using Trusted Publishing? No
- Uploaded via: twine/6.2.0 CPython/3.11.14
File hashes
| Algorithm | Hash digest | |
|---|---|---|
| SHA256 |
9a53d40376710d21eaa842ca9279cc449d5ba4b76403a7095f7ea12af946b0fc
|
|
| MD5 |
c8a6618bd32e06a3849990a1b7681d58
|
|
| BLAKE2b-256 |
f1f33e475313dcc447aa5ecd2010961bc37a109d0acdcd86f2017868bf96dc5d
|
File details
Details for the file napari_bacteria_density-1.0.0-py3-none-any.whl.
File metadata
- Download URL: napari_bacteria_density-1.0.0-py3-none-any.whl
- Upload date:
- Size: 38.7 kB
- Tags: Python 3
- Uploaded using Trusted Publishing? No
- Uploaded via: twine/6.2.0 CPython/3.11.14
File hashes
| Algorithm | Hash digest | |
|---|---|---|
| SHA256 |
4a16cd44348ab8084f61af6a201fec9899be77cda48991b64237d19bf3dac867
|
|
| MD5 |
0da4e271e6177f3dc9d63c43fb56f719
|
|
| BLAKE2b-256 |
e9d13e881d7b00862cabee715c01e8ebab37764acffb8689e4989a1703c07063
|


