
napari-signal-selector







An interactive signal selector and annotator for napari, based on matplotlib.
Usage
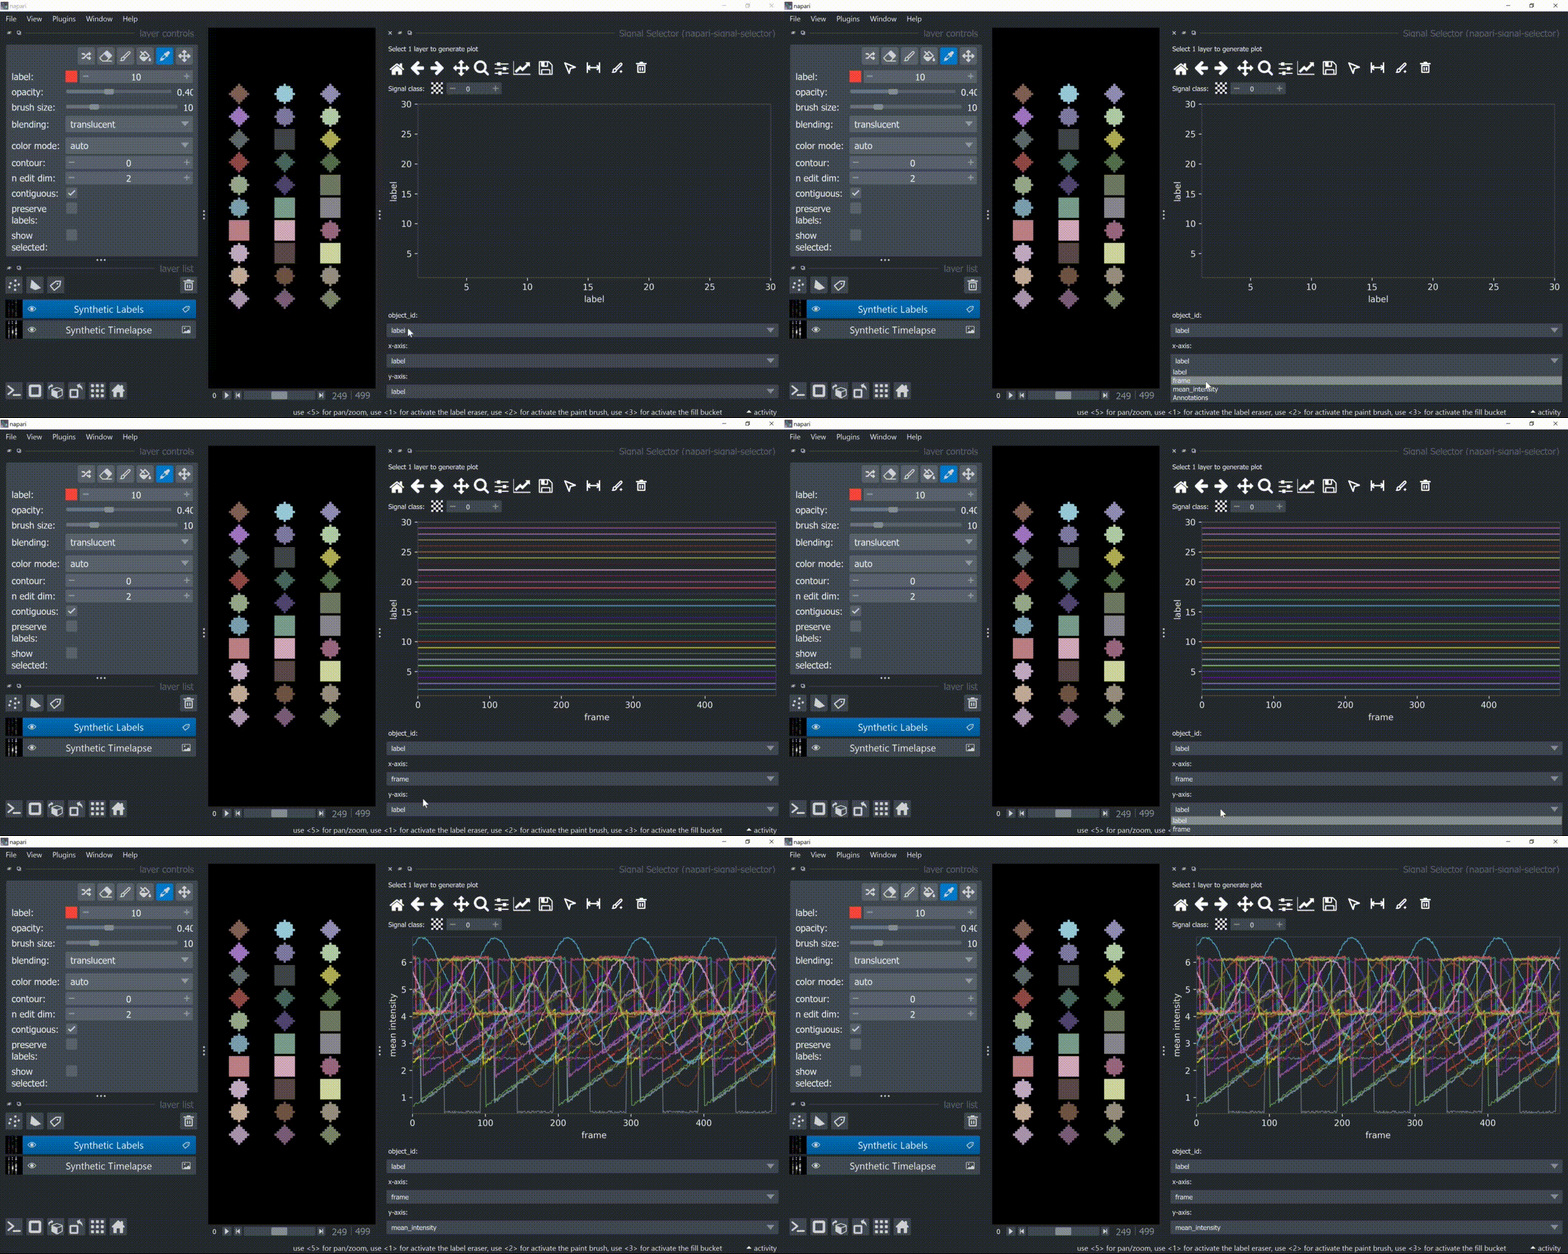
This plugin opens an embedded plotter in napari capable of plotting and interacting (selecting/annotating) with individual object signals (typically temporal features).
Input Data
napari-signal-selector works with a Labels layer containing segmented objects and whose features attribute contains a table that follows the example structure shown below:
label |
frame |
feature |
... |
|---|---|---|---|
| 1 | 0 | 1.0 | ... |
| 2 | 0 | 1.0 | ... |
| 3 | 0 | 0.5 | ... |
| 4 | 0 | 0.5 | ... |
| 1 | 1 | 2.0 | ... |
| 2 | 1 | 1.0 | ... |
| 3 | 1 | 1.0 | ... |
| 4 | 1 | 1.0 | ... |
| 1 | 2 | 3.0 | ... |
| 2 | 2 | 1.0 | ... |
| 3 | 2 | 0.5 | ... |
| 4 | 2 | 1.5 | ... |
| ⋮ | ⋮ | ⋮ |
Basically, it needs an object identifier (in this case, the label column) that matches the labels in the Labels layer, and other columns containing x- and y-axis numbers to plot. Typically, x-axis is some temporal-related property.
Here is how one could add such a layer to a napari viewer via code (check this example notebook for more details):
viewer.add_labels(labels_image, features = table)
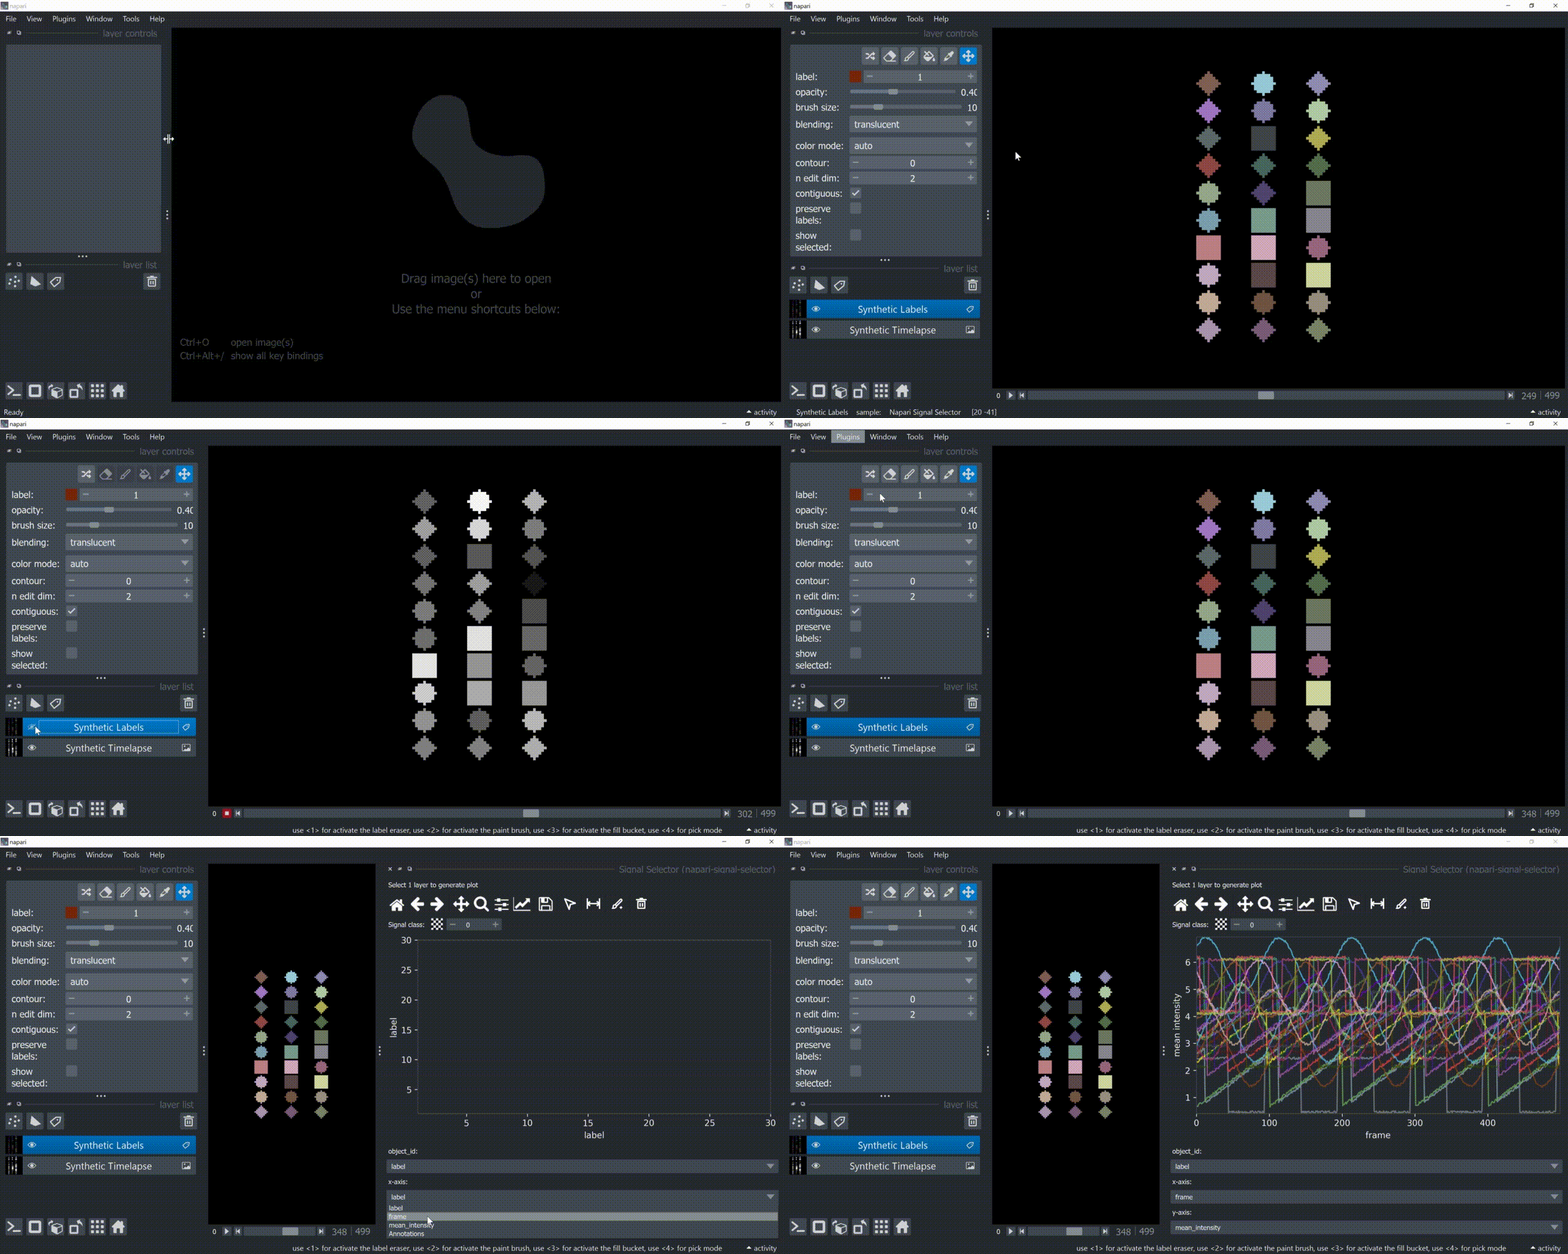
If a layer like this is selected, you can choose what to plot by means of dropdown fields in the bottom of the plotter.
Below is a basic example using the "Flashing Polygons" synthetic data:
Tools
Selection Tool
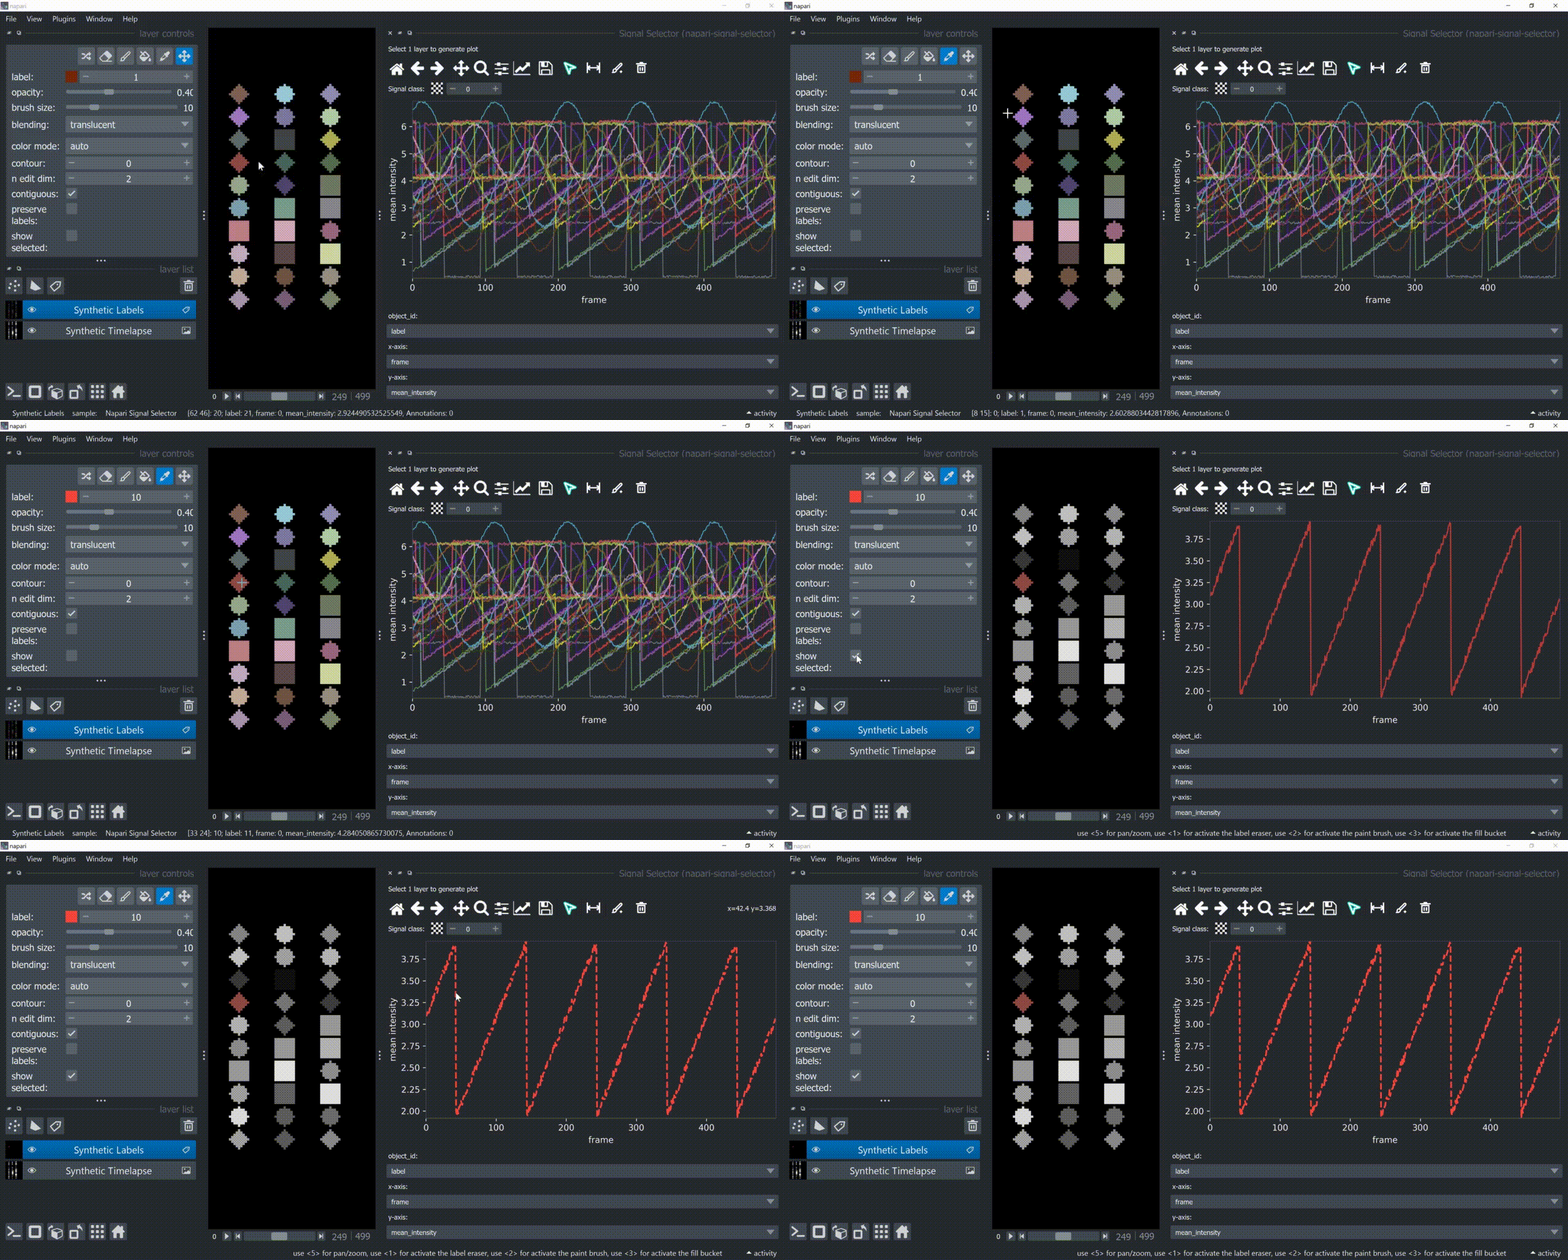
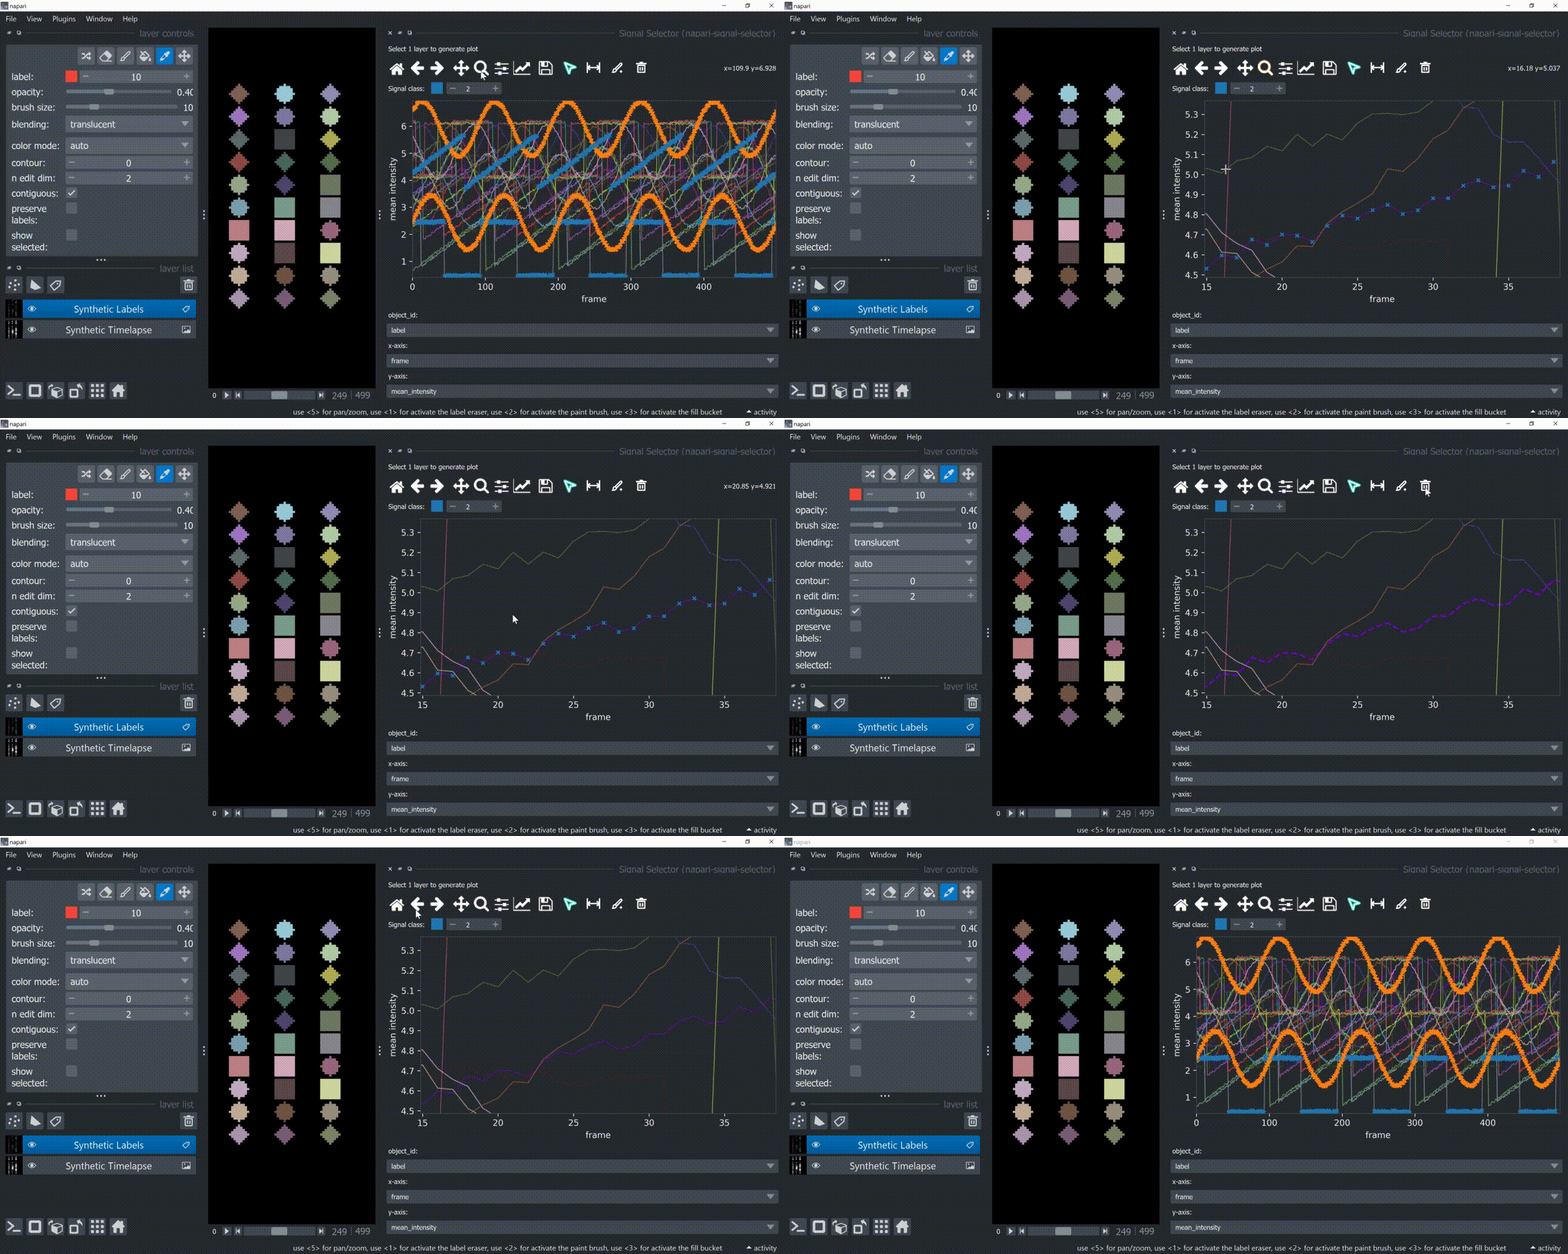
The selection tool (arrowhead icon) is a toggle button which enables you to select individual signals. Once activated, the icon gets highlighted and you can click over individual signals to select them. Right-clicking unselects everything.
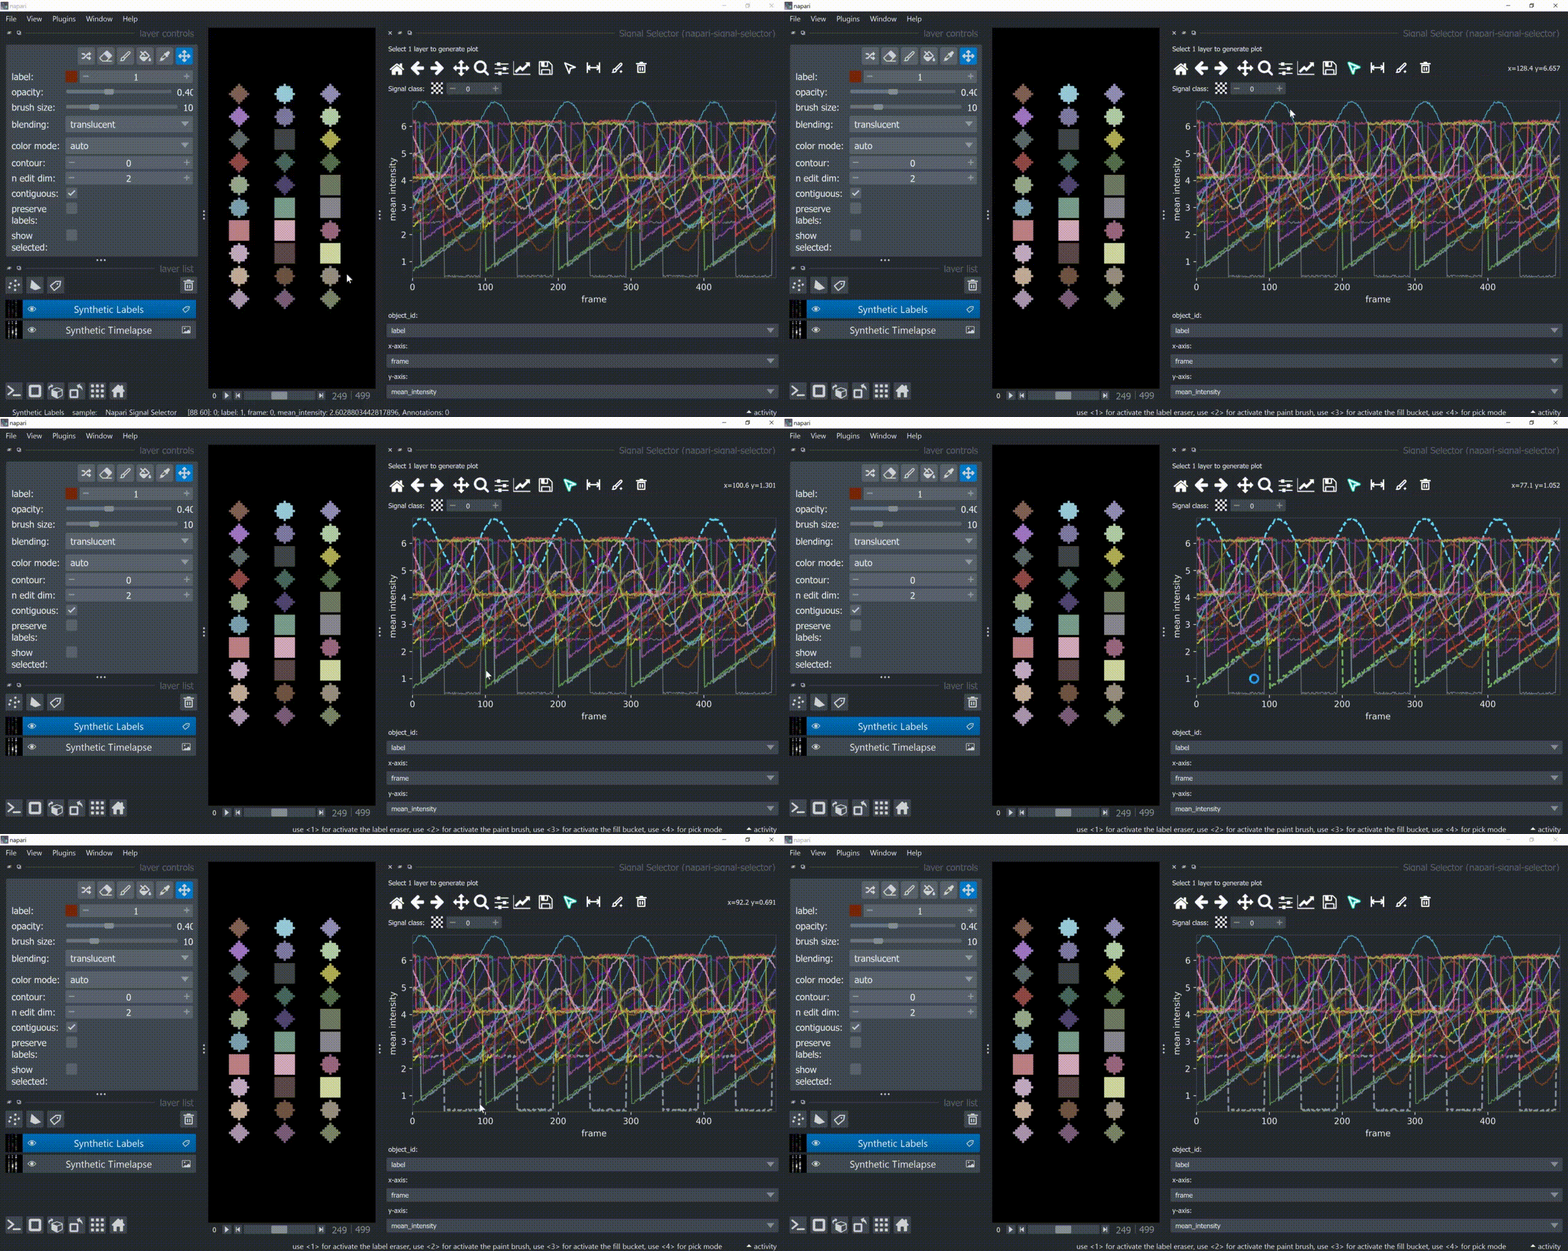
If the region you want to click is too crowded, consider zooming in first and then selecting.
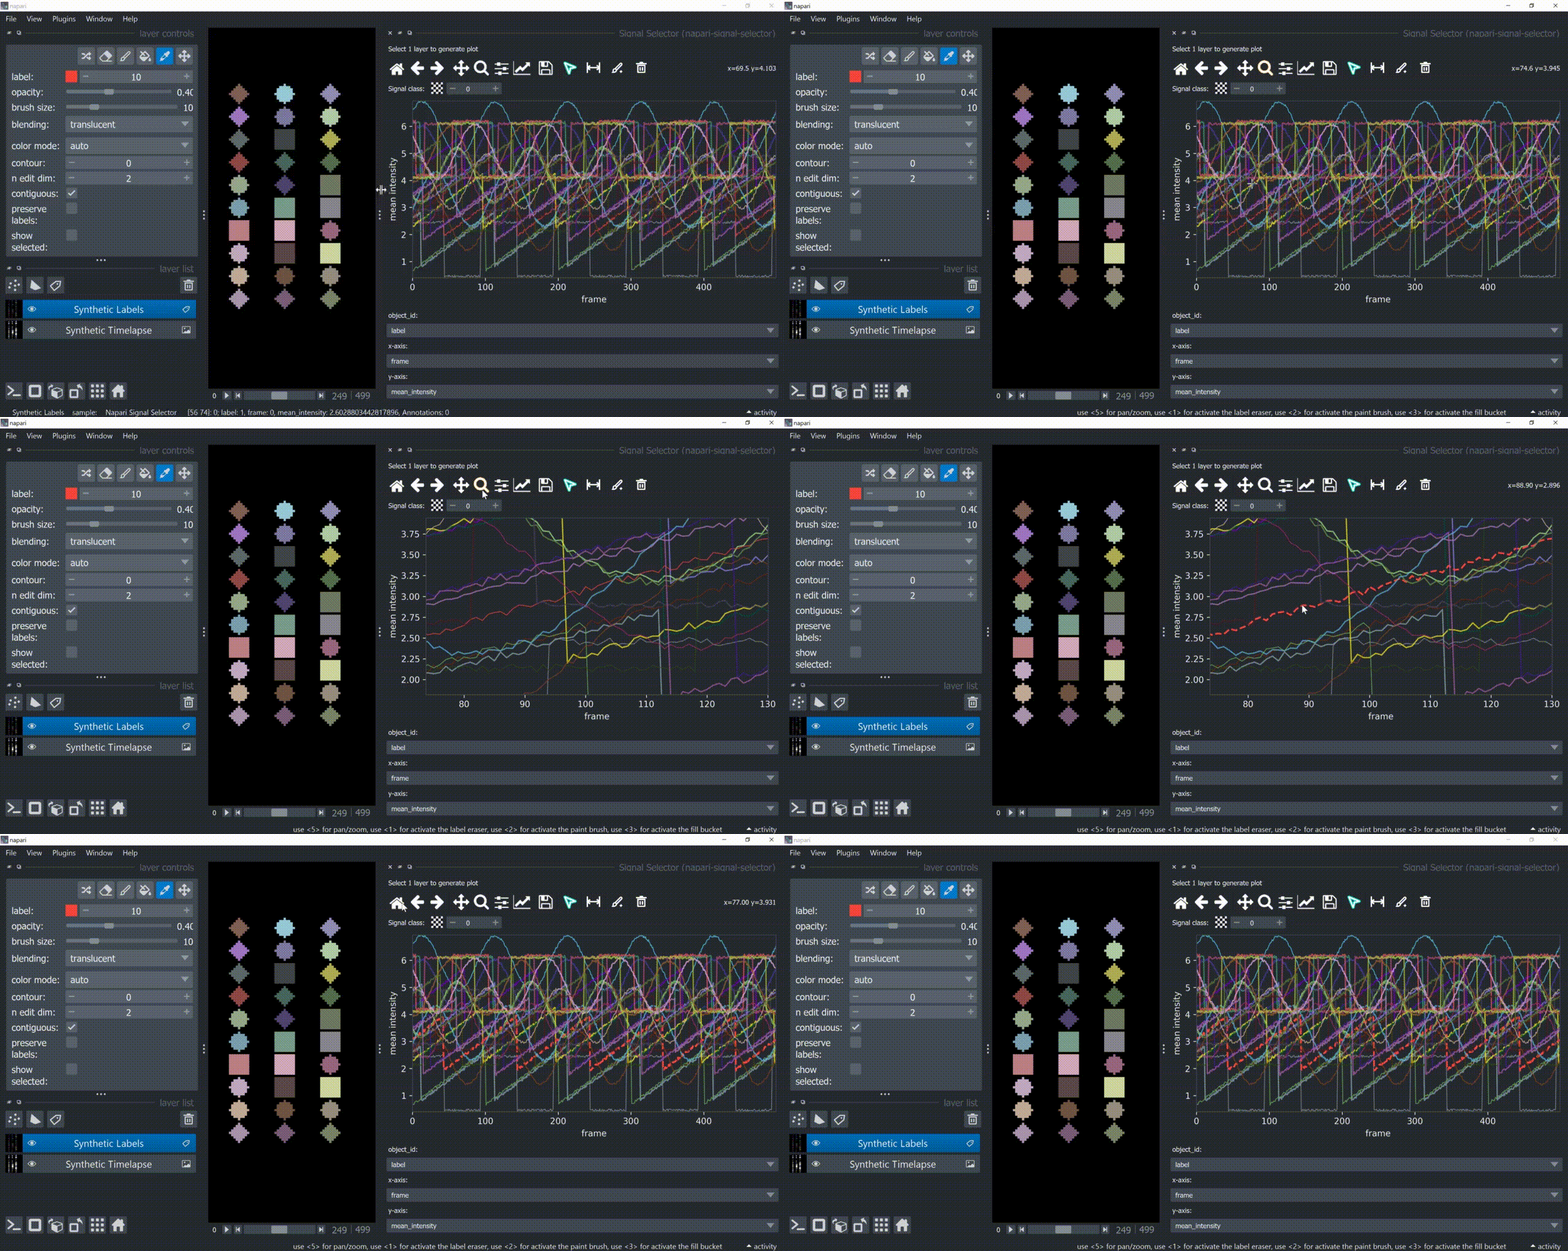
And if you know which label you want to select, you can enable 'show selected' from the Labels layer options to solely display one label at a time. The Lables layer picker tool may help you get the right label.
Annotation Tool
Once one or multiple signals are selected, you can annotate them with the annotation tool (brush with a 'plus' icon). You need to choose a signal class first. Remember to right-click to remove previous selections when annotating different signal classes!
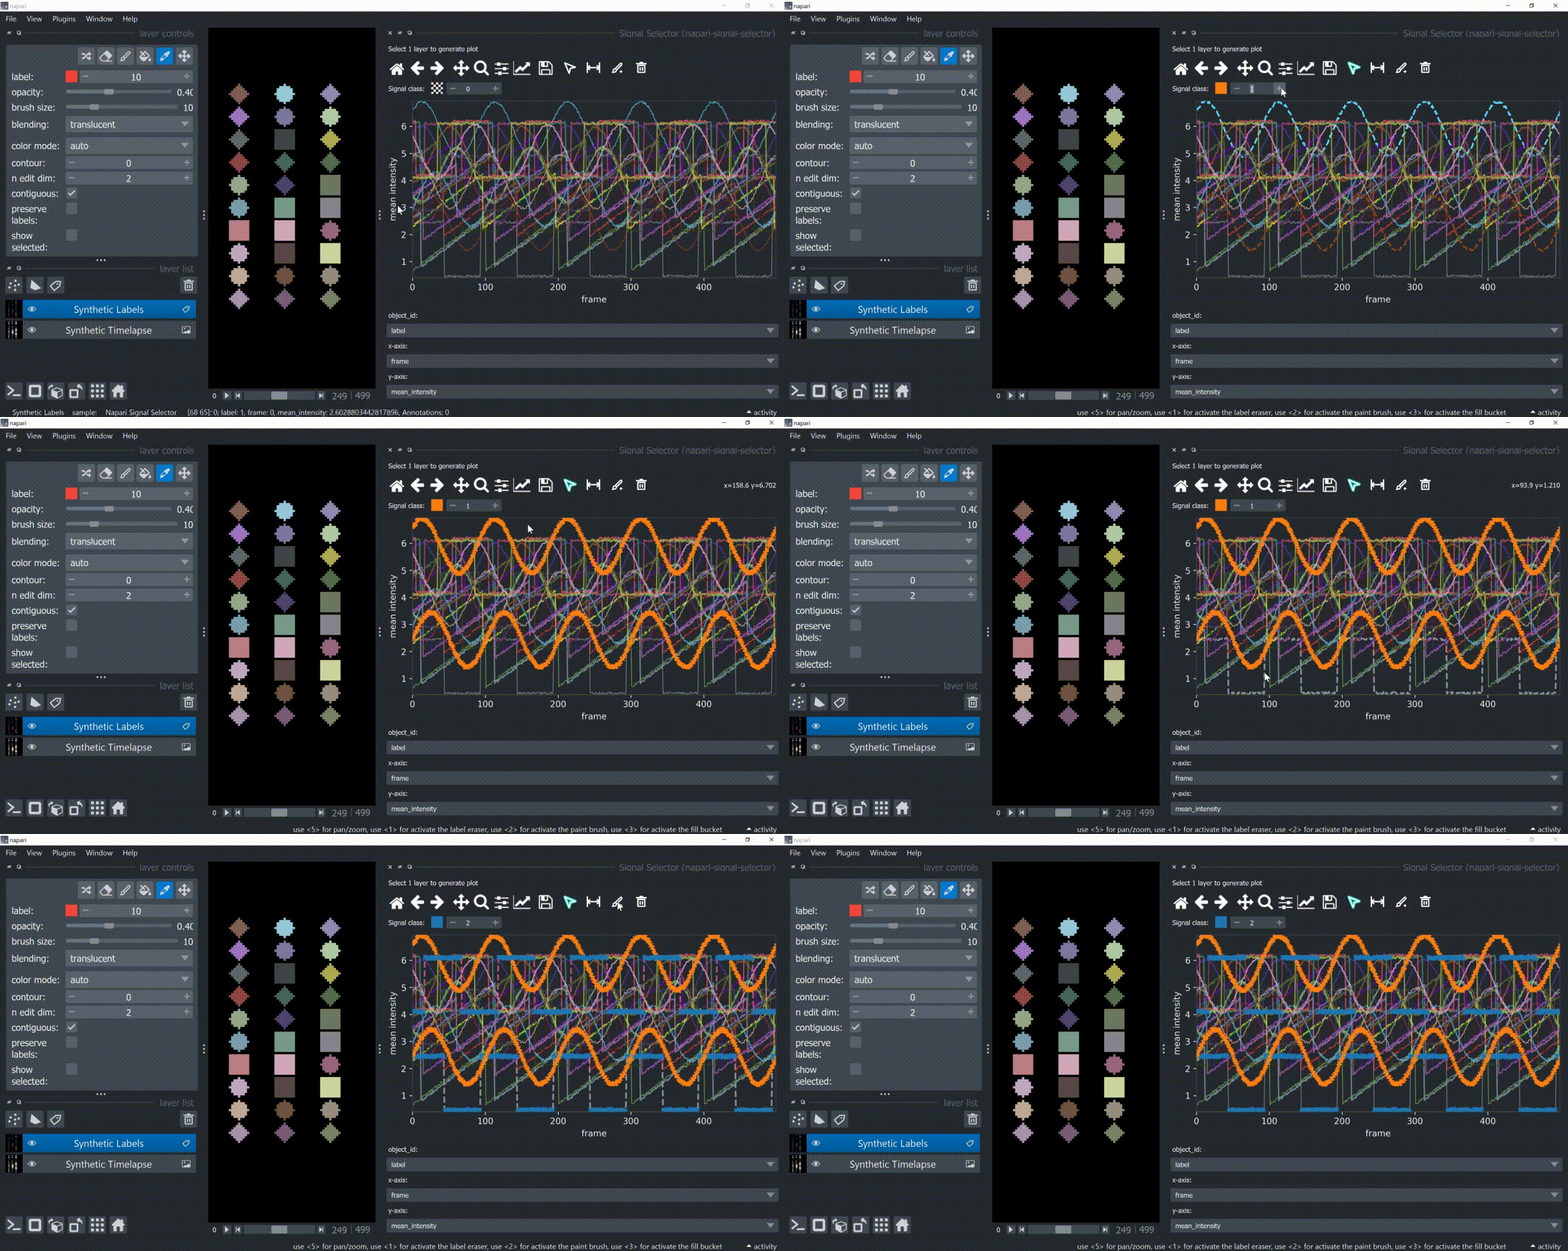
Annotations are saved back in the table in a new column called 'Annotations'. Currently multiple annotations is not possible, i.e., more than one class assigned to the same part of the signal.
Span-Selection Tool
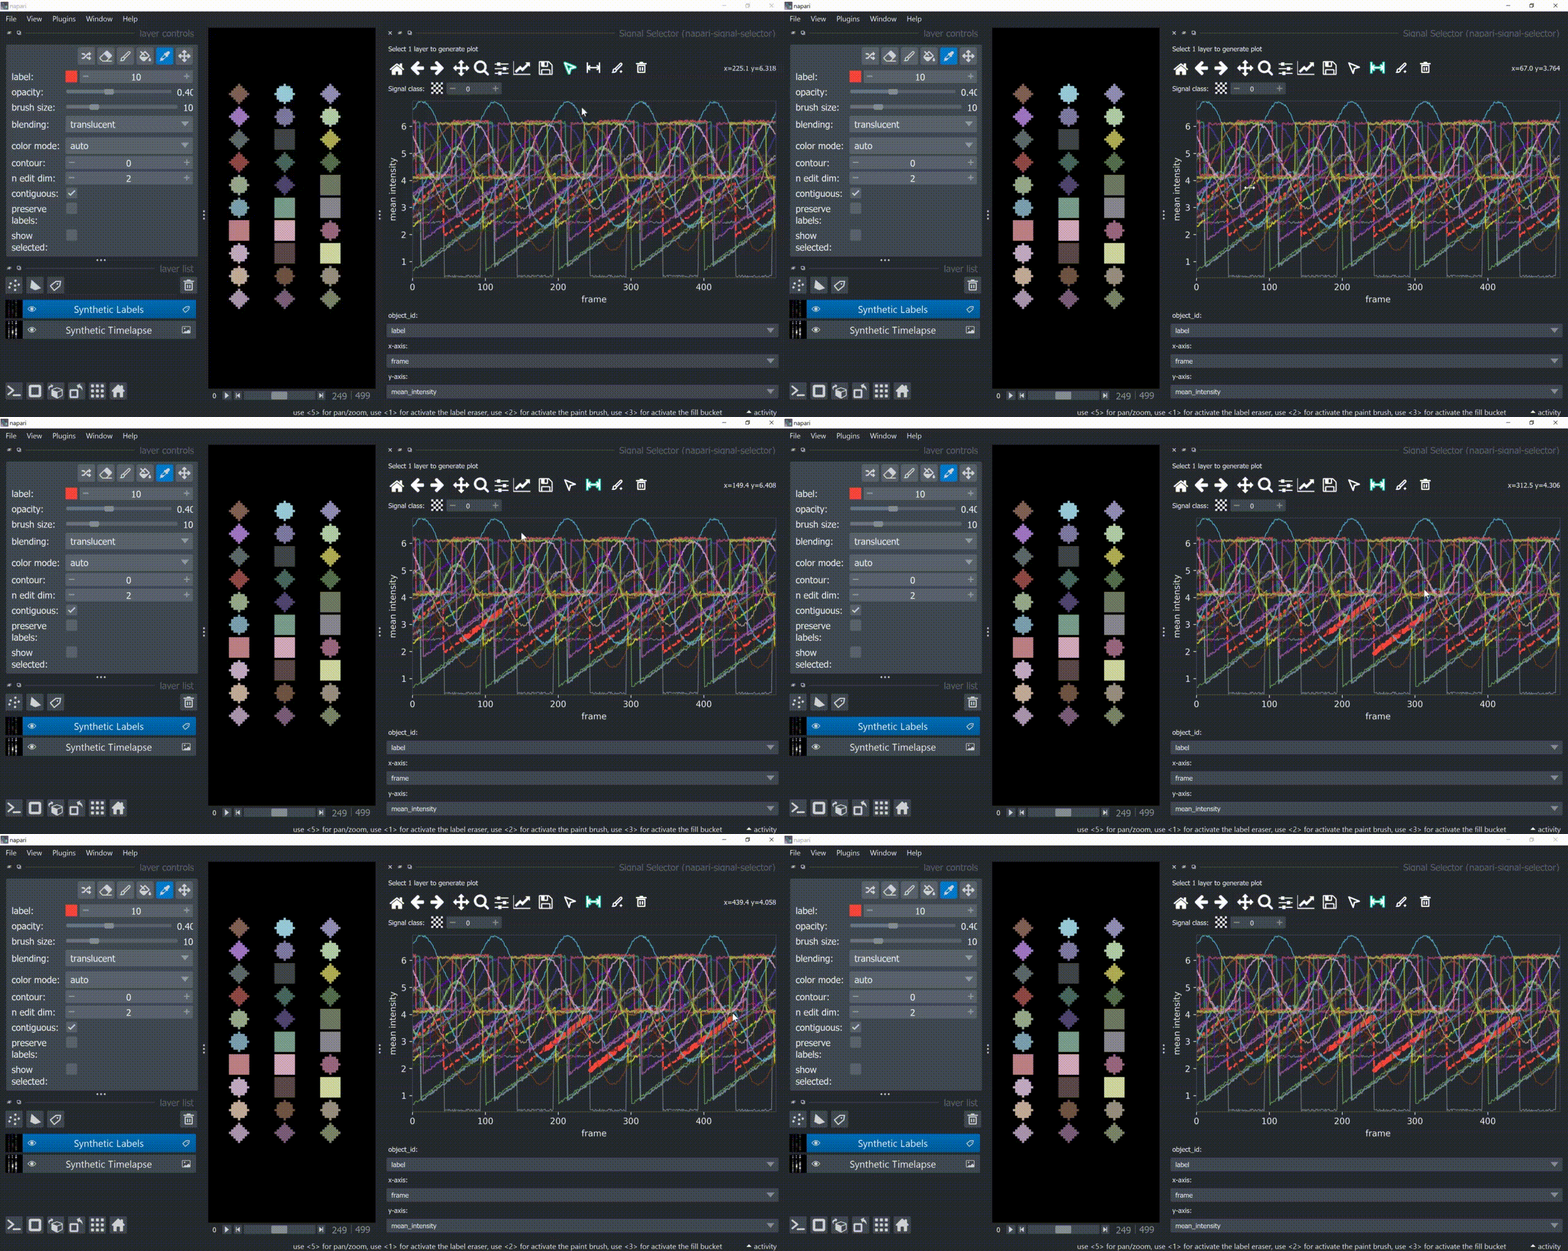
You can use the span-selection tool (bounded horizontal arrows icon) to sub-select one or multiple parts of signals. Right-click to unselect regions. Hold 'SHIFT' while dragging the mouse to select multiple sub-regions.
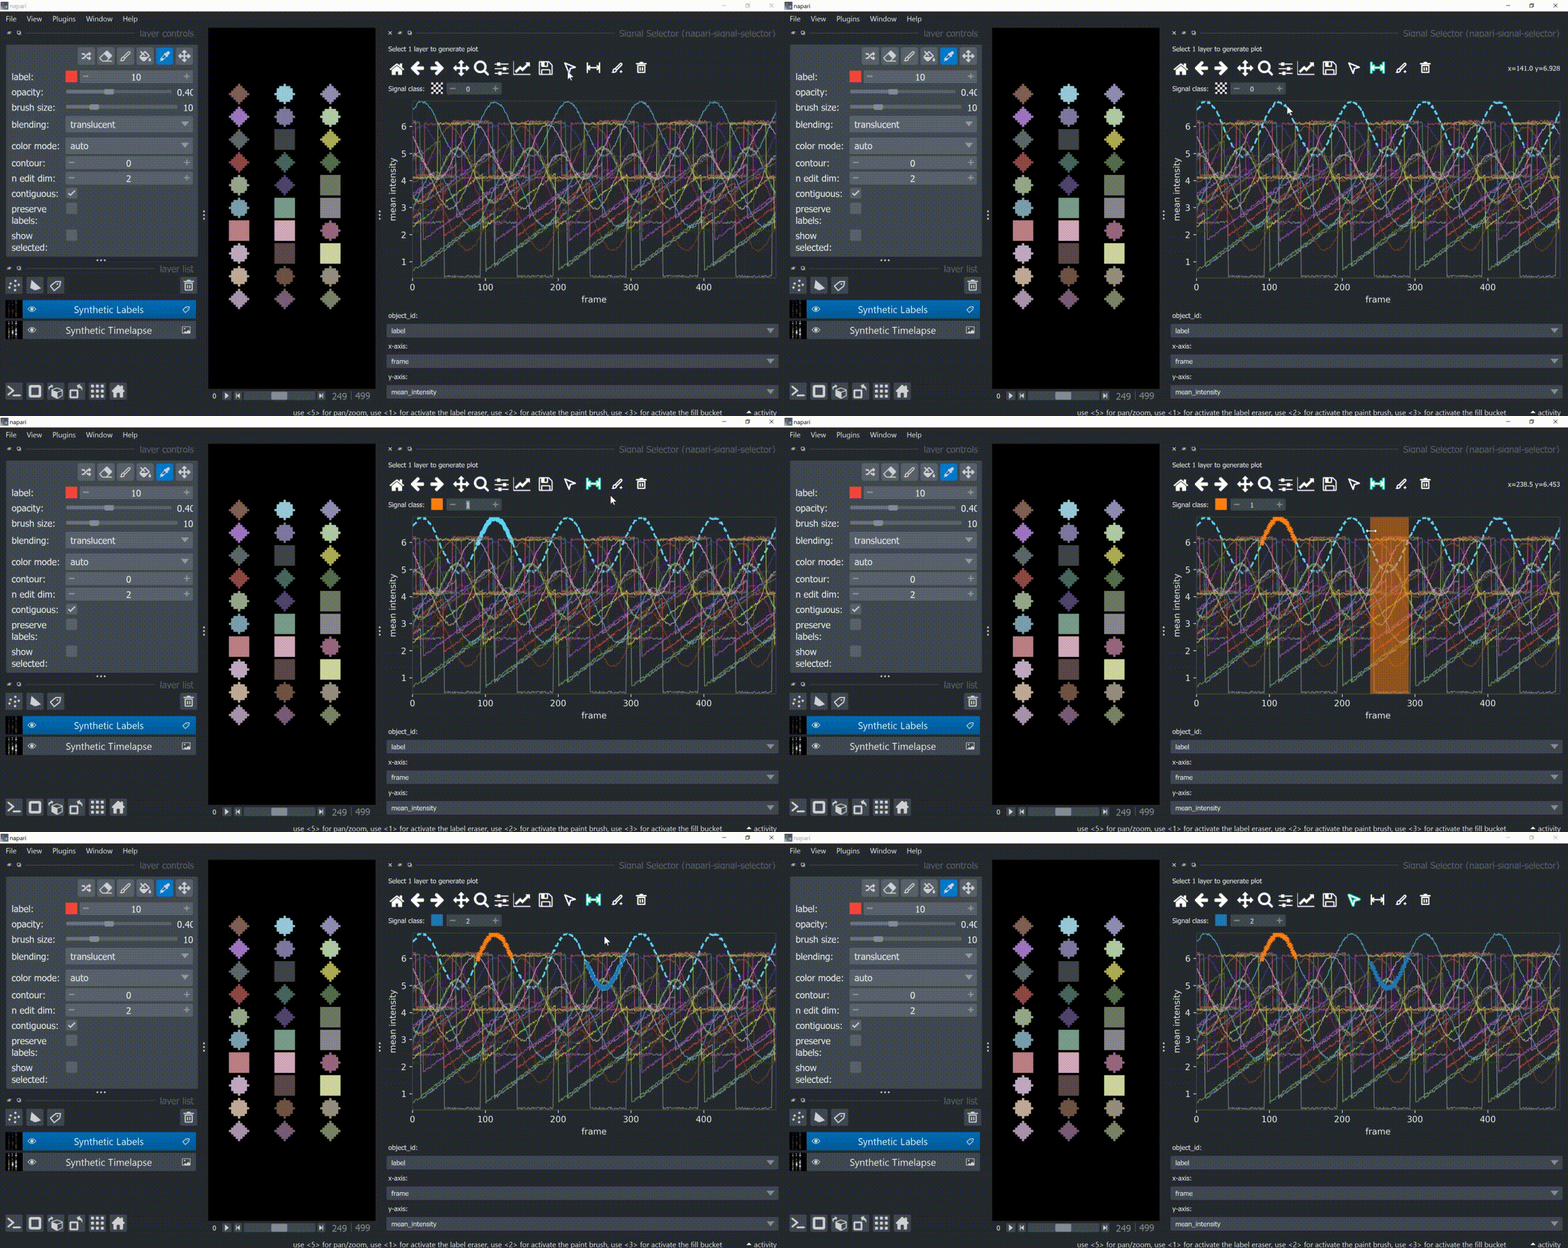
You can use this in conjunction with the annotation tool to have sub-regions from the same signal with different annotations.
Deletion Tool
If you made a mistake, you can remove previous annotations by selecting signal(s) and clicking on the trash icon at the right of the toolbar (or just annotate them with class 0).
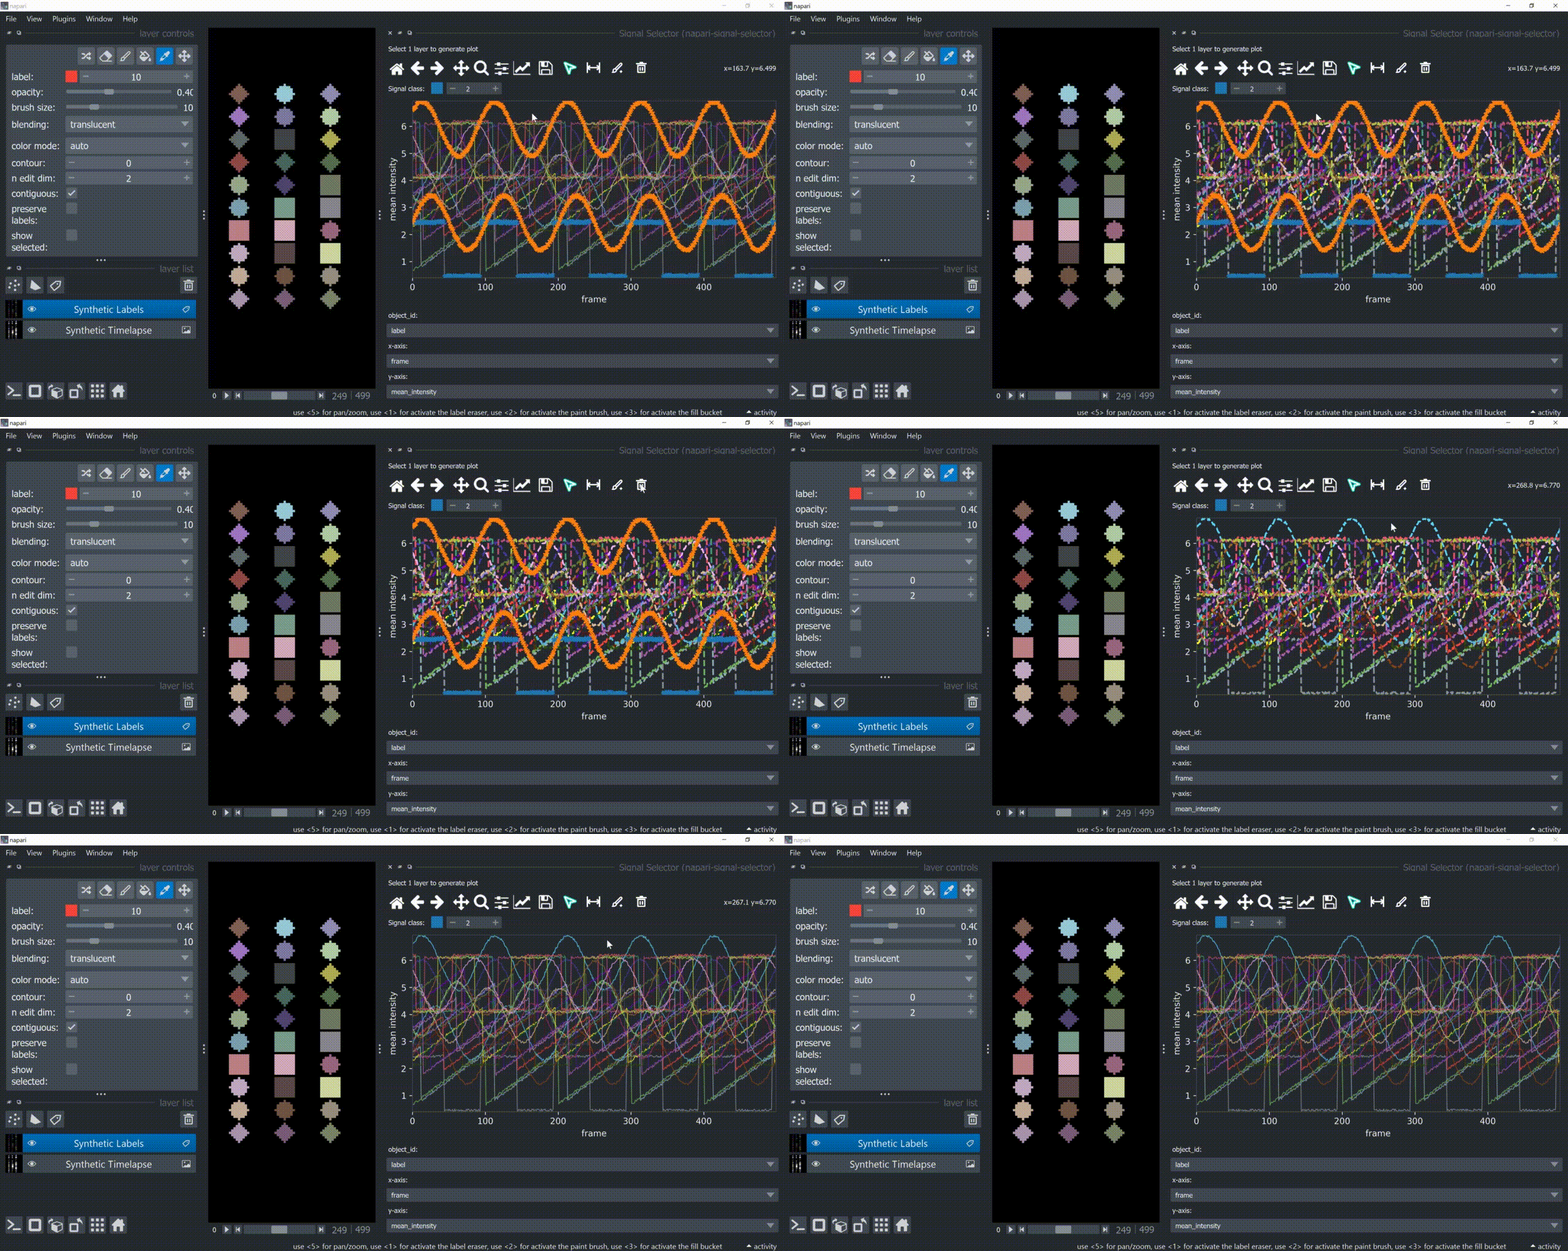
Also, with the selection tool enbaled, by holding 'SHIFT' and left-clicking, you can select all signals. This may be useful to delete all previous annotations.
Exporting Annotations
The table with annotations can be displayed in napari using the napati builtin FeaturesTableWidget via Layers > Visualize > Features table widget.
By the way, with 'show selected' checked, you can click on a label row in the table and see the corresponding label in the image ...and in the plotter!
To export the table, click on 'Save as csv...'.
Another option is to run the following code in the napari console (replace 'Labels' with the name of your Labels layer and 'annotations.csv' with the desired file name or file path):
import pandas as pd
df = viewer.layers['Labels'].data.features
df.to_csv('annotations.csv')
Installation
You can install napari-signal-selector via pip. Follow these steps from a terminal.
We recommend using mamba-forge whenever possible. Click here to choose the right download option for your OS.
If you do not use mamba-forge, replace the mamba term whenever you see it below with conda.
Create a conda environment :
mamba create -n nss-env napari pyqt python=3.11
Activate the environment :
mamba activate nss-env
Install napari-signal-selector via pip :
pip install napari-signal-selector
Alternatively, install latest development version with :
pip install git+https://github.com/zoccoler/napari-signal-selector.git
Contributing
Contributions are very welcome. Tests can be run with tox, please ensure the coverage at least stays the same before you submit a pull request.
License
Distributed under the terms of the BSD-3 license, "napari-signal-selector" is free and open source software
Issues
If you encounter any problems, please file an issue along with a detailed description.
1 maintainer

Metadata
1 maintainer
Release files for napari-signal-selector 0.1.2
For a detailed explanation of source distributions (sdists) and built distributions (wheels), please see the package formats documentation.
Source distribution (sdist)
| File | Size | Uploaded | |
|---|---|---|---|
| napari_signal_selector-0.1.2.tar.gz | 11.6 MB | Details |
Built distribution (wheel)
| File | Interpreter | ABI | Platform | Reset |
|---|---|---|---|---|
| napari_signal_selector-0.1.2-py3-none-any.whl | Python 3 | none | any | Details |
Total release size: 11.9 MB
Release files / napari_signal_selector-0.1.2.tar.gz
| Download URL | napari_signal_selector-0.1.2.tar.gz |
|---|---|
| Size | 11.6 MB |
| Tags | Source |
|
SHA-256 checksum How to use checksums |
bc7811a1b27763ef2985f8cd7946e889580fe2a01059dc2f3e7db9cf68075e56
|
|
BLAKE2b-256 checksum How to use checksums |
dc99d9ce99f8b26bb0b82c169b21c09d4a55da451f0cbbcb7e2cd08af8ae7cfe
|
| Upload date | |
|
Uploaded using Trusted Publishing? What is trusted publishing? |
Yes |
| Uploaded via |
twine/6.1.0 CPython/3.13.7
|
Provenance
Provenance describes where a file came from. On PyPI, provenance is shared via attestations, which provide a verifiable record of the build or publishing details. View details, limitations and caveats.


PyPI Publish Attestation
PyPI verified that this artifact, at this checksum, originated from the publisher listed below.
Signed by GitHub Actions, verified by PyPI on Nov 25, 2025.
Transparency logRelease files / napari_signal_selector-0.1.2-py3-none-any.whl
| Download URL | napari_signal_selector-0.1.2-py3-none-any.whl |
|---|---|
| Size | 346.6 kB |
| Tags | Python 3 |
|
SHA-256 checksum How to use checksums |
d7e128ab190817e4cc9c2125678855e98502e37831587bb27813523ed5cf6bcd
|
|
BLAKE2b-256 checksum How to use checksums |
cb663adc732ea07373a7c2977edd871404abd9dc3149bd27679e21b5e6b35c59
|
| Upload date | |
|
Uploaded using Trusted Publishing? What is trusted publishing? |
Yes |
| Uploaded via |
twine/6.1.0 CPython/3.13.7
|
Provenance
Provenance describes where a file came from. On PyPI, provenance is shared via attestations, which provide a verifiable record of the build or publishing details. View details, limitations and caveats.
PyPI Publish Attestation
PyPI verified that this artifact, at this checksum, originated from the publisher listed below.
Signed by GitHub Actions, verified by PyPI on Nov 25, 2025.
Transparency log













