
⚡ Open Terminal
A lightweight, self-hosted terminal that gives AI agents and automation tools a dedicated environment to run commands, manage files, and execute code — all through a simple API.
Why Open Terminal?
AI assistants are great at writing code, but they need somewhere to run it. Open Terminal is that place — a remote shell with file management, search, and more, accessible over a simple REST API.
You can run it two ways:
- Docker (sandboxed) — runs in an isolated container with a full toolkit pre-installed: Python, Node.js, git, build tools, data science libraries, ffmpeg, and more. Great for giving AI agents a safe playground without touching your host system.
- Bare metal — install it with
pipand run it anywhere Python runs. Commands run directly on your machine with access to your real files, your real tools, and your real environment, perfect for local development, personal automation, or giving an AI assistant full access to your actual projects.
Getting Started
Docker (recommended)
docker run -d --name open-terminal --restart unless-stopped -p 8000:8000 -v open-terminal:/home/user -e OPEN_TERMINAL_API_KEY=your-secret-key ghcr.io/open-webui/open-terminal
That's it — you're up and running at http://localhost:8000.
[!TIP] If you don't set an API key, one is generated automatically. Grab it with
docker logs open-terminal.
Image Variants
latest |
slim |
alpine |
openshift |
|
|---|---|---|---|---|
| Best for | AI agent sandboxes | Production / hardened | Edge / CI / minimal footprint | OpenShift restricted SCC |
| Size | ~4 GB | ~430 MB | ~230 MB | ~430 MB |
| Bundled tooling | Node.js, gcc, ffmpeg, LibreOffice, LaTeX, Docker CLI, data science libs | git, curl, jq | git, curl, jq | git, curl, jq |
| Install packages at runtime | ✔ (has sudo) |
✘ | ✘ | ✘ |
| Multi-user mode | ✔ | ✘ | ✘ | ✘ |
| Egress firewall | ✔ | ✔ | ✔ | ✘ |
slim and alpine have the same feature set. Slim uses Debian (glibc) for broader binary compatibility; Alpine uses musl libc and is smaller, but some C-extension pip packages may need to compile from source.
docker run -d -p 8000:8000 -e OPEN_TERMINAL_API_KEY=secret ghcr.io/open-webui/open-terminal:slim
docker run -d -p 8000:8000 -e OPEN_TERMINAL_API_KEY=secret ghcr.io/open-webui/open-terminal:alpine
docker run -d -p 8000:8000 -e OPEN_TERMINAL_API_KEY=secret ghcr.io/open-webui/open-terminal:openshift
[!NOTE] Slim and Alpine don't support
OPEN_TERMINAL_PACKAGES/OPEN_TERMINAL_PIP_PACKAGES/OPEN_TERMINAL_NPM_PACKAGES. To add packages, extend Dockerfile.slim or Dockerfile.alpine.
[!NOTE] The default
latestimage includes LibreOffice for Word, Excel, and PowerPoint to PDF conversions. Theslim,alpine, andopenshiftimages stay minimal; build a custom image if those variants need Office conversion tools.
[!NOTE] The OpenShift image is for restricted non-root pod policies. It does not support runtime package installs, Docker socket access, the iptables egress firewall, or
OPEN_TERMINAL_MULTI_USER=true. Build a custom image ahead of time when OpenShift users need extra tools.
Updating
docker pull ghcr.io/open-webui/open-terminal
docker rm -f open-terminal
Then re-run the docker run command above.
Bare Metal
No Docker? No problem. Open Terminal is a standard Python package:
# One-liner with uvx (no install needed)
uvx open-terminal run --host 0.0.0.0 --port 8000 --api-key your-secret-key

# Or install globally with pip
pip install open-terminal
open-terminal run --host 0.0.0.0 --port 8000 --api-key your-secret-key
[!CAUTION] On bare metal, commands run directly on your machine with your user's permissions. Use Docker if you want sandboxed execution.
Customizing the Docker Environment
The easiest way to add extra packages is with environment variables — no fork needed:
docker run -d --name open-terminal -p 8000:8000 \
  -e OPEN_TERMINAL_PACKAGES="cowsay figlet" \
  -e OPEN_TERMINAL_PIP_PACKAGES="httpx polars" \
  -e OPEN_TERMINAL_NPM_PACKAGES="typescript tsx" \
  ghcr.io/open-webui/open-terminal
| Variable | Description |
|---|---|
OPEN_TERMINAL_PACKAGES |
Space-separated list of apt packages to install at startup |
OPEN_TERMINAL_PIP_PACKAGES |
Space-separated list of pip packages to install at startup |
OPEN_TERMINAL_NPM_PACKAGES |
Space-separated list of npm packages to install globally at startup |
[!NOTE] Packages are installed each time the container starts, so startup will take longer with large package lists. For heavy customization, build a custom image instead.
Docker Access
The image includes the Docker CLI, Compose, and Buildx. To let agents build images, run containers, etc., mount the host's Docker socket:
docker run -d --name open-terminal -p 8000:8000 \
  -v /var/run/docker.sock:/var/run/docker.sock \
  -v open-terminal:/home/user \
  ghcr.io/open-webui/open-terminal
[!CAUTION] Mounting the Docker socket gives the container full control over the host's Docker daemon, which is effectively root access on the host machine. Anyone with access to the terminal can pull/run arbitrary containers (including
--privilegedones), mount host directories, access host networking, and manage all containers on the host. Only do this in fully trusted environments.
For full control, fork the repo, edit the Dockerfile, and build your own image:
docker build -t my-terminal .
docker run -d --name open-terminal -p 8000:8000 my-terminal
Configuration
Open Terminal can be configured via a TOML config file, environment variables, and CLI flags. Settings are resolved in this order (highest priority wins):
- CLI flags (
--host,--port,--api-key, etc.) - Environment variables (
OPEN_TERMINAL_API_KEY, etc.) - User config —
$XDG_CONFIG_HOME/open-terminal/config.toml(defaults to~/.config/open-terminal/config.toml) - System config —
/etc/open-terminal/config.toml - Built-in defaults
Create a config file at either location with any of these keys (all optional):
host = "0.0.0.0"
port = 8000
api_key = "sk-my-secret-key"
cors_allowed_origins = "*"
log_dir = "/var/log/open-terminal"
binary_mime_prefixes = "image,audio"
execute_timeout = 5  # seconds to wait for command output (unset by default)
file_browser_root = "home"
[!TIP] Use the system config at
/etc/open-terminal/config.tomlto set site-wide defaults for host and port, and the user config for personal settings like the API key — this keeps the key out ofps/htop.
You can also point to a specific config file:
open-terminal run --config /path/to/my-config.toml
File Browser Root
Open Terminal reports file-browser root metadata from GET /files/cwd so clients can hide parent navigation above a friendly starting point.
Set OPEN_TERMINAL_FILE_BROWSER_ROOT to:
| Value | Behavior |
|---|---|
home |
Default. Report the current user's home directory as Home |
/workspace |
Report an explicit path as the visual root |
{{home}}/project |
Report a path under the current user's home |
filesystem |
Opt out and report no visual root metadata |
This is a UI hint for clients. It does not restrict terminal commands or file APIs.
External Workspace Storage
Open Terminal uses the filesystem it is mounted on. To store workspace files externally, mount that storage into the container:
- Single-user:
/home/user - Multi-user:
/home
This can be a Docker volume, Kubernetes persistent volume, NFS/Azure Files mount, or FUSE mount such as blobfuse, s3fs, or rclone.
Office Previews
GET /files/view?path=... always returns the original file by default. Clients
that want a rendered preview can add preview=true; when LibreOffice is
available the server can return DOCX and PPTX previews as PDF. When rendered
preview support is not available, the same endpoint falls back to returning the
original file bytes.
Using with Open WebUI
Open Terminal integrates with Open WebUI, giving your AI assistants the ability to run commands, manage files, and interact with a terminal right from the AI interface. Make sure to add it under Open Terminal in the integrations settings, not as a tool server. Adding it as an Open Terminal connection gives you a built-in file navigation sidebar where you can browse directories, upload, download, and edit files. There are two ways to connect:
Direct Connection
Users can connect their own Open Terminal instance from their user settings. This is useful when the terminal is running on their local machine or a network only they can reach, since requests go directly from the browser.
- Go to User Settings → Integrations → Open Terminal
- Add the terminal URL and API key
- Enable the connection
System-Level Connection (Multi-User)
Admins can configure Open Terminal connections for all their users from the admin panel. No additional services required. Multiple terminals can be set up with access controlled at the user or group level. Requests are proxied through the Open WebUI backend, so the terminal only needs to be reachable from the server.
- Go to Admin Settings → Integrations → Open Terminal
- Add the terminal URL and API key
- Enable the connection
Built-in Multi-User Isolation
[!CAUTION] Single-container multi-user mode is not designed for production multi-user deployments. All users share the same kernel, network, and system resources with no hard isolation boundaries between them. If one user's process misbehaves, it can affect every other user on the system. This mode exists as a lightweight convenience for small, trusted groups — not as a security model you should rely on.
For small, trusted deployments you can enable per-user isolation inside a single container:
docker run -d --name open-terminal -p 8000:8000 \
  -v open-terminal:/home \
  -e OPEN_TERMINAL_MULTI_USER=true \
  -e OPEN_TERMINAL_API_KEY=your-secret-key \
  ghcr.io/open-webui/open-terminal
Each user automatically gets a dedicated Linux account with its own home directory. Files, commands, and terminals are isolated between users via standard Unix permissions.
API Docs
Full interactive API documentation is available at http://localhost:8000/docs once your instance is running.
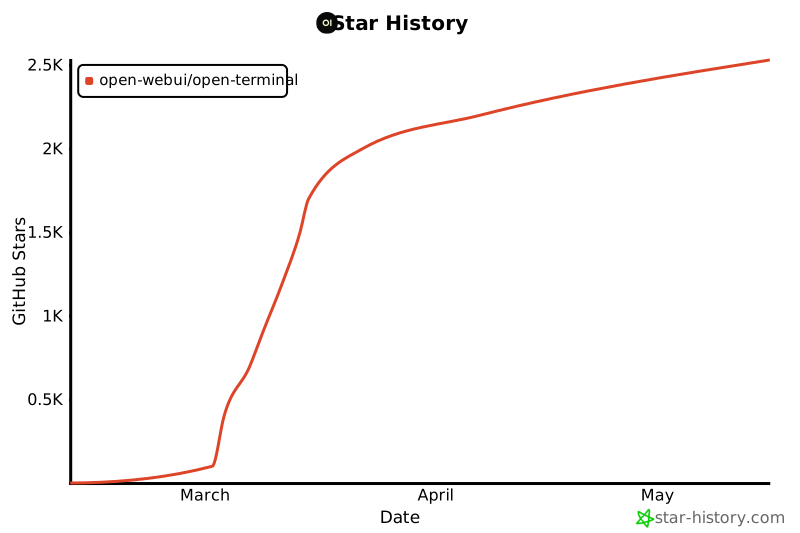
Star History
[!TIP] Need container-per-user isolation? Check out Terminals, which provisions and manages separate Open Terminal containers per user. For lighter deployments, built-in multi-user mode (
OPEN_TERMINAL_MULTI_USER=true) provides per-user isolation inside a single container.
License
MIT — see LICENSE for details.
1 maintainer

Metadata
1 maintainer
Release files for open-terminal 0.13.0
For a detailed explanation of source distributions (sdists) and built distributions (wheels), please see the package formats documentation.
Source distribution (sdist)
| File | Size | Uploaded | |
|---|---|---|---|
| open_terminal-0.13.0.tar.gz | 74.1 kB | Details |
Built distribution (wheel)
| File | Interpreter | ABI | Platform | Reset |
|---|---|---|---|---|
| open_terminal-0.13.0-py3-none-any.whl | Python 3 | none | any | Details |
Total release size: 130.5 kB
Release files / open_terminal-0.13.0.tar.gz
| Download URL | open_terminal-0.13.0.tar.gz |
|---|---|
| Size | 74.1 kB |
| Tags | Source |
|
SHA-256 checksum How to use checksums |
694d5820439fe25b669ea9304a04b907aec3ee84ad4fddbe84739044bf146bb8
|
|
BLAKE2b-256 checksum How to use checksums |
96d09b9bbb841daa65066d4712316285e35ec0cd2324c05903838c0e4c398383
|
| Upload date | |
|
Uploaded using Trusted Publishing? What is trusted publishing? |
Yes |
| Uploaded via |
twine/7.0.0 CPython/3.13.14
|
Provenance
Provenance describes where a file came from. On PyPI, provenance is shared via attestations, which provide a verifiable record of the build or publishing details. View details, limitations and caveats.


PyPI Publish Attestation
PyPI verified that this artifact, at this checksum, originated from the publisher listed below.
Signed by GitHub Actions, verified by PyPI on Sep 14, 2026.
Transparency logRelease files / open_terminal-0.13.0-py3-none-any.whl
| Download URL | open_terminal-0.13.0-py3-none-any.whl |
|---|---|
| Size | 56.5 kB |
| Tags | Python 3 |
|
SHA-256 checksum How to use checksums |
81bdddea8eff2c0dc659a1ab8f59d2189c6227987008b6ecd3fa5f2dab50ba12
|
|
BLAKE2b-256 checksum How to use checksums |
bc79caf6aebb28fc924ef27a2befa71df8c8b0f37b5145d1e4f9b6259f2ddb91
|
| Upload date | |
|
Uploaded using Trusted Publishing? What is trusted publishing? |
Yes |
| Uploaded via |
twine/7.0.0 CPython/3.13.14
|
Provenance
Provenance describes where a file came from. On PyPI, provenance is shared via attestations, which provide a verifiable record of the build or publishing details. View details, limitations and caveats.
PyPI Publish Attestation
PyPI verified that this artifact, at this checksum, originated from the publisher listed below.
Signed by GitHub Actions, verified by PyPI on Sep 14, 2026.
Transparency log













