
This release is a pre-release and may not be stable for production use.
Paude
Run AI coding agents in secure containers. They make commits, you pull them back.
Supported Agents
| Agent | Flag | Status |
|---|---|---|
| Claude Code | --agent claude (default) |
Supported |
| Codex CLI | --agent codex |
Supported |
| Cursor CLI | --agent cursor |
Supported |
| Gas City | --agent gascity |
Supported |
| Gemini CLI | --agent gemini |
Supported |
| OpenClaw | --agent openclaw |
Supported |
| OpenCode | --agent opencode |
Supported |
Agents are installed automatically inside the container — no local agent installation needed. You just need authentication credentials for your chosen provider.
Paude-managed agent containers include common development utilities, including
rg (ripgrep) for fast code search.
The Codex CLI image also includes Node.js for documentation tooling, using the
custom base image's package manager or an existing Node.js installation.
Agent installation, credential setup, and provider selection are independent.
--agents is the exact install set and its first entry launches as the primary.
--providers selects credentials to configure, while --agent-provider maps
installed agents to those providers:
paude create \
  --agents gascity,claude,codex \
  --providers vertex,chatgpt \
  --agent-provider gascity=vertex,claude=vertex,codex=chatgpt \
  my-project
Unmapped agents use their default provider. If --providers is omitted, its
value is derived from the effective mappings; when supplied, it must include
every mapped provider but may include extras. --provider remains shorthand
for mapping the primary agent. Gas City no longer installs child CLIs
implicitly—list every CLI the image should contain.
Why Paude?
- Isolated execution: Your agent runs in a container, not on your host machine
- Safe autonomous mode: Enable
--yolowithout fear — the agent can't send your code anywhere - Git-based workflow: The agent commits inside the container, you
git pullthe changes - Run anywhere: Locally or over SSH with Podman or Docker
Demo
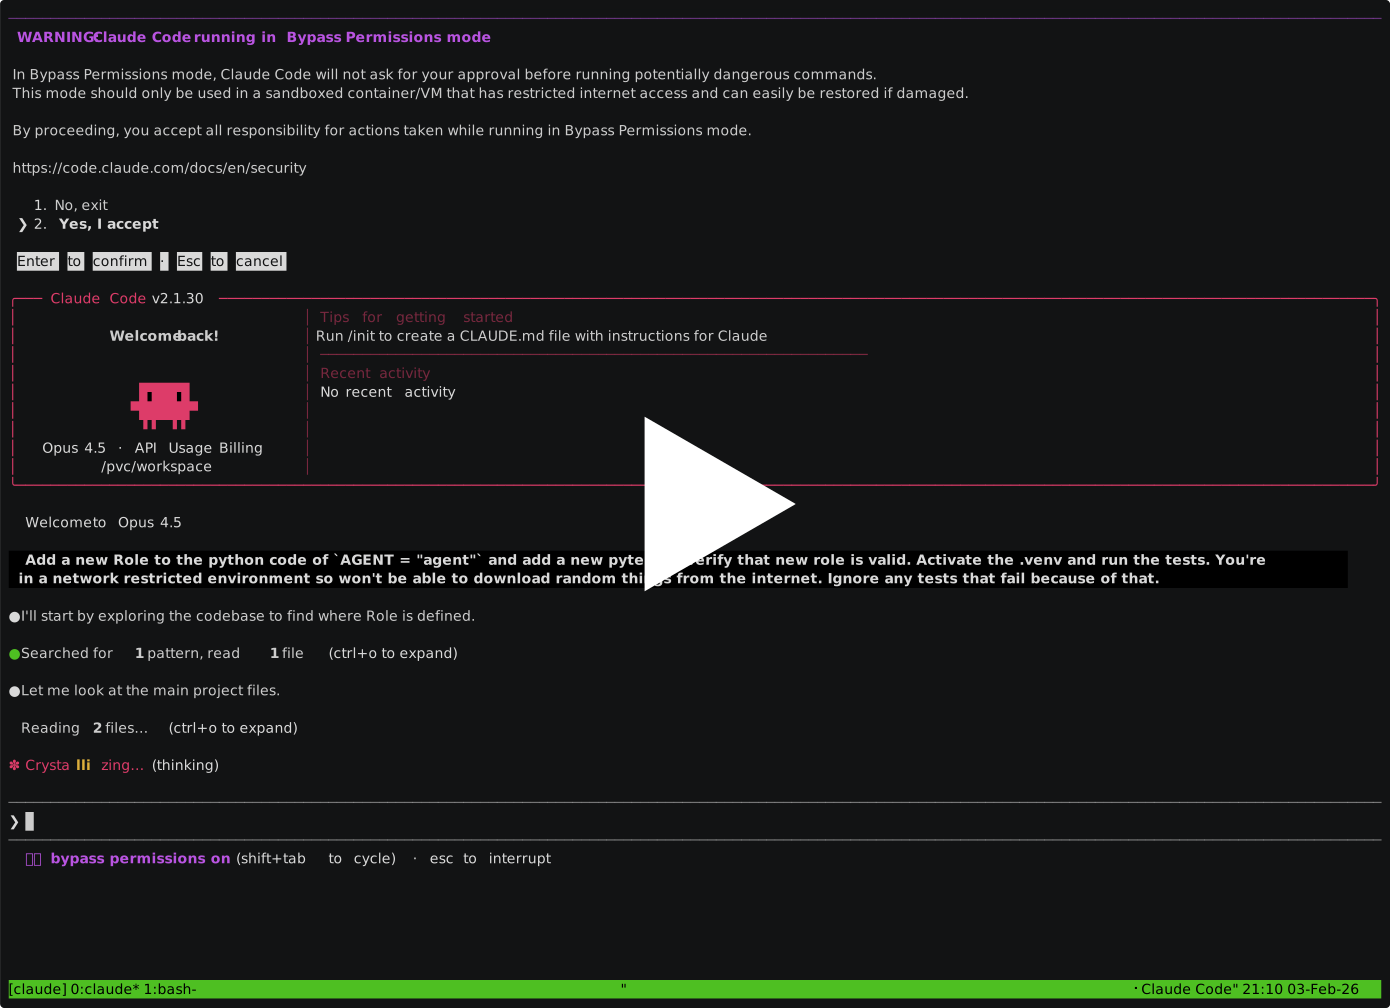
The demo shows Claude Code, but the workflow is identical with other agents.
Quick Start
Prerequisites
Container runtime: Podman or Docker, locally or on a remote host reached over SSH.
Authentication — set up credentials for your chosen provider:
Google Cloud / Vertex AI (Claude Code, Gemini CLI, OpenClaw, OpenCode)
Install the Google Cloud SDK, then:
gcloud auth application-default login
Set your project (find the ID in Google Cloud Console):
# Claude Code via Vertex
export CLAUDE_CODE_USE_VERTEX=1
export ANTHROPIC_VERTEX_PROJECT_ID=your-project-id
export GOOGLE_CLOUD_PROJECT=your-project-id

# Gemini CLI / OpenClaw via Vertex
export GOOGLE_CLOUD_PROJECT=your-project-id

# OpenCode via Vertex
export GOOGLE_CLOUD_PROJECT=your-project-id
export VERTEX_LOCATION=us-east5
Anthropic API key (Claude Code, OpenClaw, OpenCode)
export ANTHROPIC_API_KEY=your-api-key
This is the default provider for OpenCode. For Claude Code and OpenClaw, also pass --provider anthropic:
paude create --agent openclaw --provider anthropic ...
OpenAI API key (Codex CLI, OpenClaw, OpenCode)
export OPENAI_API_KEY=your-api-key
paude create --agent openclaw --provider openai ...
paude create --agent opencode --provider openai ...
ChatGPT plan login (Codex CLI)
paude create --agent codex --yolo --git my-project
paude connect my-project
chatgpt is the default provider for the Codex agent.
Inside the session, run codex login. Codex prints a URL and code — complete
the login in any browser, on any device (no localhost callback or port
forwarding is needed). The session's own proxy sidecar captures the resulting
OAuth tokens and manages refresh transparently and independently; real tokens
never reach the agent container. Each session has its own OAuth lineage tied
to its own private state volume, so multiple ChatGPT-plan sessions can run
concurrently without one session's token refresh invalidating another's.
Pass --provider openai to use the plain OPENAI_API_KEY provider instead
— no ChatGPT plan, no proxy-managed auth. The default Codex network policy
allows chatgpt.com and auth.openai.com for the ChatGPT API and OAuth
exchange.
You can also switch an existing session's Codex auth in place with
paude upgrade — no need to recreate it. Use --agent-provider to remap
Codex's provider (or --provider if Codex is the session's primary agent):
# Swap Codex from ChatGPT-plan OAuth to the OpenAI API key
export OPENAI_API_KEY=your-api-key
paude upgrade my-project --agent-provider codex=openai
Export OPENAI_API_KEY before upgrading: it is read from your host
environment and injected into the session's proxy (the same key must be present
on later start/connect). The upgrade drops the chatgpt credential
provider, clears the old ChatGPT auth.json, and reconfigures Codex's
config.toml for the OpenAI API. To go back, run
paude upgrade my-project --agent-provider codex=chatgpt and codex login
inside the session again.
Paude merges the required HTTP/SSE provider settings into the session's
persistent Codex config.toml because the local MITM proxy does not support
the Responses WebSocket transport. Existing model, MCP, project trust, and
other user settings are preserved across starts and upgrades. Codex Apps are
disabled for ChatGPT OAuth sessions so the Apps MCP integration does not
attempt to connect from the container; standalone MCP server configuration
is unchanged.
Breaking change from previous versions: paude no longer reads
~/.codex/auth.json from the host. Sessions created under the old
host-seeded model must be recreated (paude delete + paude create --agent codex) and re-authenticated with codex login inside the container.
Cursor
agent login # or set CURSOR_API_KEY=your-api-key
macOS note: On Mac hosts,
CURSOR_API_KEYis the simplest authentication method. Without it, each paude session requires a separate browser-based OAuth login viaagent logininside the container.
Install
uv tool install paude
First run: Paude pulls container images on first use. This takes a few minutes; subsequent runs start immediately.
Persistent sessions and upgrades
Agent configuration, logins, conversation history, skills, and workspace data
are stored on each session's private volume. They survive start, stop, and
container recreation. Each session gets a writable /pvc/.gitconfig, seeded
from the host config when available or created empty otherwise. Your git
author identity is resolved on the host with git config (honoring global,
XDG, system, and includeIf config) and applied inside the container when the
seeded config lacks one, so commits are attributed correctly. All container
processes use it, so git config --global works consistently for local and
SSH-remote Docker/Podman sessions without modifying the host config.
After updating Paude, refresh a session with:
paude upgrade SESSION
The command performs a fresh build with the latest stable agent tooling and
migrates state from older containers before replacing them. Upgrades are
crash-safe: your /pvc data volume is reused in place and never removed, and if
an upgrade is interrupted (e.g. Ctrl-C) you can simply re-run
paude upgrade SESSION to finish it. upgrade can also add an agent to an
existing session in place, e.g. paude upgrade SESSION --add-agent codex. See
Session Management for the per-agent persistence paths.
Your First Session
# OpenClaw — browser-based, no local agent install needed
paude create --agent openclaw --allowed-domains "default openclaw" my-project

# Claude Code (default)
cd your-project
paude create --yolo --git my-project

# Codex CLI
paude create --agent codex --yolo --git my-project

# Cursor CLI
paude create --agent cursor --yolo --git my-project

# Gemini CLI
paude create --agent gemini --yolo --git my-project

# OpenCode
paude create --agent opencode --yolo --git my-project

# Connect to a CLI agent's running session
paude connect my-project

# Pull the agent's commits (use your branch name):
git pull paude-my-project main
You'll know it's working when: For CLI agents, paude connect shows the agent interface and git pull brings back commits. For OpenClaw, paude connect prints a URL — open it in your browser.
OpenTelemetry Export
Export agent telemetry (metrics, logs, traces) to any OTLP-compatible collector:
paude create --otel-endpoint http://collector:4318 my-project
The endpoint hostname is automatically added to the proxy allowlist and non-standard ports (like 4318) are opened in the proxy. Supported agents: Claude Code, Gemini CLI, OpenClaw. Set otel-endpoint in ~/.config/paude/defaults.json to apply globally.
Port Forwarding
Some agents run a service inside the container that you want to reach from your host — for example a web dashboard. Forwarding is opt-in and per-connection: by default no container ports are exposed. Pass --forward-port when you attach to a session, on either paude connect or paude start:
# Forward container port 8372 to host port 8372
paude connect my-project --forward-port 8372

# Different host port than container port (HOST:CONTAINER)
paude connect my-project --forward-port 9000:8372

# Bind a non-loopback host interface (HOST_IP:HOST:CONTAINER)
paude connect my-project --forward-port 0.0.0.0:8372:8372

# Repeat the flag to forward multiple ports
paude connect my-project --forward-port 8372 --forward-port 5173

# Works the same on the start path (start a stopped session, then attach)
paude start my-project --forward-port 8372
--forward-port accepts three forms:
PORT— same port on host and container (binds127.0.0.1)HOST:CONTAINER— map a different host port (binds127.0.0.1)HOST_IP:HOST:CONTAINER— bind a specific host interface (e.g.0.0.0.0to expose on your LAN)
Because forwarding is decided at attach time, you choose which ports to expose on every connect/start, and nothing is persisted with the session. Forwarding starts when you attach and stops when you disconnect. It works on both the Podman and Docker backends.
macOS (podman machine): Podman runs containers in a VM on macOS, but the forwarder's listener runs on your Mac host directly — it never binds inside the VM. Reaching the container uses the same podman exec path paude connect already relies on, so --forward-port behaves the same as on Linux; no extra podman machine port-publishing is needed.
Loopback binding: the forwarder reaches the service over 127.0.0.1 inside the container, so the in-container service must listen on 127.0.0.1 (or 0.0.0.0) rather than a container-external interface. Every connection appears to the service as coming from 127.0.0.1, which satisfies services that only accept loopback traffic.
Worked example: Gas City dashboard
The Gas City agent serves a dashboard inside the container on 127.0.0.1:8372. To reach it from your host:
# Connect to a Gas City session and forward the dashboard port
paude connect my-project --forward-port 8372
While connected, paude prints Port-forward active: http://127.0.0.1:8372. Open http://localhost:8372 in your host browser to view the dashboard.
Remote hosts (SSH): the forwarder runs on your local machine even when the container runs on a remote host, tunnelling each connection through ssh … podman exec. So the same flag works transparently over SSH — no manual tunnel required:
paude connect my-project --forward-port 8372
# Dashboard is reachable at http://localhost:8372 on your LOCAL machine
If you prefer to forward without paude, the equivalent manual SSH tunnel is:
ssh -L 8372:127.0.0.1:8372 user@remote
Note that a plain ssh -L reaches the remote host's loopback, so the container service must additionally be published to the remote host; paude's --forward-port avoids that by exec'ing directly into the container.
Passing a Task
paude create --yolo my-project -a '-p "refactor the auth module"'
File copies also cross the SSH connection automatically. The local path is
always resolved on the machine where you run paude:
paude cp dgx-spark-codex:/pvc/workspace/output.log ./output.log
paude cp ./input.txt dgx-spark-codex:/pvc/workspace/input.txt
Or just start the session and type your request in the agent interface.
Something Not Working?
- Run
paude --helpfor all options and examples - Run
paude listto check session status - Use
paude create --dry-runto verify configuration - Use
paude start -vfor verbose output (shows sync progress) - Check credentials:
gcloud auth application-default print-access-token(Vertex/Gemini) or verify your API key is exported
Learn more:
- Session Management — commands, lifecycle, code sync
- Configuration — defaults, network domains, GitHub CLI, custom environments
- Security Model — attack vectors,
--yolosafety, residual risks - Orchestration — fire-and-forget workflow, harvest (including containers holding multiple repos), PRs
- Remote Hosts & Docker — SSH remotes, Docker backend, GPU passthrough
How It Works
Your Machine                    Container
    |                              |
    |-- git push ----------------▶ |  Agent works here
    |                              |  (network-filtered)
    ◀-- git pull -----------------|
    |                              |
- Git is the sync mechanism — your local files stay untouched until you pull
--yolois safe because network filtering blocks the agent from sending data to arbitrary URLs- The agent can only reach its API (e.g., Vertex AI) and package registries (e.g., PyPI) by default
Install from Source
git clone https://github.com/bbrowning/paude
cd paude
uv venv --python 3.12 --seed
source .venv/bin/activate
pip install -e .
Requirements
- Python 3.11+ (for the Python package)
- Podman or Docker (for local backend)
- Auth credentials for your provider (Google Cloud SDK, API key, etc.)
Development
See CONTRIBUTING.md for development setup, testing, and release instructions.
License
MIT
1 maintainer

Download files
Download the file for your platform. If you're not sure which to choose, learn more about installing packages.
Source Distribution
Built Distribution
Filter files by name, interpreter, ABI, and platform.
If you're not sure about the file name format, learn more about wheel file names.
Copy a direct link to the current filters
File details
Details for the file paude-0.20.0a9.tar.gz.
File metadata
- Download URL: paude-0.20.0a9.tar.gz
- Upload date:
- Size: 346.5 kB
- Tags: Source
- Uploaded using Trusted Publishing? Yes
- Uploaded via: twine/7.0.0 CPython/3.13.14
File hashes
| Algorithm | Hash digest | |
|---|---|---|
| SHA256 |
6955ce2710e454758a4b200a32a4b9b1457dfa8376e5db327cf7297042e3d620
|
|
| MD5 |
e74d763bb5dced45de5fbdc7993f1582
|
|
| BLAKE2b-256 |
2eaab1ca58ce8a8110d13cd8474d00fc167b1151b368bd5cd64dd2676b673459
|
Provenance
The following attestation bundles were made for paude-0.20.0a9.tar.gz:
Publisher:
release.yml on bbrowning/paude
-
Statement:
-
Statement type:
https://in-toto.io/Statement/v1 -
Predicate type:
https://docs.pypi.org/attestations/publish/v1 -
Subject name:
paude-0.20.0a9.tar.gz -
Subject digest:
6955ce2710e454758a4b200a32a4b9b1457dfa8376e5db327cf7297042e3d620 - Sigstore transparency entry: 2409786335
- Sigstore integration time:
-
Permalink:
bbrowning/paude@a8ec3f3f33dac81ee3bc3d3184441e9ce03946f4 -
Branch / Tag:
refs/tags/v0.20.0a9 - Owner: https://github.com/bbrowning
-
Access:
public
-
Token Issuer:
https://token.actions.githubusercontent.com -
Runner Environment:
github-hosted -
Publication workflow:
release.yml@a8ec3f3f33dac81ee3bc3d3184441e9ce03946f4 -
Trigger Event:
push
-
Statement type:
File details
Details for the file paude-0.20.0a9-py3-none-any.whl.
File metadata
- Download URL: paude-0.20.0a9-py3-none-any.whl
- Upload date:
- Size: 198.7 kB
- Tags: Python 3
- Uploaded using Trusted Publishing? Yes
- Uploaded via: twine/7.0.0 CPython/3.13.14
File hashes
| Algorithm | Hash digest | |
|---|---|---|
| SHA256 |
18094499be13b1454b070a943b3790ba360b36c66d60d72296c4172af27fd6d4
|
|
| MD5 |
3e63348431a9f024cb219601f6e0a02b
|
|
| BLAKE2b-256 |
bb35795a23f43c492b3cdb68463706555c7a58b768b1eb725bd75e128a8df6c9
|
Provenance
The following attestation bundles were made for paude-0.20.0a9-py3-none-any.whl:
Publisher:
release.yml on bbrowning/paude
-
Statement:
-
Statement type:
https://in-toto.io/Statement/v1 -
Predicate type:
https://docs.pypi.org/attestations/publish/v1 -
Subject name:
paude-0.20.0a9-py3-none-any.whl -
Subject digest:
18094499be13b1454b070a943b3790ba360b36c66d60d72296c4172af27fd6d4 - Sigstore transparency entry: 2409786362
- Sigstore integration time:
-
Permalink:
bbrowning/paude@a8ec3f3f33dac81ee3bc3d3184441e9ce03946f4 -
Branch / Tag:
refs/tags/v0.20.0a9 - Owner: https://github.com/bbrowning
-
Access:
public
-
Token Issuer:
https://token.actions.githubusercontent.com -
Runner Environment:
github-hosted -
Publication workflow:
release.yml@a8ec3f3f33dac81ee3bc3d3184441e9ce03946f4 -
Trigger Event:
push
-
Statement type:







