
This release is a pre-release and may not be stable for production use.








The qBraid-SDK is a Python toolkit for cross-framework abstraction, transpilation, and execution of quantum programs.

Features
- Unified quantum frontend interface. Transpile quantum circuits between supported packages. Leverage the capabilities of multiple frontends through simple, consistent protocols.
- Build once, target many. Create quantum programs using your preferred circuit-building package, and execute on any backend that interfaces with a supported frontend.
- Benchmark, compare, interpret results. Built-in compatible post-processing enables comparing results between runs and across backends.
Installation & Setup

For the best experience, install the qBraid-SDK environment on lab.qbraid.com. Login (or create an account) and follow the steps to install an environment.
Using the SDK on qBraid Lab means direct, pre-configured access to all Amazon Braket supported devices with no additional access keys or API tokens required. See qBraid Quantum Jobs for more.
Local install
The qBraid-SDK, and all of its dependencies, can also be installed using pip:
pip install qbraid
You can also install from source by cloning this repository and running a pip install command in the root directory of the repository:
git clone https://github.com/qBraid/qBraid.git
cd qBraid
pip install -e '.[all]'
Note: The qBraid-SDK requires Python 3.10 or greater.
If using locally, follow linked instructions to configure your qBraid, AWS, and IBMQ credentials.
Check version
You can view the version of the qBraid-SDK you have installed within Python using the following:
In [1]: import qbraid

In [2]: qbraid.__version__
Documentation & Tutorials
qBraid documentation is available at docs.qbraid.com.
See also:
Quickstart
Transpiler
Construct a quantum program of any supported program type.
Below, QPROGRAM_LIBS lists shorthand identifiers for supported quantum programs, each corresponding to a type in the QPROGRAM Union. For example, 'qiskit' in QPROGRAM_LIBS maps to qiskit.QuantumCircuit in QPROGRAM. Notably, 'qasm2' and 'qasm3' both represent raw OpenQASM strings. This arrangement simplifies targeting and transpiling between different quantum programming frameworks.
>>> from qbraid import QPROGRAM_LIBS, QPROGRAM
>>> QPROGRAM_LIBS
['braket', 'cirq', 'qiskit', 'pyquil', 'pytket', 'openqasm3', 'qasm2', 'qasm3']
>>> QPROGRAM
typing.Union[
  cirq.circuits.circuit.Circuit,
  qiskit.circuit.quantumcircuit.QuantumCircuit,
  pyquil.quil.Program,
  pytket._tket.circuit.Circuit,
  braket.circuits.circuit.Circuit,
  openqasm3.ast.Program,
  str]
Pass any quantum program of type QPROGRAM to the circuit_wrapper() and specify a target package
from QPROGRAM_LIBS to "transpile" your circuit to a new program type:
>>> from qbraid import circuit_wrapper
>>> from qbraid.interface import random_circuit
>>> qiskit_circuit = random_circuit("qiskit")
>>> cirq_circuit = circuit_wrapper(qiskit_circuit).transpile("cirq")
>>> print(qiskit_circuit)
          ┌────────────┐
q_0: ──■──┤ Rx(3.0353) ├
     ┌─┴─┐└───┬────┬───┘
q_1: ┤ H ├────┤ √X ├────
     └───┘    └────┘
>>> print(cirq_circuit)
0: ───@───Rx(0.966π)───
      │
1: ───H───X^0.5────────
The same functionality can be achieved using the underlying convert_to_package() function directly:
>>> from qbraid import convert_to_package
>>> cirq_circuit = convert_to_package(qiskit_circuit, "cirq")
Devices & Jobs
Search for quantum backend(s) on which to execute your program.
>>> from qbraid import get_devices
>>> get_devices()
Device status updated 0 minutes ago

Device ID                           Status
---------                           ------
aws_oqc_lucy                        ONLINE
aws_ionq_aria2                      OFFLINE
aws_rigetti_aspen_m3                ONLINE
ibm_q_brisbane                      ONLINE
...
Apply the device_wrapper(), and send quantum jobs to any supported backend,
from any supported program type:
>>> from qbraid import device_wrapper, get_jobs
>>> aws_device = device_wrapper("aws_oqc_lucy")
>>> ibm_device = device_wrapper("ibm_q_brisbane")
>>> aws_job = aws_device.run(qiskit_circuit, shots=1000)
>>> ibm_job = ibm_device.run(cirq_circuit, shots=1000)
>>> get_jobs()
Displaying 2 most recent jobs:

Job ID                                              Submitted                  Status
------                                              ---------                  ------
aws_oqc_lucy-exampleuser-qjob-zzzzzzz...            2023-05-21T21:13:47.220Z   QUEUED
ibm_q_brisbane-exampleuser-qjob-xxxxxxx...          2023-05-21T21:13:48.220Z   RUNNING
...
Compare results in a consistent, unified format:
>>> aws_result = aws_job.result()
>>> ibm_result = ibm_job.result()
>>> aws_result.measurement_counts()
{'00': 483, '01': 14, '10': 486, '11': 17}
>>> ibm_result.measurement_counts()
{'00': 496, '01': 12, '10': 479, '11': 13}
Local account setup
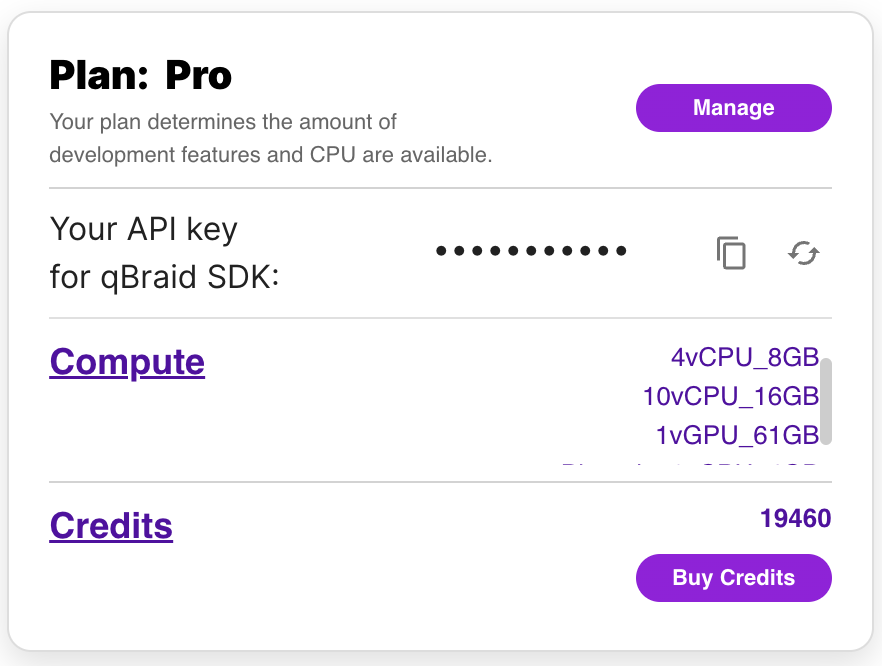
To use the qBraid-SDK locally (outside of qBraid Lab), you must add your account credentials:
-
Create a qBraid account or log in to your existing account by visiting account.qbraid.com
-
Copy your API Key token from the left side of your account page:
-
Save your API key from step 2 by calling
QbraidSession.save_config():
from qbraid.api import QbraidSession

session = QbraidSession(api_key='API_KEY')
session.save_config()
The command above stores your credentials locally in a configuration file ~/.qbraid/qbraidrc,
where ~ corresponds to your home ($HOME) directory. Once saved, you can then connect to the
qBraid API and leverage functions such as get_devices() and get_jobs().
Load Account from Environment Variables
Alternatively, the qBraid-SDK can discover credentials from environment variables:
export JUPYTERHUB_USER='USER_EMAIL'
export QBRAID_API_KEY='QBRAID_API_KEY'
Then instantiate the session without any arguments
from qbraid.api import QbraidSession

session = QbraidSession()
Launch on qBraid
The "Launch on qBraid" button (below) can be added to any public GitHub
repository. Clicking on it automaically opens qBraid Lab, and performs a
git clone of the project repo into your account's home directory. Copy the
code below, and replace YOUR-USERNAME and YOUR-REPOSITORY with your GitHub
info.
Use the badge in your project's README.md:
[<img src="https://qbraid-static.s3.amazonaws.com/logos/Launch_on_qBraid_white.png" width="150">](https://account.qbraid.com?gitHubUrl=https://github.com/YOUR-USERNAME/YOUR-REPOSITORY.git)
Use the badge in your project's README.rst:
.. image:: https://qbraid-static.s3.amazonaws.com/logos/Launch_on_qBraid_white.png
    :target: https://account.qbraid.com?gitHubUrl=https://github.com/YOUR-USERNAME/YOUR-REPOSITORY.git
    :width: 150px
Contributing
-
Interested in contributing code, or making a PR? See CONTRIBUTING.md
-
For feature requests and bug reports: Submit an issue
-
For discussions, and specific questions about the qBraid SDK, qBraid Lab, or other topics, join our discord community
-
For questions that are more suited for a forum, post to Quantum Computing Stack Exchange with the
qbraidtag. -
Want your open-source project featured as its own runtime environment on qBraid Lab? Fill out our New Environment Request Form
License


Release files for qbraid 0.5.0.dev20231214183824
For a detailed explanation of source distributions (sdists) and built distributions (wheels), please see the package formats documentation.
Source distribution (sdist)
| File | Size | Uploaded | |
|---|---|---|---|
| qbraid-0.5.0.dev20231214183824.tar.gz | 2.0 MB | Details |
Built distribution (wheel)
| File | Interpreter | ABI | Platform | Reset |
|---|---|---|---|---|
| qbraid-0.5.0.dev20231214183824-py3-none-any.whl | Python 3 | none | any | Details |
Total release size: 2.2 MB
Release files / qbraid-0.5.0.dev20231214183824.tar.gz
| Download URL | qbraid-0.5.0.dev20231214183824.tar.gz |
|---|---|
| Size | 2.0 MB |
| Tags | Source |
|
SHA-256 checksum How to use checksums |
7abf1c4a2be9270ba43588164d12585e531c8e5ab065ffe3818696679d8b7ed4
|
|
BLAKE2b-256 checksum How to use checksums |
67754eeb54deea3a6c54ff86c77550f53dc805868ba848425722547b96e94de2
|
| Upload date | |
|
Uploaded using Trusted Publishing? What is trusted publishing? |
No |
| Uploaded via |
twine/4.0.2 CPython/3.11.7
|
Release files / qbraid-0.5.0.dev20231214183824-py3-none-any.whl
| Download URL | qbraid-0.5.0.dev20231214183824-py3-none-any.whl |
|---|---|
| Size | 213.6 kB |
| Tags | Python 3 |
|
SHA-256 checksum How to use checksums |
e94a01c05858993d7119d33bd6c0f8c8d1ee14cb8d3b4fd3cb585239dd2d08ee
|
|
BLAKE2b-256 checksum How to use checksums |
cc4901fcb6b27932ace5ecb5f4b6fb68ac18c42135f50e9078d183151962e7a3
|
| Upload date | |
|
Uploaded using Trusted Publishing? What is trusted publishing? |
No |
| Uploaded via |
twine/4.0.2 CPython/3.11.7
|














