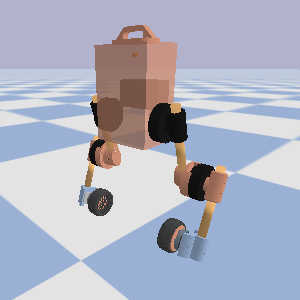
Python module to control Upkie wheeled bipeds.
Project description
Upkie wheeled biped robot
Build instructions and software for Upkie wheeled bipeds. Develop on Linux 🐧 or macOS 🍏, deploy to the robot's Raspberry Pi 🍓. Questions are welcome in the Discussions forum or on the Chat.
Quick sim
If you have Python and a C++ compiler (setup one-liners: Fedora, Ubuntu), you can run an Upkie simulation right from the command line. It won't install anything on your machine, as everything will run locally from the repository:

git clone https://github.com/tasts-robots/upkie.git
cd upkie
./start_wheel_balancer.sh
Click on the robot in the simulator window to apply external forces 😉
Getting started
Running a spine
Upkie's code is organized into spines, which communicate with the simulation or mjbots actuators, and agents, the programs that implement robot behaviors. We use Bazel to build spines, both for simulation on your development computer or for running on the robot's Raspberry Pi. Bazel builds everything locally, does not install anything on your system, and makes sure that all versions of all dependencies are correct. Check out this introduction for more details.
Simulation spine
In the example above we ran an agent called "wheel balancer". We could also start the simulation spine independently, and let it run waiting for agents to connect:
./start_simulation.sh
This script is just an alias for a Bazel run command:
./tools/bazelisk run -c opt //spines:bullet -- --show
The -c opt flag selects the optimized compilation mode. It is actually the default in this project, we just show it here for example.
Robot spine
To run a spine on the robot, we first build it locally and upload it to the onboard Raspberry Pi:
make build
make upload UPKIE_NAME=your_upkie
Next, log into the Pi and run a pi3hat spine:
$ ssh foo@robot
foo@robot:~$ cd upkie
foo@robot:upkie$ make run_pi3hat_spine
Once the spine is running, you can run any agent in a separate shell on the robot, for example the wheel balancer:
foo@robot:upkie$ make run_wheel_balancer
Running a Python agent
We develop Python agents using the upkie interface distributed on PyPI. This interface is already fast enough for real-time control. To install it:
pip install upkie
The repository ships a number of agents that have been tested on several Upkie's. You will find them in the agents/ directory. To run an agent, call its main Python script. For instance, to run the PPO balancer:
python agents/ppo_balancer/main.py
Example of a custom agent
You can develop your own agent using the environments distributed in upkie.envs. For example, run a spine and try executing the following code in a Python interpreter:
import gymnasium as gym
import upkie.envs

upkie.envs.register()

with gym.make("UpkieGroundVelocity-v1", frequency=200.0) as env:
    observation = env.reset()
    action = 0.0 * env.action_space.sample()
    for step in range(1_000_000):
        observation, reward, done, _ = env.step(action)
        if done:
            observation = env.reset()
        pitch = observation[0]
        action[0] = 10.0 * pitch
With a simulation spine, this code will reset the robot's state and execute the policy continuously. In a pi3hat spine, this code will control the robot directly. You can check out the examples/ directory for more examples.
Project details
Release history Release notifications | RSS feed
Download files
Download the file for your platform. If you're not sure which to choose, learn more about installing packages.


