Python frontend for Gmsh

Project description


Gmsh is a powerful mesh generation tool with a scripting language that is notoriously hard to write.
The goal of pygmsh is to combine the power of Gmsh with the versatility of Python and to provide useful abstractions from the Gmsh scripting language so you can create complex geometries more easily.
Built-in
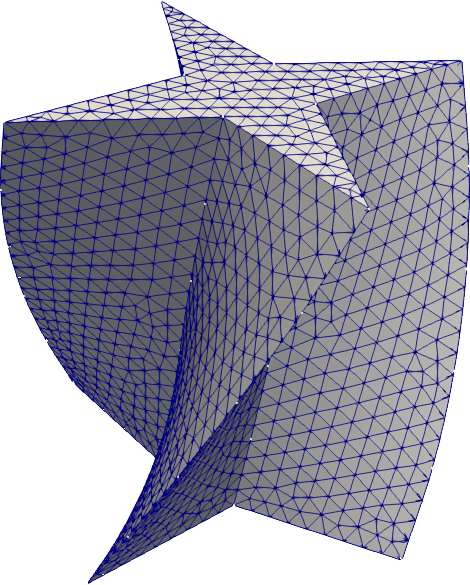
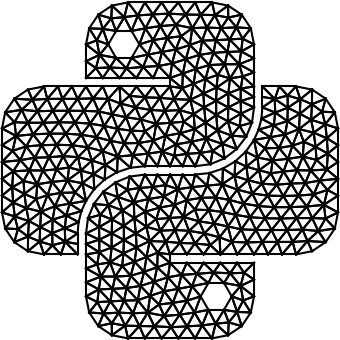
To create the above mesh, simply do
import pygmsh
import numpy as np

geom = pygmsh.built_in.Geometry()

# Draw a cross.
poly = geom.add_polygon([
    [0.0,   0.5, 0.0],
    [-0.1,  0.1, 0.0],
    [-0.5,  0.0, 0.0],
    [-0.1, -0.1, 0.0],
    [0.0,  -0.5, 0.0],
    [0.1,  -0.1, 0.0],
    [0.5,   0.0, 0.0],
    [0.1,   0.1, 0.0]
    ],
    lcar=0.05
    )

axis = [0, 0, 1]

geom.extrude(
    poly,
    translation_axis=axis,
    rotation_axis=axis,
    point_on_axis=[0, 0, 0],
    angle=2.0 / 6.0 * np.pi
    )

points, cells, point_data, cell_data, field_data = pygmsh.generate_mesh(geom)
to retrieve all points and cells of the mesh for the specified geometry. To store the mesh, you can use meshio; for example
import meshio
meshio.write('test.vtu', points, cells, cell_data=cell_data)
The output file can be visualized with various tools, e.g., ParaView.
You will find the above mesh in the directory `test/ <https://github.com/nschloe/pygmsh/tree/master/test/>`__ along with other small examples.
OpenCASCADE
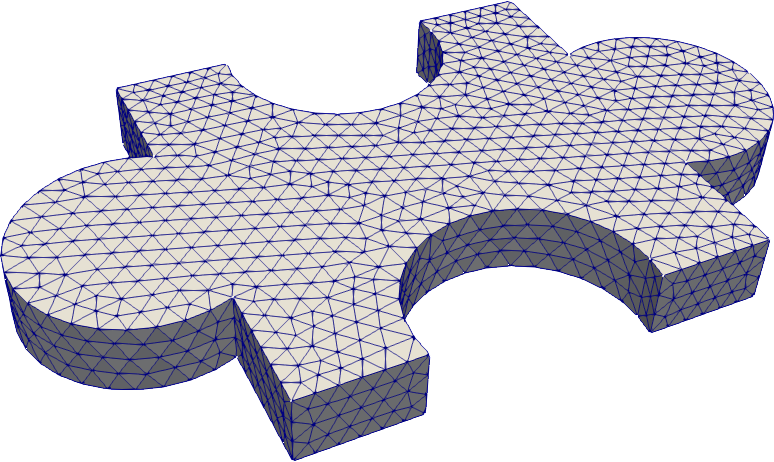
As of version 3.0, Gmsh supports OpenCASCADE, allowing for a CAD-style geometry specification.
Example:
import pygmsh

geom = pygmsh.opencascade.Geometry(
  characteristic_length_min=0.1,
  characteristic_length_max=0.1,
  )

rectangle = geom.add_rectangle([-1.0, -1.0, 0.0], 2.0, 2.0)
disk1 = geom.add_disk([-1.2, 0.0, 0.0], 0.5)
disk2 = geom.add_disk([+1.2, 0.0, 0.0], 0.5)
union = geom.boolean_union([rectangle, disk1, disk2])

disk3 = geom.add_disk([0.0, -0.9, 0.0], 0.5)
disk4 = geom.add_disk([0.0, +0.9, 0.0], 0.5)
flat = geom.boolean_difference([union], [disk3, disk4])

geom.extrude(flat, [0, 0, 0.3])

points, cells, point_data, cell_data, field_data = pygmsh.generate_mesh(geom)
Installation
pygmsh is available from the Python Package Index, so simply type
pip install -U pygmsh
to install or upgrade.
Usage
Just
import pygmsh as pg
and make use of all the goodies the module provides. The documentation and the examples under `test/ <https://github.com/nschloe/pygmsh/tree/master/test/>`__ might inspire you.
Testing
To run the pygmsh unit tests, check out this repository and type
pytest
Building Documentation
Docs are built using Sphinx.
To build run
sphinx-build -b html doc doc/_build
Distribution
To create a new release
bump the __version__ number,
publish to PyPi and GitHub:
$ make publish
License
pygmsh is published under the MIT license.
Release history Release notifications | RSS feed


Download files
Download the file for your platform. If you're not sure which to choose, learn more about installing packages.
Source Distributions
Built Distribution
Filter files by name, interpreter, ABI, and platform.
If you're not sure about the file name format, learn more about wheel file names.
Copy a direct link to the current filters
File details
Details for the file pygmsh-4.0.8-py2.py3-none-any.whl.
File metadata
- Download URL: pygmsh-4.0.8-py2.py3-none-any.whl
- Upload date:
- Size: 31.0 kB
- Tags: Python 2, Python 3
- Uploaded using Trusted Publishing? No
File hashes
| Algorithm | Hash digest | |
|---|---|---|
| SHA256 |
bfc04a2ecbb918371ea9953b6f26cc867fc74d64a233b890ea4087154bb577f9
|
|
| MD5 |
4285c5729ef0ab12a73a35d60766f612
|
|
| BLAKE2b-256 |
33d59ffd9d6cec110c72888dfdbe86cc83001ccbfefd8cd6532173e4b8a5f7a6
|


