
napari-tmidas








Need fast batch processing for confocal & whole-slide microscopy images of biological cells and tissues?
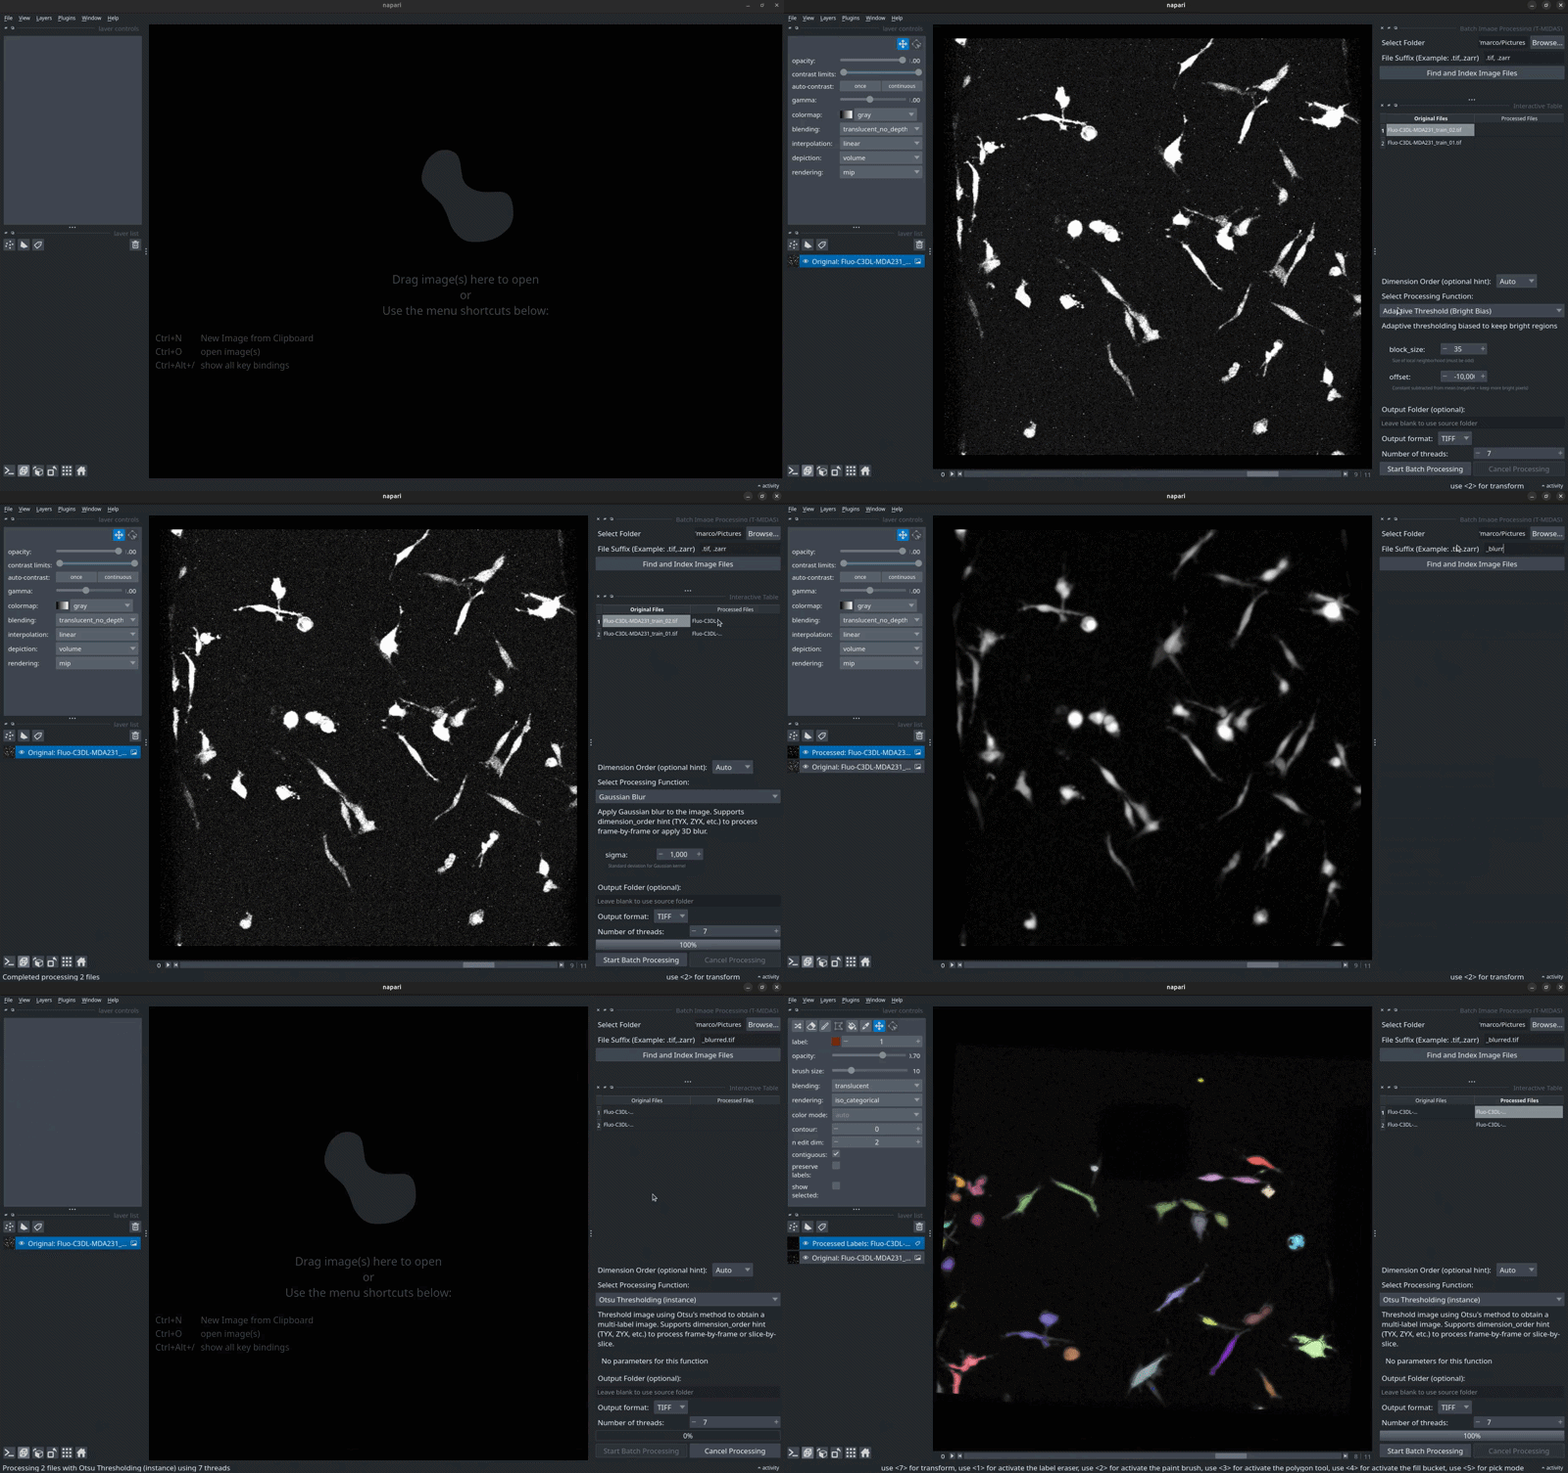
This open-source napari plugin integrates state-of-the-art AI + analysis tools in an interactive GUI with side-by-side result comparison! Transform, analyze, and quantify microscopy data at scale including deep learning - from file conversion to segmentation, tracking, and analysis.
✨ Key Features
🤖 AI Methods Built-In
- Virtual staining (VisCy) • Denoising (CAREamics) • Spot detection (Spotiflow) • Segmentation (Cellpose, Convpaint) • Tracking (Trackastra, HOCT, Ultrack)
- Auto-install in isolated environments • No dependency conflicts • GPU acceleration
🔄 Universal File Conversion
- Convert LIF, ND2, CZI, NDPI, Acquifer → TIFF or OME-Zarr
- Preserve spatial metadata automatically
⚡ Batch Processing
- Process entire folders with one click • 40+ processing functions • Progress tracking & quality control
- One Dimension Order setting, shared by every function — set it once per batch, not per function
� Interactive Workflow
- Side-by-side table view of original and processed images • Click to instantly compare results • Quickly iterate parameter values • Real-time visual feedback
�📊 Complete Analysis Pipeline
- Segmentation → Tracking → Quantification → Colocalization
🚀 Quick Start
Supports Python 3.11+; commands below use Python 3.12.
# Install napari and the plugin
mamba create -y -n napari-tmidas -c conda-forge python=3.12
mamba activate napari-tmidas
pip install "napari[all]"
pip install napari-tmidas

# Launch napari
napari
Then find napari-tmidas in the Plugins menu. Watch video tutorials →
💡 Tip: AI methods (SAM2, Cellpose, Spotiflow, etc.) auto-install into isolated environments on first use - no manual setup required!
⚠️ Before a batch run: set Dimension Order (top of the batch widget) to match your data —
TZYXfor a 3D time series,ZYXfor a Z-stack,TYXfor a 2D movie. Most microscopy TIFFs carry no usable axis metadata, so onAutoa function that builds 3D objects cannot tell Z from T: it will either stop with an error or label the same object once per Z slice. The widget reads each file's rank up front, shows it next to the dropdown, and warns before the run starts.
📖 Documentation
AI-Powered Methods
| Method | Description | Documentation |
|---|---|---|
| 🎨 VisCy | Virtual staining from phase/DIC | Guide |
| 🔧 CAREamics | Noise2Void/CARE denoising | Guide |
| 🎯 Spotiflow | Spot/puncta detection | Guide |
| 🔬 Cellpose | Cell/nucleus segmentation | Guide |
| 🎨 Convpaint | Custom semantic/instance segmentation | Guide |
| 📈 Trackastra | Transformer-based cell tracking | Guide |
| 🧬 HOCT | Transformer-based cell tracking (Higher-Order Cell Tracking Transformer) | Guide |
| 🔗 Ultrack | Cell tracking based on segmentation ensemble | Guide |
Core Workflows
- File Conversion - Multi-format microscopy file conversion (LIF, ND2, CZI, NDPI, Acquifer)
- Batch Processing - All 40+ processing functions in one place
- Frame Removal - Interactive human-in-the-loop frame removal from time series
- Label-Based Cropping - Interactive ROI extraction with label expansion
- Quality Control - Visual QC with grid overlay
- Quantification - Extract measurements from labels
Advanced Features
- Batch Crop Anything - Interactive object cropping with SAM2
- Batch Label Inspection - Manual label verification and editing, with one-click delete/relabel across all timepoints, click-to-split for merged objects, and click-to-merge-neighbors for over-segmented ones
- Multichannel Processing - Channel selection and per-channel processing
💻 Installation
Step 1: Install napari
mamba create -y -n napari-tmidas -c conda-forge python=3.12
mamba activate napari-tmidas
python -m pip install "napari[all]"
Step 2: Install napari-tmidas
| Your Needs | Command |
|---|---|
| Standard installation | pip install napari-tmidas |
| Want the latest dev features | pip install git+https://github.com/MercaderLabAnatomy/napari-tmidas.git |
🖼️ Screenshots
File Conversion Widget
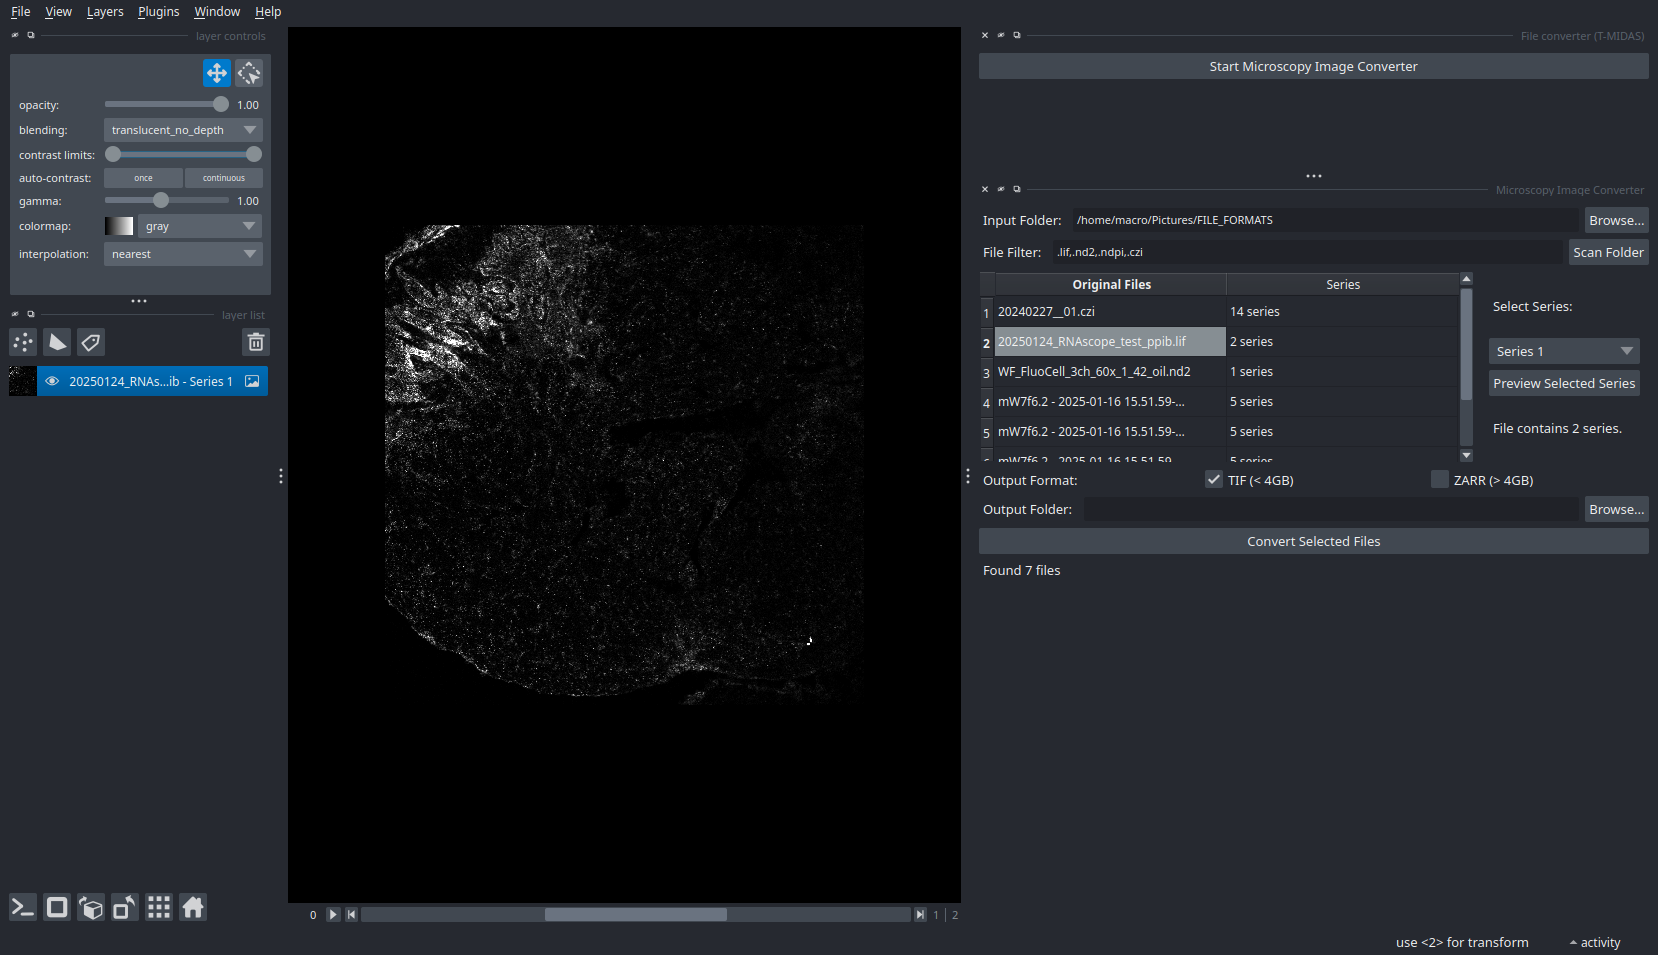
Convert proprietary formats to open standards with metadata preservation.
Batch Processing Interface
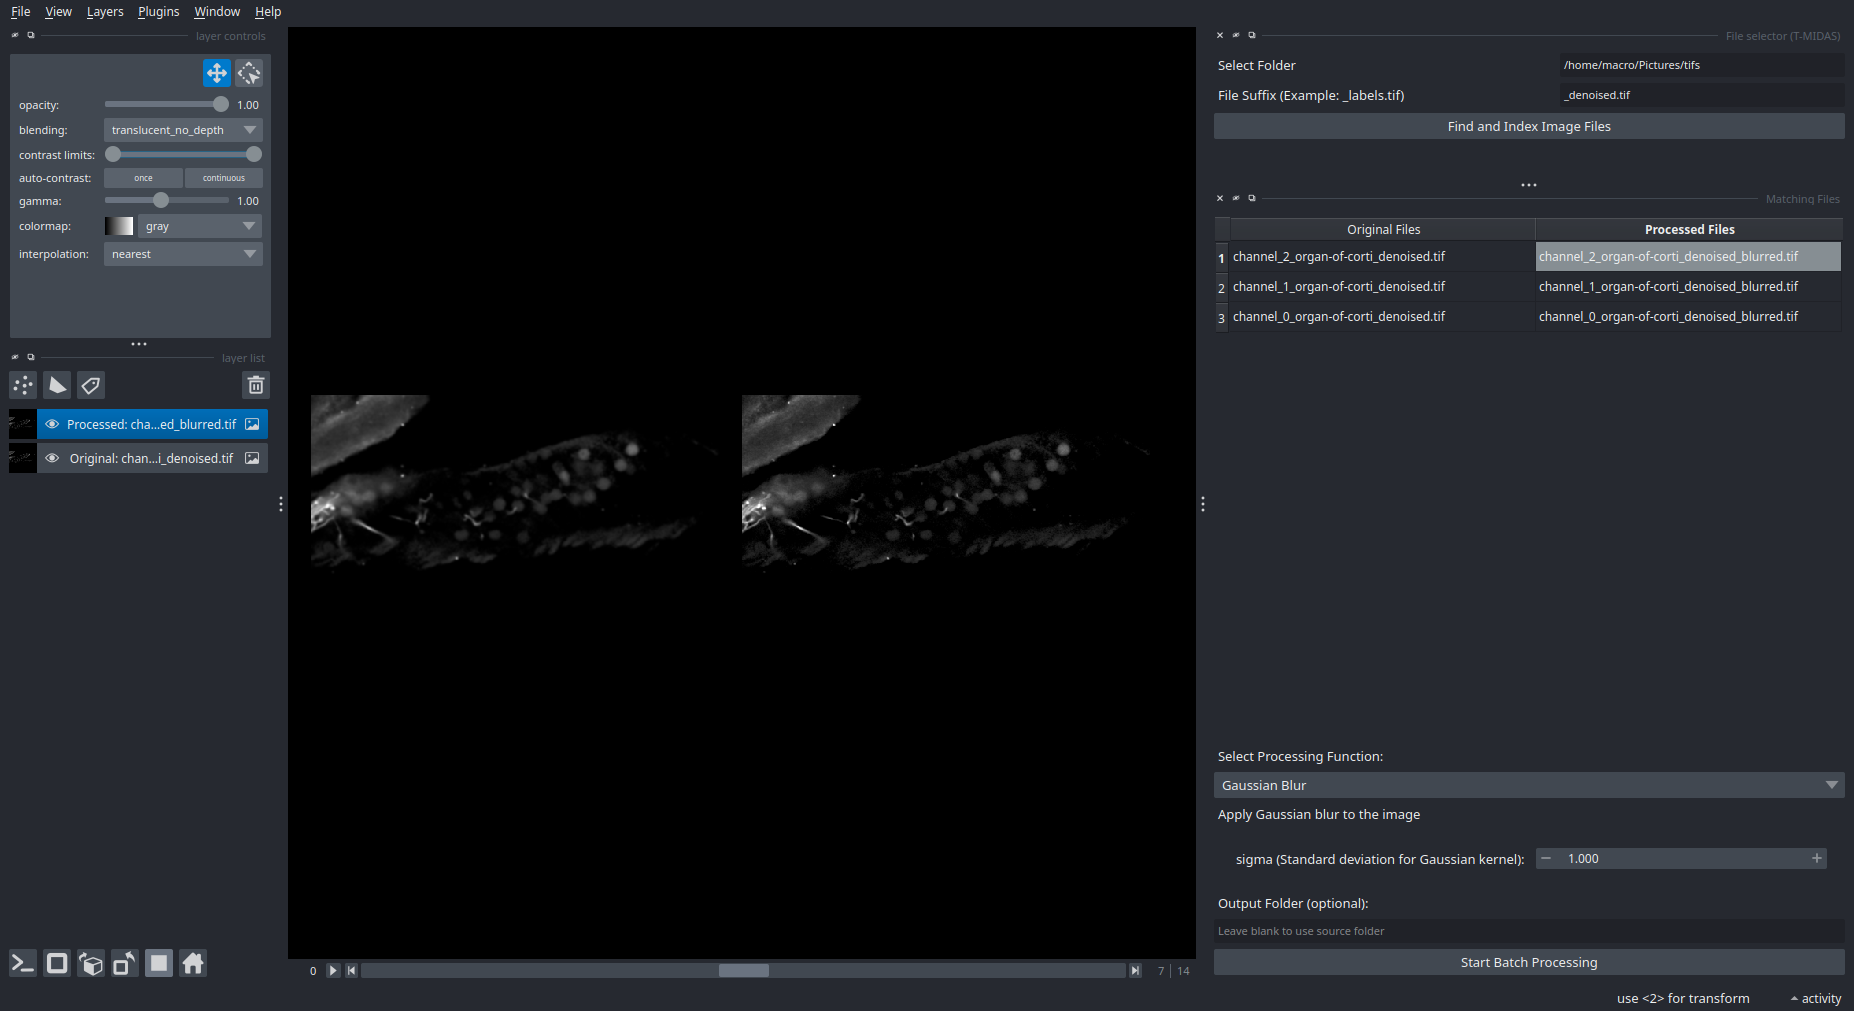
Select files → Choose processing function → Run on entire dataset.
Label Inspection
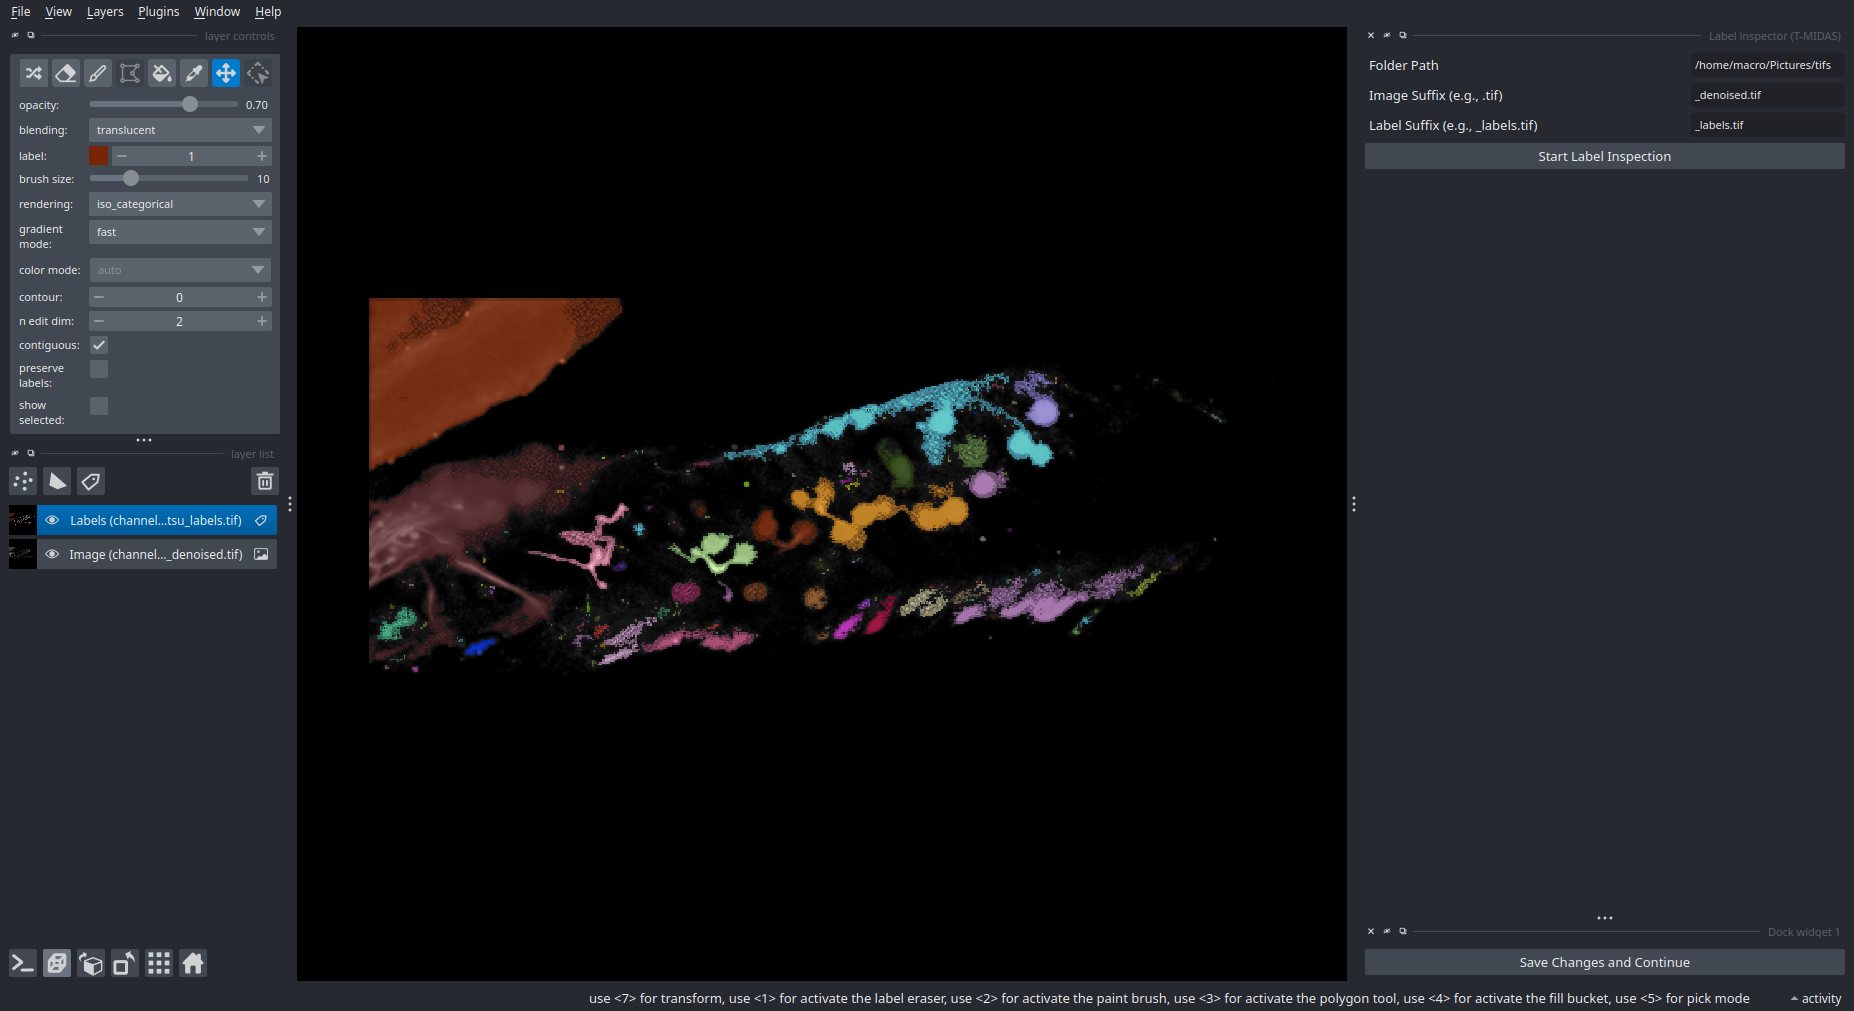
Inspect and manually correct segmentation results.
SAM2 Crop Anything
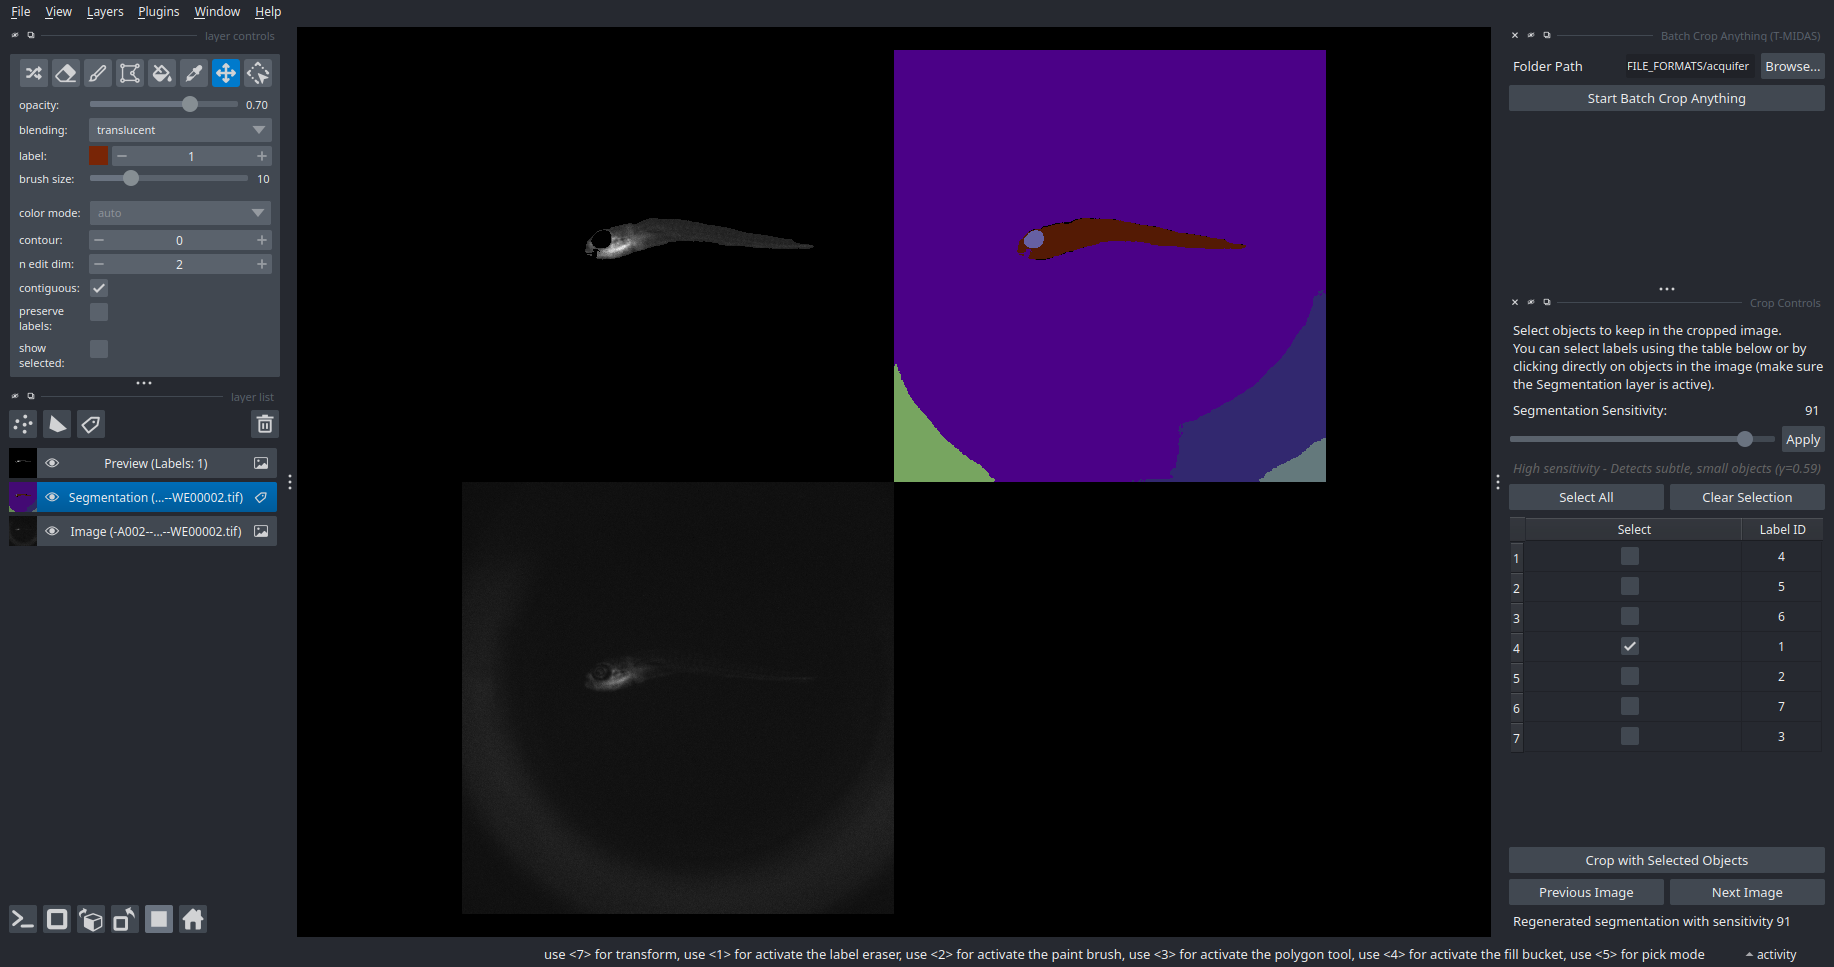
Interactive object selection and cropping with SAM2.
📋 TODO
Memory-Efficient Streaming
Most of this is done. Batch processing no longer materializes whole stacks: the worker keeps large inputs lazy and streams results back to disk block by block (256 MB budget), 15 functions map their existing body over blocks via the @chunked decorator, and 6 more own their I/O outright via skip_load. Measured end to end on a real (31, 2, 57, 2720, 2720) uint16 acquisition — 52 GB dense — Gamma Correction peaks at 3.15 GB RSS in 8.8 min, byte-identical to the dense path. Convpaint prediction, Cellpose segmentation and Trackastra tracking all write per-timepoint now. The mechanism is documented in _chunked.py, and the behaviour is pinned by TestZarrOutputStreaming, TestSplitChannelsStreaming, TestLazyTiffLoading, TestCLAHEDaskMemory and TestRollingBallPerPlane.
What is left:
- CAREamics denoising and VisCy virtual staining still run dense. Both allocate the full output array and take the input as a NumPy array. Neither has been audited for real — that needs their dedicated virtualenvs installed.
- ~14 registered functions still scale linearly with input size. That is now a known list rather than an unknown one. Each needs either a
@chunkedconversion or a check that it cannot take one: functions using global statistics (Convert to 8-bitrescales by the whole-stack min/max) and functions with cross-block topology (Mirror Labels) both resist it. - The structural decision. Dense functions opt into laziness one at a time, by accepting
_source_filepath. Whether to keep converting them individually or change the worker's contract for all of them at once is still open.
Other Known Issues
Resize Zarr by YX Scale (OME-Zarr native)writes zarr v3 stores: attributes live inzarr.json(multiscales nested under anomekey), not in a v2.zattrs. Anything downstream that reads.zattrsdirectly will find no file there — useome_output_utils._read_root_attrs(), which handles both layouts.
🤝 Contributing
Contributions are welcome! Please ensure tests pass before submitting PRs:
pip install tox
tox
📄 License
BSD-3 License - see LICENSE for details.
🐛 Issues
Found a bug or have a feature request? Open an issue
🙏 Acknowledgments
Built with napari and powered by:
AI/ML Methods:
Core Scientific Stack:
- NumPy • scikit-image • PyTorch
File Format Support:
- OME-Zarr • tifffile • nd2 • pylibCZIrw • readlif
1 maintainer

Release files for napari-tmidas 0.5.15
For a detailed explanation of source distributions (sdists) and built distributions (wheels), please see the package formats documentation.
Source distribution (sdist)
| File | Size | Uploaded | |
|---|---|---|---|
| napari_tmidas-0.5.15.tar.gz | 935.3 kB | Details |
Built distribution (wheel)
| File | Interpreter | ABI | Platform | Reset |
|---|---|---|---|---|
| napari_tmidas-0.5.15-py3-none-any.whl | Python 3 | none | any | Details |
Total release size: 1.8 MB
Release files / napari_tmidas-0.5.15.tar.gz
| Download URL | napari_tmidas-0.5.15.tar.gz |
|---|---|
| Size | 935.3 kB |
| Tags | Source |
|
SHA-256 checksum How to use checksums |
e738cb8f8aa846b7f560dec85eaf3de9ae4c38470986a27e103836c87705307d
|
|
BLAKE2b-256 checksum How to use checksums |
a7eed23e77ec0cf8a464ac49bc7d5f60d3e860a939dcb0602653b67d0f4cc3d7
|
| Upload date | |
|
Uploaded using Trusted Publishing? What is trusted publishing? |
No |
| Uploaded via |
twine/7.0.0 CPython/3.14.7
|
Release files / napari_tmidas-0.5.15-py3-none-any.whl
| Download URL | napari_tmidas-0.5.15-py3-none-any.whl |
|---|---|
| Size | 907.8 kB |
| Tags | Python 3 |
|
SHA-256 checksum How to use checksums |
37f0b2d6d2cc82e90d6ee710ac2b32c834efcff25a66976b037589627bbc1a5c
|
|
BLAKE2b-256 checksum How to use checksums |
fd5cdb20482cefdcc88629177c9f71ed85a4e9893ec9fc305088e7673841743e
|
| Upload date | |
|
Uploaded using Trusted Publishing? What is trusted publishing? |
No |
| Uploaded via |
twine/7.0.0 CPython/3.14.7
|














