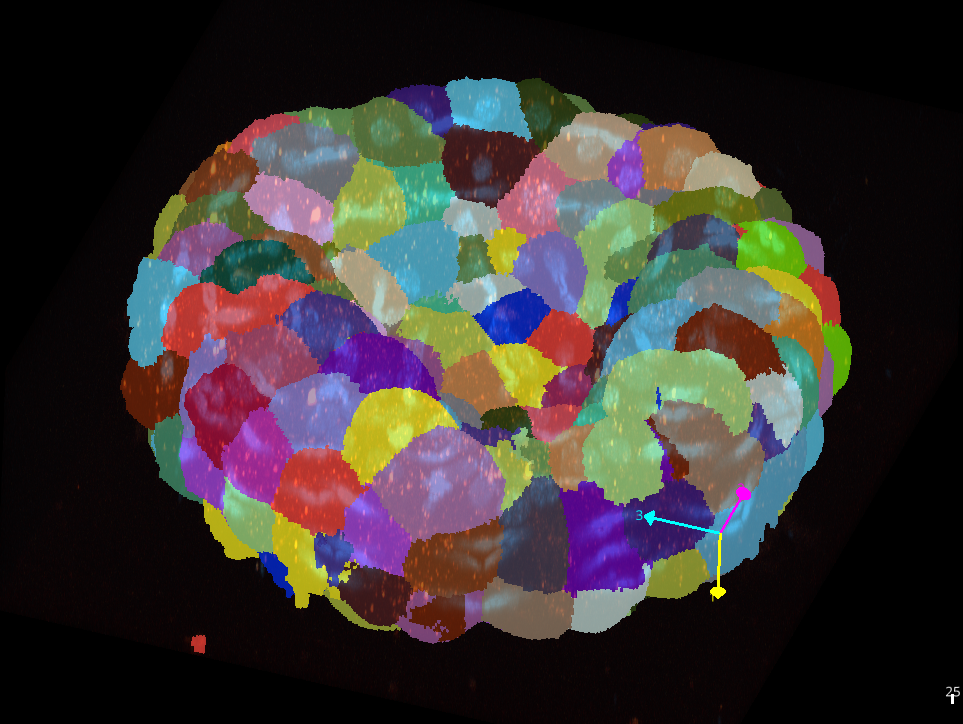
3D Segment ascidian embryos using cellpose. The images are first rescaled to be isotropic and then downscaled, before cellpose is used. The resulting labels are upscaled to match the original data.


Project description
segment-embryo


This napari plugin was generated with copier using the napari-plugin-template.
Installation
You can install segment-embryo via pip:
pip install segment-embryo
Usage
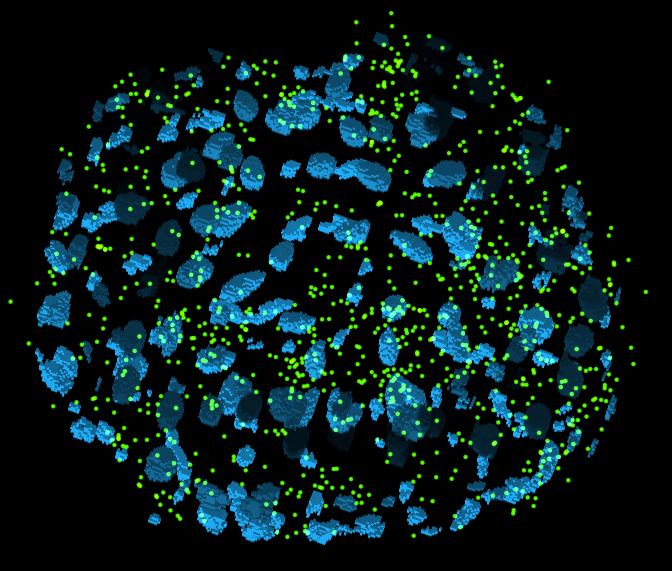
We will segment the cells of an embryo and count the mRNA spots tagged in another channel per cell.
1. Opening an image
Drag a tif- or czi-file from your file-browser and drop it into the napari window. The image will opened. The napari-plugin napari-czifile2 is used to open czi-files.
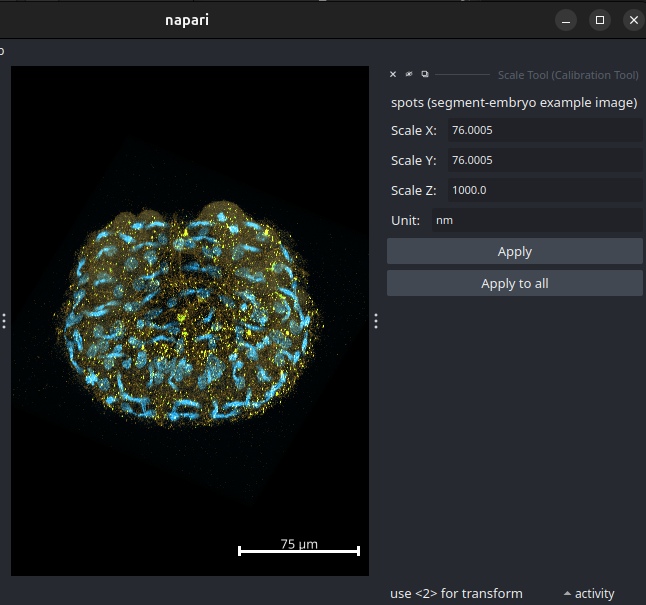
2. Checking and modifying the voxel size
Open the plugin Scale-Tool plugin from the Plugins-menu. Make sure the voxel-size values are set correctly in nm. Correct the values and the unit if necessary and press the Apply to all button.
3. Segmenting the cells of the embryo
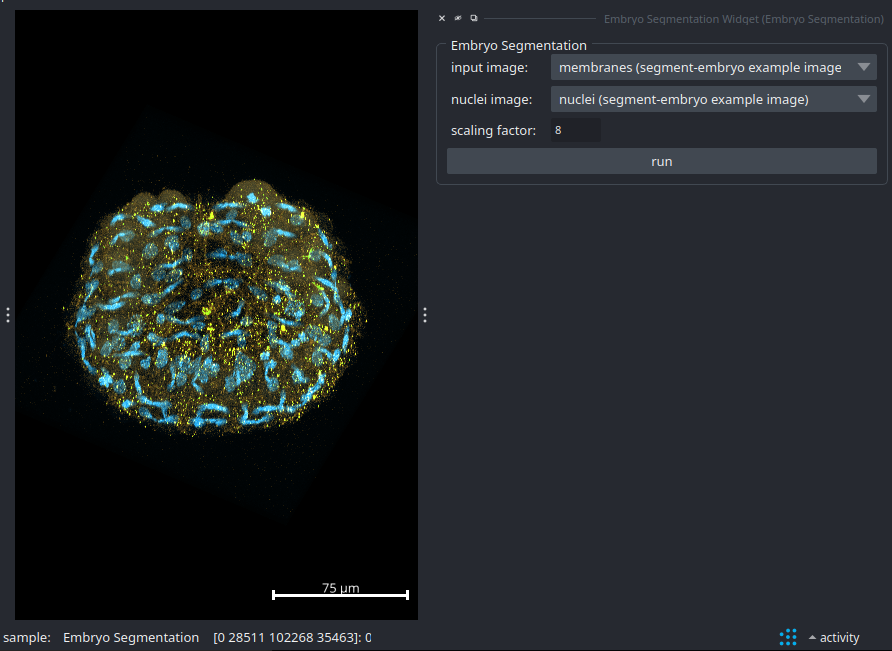
Close the Scale-Tool plugin and open the Embryo Segmentation-plugin from the Plugins-menu. Select the layer containing the membranes as input image and the layer containing the nuclei as nuclei image. Press the run button and wait until the segmentation is finished. When the segmentation is finished a Labels layer with the result will be added to the layers list.
4. Exporting and curating the labels
If the labels need curation, select the labels layer and save it to a tiff-file via the menu File>Save Selected Layers.... Import the saved labels into the Morphonet 2 standalone client, make the corrrections and export the corrected labels to a tiff-file. Open the tiff-file in napari.
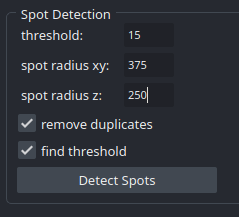
5. Detecting spots
Close the Embryo Segmentation plugin, select the layer containing the mRNA-spots and open the Detect FISH spots-plugin from the Plugins-menu. Estimate the spot size in xy and z in ImageJ and enter the values into the corresponding fields. You can either estimate the threshold let the software find a threshold value. Press the detect spots button. Depending on the result you might want to modify the threshold-value and run the plugin again.
6. Counting Spots per cell
In the Spot Counting section of the plugin, select the spots layer as input and the labels layer for the cytoplasm labels and also for the nuclei labels.
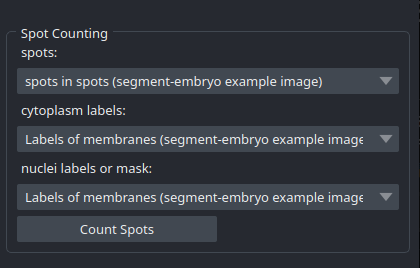
Press the Count Spots button! You will obtain a table with the numbers of spots per cell. If you provide the image twice, for the cytoplasm as well as for the nuclei, the spots will all be counted inside the nuclei. If you also want to know per cell how many spots are in the nucleus and how many are in the cytoplasm, you need to provide a mask or label image for the nuclei. You can obtain one by thresholding the nucleus image or by selecting segment nuclei in step 3.
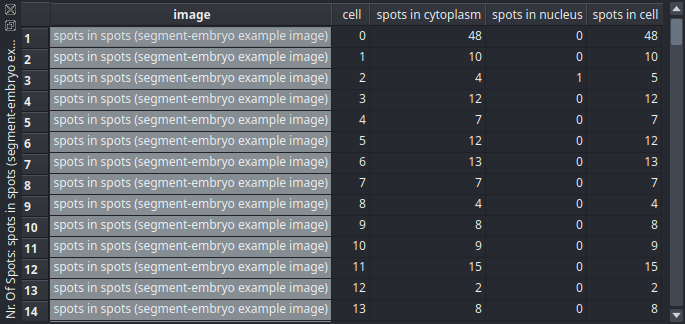
You can copy the data from the table to your spreadsheat software. Activate the table by clicking into it and press ctrl+a to select all rows and columns. Press ctrl+c to copy the data to the clipboard and ctrl+v to paste it into your spreadsheet.
Contributing
Contributions are very welcome. Tests can be run with tox, please ensure the coverage at least stays the same before you submit a pull request.
License
Distributed under the terms of the MIT license, "segment-embryo" is free and open source software
Issues
If you encounter any problems, please [file an issue] along with a detailed description.
Release history Release notifications | RSS feed


Download files
Download the file for your platform. If you're not sure which to choose, learn more about installing packages.
Source Distribution
Built Distribution
Filter files by name, interpreter, ABI, and platform.
If you're not sure about the file name format, learn more about wheel file names.
Copy a direct link to the current filters
File details
Details for the file segment_embryo-0.5.tar.gz.
File metadata
- Download URL: segment_embryo-0.5.tar.gz
- Upload date:
- Size: 17.4 kB
- Tags: Source
- Uploaded using Trusted Publishing? No
- Uploaded via: twine/6.0.1 CPython/3.12.8
File hashes
| Algorithm | Hash digest | |
|---|---|---|
| SHA256 |
2111d24dbf05f54d825c4adf2e99a4361c5507acf03c9fa71c2126c56ca24dd4
|
|
| MD5 |
a2446585d904b286f234d07072151673
|
|
| BLAKE2b-256 |
3594212c3baa45374a637fcfd5a30a1ebebe2c13ccbb6e0d23e0dd930e59132a
|
File details
Details for the file segment_embryo-0.5-py3-none-any.whl.
File metadata
- Download URL: segment_embryo-0.5-py3-none-any.whl
- Upload date:
- Size: 13.0 kB
- Tags: Python 3
- Uploaded using Trusted Publishing? No
- Uploaded via: twine/6.0.1 CPython/3.12.8
File hashes
| Algorithm | Hash digest | |
|---|---|---|
| SHA256 |
7af626f5d4a21c0d8a04ec03567ccee60e10f3a8157b9794830a9db6c03501e7
|
|
| MD5 |
2661365cd69a4f3f76ecdb3ff240d4ec
|
|
| BLAKE2b-256 |
062e8b0fab94f707e470e9eaf00bd588c6f539418cbd037a7e5105da92e1ef69
|


